SIMULATED CONVERTIBLE TOP REVISED VINYL REPAIR PROCEDURE

Model and Year: 1985 CELEBRITY COUPES AND SEDANS
TO: ALL CHEVROLET DEALERS
Due to changes with the configuration of the center roof drip retainers and the elimination of a foam filler pad, the procedures for removal and replacement of the subject top have been revised.
Fabric Roof Cover - Simulated Convertible Top
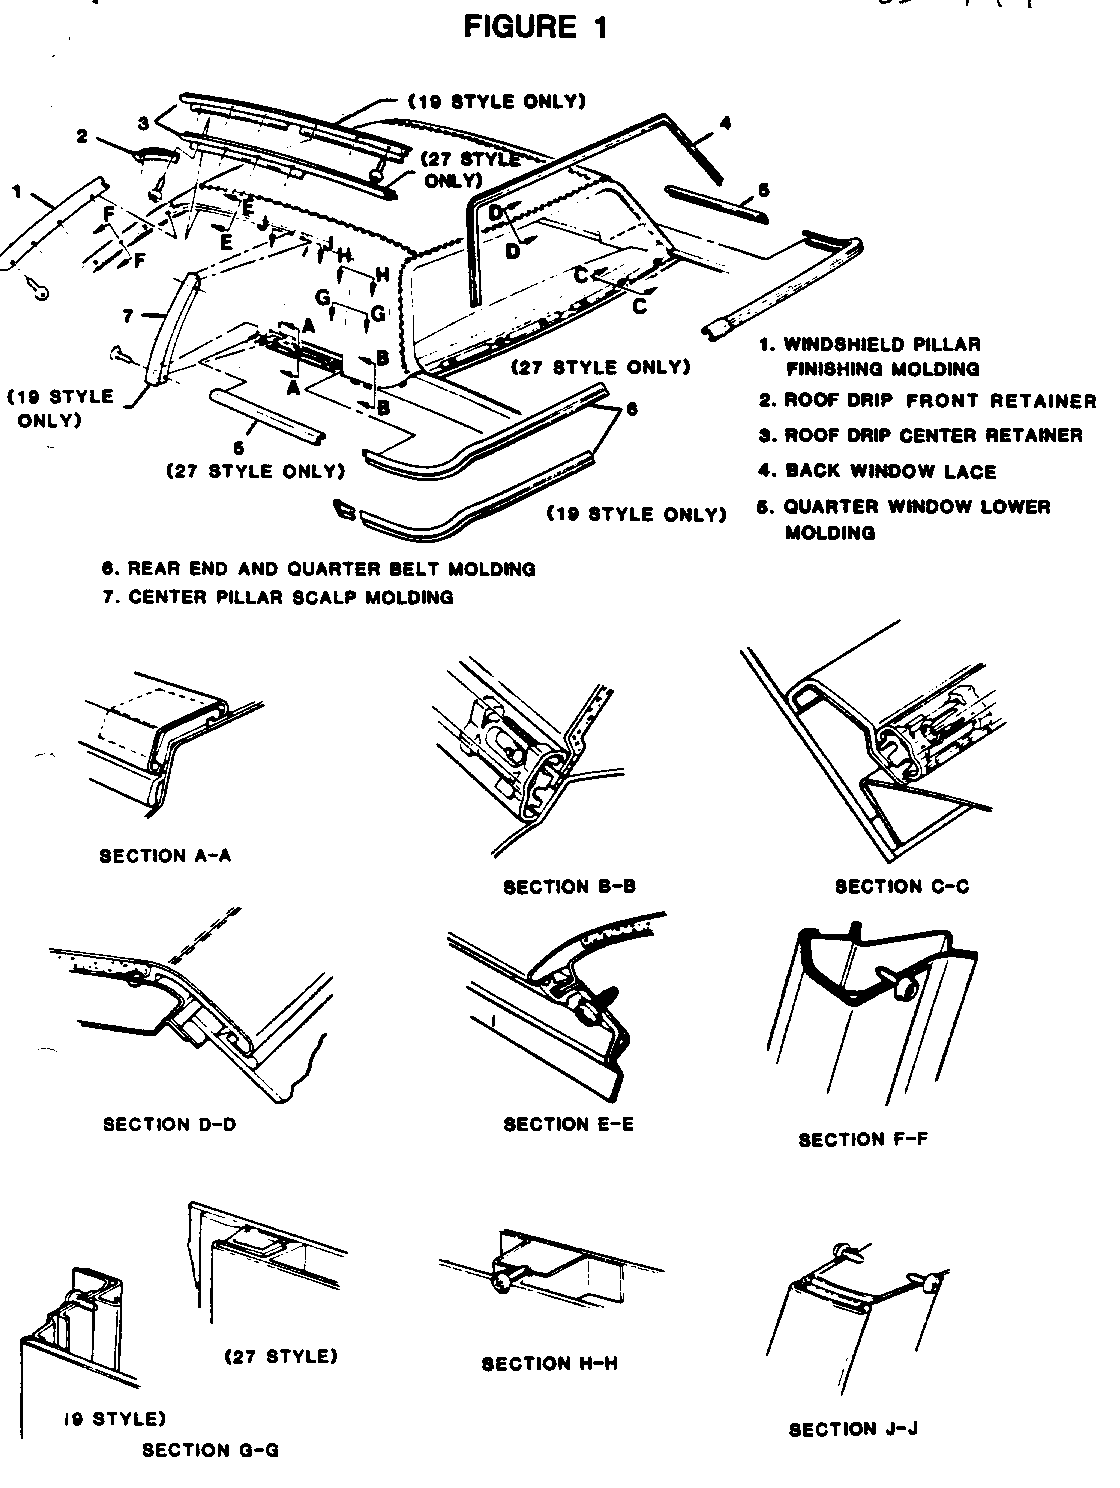
Remove or Disconnect (Figures 1 and 2)
1. Install protective cover over rear deck and rear edge of front fender.
2. Rear end and quarter belt moldings (6, Fig. 1).
3. On 27 styles only, quarter window lower moldings (5).
4. Windshield pillar finishing moldings (1).
5. On 19 styles only, center pillar scalp moldings (7).
6. Roof drip front and center retainers (2 and 3).
7. Windshield and back window lace (4).
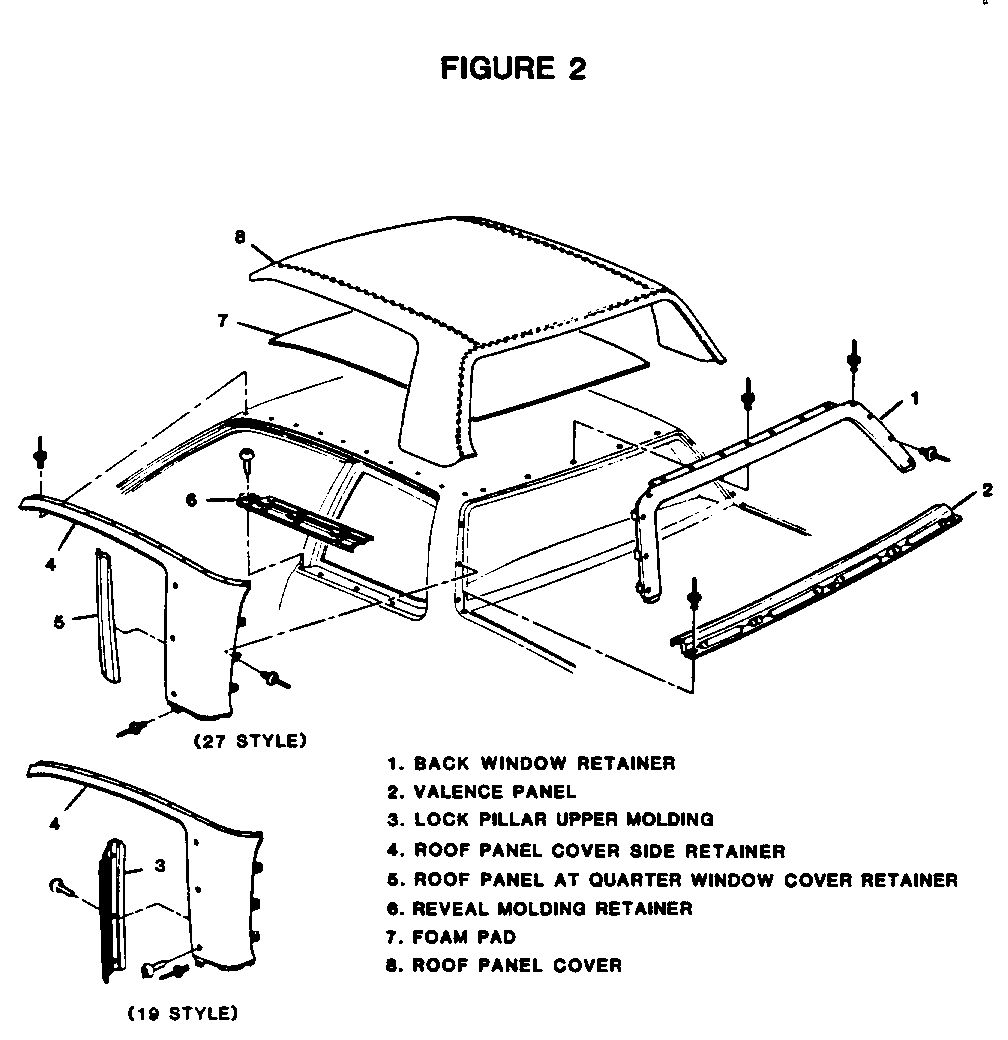
8. Valence panel (2, Fig. 2).
9. Roof panel at quarter window cover retainer (5).
10. Windshield wiper arms, cowl grille and washer hoses.
11. Slit vinyl top front to rear approximately 152mm (6") inboard from outboard edge of roof panel cover side retainer (5).
12. Peel vinyl down and off retainers and pull from under cover side retainers.
13. Similarly repeat steps 11 and 12 for back window retainer (1).
14. Slit remainder of vinyl top into 5 to 6 inch strips and remove.
15. If necessary to remove cover side and/or back window retainers (1 and 5), remove bridging tape covering rivets and drill out rivets.
16. Clean roof as required of any old padding. A xylol solvent such as 3M Adhesive Cleaner or equivalent should be used to remove or smooth out excess old cement. Apply solvent according to manufacturer's directions.
17. Cut a channel in urethane surrounding windshield opening sufficient to allow windshield lace to be reinstalled.
18. Trial fit windshield lace to glass. It may be necessary to cut down ribbed tail of lace in order to correctly seat lace flush to glass.
Install or Connect
1. Roof panel cover side retainers and back window retainer if previously removed. Two different size rivets are used to secure retainers: 1/8 x 5/8" and 1/8 x 1/4".
2. Find centerline of roof panel and identify lines as it extends out to front and back glass by marking on glass with grease pencil.
3. Find centerline of pad by folding pad lengthwise and mark centerline at front and rear of pad. A 3/16" foam pad is used.
4. Align pad to roof and check for proper positioning and amount of over-hang. Remove release paper or covering from half of pad and lightly secure pad in position. Razor cut pad along edge where pad butts to inside edge or retainer in order to achieve square butt joint. Finally, slick pad down and work out wrinkles.
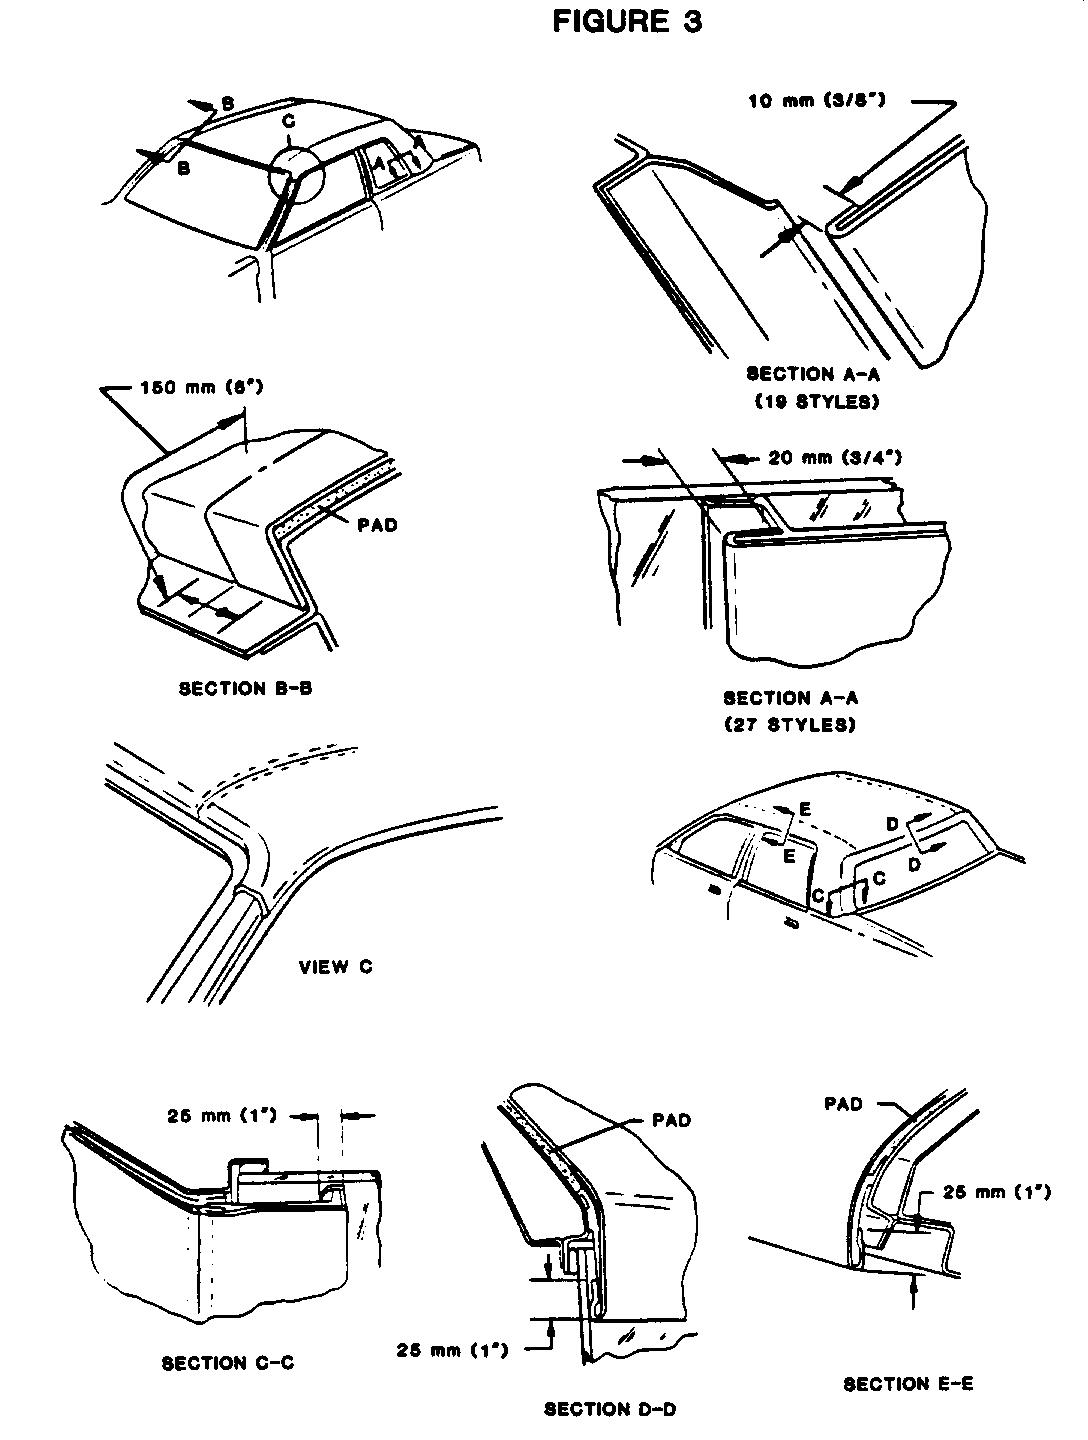
5. Repeat operation on second half of roof. Ref. Figs. 1 and 3 if additional information is needed for trimming.
6. Apply two inch body tape along edge of roof panel cover side retainer so that it bridges edges between foam pad and retainer, as well as covering retainer rivet holes. Pull tape taut when installing in order to minimize depressions in covered surfaces and to achieve good bridging action.
7. Position vinyl top onto roof panel and align notches at front and rear center of top with roof panel centerline.
8. Cement vinyl top to foam pad by applying a coat of contact cement such as Hughes HC 4183 or 3M 8046 or equivalent to pad and vinyl top. If desired, a spray contact adhesive such as 3M Super Trim Adhesive 08090 or equivalent may also be used. With aid of a helper, stretch top and cement to roof. Work on one half of roof before proceeding to second half. Vinyl cover cannot be pulled excessively or repositioned easily once contact is made. Before slicking top down be sure it is correctly positioned.
9. Trim top along windshield and back window and along roof panel cover side retainers. Ref. sectional views of Fig. 3.
10. Using rear end and quarter belt molding as a guide, fit molding to body and mark and trim vinyl along quarter panel. Ref. Section B-B, Fig. 1.
11. Tuck vinyl into windshield opening, and under back window and roof panel cover side retainers.
12. Back window lace, valence panel, rear end and quarter belt moldings, roof drip front and center retainers, windshield pillar finishing molding and on 19 styles only, center pillar scalp molding. On 27 styles, install roof panel at quarter window cover retainer (5, Fig. 2).
13. Apply masking tape across upper windshield opening and down windshield pillar finishing molding. Apply a bead of urethane sealant around glass and install windshield lace.
14. Cowl grille, wiper arms and washer hoses.
15. Remove protective tape and clean surfaces as required.


General Motors bulletins are intended for use by professional technicians, not a "do-it-yourselfer". They are written to inform those technicians of conditions that may occur on some vehicles, or to provide information that could assist in the proper service of a vehicle. Properly trained technicians have the equipment, tools, safety instructions and know-how to do a job properly and safely. If a condition is described, do not assume that the bulletin applies to your vehicle, or that your vehicle will have that condition. See a General Motors dealer servicing your brand of General Motors vehicle for information on whether your vehicle may benefit from the information.
