Exhaust Pipe Replacement Front 7.2L Diesel
Removal Procedure
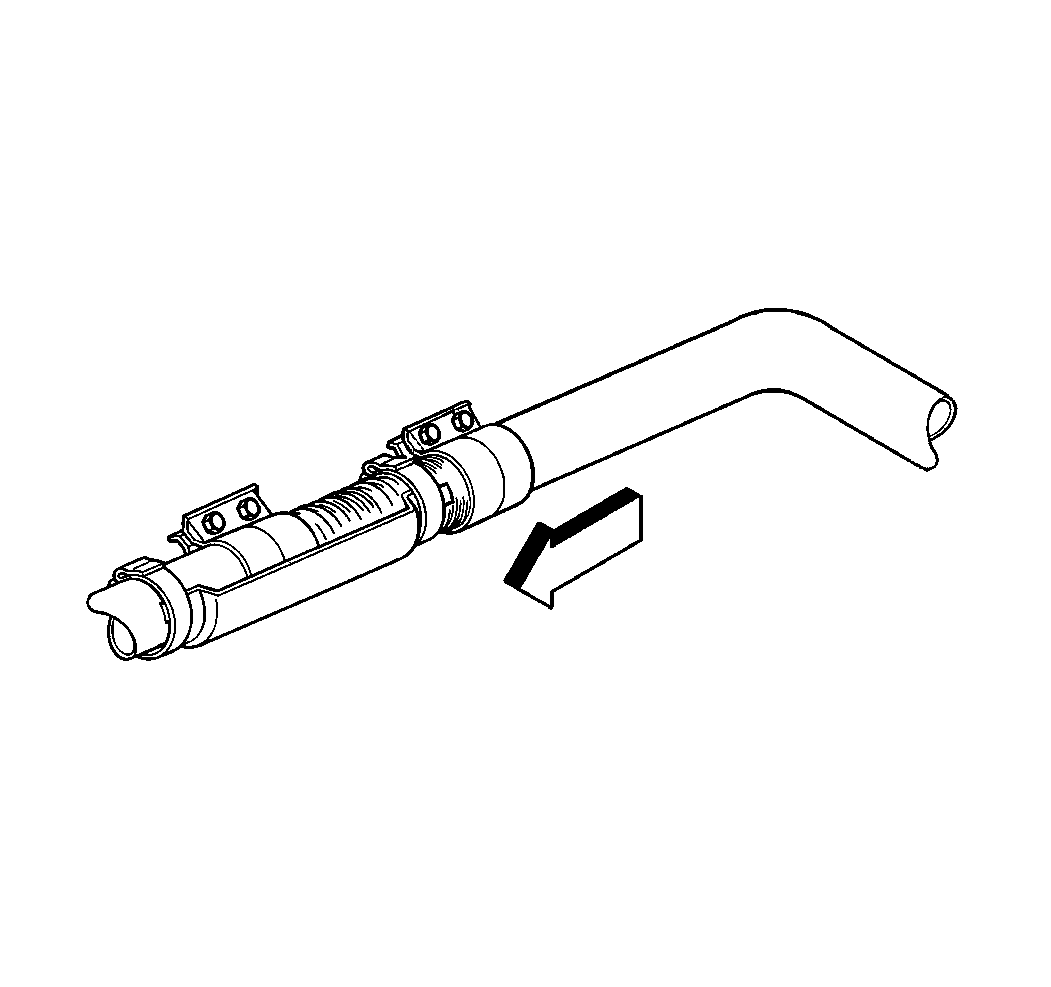
- Loosen the heat shield clamps. Slide off and remove the clamps from around the heat shield.
- Remove the heat shield.
- Remove the following components:
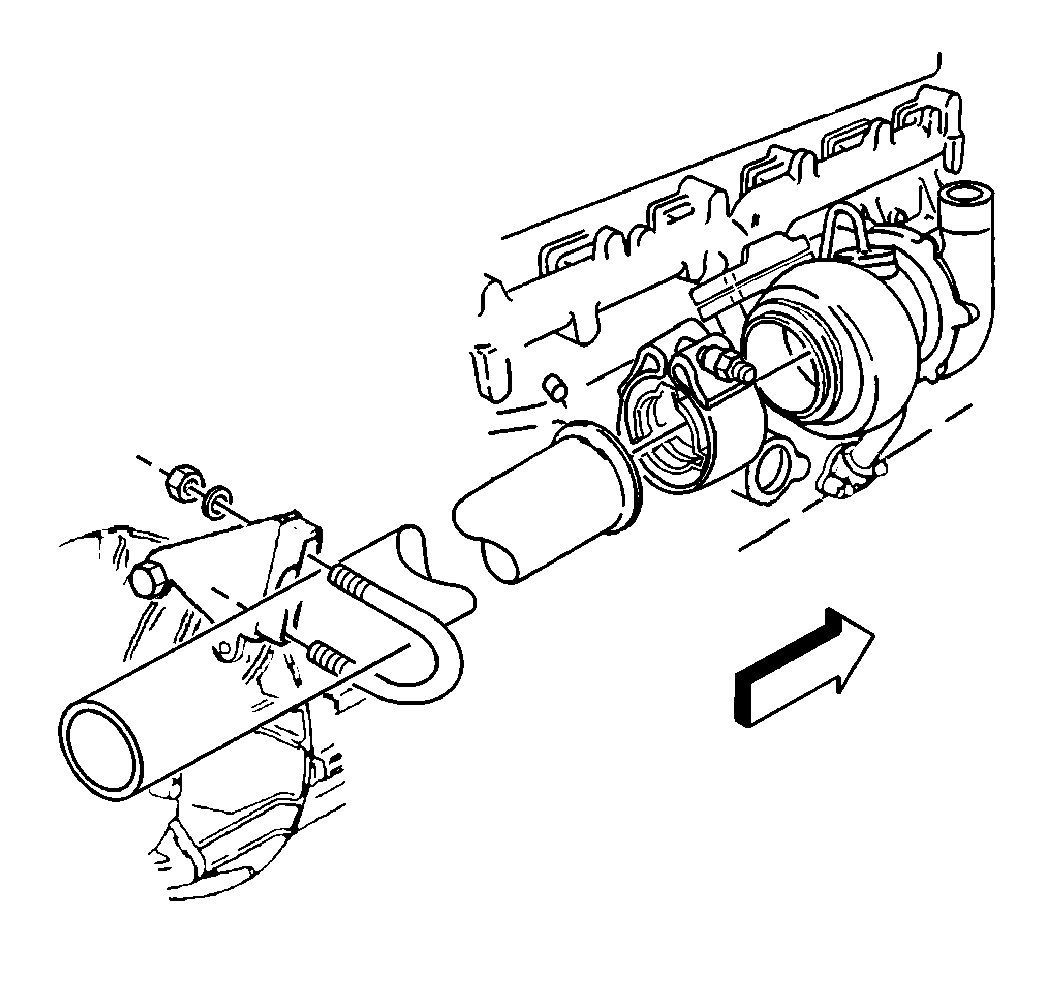
- Remove the clamp assemblies from the front exhaust pipe. Refer to Exhaust Clamps Replacement
- Remove the front exhaust pipe.
- Inspect all of the components for the following conditions:
- Replace any damaged components as necessary.
| • | The nuts |
| • | The washers |
| • | The U-bolt |
| • | Cracks |
| • | Bends |
| • | Stripped threads |
| • | Corrosion damage |
| • | Leaks |
Installation Procedure
- Slide the proper clamp assemblies onto the front exhaust pipe.
- Install the front exhaust pipe.
- Tighten the clamp assemblies that secure the front exhaust pipe.
- Install the heat shield.
- Slide the clamps over the ends of the heat shield and align the clamps.

Notice: Use the correct fastener in the correct location. Replacement fasteners must be the correct part number for that application. Fasteners requiring replacement or fasteners requiring the use of thread locking compound or sealant are identified in the service procedure. Do not use paints, lubricants, or corrosion inhibitors on fasteners or fastener joint surfaces unless specified. These coatings affect fastener torque and joint clamping force and may damage the fastener. Use the correct tightening sequence and specifications when installing fasteners in order to avoid damage to parts and systems.
Tighten
| • | Tighten the turbocharger clamp nut to 9 N·m (79 lb in). |
| • | Tighten the bolts on the wide band clamp to 73 N·m (54 lb ft). |

Tighten
Tighten the heat shield exhaust clamps to 8 N·m (70 lb in).
Exhaust Pipe Replacement Front 6.5L Diesel
Removal Procedure
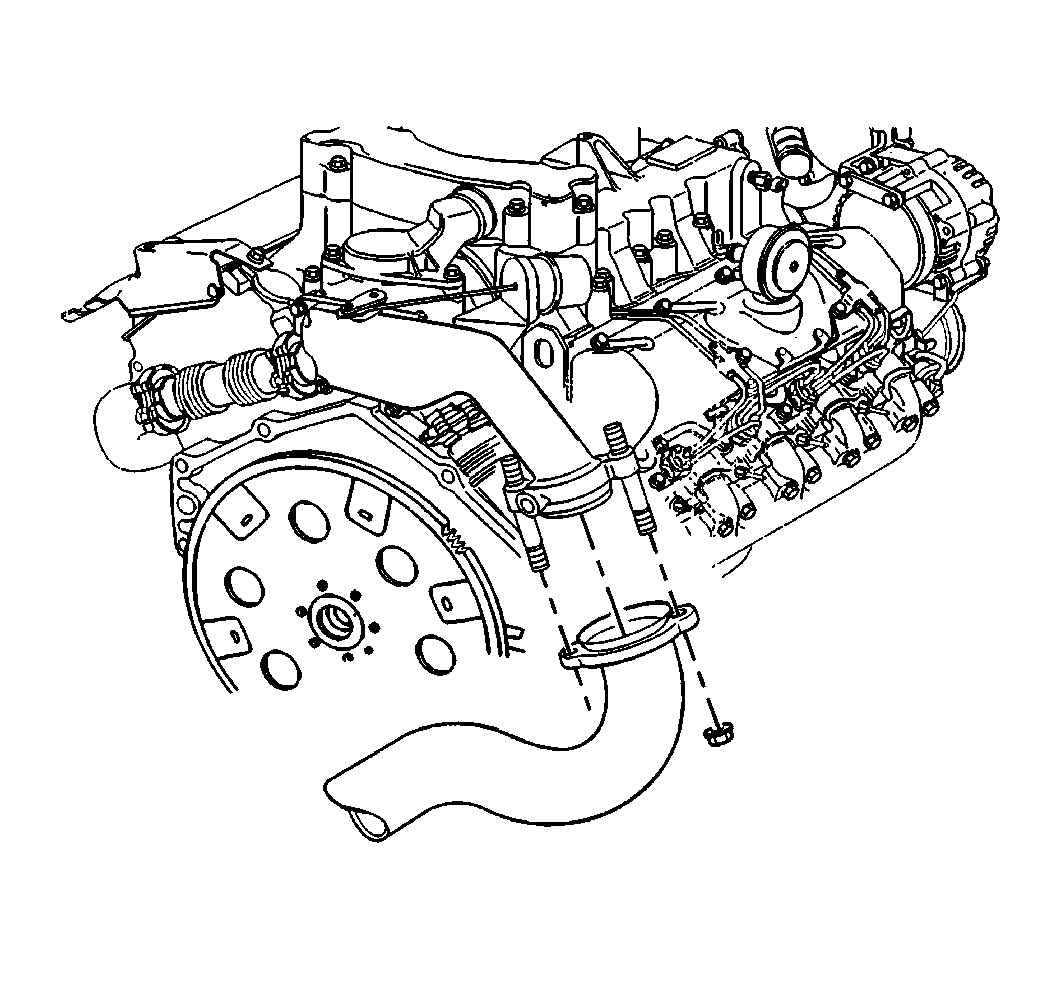
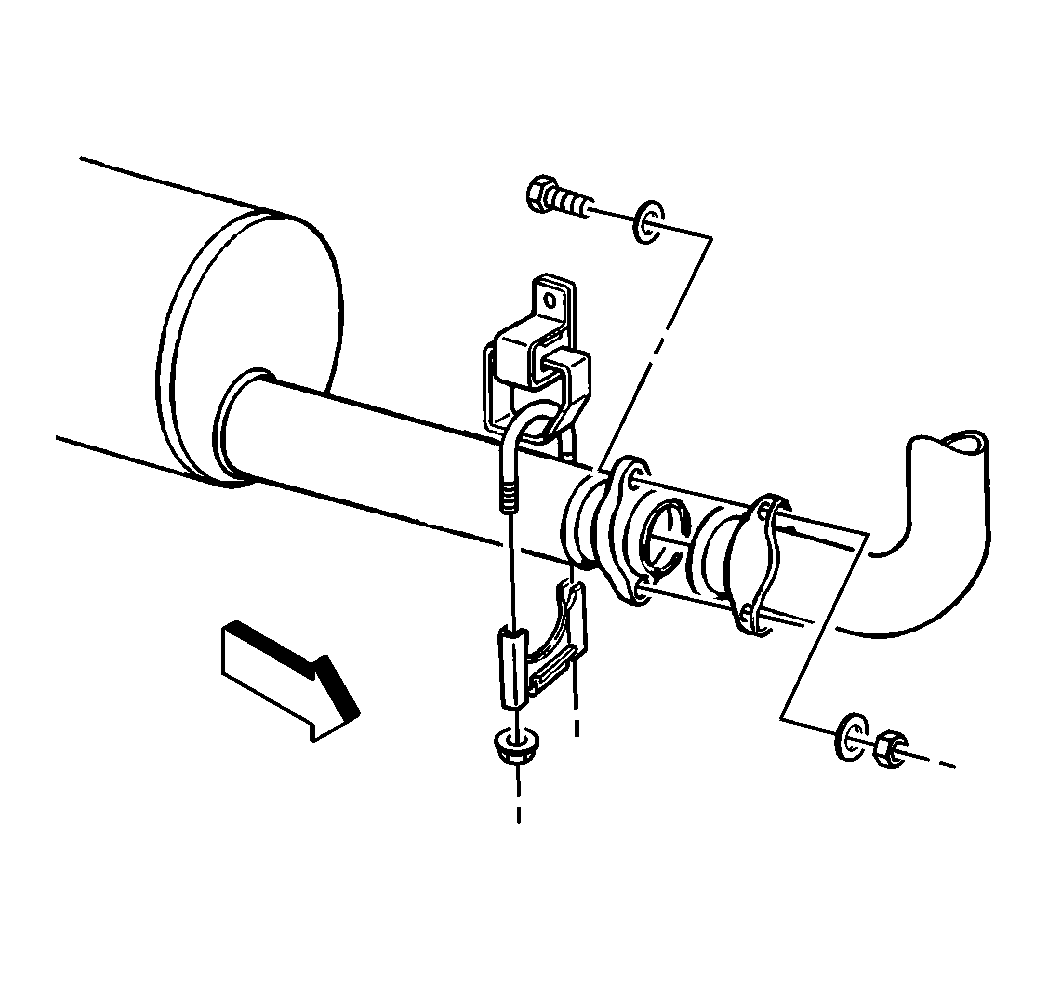
- Remove the nuts from the exhaust manifold.
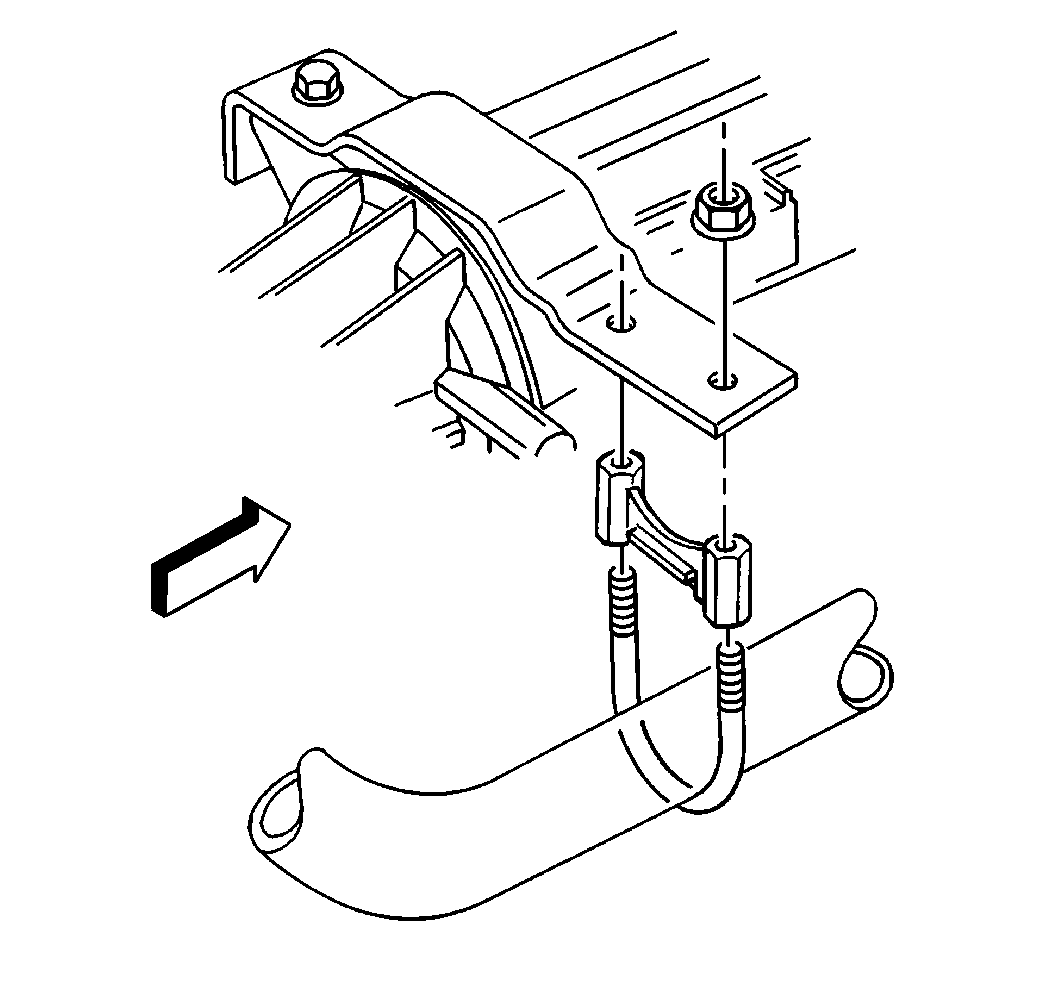
- Remove the clamp from the exhaust pipe bracket.
- Remove the bolts that attach the exhaust pipe to the muffler.
Installation Procedure
- Install the nuts to the exhaust manifold.
- Install the clamp to the exhaust pipe bracket.
- Install the bolts to the exhaust pipe and to the muffler.
- Tighten the fasteners.


Notice: Use the correct fastener in the correct location. Replacement fasteners must be the correct part number for that application. Fasteners requiring replacement or fasteners requiring the use of thread locking compound or sealant are identified in the service procedure. Do not use paints, lubricants, or corrosion inhibitors on fasteners or fastener joint surfaces unless specified. These coatings affect fastener torque and joint clamping force and may damage the fastener. Use the correct tightening sequence and specifications when installing fasteners in order to avoid damage to parts and systems.
Tighten
| • | Tighten the nuts that secure the exhaust pipe to the engine to 29 N·m (21 lb ft). |
| • | Tighten the nuts that secure the exhaust pipe to the exhaust pipe bracket to 42 N·m (31 lb ft). |
| • | Tighten the nuts that secure the exhaust pipe to the muffler to 24 N·m (18 lb ft). |
Exhaust Pipe Replacement Rear 7.2L Diesel
Removal Procedure
- Loosen the heat shield clamps. Slide off and remove the clamps from around the heat shield.
- Remove the heat shield.
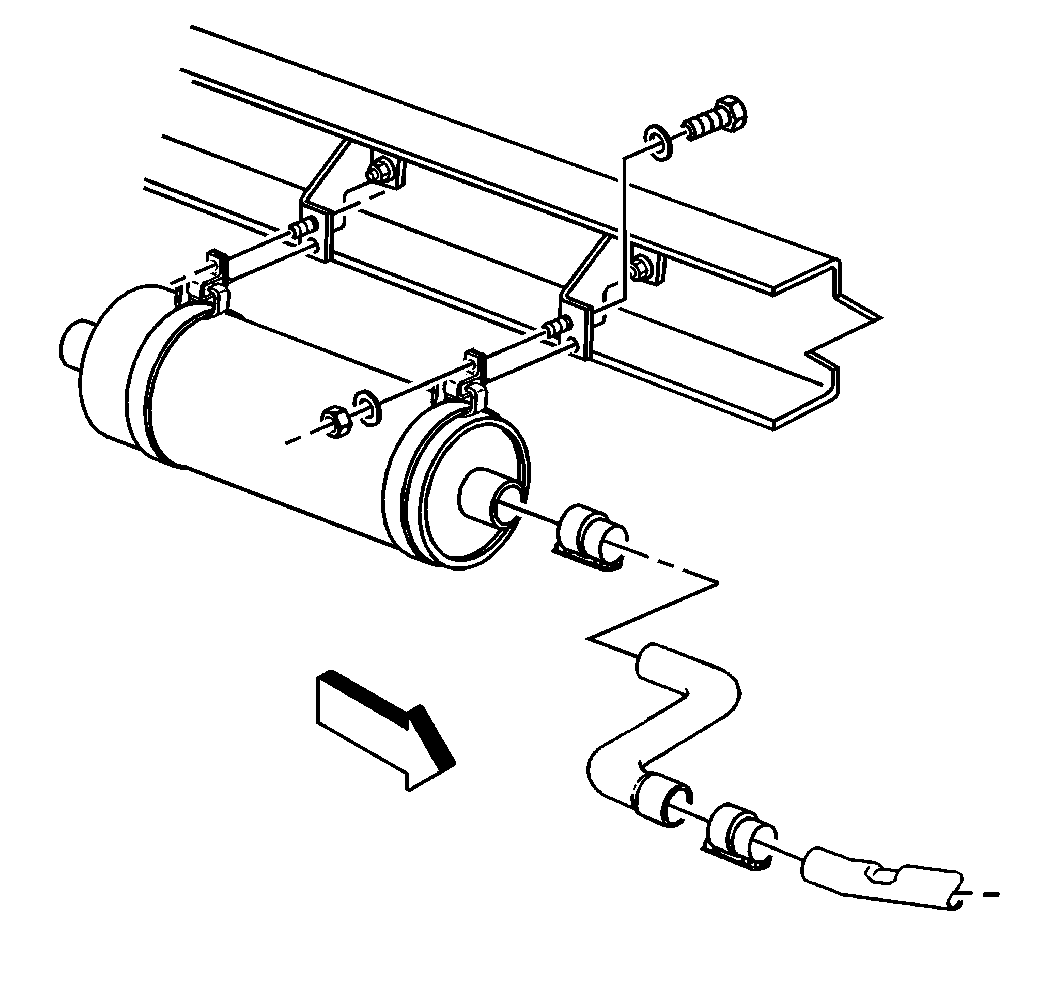
- Remove the clamp assemblies from the rear exhaust pipe. Refer to Exhaust Clamps Replacement .
- Remove the rear exhaust pipe.
- Inspect all of the components for the following conditions:
- Replace any damaged components as necessary.
| • | Cracks |
| • | Bends |
| • | Stripped threads |
| • | Corrosion damage |
| • | Leaks |
Installation Procedure
- Slide the clamp assemblies over the rear exhaust pipe.
- Install the rear exhaust pipe.
- Tighten the clamp assemblies on the rear exhaust pipe.
- Install the heat shield.
- Slide the clamps over the ends of the heat shield.

Notice: Use the correct fastener in the correct location. Replacement fasteners must be the correct part number for that application. Fasteners requiring replacement or fasteners requiring the use of thread locking compound or sealant are identified in the service procedure. Do not use paints, lubricants, or corrosion inhibitors on fasteners or fastener joint surfaces unless specified. These coatings affect fastener torque and joint clamping force and may damage the fastener. Use the correct tightening sequence and specifications when installing fasteners in order to avoid damage to parts and systems.
Tighten
Tighten the bolts on the wide band clamp to 73 N·m (54 lb ft).
Align the clamps.
Tighten
Tighten the nuts on the exhaust clamps to 8 N·m (70 lb in).
Exhaust Pipe Replacement Gasoline
Removal Procedure
- Loosen the heat shield clamps. Slide off and remove the clamps from around the heat shield.
- Remove the heat shield.
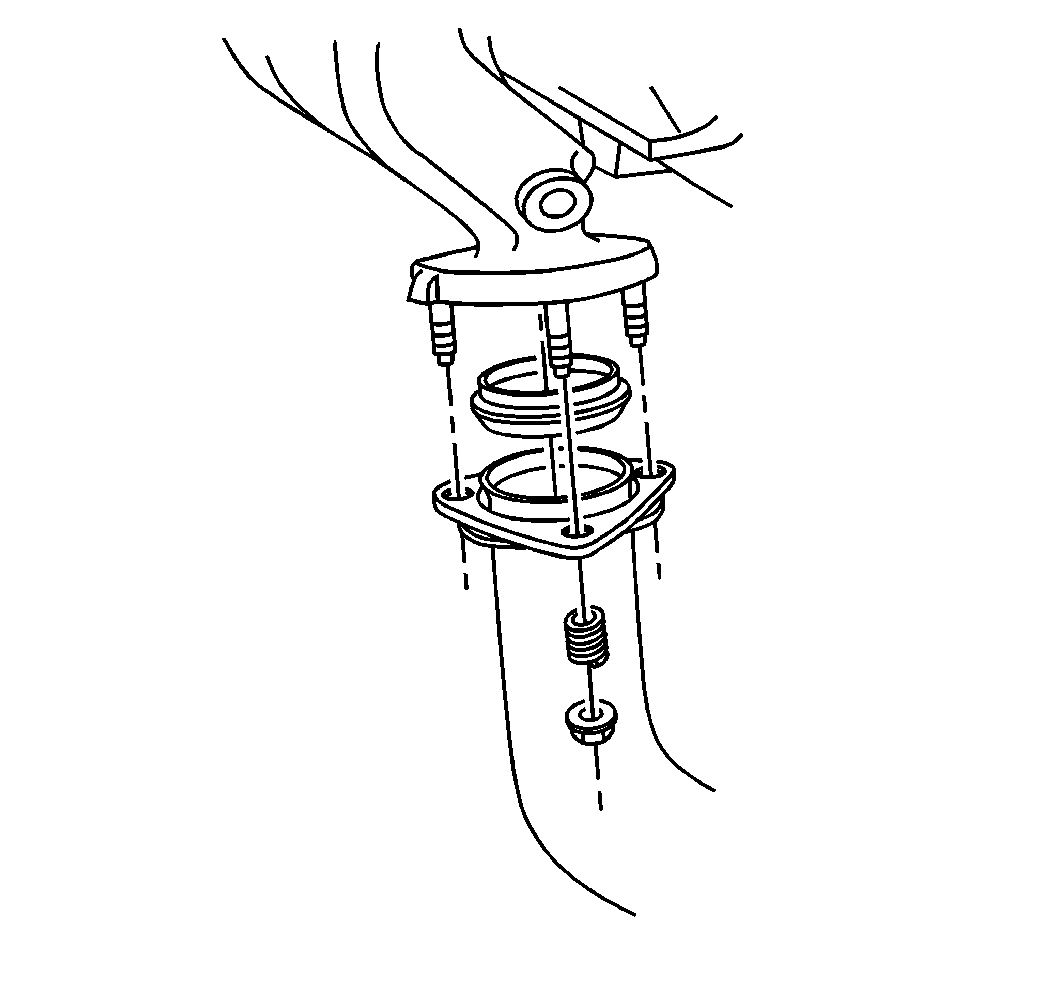
- Remove the following components from the front of the exhaust pipe:
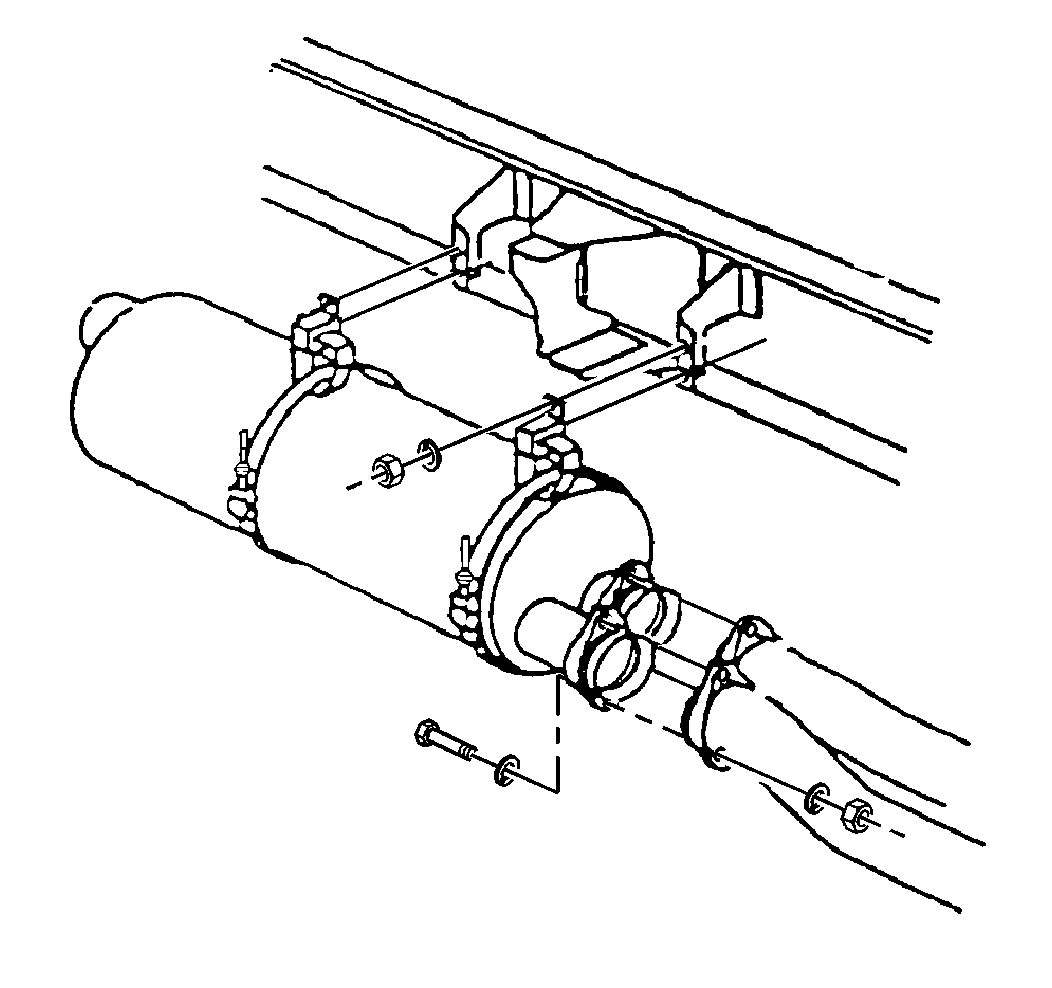
- Remove the following components from the rear of the exhaust pipe:
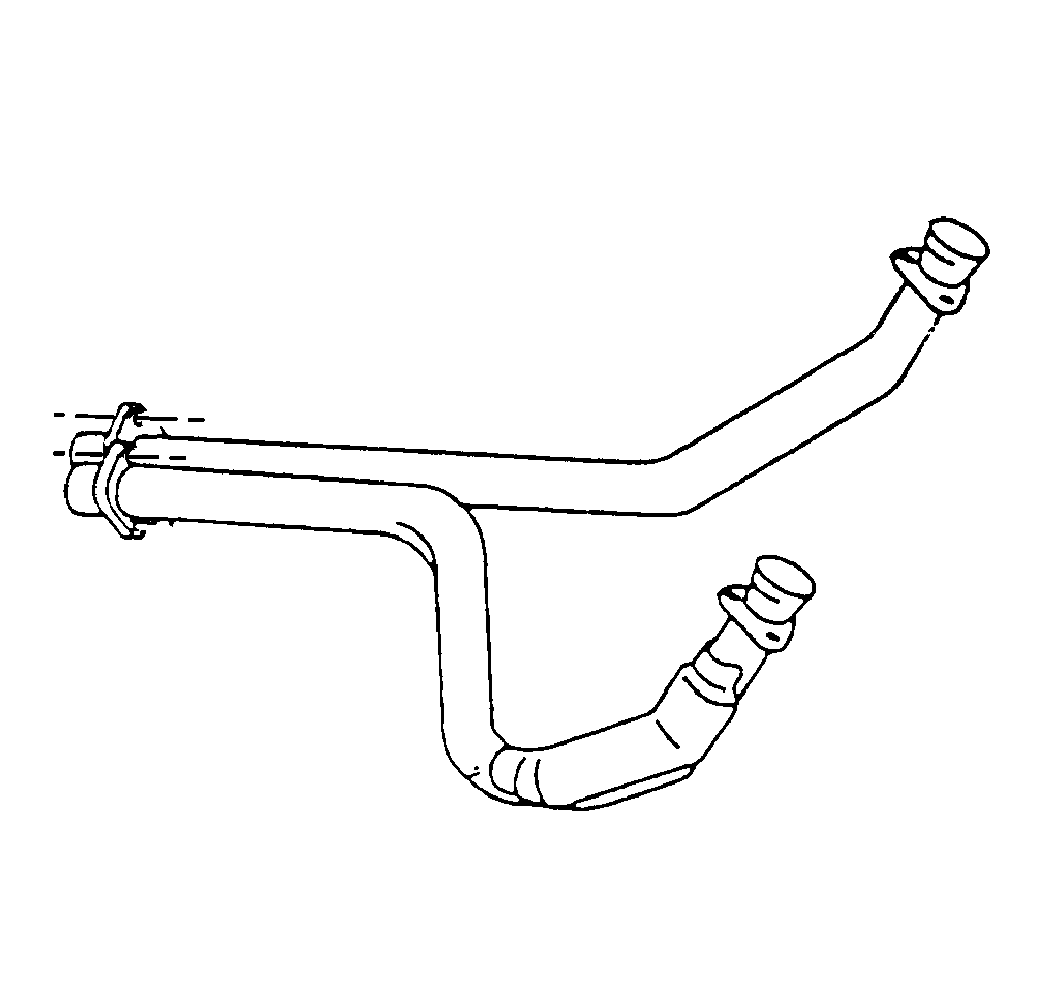
- Remove the exhaust pipes.
- Inspect the components for the following conditions:
- Replace any damaged components as necessary.
| • | The nuts |
| • | The springs |
| • | The washers |
| • | The seals |
| • | The nuts |
| • | The bolts |
| • | The washers |
| • | Cracks |
| • | Bends |
| • | Stripped threads |
| • | Corrosion damage |
| • | Leaks |
Installation Procedure
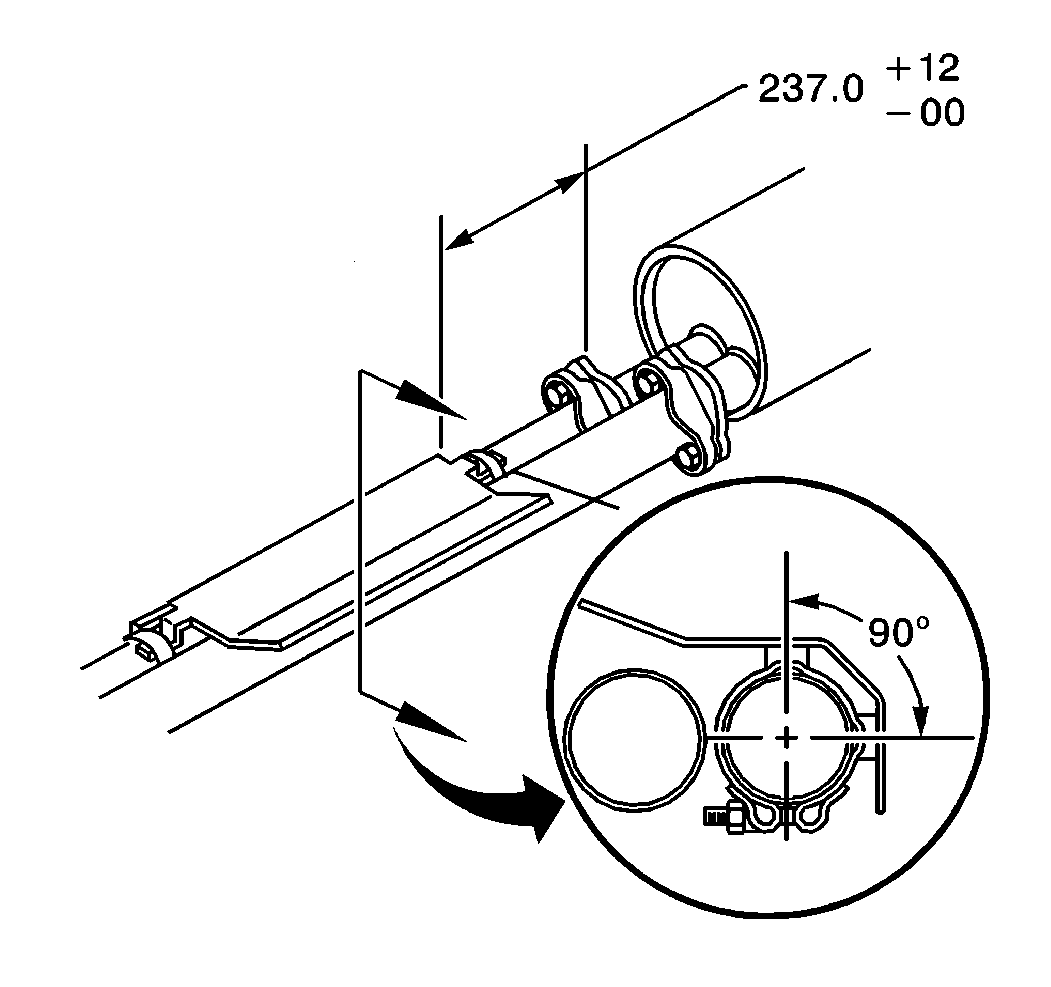
- Install the heat shield.
- Slide the clamps over the heat shield.
- Install the exhaust pipes.
- Install the following components to the rear of the exhaust pipe:
- Install the following components to the front of the exhaust pipe:
- Tighten the fasteners.


| • | The nuts |
| • | The bolts |
| • | The washers |

| • | The nuts |
| • | The springs |
| • | The seals |
Notice: Use the correct fastener in the correct location. Replacement fasteners must be the correct part number for that application. Fasteners requiring replacement or fasteners requiring the use of thread locking compound or sealant are identified in the service procedure. Do not use paints, lubricants, or corrosion inhibitors on fasteners or fastener joint surfaces unless specified. These coatings affect fastener torque and joint clamping force and may damage the fastener. Use the correct tightening sequence and specifications when installing fasteners in order to avoid damage to parts and systems.
Tighten
| • | Tighten the nuts on the exhaust manifold studs to 38 N·m (28 lb ft). |
| • | Tighten the heat shield clamp nuts to 8 N·m (70 lb in). |
| • | Tighten the nuts that secure the exhaust pipes to the muffler to 24 N·m (18 lb ft). |
