For 1990-2009 cars only
Removal Procedure
- Block the wheels.
- Cage the rear air brake chambers. Refer to Caging the Rear Air Brake Chamber .
- Drain all air reservoirs. Refer to Draining Reservoirs in Air Brakes.
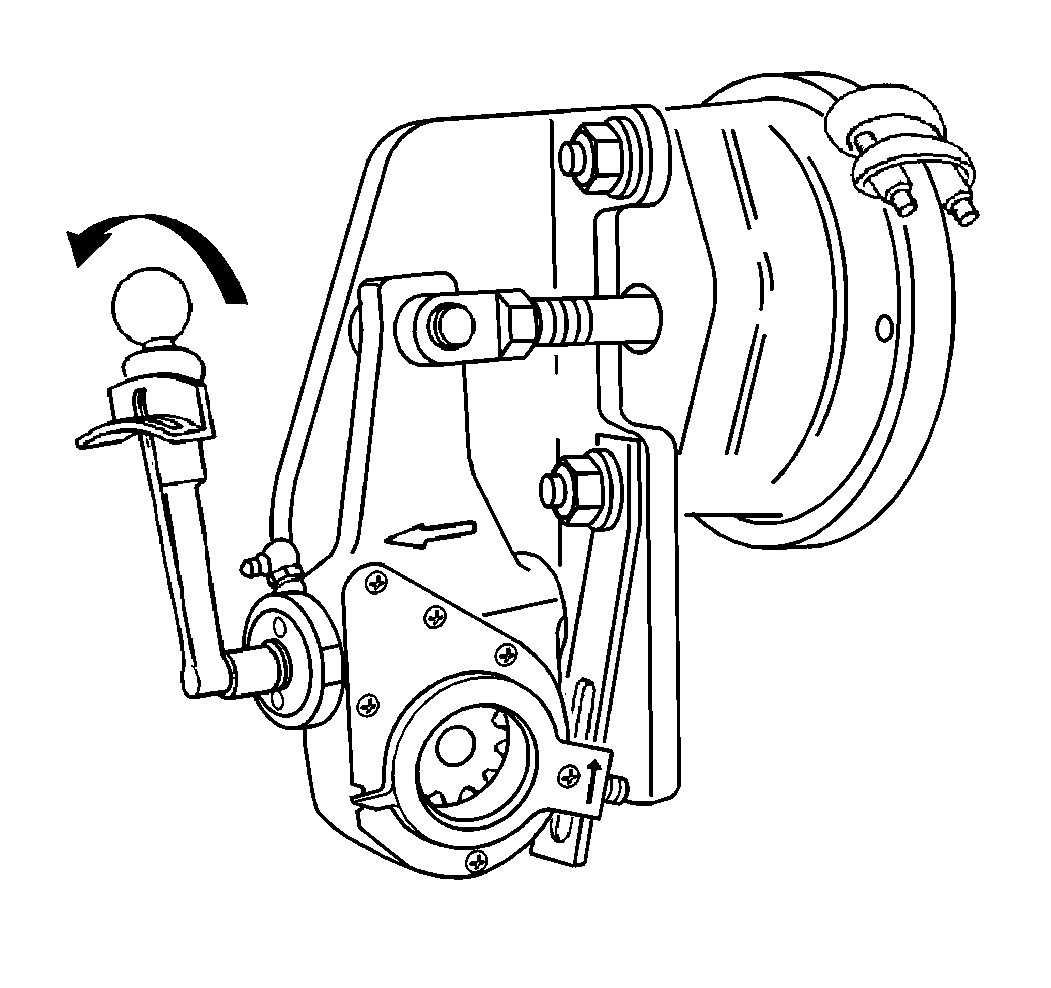
- Remove the air brake chamber clevis pin cotter pin.
- Remove the air brake chamber clevis pin.
- Fully release the air brake automatic slack adjuster by turning the air brake automatic slack adjuster counterclockwise. Free the air brake automatic slack adjuster arm from the air brake chamber clevis.
- Loosen the jam nut.
- Remove the air brake chamber clevis and the jam nut.
- Inspect the air brake chamber pushrod for damage. Overhaul or replace the service brake chamber if damaged.
Installation Procedure
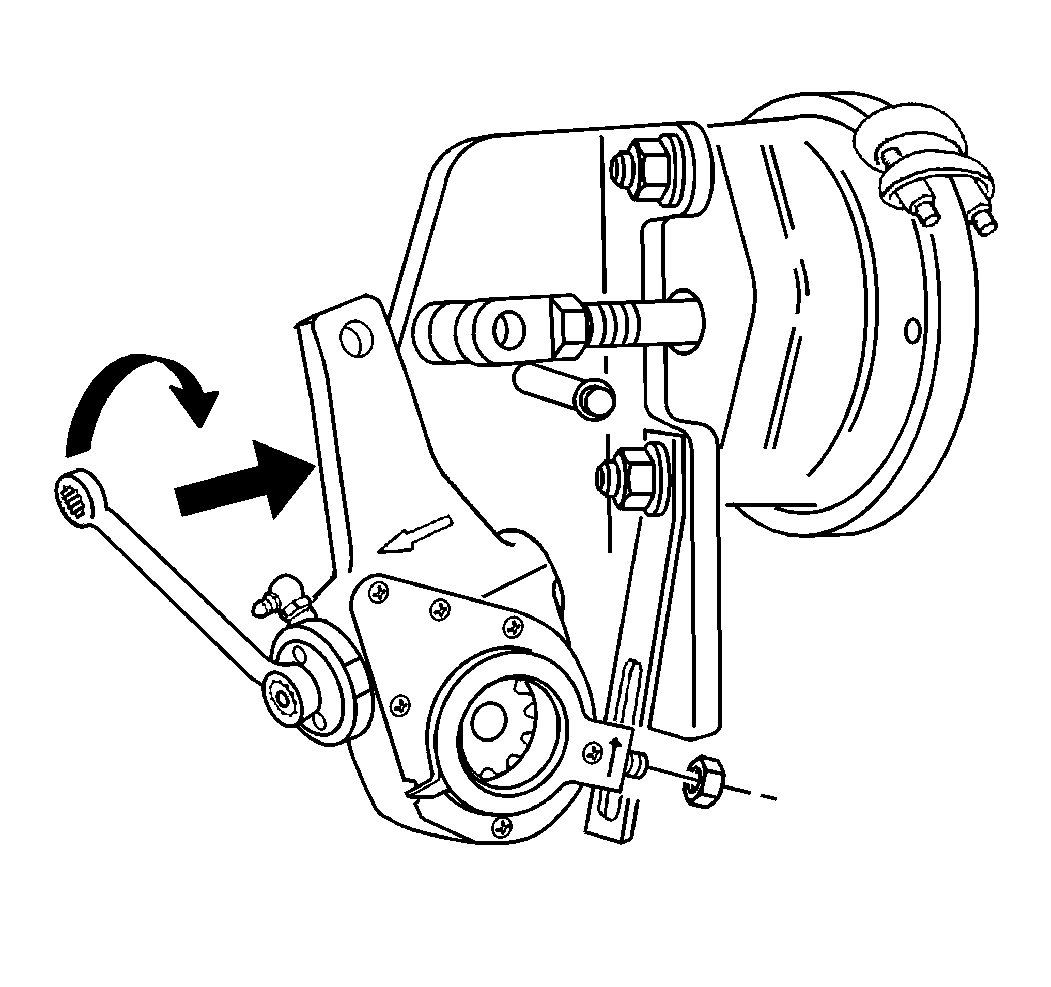
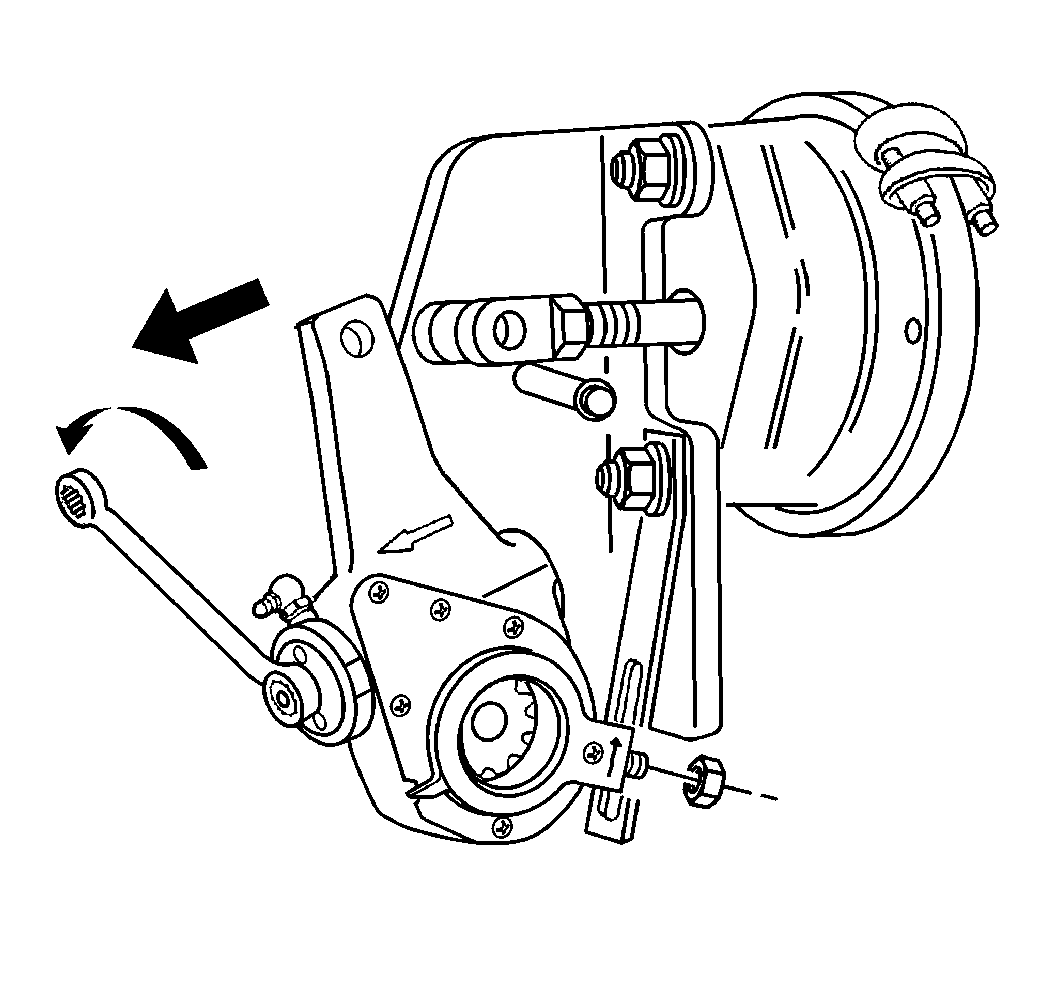
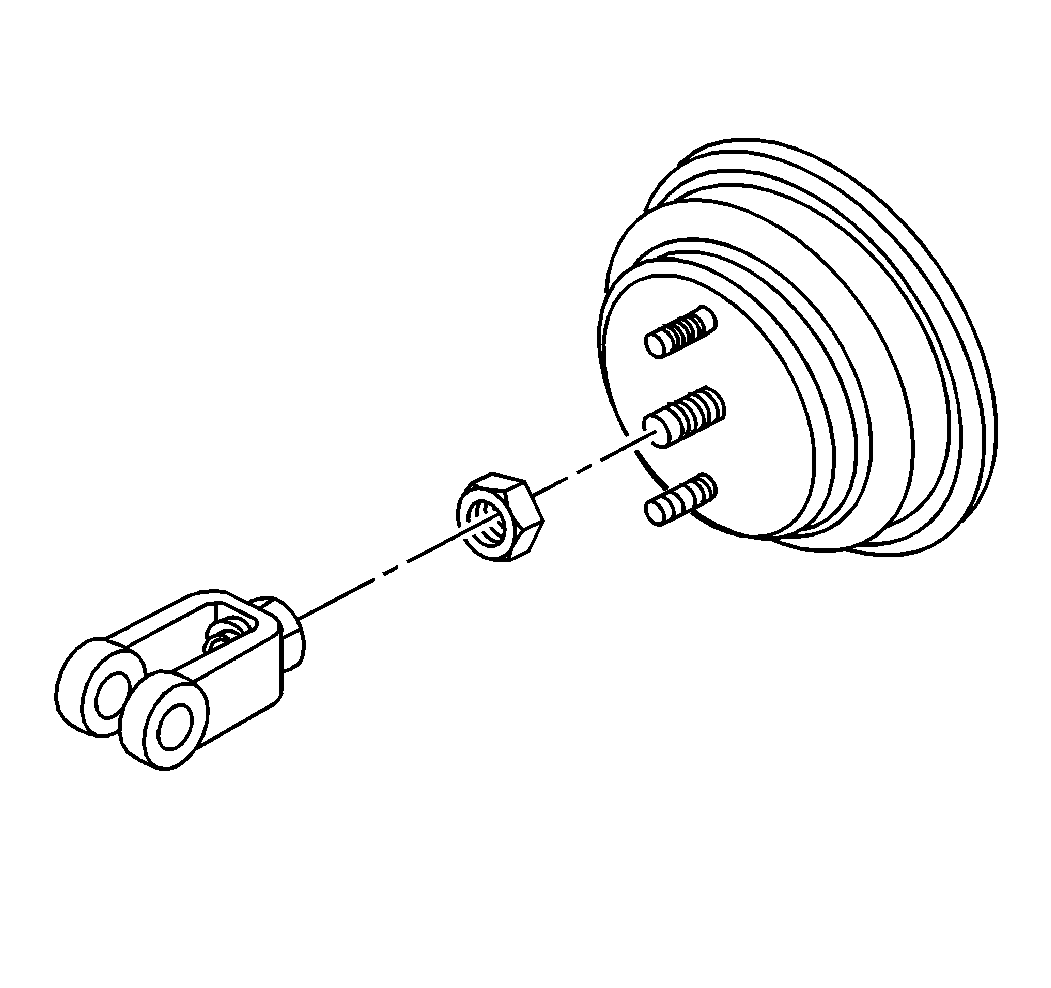
- Loosely assemble the jam nut and the air brake chamber clevis to the air brake chamber pushrod.
- Adjust the air brake chamber clevis by turning the air brake chamber clevis clockwise in order to decrease the distance and counterclockwise in order to increase the distance.
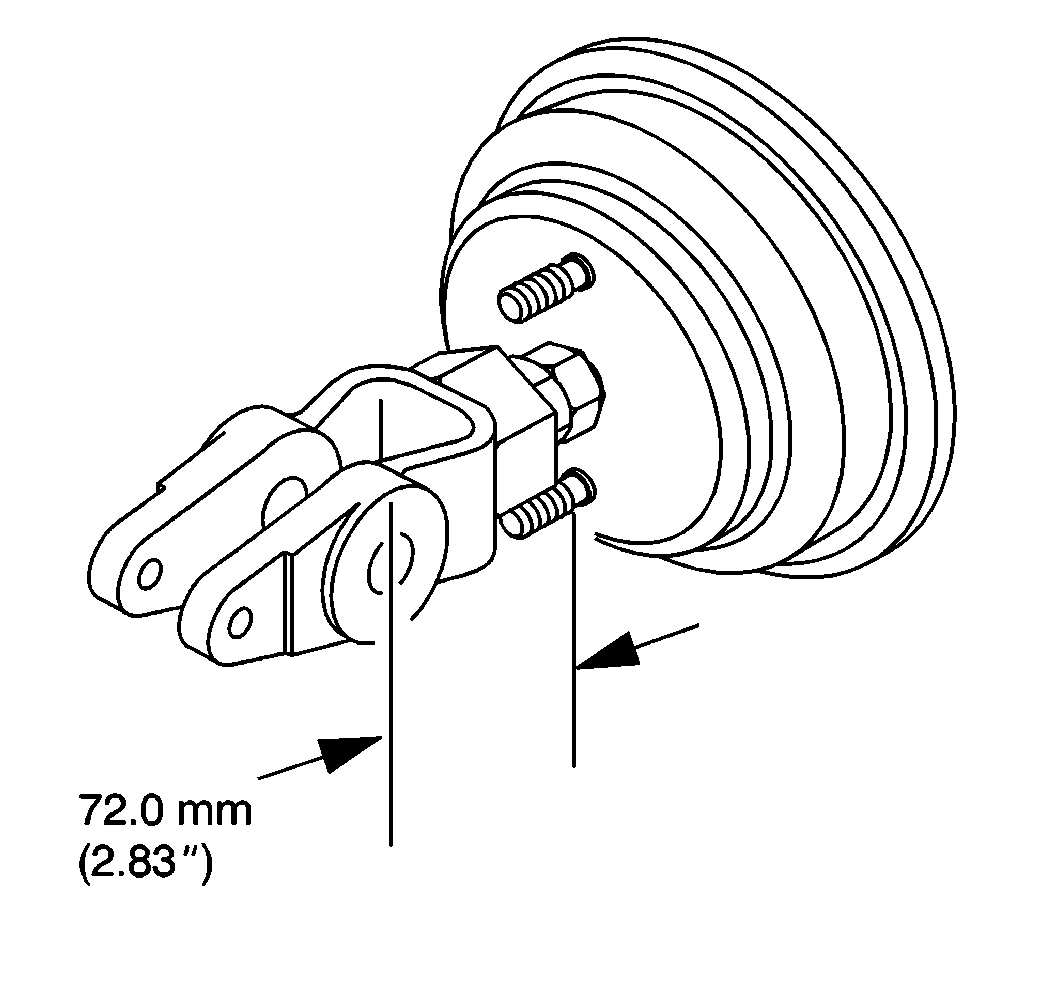
- Measure the front air brake chamber clevis to 72.0 mm (2.83 in) from the mounting surface of the front air brake chamber to the center of the air brake chamber clevis pin mounting hole.
- Measure the rear air brake chamber clevis to 68.5 mm (2.69 in) from the mounting surface of the rear air brake chamber to the center of the air brake chamber clevis pin mounting hole.
- Tighten the front and rear air brake chamber clevis nuts.
- Rotate the air brake automatic slack adjuster adjusting hex clockwise until the air brake automatic slack adjuster arm hole lines up with the air brake chamber clevis hole.
- Install the air brake chamber clevis pin.
- Install the air brake chamber clevis pin cotter pin.
- Adjust the brakes. Refer to Air Drum Brake Adjustment .
- Start the engine.
- Charge the system to the air compressor governor valve cut-out point.
- Stop the engine.
- Uncage the rear air brake chambers. Refer to Caging the Rear Air Brake Chamber .
- Check for proper brake operation.
- Set the parking brake.
- Remove the wheel blocks.

Notice: Use the correct fastener in the correct location. Replacement fasteners must be the correct part number for that application. Fasteners requiring replacement or fasteners requiring the use of thread locking compound or sealant are identified in the service procedure. Do not use paints, lubricants, or corrosion inhibitors on fasteners or fastener joint surfaces unless specified. These coatings affect fastener torque and joint clamping force and may damage the fastener. Use the correct tightening sequence and specifications when installing fasteners in order to avoid damage to parts and systems.
Tighten
| • | Tighten the front air brake chamber clevis jam nut (type 16 air brake chamber) to 45 N·m (33 lb ft). |
| • | Tighten the front air brake chamber clevis jam nut (types 20 and 24 air brake chamber) to 78 N·m (57 lb ft). |
| • | Tighten the rear air brake chamber clevis jam nut to 77 N·m (56 lb ft). |