For 1990-2009 cars only
Removal Procedure
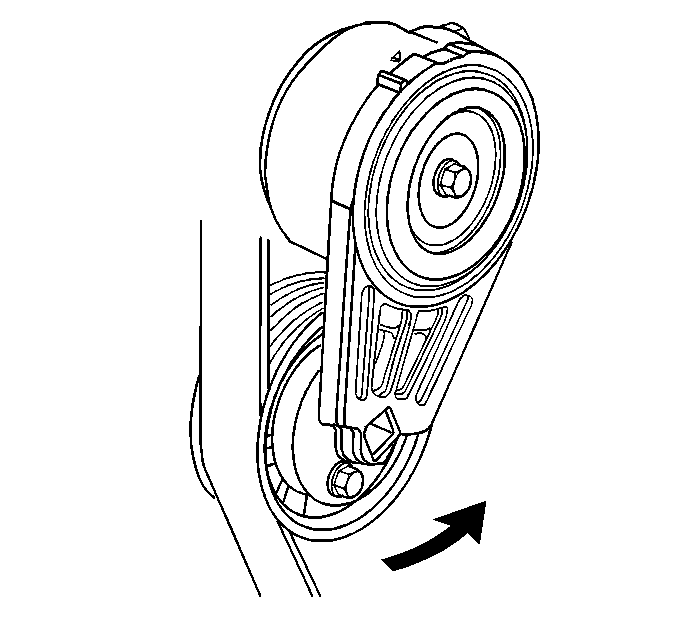
- Install a 3/8 inch drive wrench on the tensioner arm and rotate the arm counterclockwise.
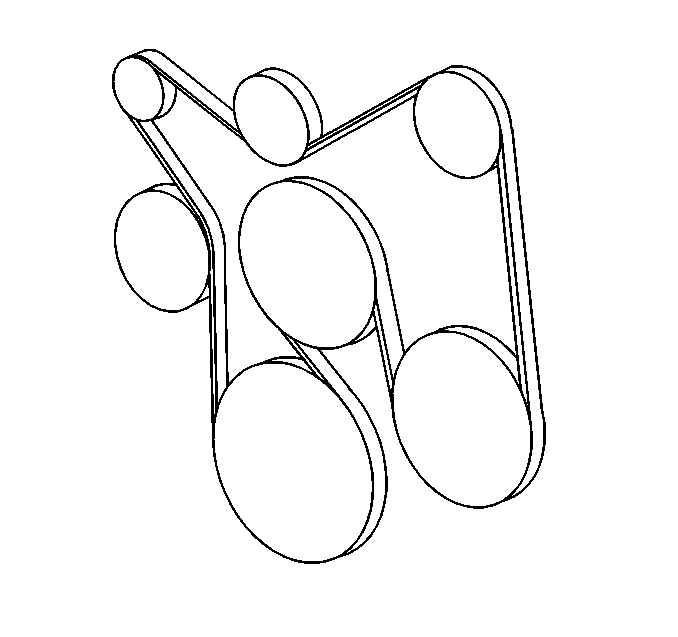
- Remove the drive belt from the drive pulleys (if equipped with a single generator).
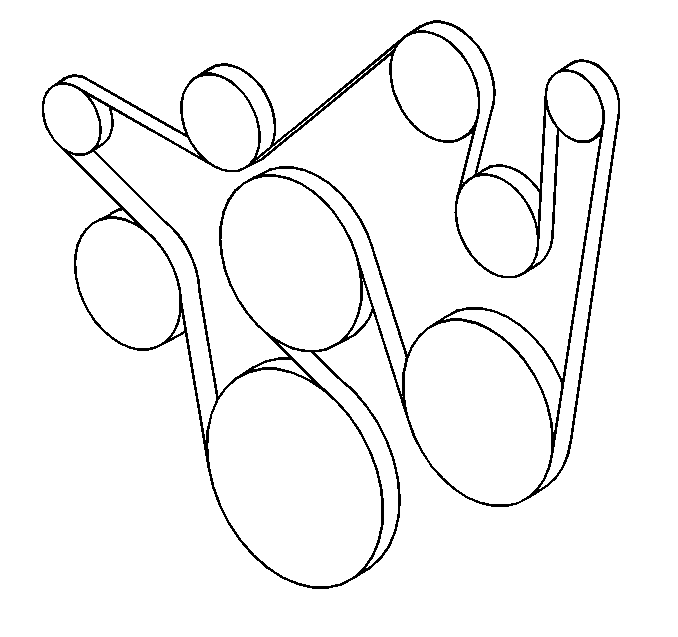
- Remove the drive belt from the drive pulleys (if equipped with dual generators).
- Slowly release the tension on the tensioner arm.
Installation Procedure
- Install the belt over all the pulleys except the tensioner arm (if equipped with a single generator).
- Install the drive belt over all the pulleys except the tensioner arm (if equipped with a dual generators).
- Install a 3/8 inch drive wrench on the tensioner arm and rotate the arm counterclockwise.
- Slowly release the tension on the tensioner arm.
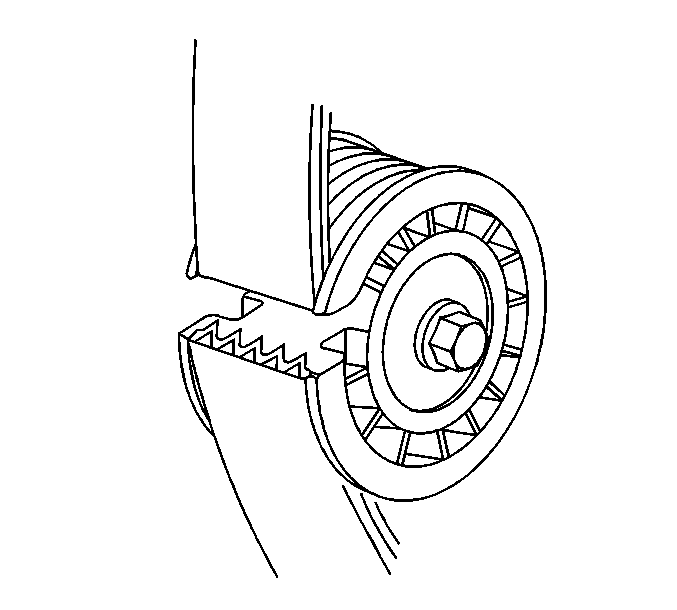
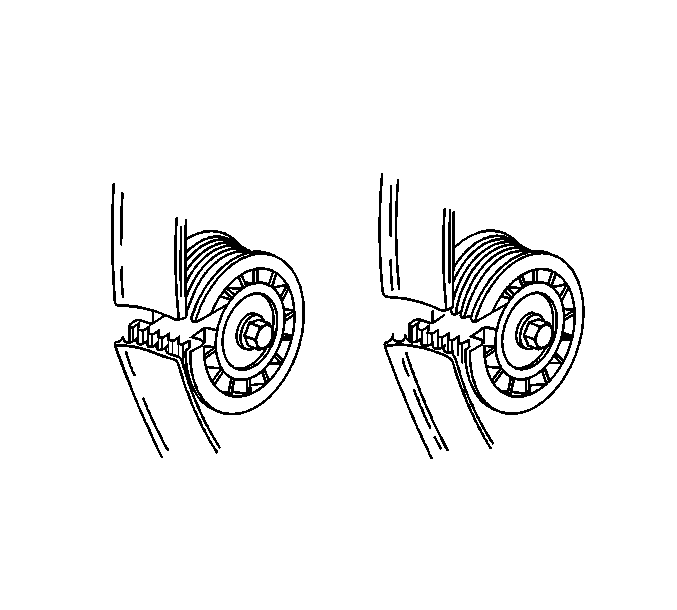
- Inspect for the drive belt being properly install on the pulleys.
- Avoid mis-positioning the drive belt by one or more grooves.
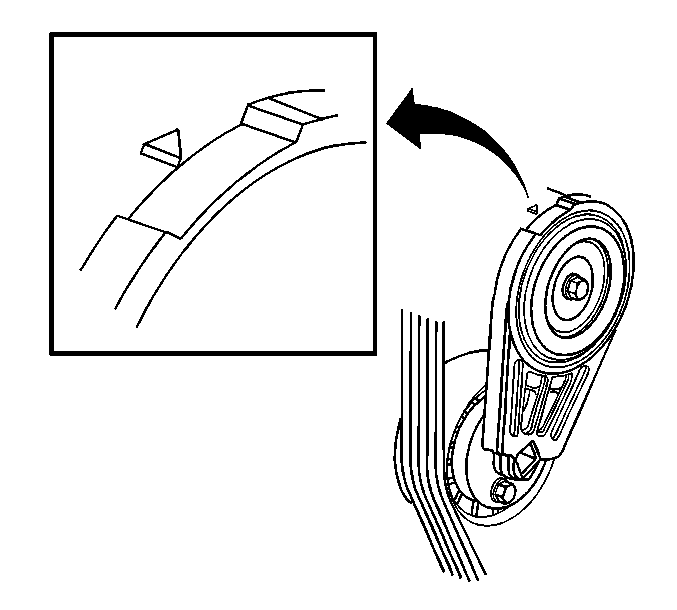
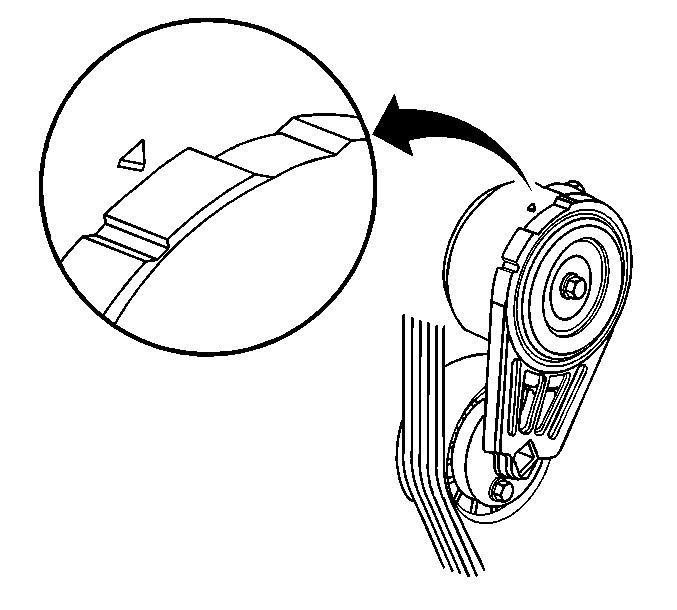
- Confirm for the proper drive belt size and the correct drive belt routing by observing the location of the fix pointer and index marks on the drive belt tensioner. With a new drive belt installed the fix pointer should align within the indentation on the drive belt tensioner.
- With a used drive belt installed the fix pointer should not align past the index marks.
- Install the air cleaner assembly. Refer to Air Cleaner Assembly Replacement in Engine Controls-6.5L (L65).
Important: Refer to the Underhood Label for the proper drive belt routing graphic.


