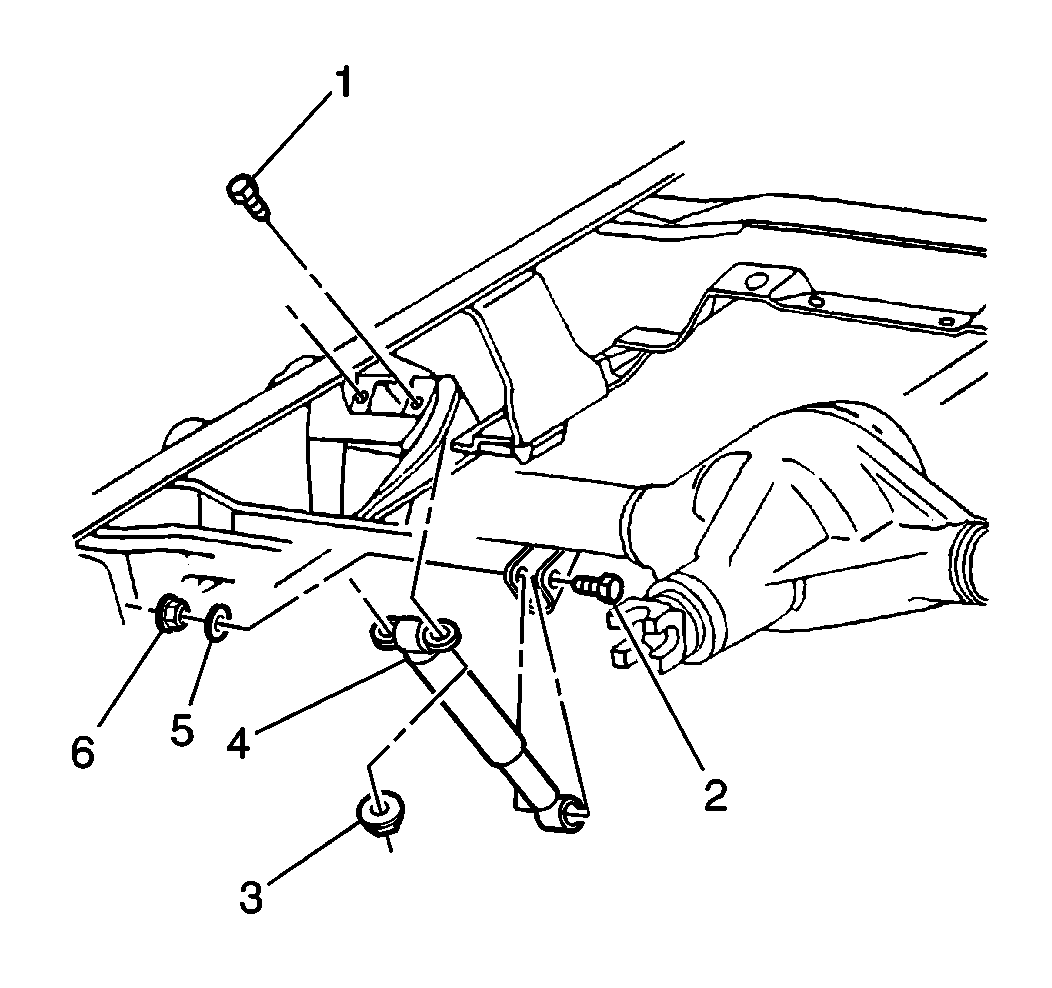
Removal Procedure
Notice: Original equipment shock absorbers serve additionally as suspension
drop cutoffs. Replacement shock absorbers must have a built in suspension
cutoff feature and must not be longer than original shocks when they are fully
extended or serious vehicle or component damage could result.
- Raise the vehicle. Support the vehicle with suitable safety stands.
Refer to
Lifting and Jacking the Vehicle
in General Information.

- Remove the following parts
from the frame:
| • | The upper shock nut (3) |
- Remove the following parts from the axle bracket:
| • | The lower shock nut (6) |
| • | The lower shock washer (5) |
| • | The lower shock bolt (2) |
- Remove the shock absorber (4) from the vehicle.
Installation Procedure

- Install the shock absorber
(4) to the vehicle.
Notice: Use the correct fastener in the correct location. Replacement fasteners
must be the correct part number for that application. Fasteners requiring
replacement or fasteners requiring the use of thread locking compound or sealant
are identified in the service procedure. Do not use paints, lubricants, or
corrosion inhibitors on fasteners or fastener joint surfaces unless specified.
These coatings affect fastener torque and joint clamping force and may damage
the fastener. Use the correct tightening sequence and specifications when
installing fasteners in order to avoid damage to parts and systems.
- Install the following
parts:
| 2.1. | The lower shock bolt (2) |
| 2.2. | The lower shock washer (5) |
| 2.3. | The lower shock nut (6) |
Tighten
Tighten the lower shock nut to 70 N·m (52 lb ft).
| 2.4. | The upper shock bolt (1) |
Tighten
Tighten the upper shock nut to 15 N·m (11 lb ft).


