Removal Procedure
- Remove the instrument panel compartment. Refer to
Instrument Panel Compartment Replacement
in Instrument Panel, Gauges and Console.
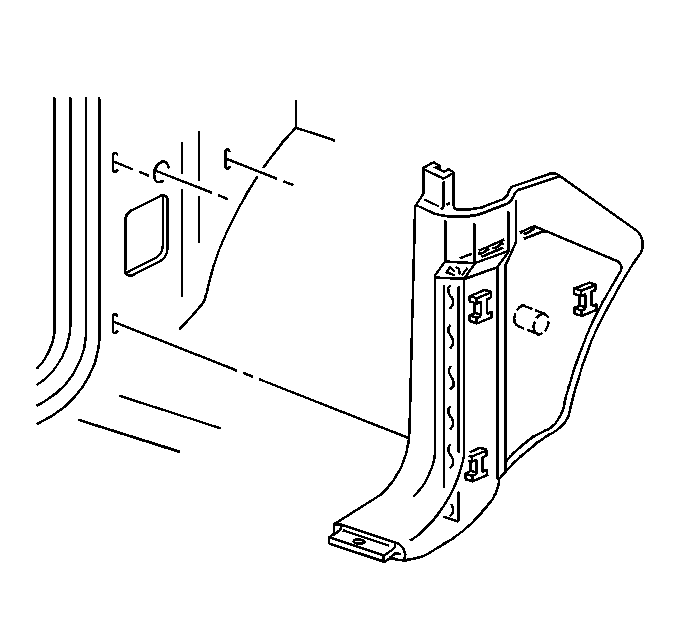
- Remove the front screw from the right door sill plate.

- Remove the retainer screw.
- Remove the trim panel from the retainers.
- Disconnect the electrical connectors to the powertrain control
module .
On diesel engines only, remove the PCM and the mounting
bracket.

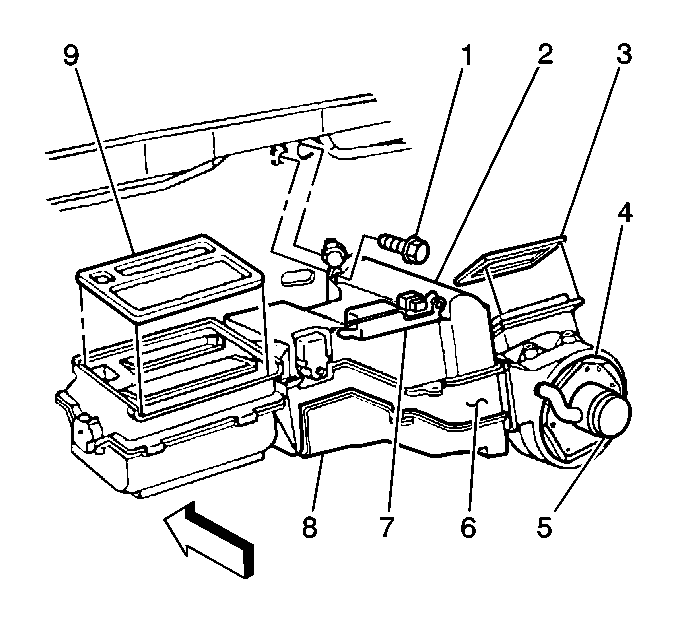
- Remove the blower motor
cover.
- Disconnect the electrical connectors from the blower motor (5).
- Remove the bolt from the right lower instrument panel support.
- Remove the blower motor cooling tube.
- Remove the blower motor screws (4).
- Complete the following steps in order to remove the blower motor:
| • | Carefully pull forward the blower motor in order to avoid distorting
the blower fan. |
| • | Pry back the right side of the instrument panel. |
- Complete the following inspection steps:
| • | Inspect the blower motor terminals for distortion. |
| • | Clean any corrosion from the terminals, or replace the blower motor as necessary. |
| • | Inspect the flange of the blower motor for any damage or distortion
that may cause an air leak. |
| • | Repair the flange, as necessary. |
| • | Inspect the blower fan for any damage or distortion. |
Installation Procedure

- Install the blower motor (5)
into position.
- Install the blower motor screws (4).
- Install the blower motor cooling tube.
- Connect the electrical connector to the blower motor.
- Install the blower motor cover.
- Install the bolt to the right lower instrument panel support.
- Install the mounting bracket and the engine control module.
- Connect the electrical connectors to the ECM.

- Install the trim panel to the retainers.
- Install the retainer screw.
Tighten
Tighten the screw to 6 N·m (53 lb in).
- Install the front screw into the front door sill plate.
Tighten
Tighten the screw to 6 N·m (53 lb in).
- Install the instrument panel compartment. Refer to
Instrument Panel Compartment Replacement
in Instrument Panel,
Gauges and Console.


