For 1990-2009 cars only
Brake calipers have wear shims available to compensate for wear at the caliper to mounting bracket contact points. A rattling sound or clunking noise may be heard from the brake area when the caliper and/or mounting bracket contact points become excessively worn. Use the following procedure to measure and correct this condition.
- Remove the caliper from the mounting bracket and support the caliper with heavy mechanic's wire or equivalent. DO NOT disconnect the hydraulic brake hose from the caliper. Refer to Front Brake Caliper Replacement or Rear Brake Caliper Replacement in Disc Brakes.
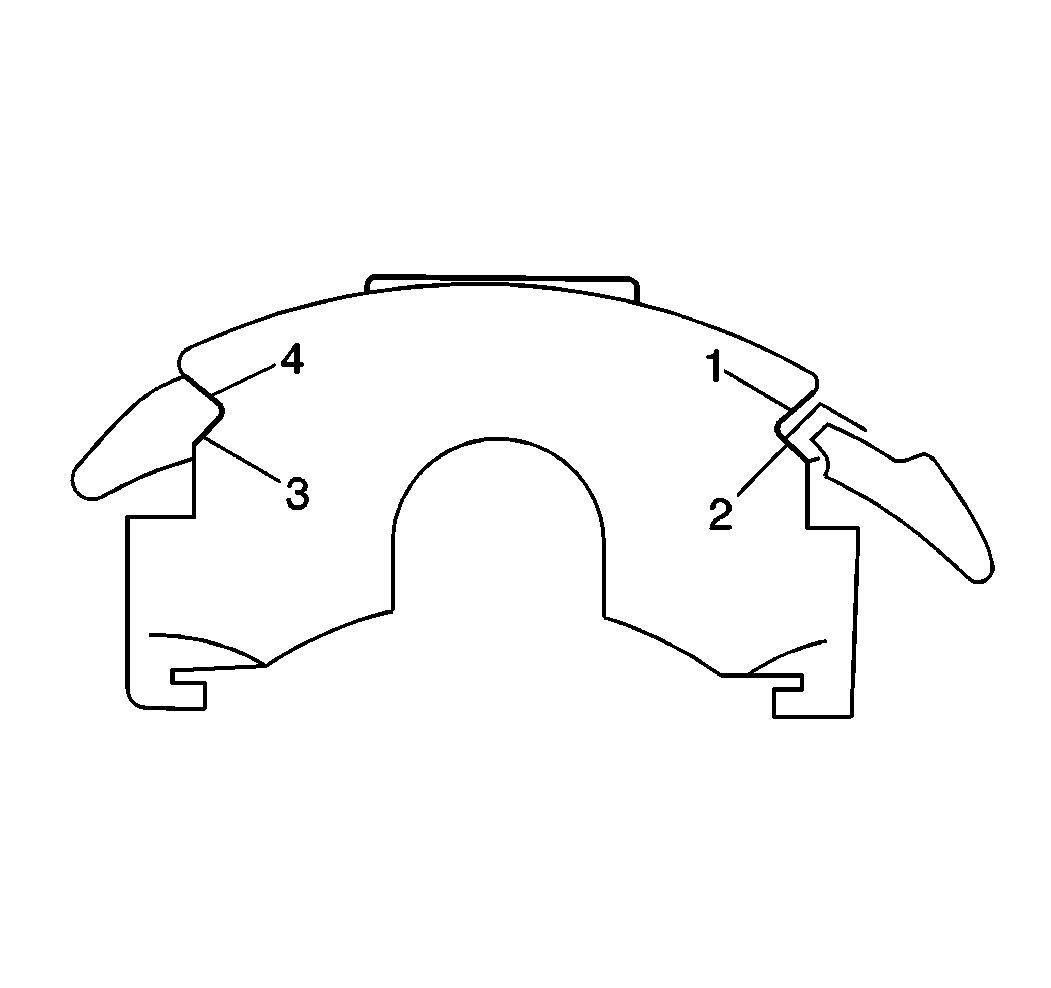
- Clean surfaces (1-4) with a wire brush.
- Smooth any deep nicks or gouges with a file.
- Measure the caliper contact surface for wear by performing the following steps:
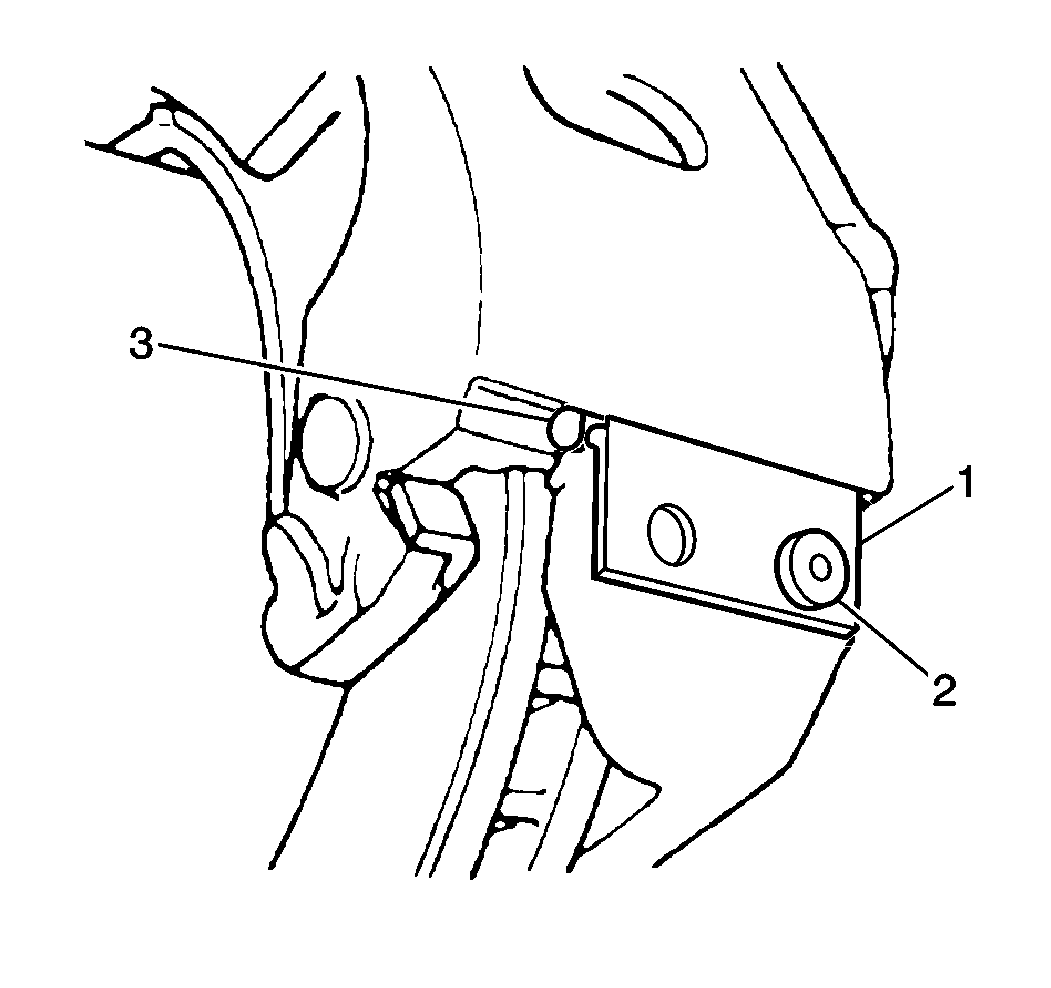
- Install a new support key (1) without the spring (3).
- Install the caliper lock mounting bolt (2).
- Measure caliper to mounting bracket by performing the following steps.
- Install a caliper shim by performing the following steps:
- Remeasure the bumper gap. If the gap exceeds 1.50 mm (0.058 in). Install a thicker shim. Refer to Caliper Wear Shim Specifications Or replace the mounting bracket. Refer to Front Brake Caliper Mounting Plate Replacement or Rear Brake Caliper Mount Plate Replacement .
Notice: Support the brake caliper with heavy mechanic wire, or equivalent, whenever it is separated from its mount and the hydraulic flexible brake hose is still connected. Failure to support the caliper in this manner will cause the flexible brake hose to bear the weight of the caliper, which may cause damage to the brake hose and in turn may cause a brake fluid leak.


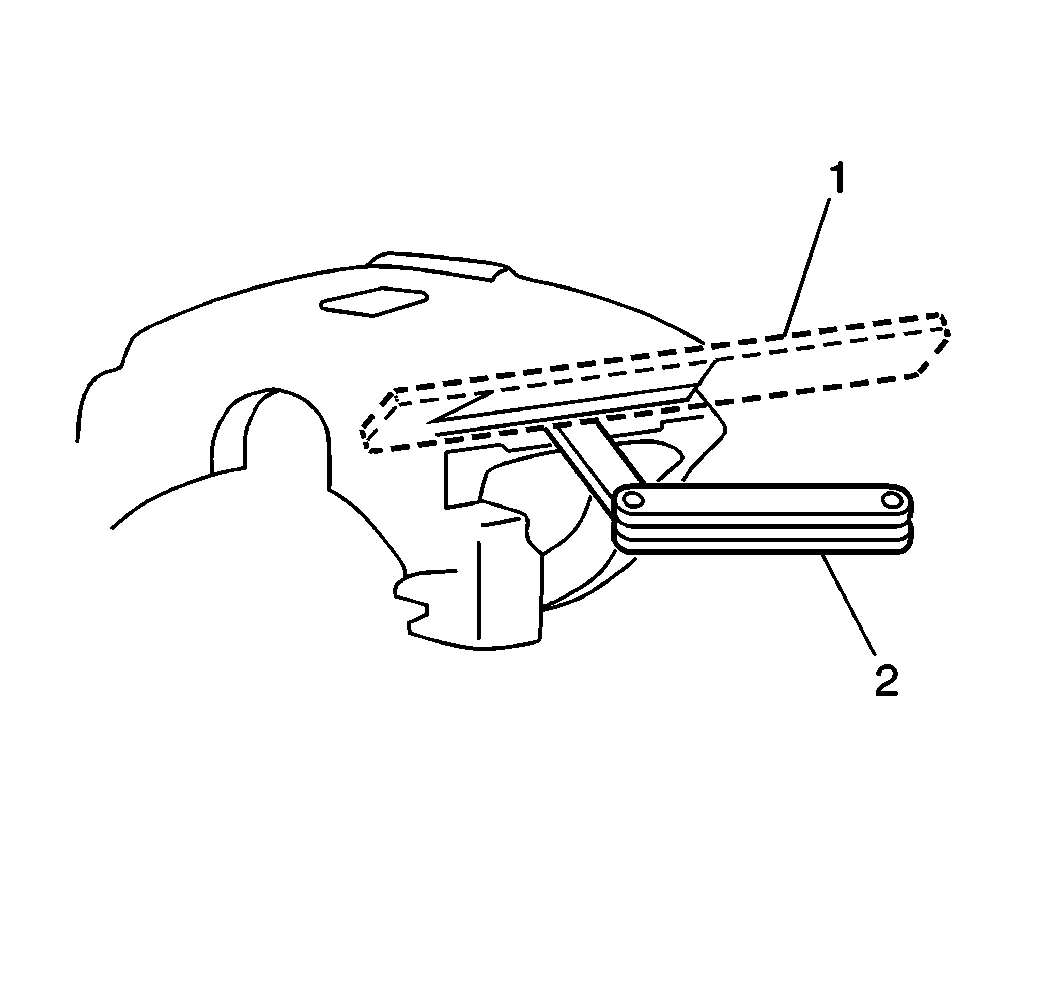
| 4.1. | Lay a straight edge (1) across the caliper surfaces. |
| 4.2. | Measure the maximum depth of any wear on the surfaces using feeler gage (2). |
| 4.3. | Replace any calipers worn to a depth of 1.25 mm (0.050 in) or more. Refer to Front Brake Caliper Replacement or Rear Brake Caliper Replacement . |


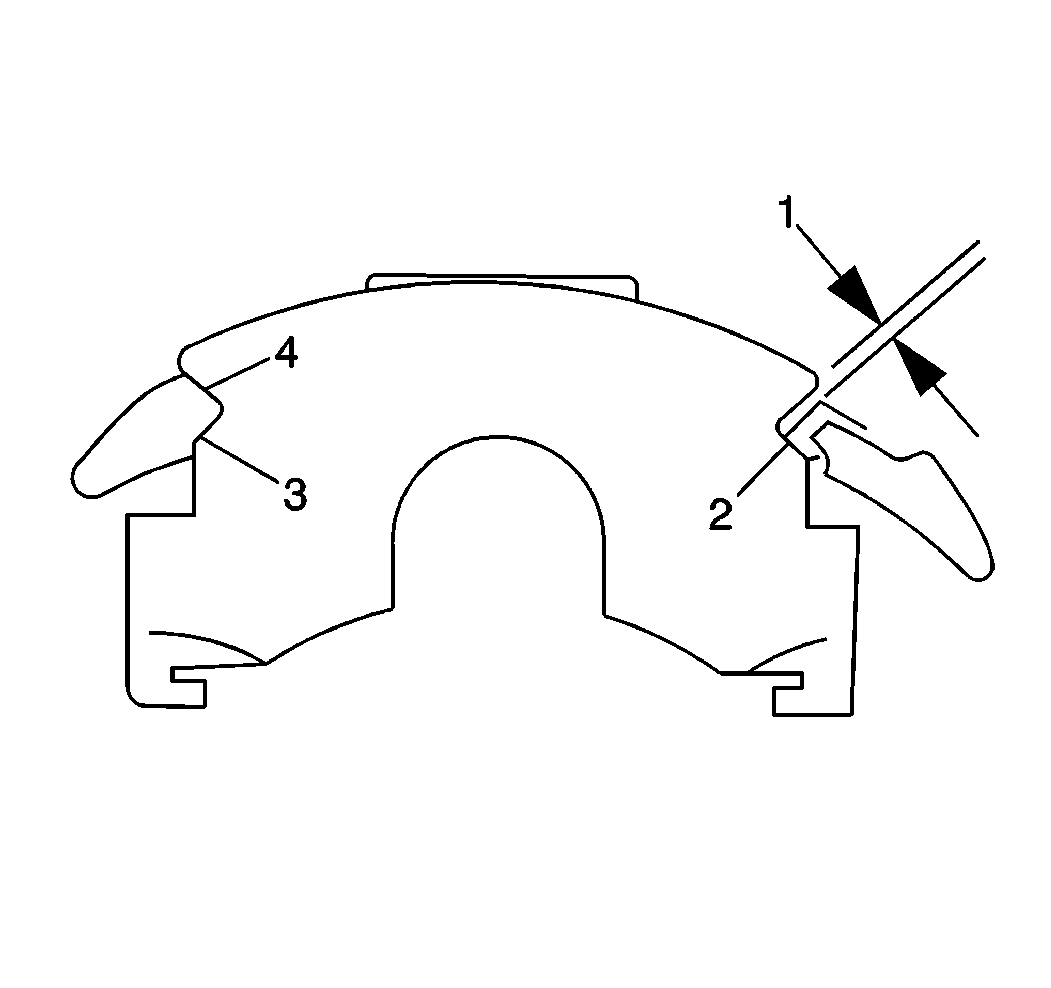
| 7.1. | Insert a screw driver into the center of the key bumper gap (1). |
| 7.2. | Pry the screw driver firmly into the center of the key bumper gap to ensure that the caliper is sitting at the surfaces. |
| 7.3. | Measure the bumper gap with the largest feeler gauge that will fit into the gap on either side of the screw driver. |
| 7.4. | Select a shim based on the bumper gap measurement. Refer to Caliper Wear Shim Specifications . |
| 8.1. | Remove the caliper from the mounting bracket and support the caliper with heavy mechanic's wire or equivalent. DO NOT disconnect the hydraulic brake hose from the caliper. Refer to Front Brake Caliper Replacement or Rear Brake Caliper Replacement . |
| 8.2. | Install the shim on the mounting bracket V-way opposite from the key and the spring V-way. |
| 8.3. | Install the caliper using a new support key and spring. Refer to Front Brake Caliper Replacement or Rear Brake Caliper Replacement . |
