PREMATURE AXLE WEAR DIRT AND WATER ENTRY

MODELS: 1982-1986 C/K AND 1987 R/V MODELS
Some 1982-1986 C/K and 1987 R/V trucks used in severe duty/off road operations may experience premature axle wear due to dirt and water entry through the axle tube vent.
Modifications to the vents for both the front and rear axles can reduce the amounts of dirt and water entering the axle housing and decrease the chances of premature axle wear in severe duty/off road operations.
Prior to modifying the axle vents, remove axle cover and inspect for contamination. If water or dirt are present, flush out axle housing, ring and pinion with a suitable solvent such as choke cleaner (GM Part Number 1050494) or equivalent. Reinstall housing cover and gasket and refill housing with the lubricant specified in the Light Duty Truck Service Manual or Maintenance Schedule. If the axle lubricant does not show signs of contamination, reinstall housing cover and gasket, and refill the housing with the lubricant specified in the Light Duty Truck Service Manual or Maintenance Schedule.
The following service procedure should be followed for the modification.
VENTING REAR AXLE ASSEMBLY
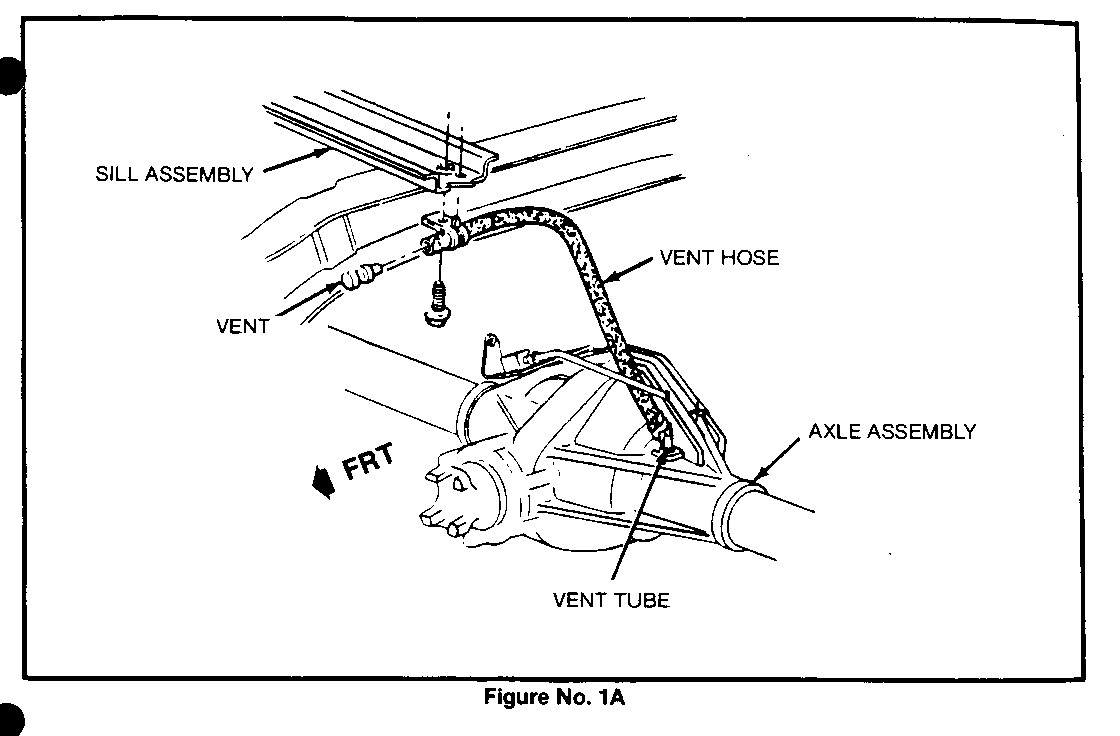
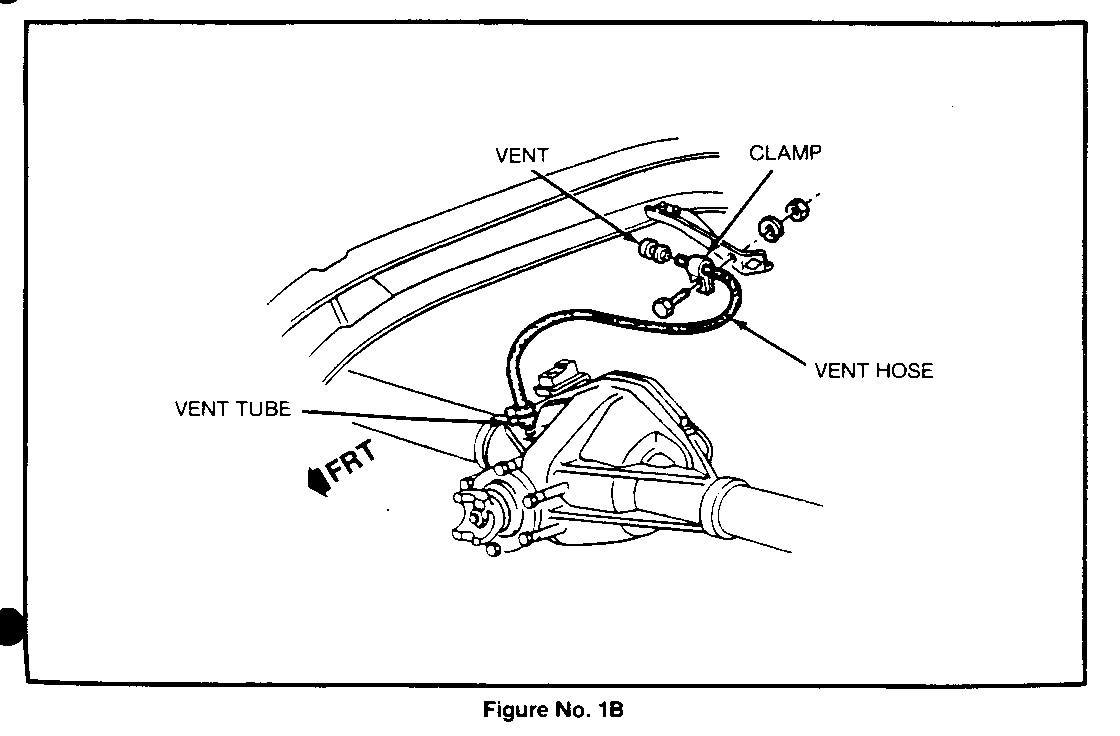
1.Disconnect rear axle vent hose and vent at attachment to box floor cross sill or frame and axle housing. Typical attachments are shown in Figures No. 1A and 1B. Various other att achments are possible depending on axle size and model year.
2.Replace vent with filter, P/N 25055032, and secure to vent hose with a screw clamp, P/N 797923.
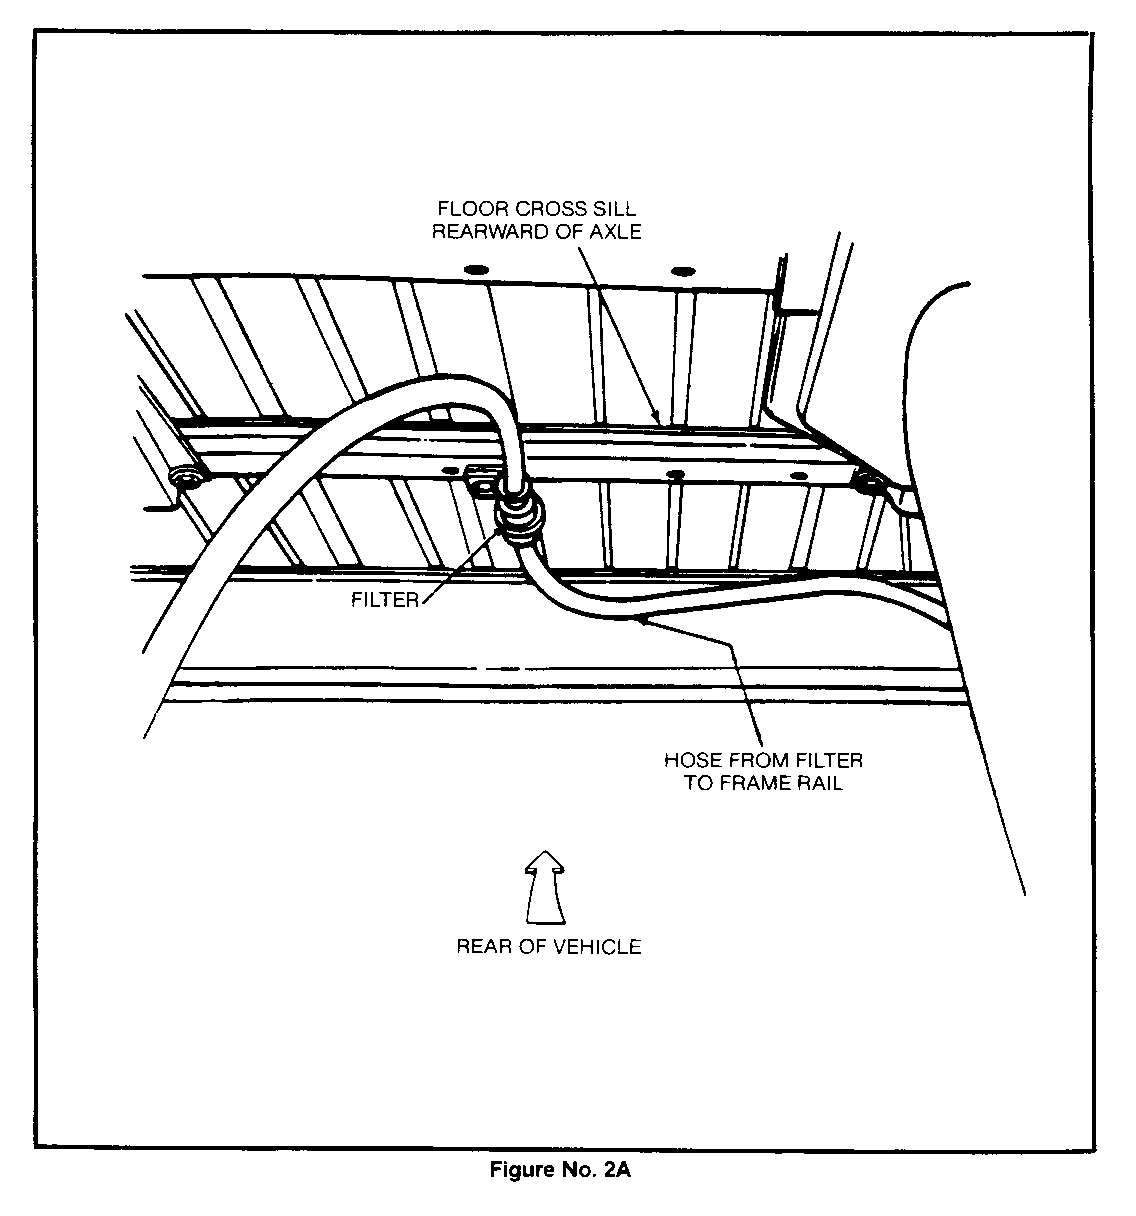
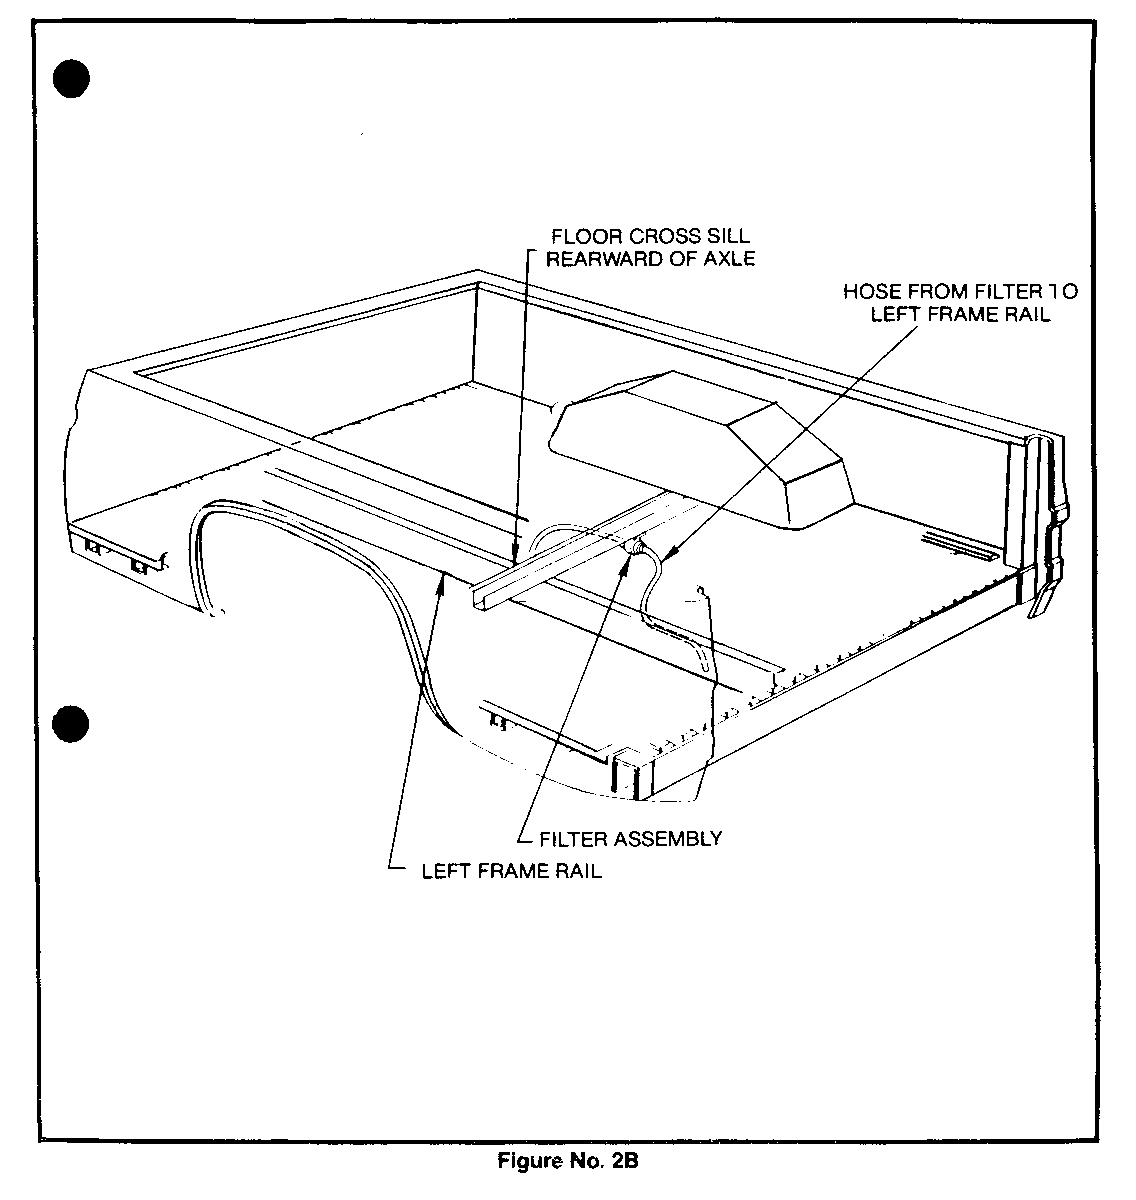
3.Install clamp on the body of the filter and install filter on the box floor (body floor) cross sill one rib REARWARD of the axle housing using the existing bolt. Filter outlet should face rearward. See Figures No. 2A and 2B.
4.Install 38 inches of 5/16 inch hose, P/N 9438315, on the filter securing with a screw damp.
5.Route the hose REARWARD to the left side frame rail and secure using plastic fasteners (ties). Let hose hang downward within left frame rail.
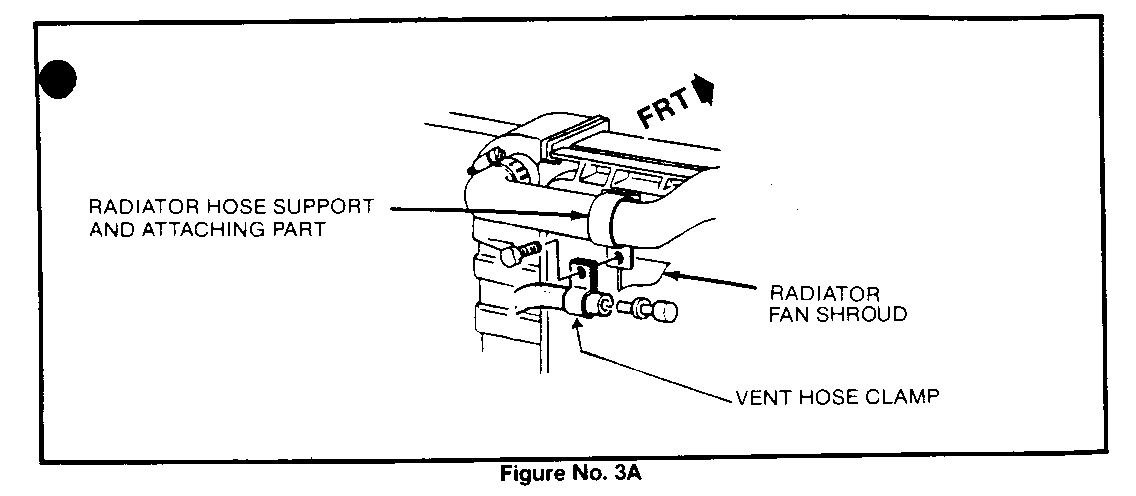
VENTING FRONT AXLE - K/V MODELS -------------------------------- 1.Remove clamp holding the vent hose to the radiator support. See Figure No. 3A.
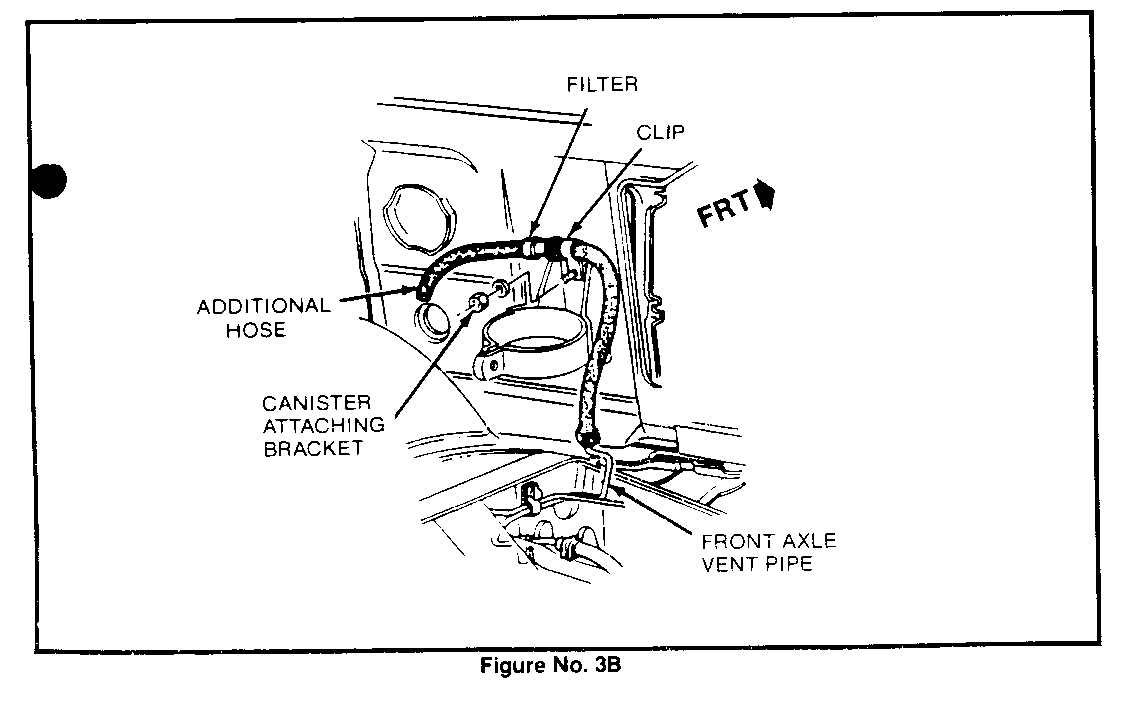
2.Remove the plastic vent from the hose and install filter, P/N 25055032, and secure with screw clamp.
3.Install six inches of 5/16 inch hose, P/N 9438315, on the filter with a screw clamp and relocate the filter to the canister attaching bracket. Let end of hose hang downward from filter. See Figure No.3B.
The time required to make this inspection and modificatation is as follows:
K/V Models (Both Axles) 1.2 hrs
C/R Models 0.7 hrs
General Motors bulletins are intended for use by professional technicians, not a "do-it-yourselfer". They are written to inform those technicians of conditions that may occur on some vehicles, or to provide information that could assist in the proper service of a vehicle. Properly trained technicians have the equipment, tools, safety instructions and know-how to do a job properly and safely. If a condition is described, do not assume that the bulletin applies to your vehicle, or that your vehicle will have that condition. See a General Motors dealer servicing your brand of General Motors vehicle for information on whether your vehicle may benefit from the information.
