Removal Procedure
Tools Required
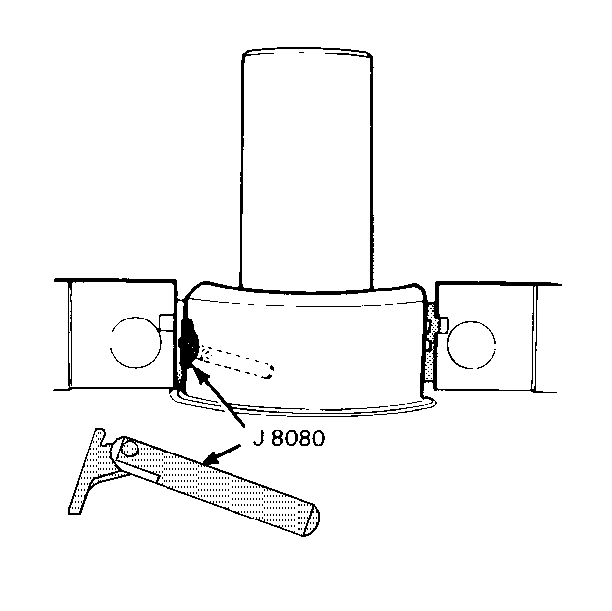
J 8080 Crankshaft
Main Bearing Remover/Installer
- Remove the spark plugs. Refer to Spark Plug Replacement in Engine
Electrical.
- Remove the oil pan. Refer to
Oil Pan Replacement
.
- Remove the oil pump. Refer to
Oil Pump Replacement
.
- Check the crankshaft main bearing caps for location markings.
Mark the caps if necessary. The caps must be returned to their original locations
during assembly.

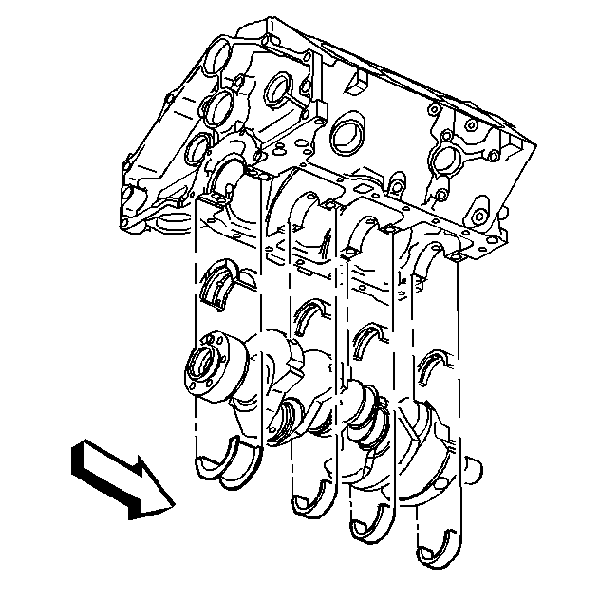
- Remove the crankshaft main bearing caps.

- Remove the lower crankshaft main bearing inserts from the crankshaft
main bearing caps.

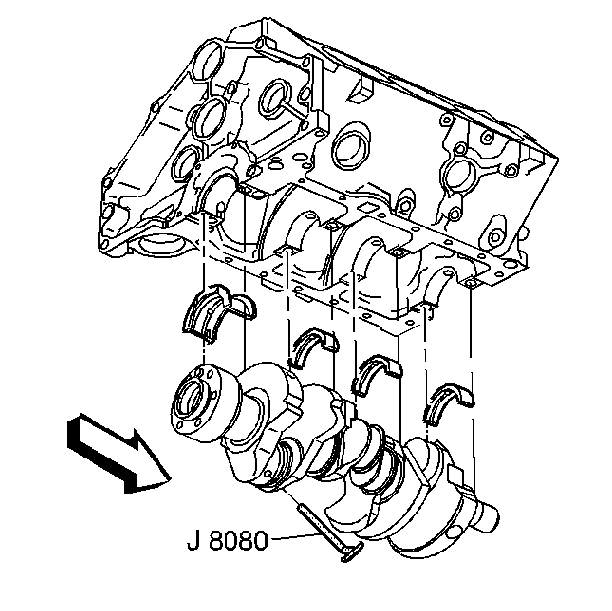
- Remove the upper crankshaft main bearing inserts.
| 7.1. | Insert the J 8080
into the crankshaft oil hole. |
| 7.2. | Rotate the crankshaft to "turn" the bearing insert
out of the block. |
- Clean and inspect the components. Repair and replace as necessary.
Installation Procedure
Tools Required
J 8080 Crankshaft
Main Bearing Remover/Installer

- Install upper crankshaft main bearing inserts.
| 1.1. | Insert the J 8080
into a crankshaft main bearing oil hole. |
| 1.2. | Apply engine oil to the inserts of the proper size. |
| 1.3. | Insert the plain end of the insert, without the bearing tang,
between the crankshaft and the notched side of the block. |
| 1.4. | Rotate the crankshaft to "roll" the insert into the
block. |

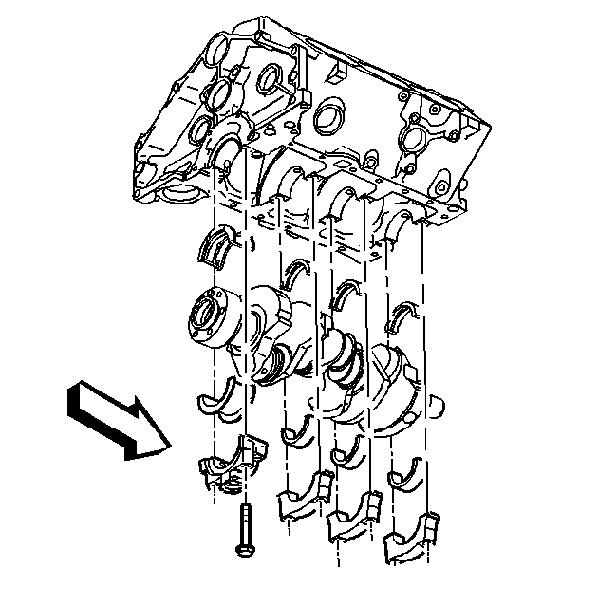
- Install the lower crankshaft main bearing inserts to the crankshaft
main bearing caps.
| 2.1. | Make sure the inserts are of the proper size. |
| 2.2. | Apply engine oil to the inserts. |
- Adjust the crankshaft main bearing clearance. Refer to
Engine Mechanical Specifications
.
| 3.1. | Support the crankshaft upward to remove any clearance from the
upper bearing. |
| 3.2. | Measure the total clearance between the lower bearing and the
journal. |
- Install the crankshaft main bearing caps (except the rear cap).
- Install the bolts to the block.
Tighten
Tighten the crankshaft main bearing cap bolts to 105 N·m
(75 lb ft).
Notice: Use the correct fastener in the correct location. Replacement fasteners
must be the correct part number for that application. Fasteners requiring
replacement or fasteners requiring the use of thread locking compound or sealant
are identified in the service procedure. Do not use paints, lubricants, or
corrosion inhibitors on fasteners or fastener joint surfaces unless specified.
These coatings affect fastener torque and joint clamping force and may damage
the fastener. Use the correct tightening sequence and specifications when
installing fasteners in order to avoid damage to parts and systems.
- Apply engine oil to the bearing insert.
- Install the crankshaft rear main bearing cap.
- Install the crankshaft rear main bearing cap bolts.
Tighten
Tighten the bolts temporarily to 14 N·m (124 lb in).
- Inspect the crankshaft end play. Refer to Crankshaft and Bearings Clean and Inspect (Bearing Fit)
.
- Install the oil pump. Refer to
Oil Pump Replacement
.
- Install the oil pan. Refer to
Oil Pan Replacement
.
- Install the spark plugs. Refer to Spark Plug Replacement in Engine
Electrical.


