Tools Required
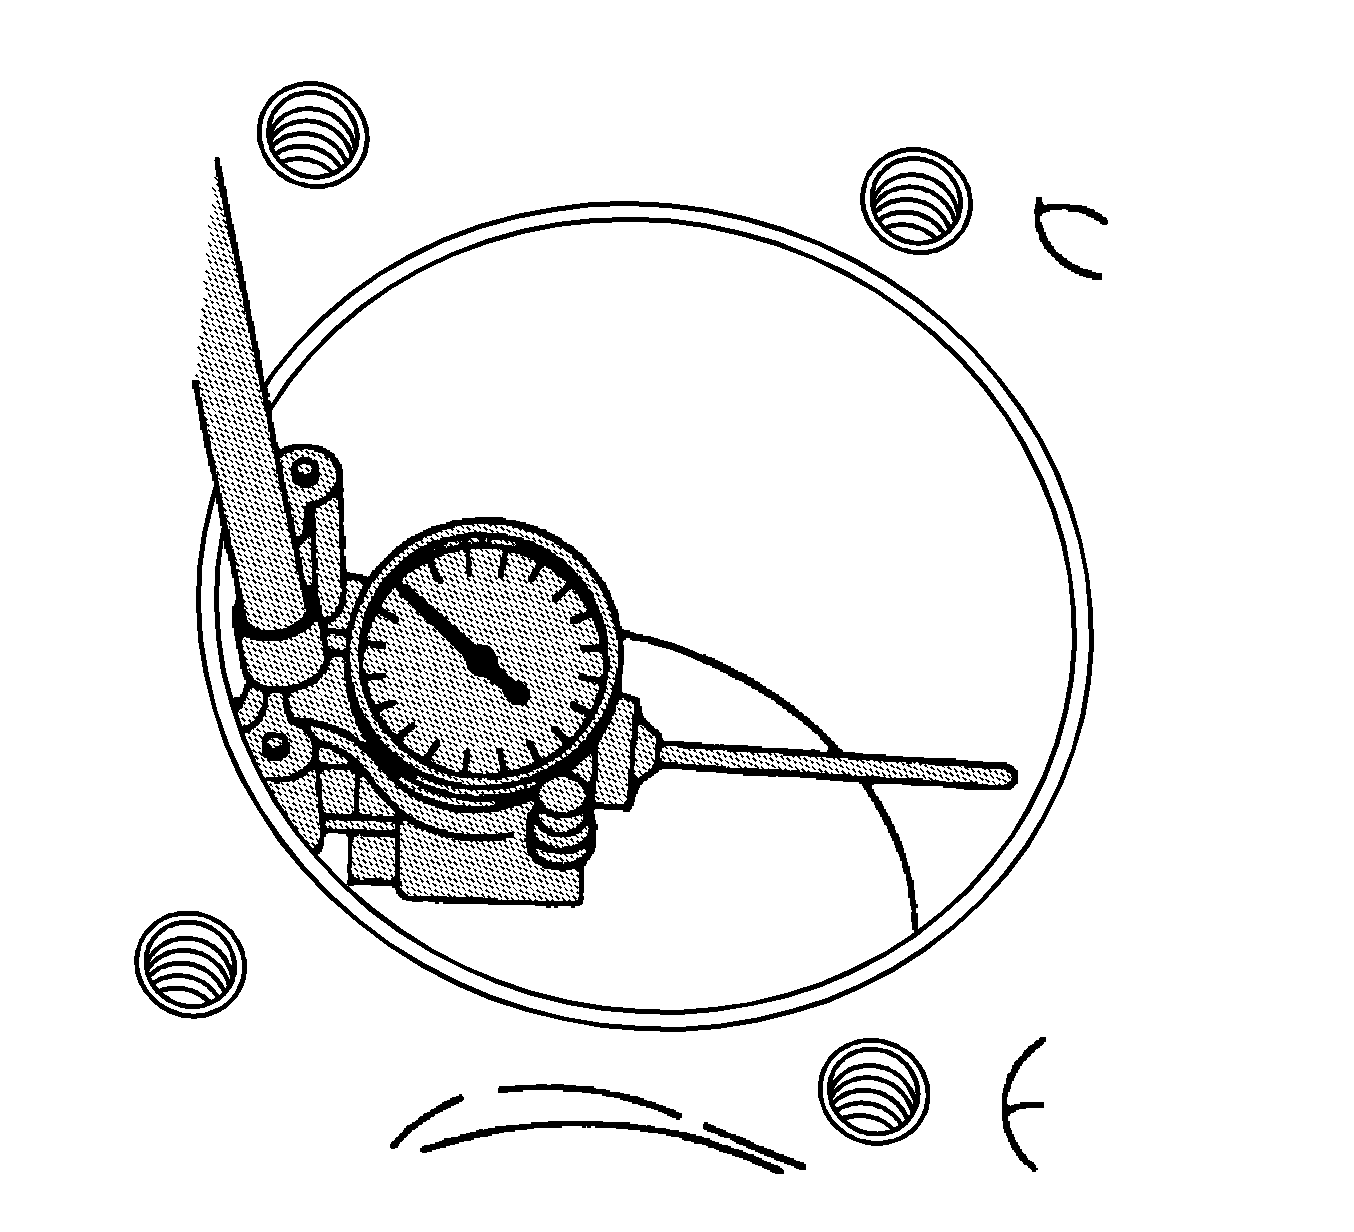
J 8087 Cylinder Bore Gauge

- Clean the cylinder bores with a hot water
and detergent wash.
- Using a suitable measuring device, measure the diameter of the
cylinder bore. Refer to
Engine Mechanical Specifications
.
- Record the measurements.
- Using theJ 8087
Cylinder
Bore Gauge, measure the taper and out-of-round of the cylinder bore. Refer
to tool manufacturer's instructions for proper tool operation. Refer to
Engine Mechanical Specifications
.
- Record the measurements.
- Using a finger nail, check the cylinder bore for fine vertical
scratches.
| • | You should not be able to feel a fine vertical scratch. |
| • | Fine vertical scratches will not cause excessive oil consumption. |
| • | Honing to remove fine vertical scratches is not necessary. |
- Visually check the cylinder bore for smooth, shiny, polished areas
through the hone marks. If present, hone the cylinder lightly with a finish
hone.
- Repeat steps two through seven for the remaining cylinders.

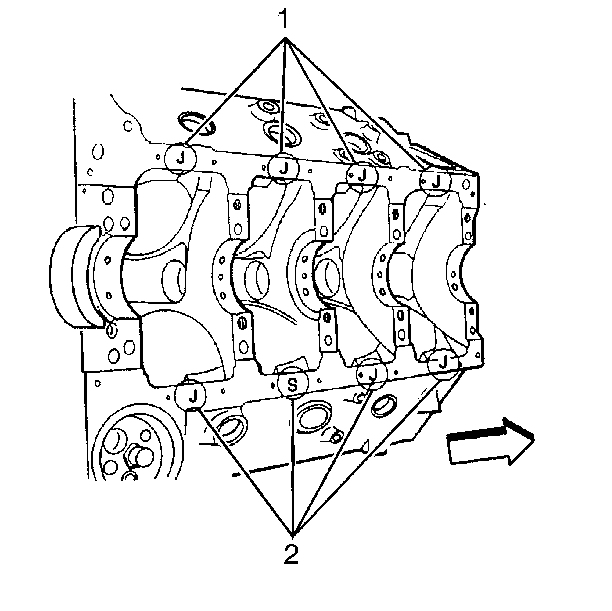
Important: There is only one production standard piston grade size. When using
production standard grade size pistons in all eight cylinder bores, a J is
metal stamped in a single place on the cylinder block oil pan rail.
A 0.13 mm oversize production piston is available for in a plant
rework of cylinders that do not meet the production standard specification.
An S metal stamped on the pan rail next to any reworked cylinder identifies
that cylinder as production oversize. A J will also be metal stamped in
a single place on the oil pan rail to represent that all remaining cylinders
are production standard.
All service oversize pistons are of the same weight as the production
pistons. Using service oversized pistons will not affect engine balance.
- Review the recorded measurements to determine the condition of the cylinders.
Refer to
Engine Mechanical Specifications
.
- Hone the cylinders, as required. Hone only those cylinders that
require it.
| • | Follow the tool manufacturer's instructions for use. |
| • | Use only clean, sharp stones of the proper grade for the amount
of material to be removed. Dull, dirty stones cut unevenly and generate excessive
heat. |
| • | When using coarse or medium grade stones, leave sufficient metal
to allow all stone marks to be removed with the fine stones used during the
finishing process. |
| • | The surface roughness specifications for cylinder bores are: |
| - | RA (Minimum ) = 0.40 Micro-meter (16 Micro-inch) |
| - | RA (Maximum) = 0.90 Micro-meter (32 Micro-inch) |
| • | All crankshaft bearing caps must be in place and tightened to
the proper torque in order to avoid distortion of the bores. Refer to
Engine Mechanical Specifications
. |
- Make full strokes of the hone in the cylinder bore.
- Move the hone up and down at a sufficient speed in order to obtain
very fine uniform surface finish marks in a cross-hatch pattern at the specified
angle (45-65 degrees). The finish marks should be:
| • | Free from imbedded particles |
| • | Free from torn or folded metal |
- Check the measurement at the top, the middle, and the bottom of
the cylinder bore regularly.
Important: Any abrasive material remaining in the cylinder bores will cause premature
wear to the piston rings, cylinder bores, and bearing surfaces.
- Clean the cylinder bores with a hot water and detergent wash.
- Clean the dry cylinder bores with a power-driven fiber brush.
- Apply a light coating of clean engine oil to the cylinder bores.


