Rear Axle Shaft and/or Gasket Replacement 10.5 Inch Axle
Removal Procedure
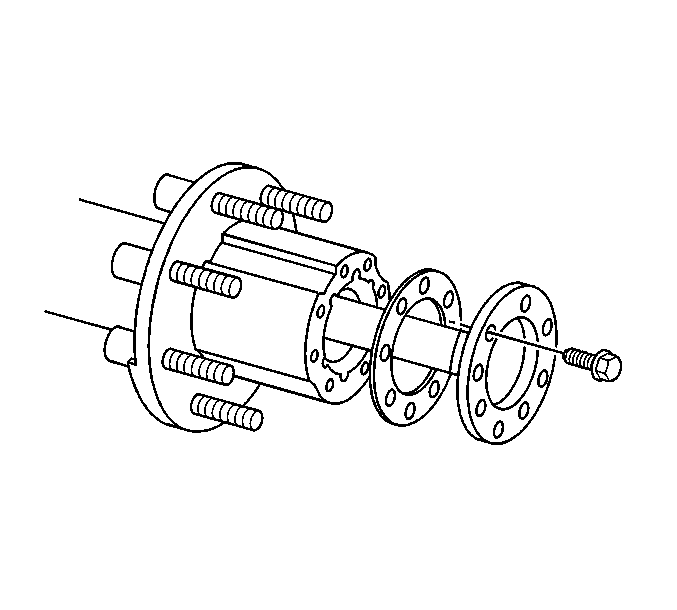
- Remove the flange bolts.
- Lightly tap the axle shaft with a soft-faced hammer in order to loosen the shaft.
- Grip the rib on the axle shaft flange with a locking pliers. Twist the axle shaft flange in order to start the axle shaft removal.
- Remove the axle shaft from the tube.
- Remove the gasket.
- Clean the axle shaft flange and the outside face of the hub assembly.
Installation Procedure
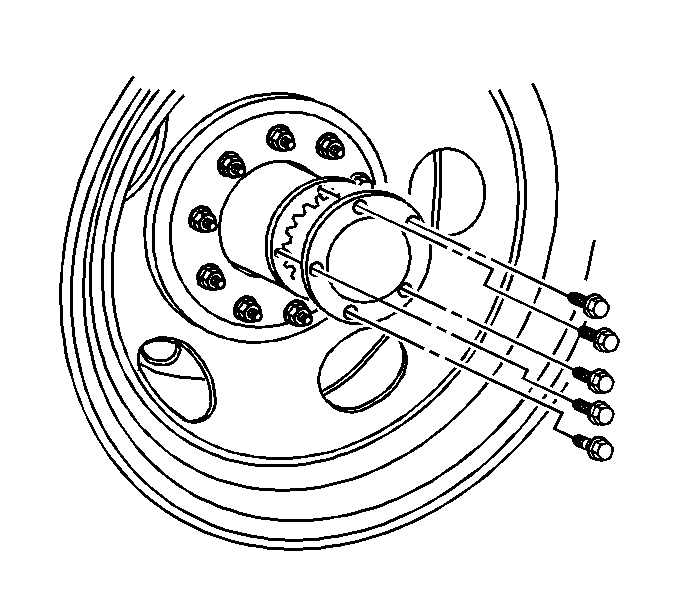
- Install the gasket onto the axle shaft.
- Install the gasket and the axle shaft into the axle tube.
- Install the axle flange bolts.
| 2.1. | Ensure the shaft splines mesh into the differential side gear. |
| 2.2. | Align the holes in the axle flange and the gasket with the holes in the hub. |
Notice: Use the correct fastener in the correct location. Replacement fasteners must be the correct part number for that application. Fasteners requiring replacement or fasteners requiring the use of thread locking compound or sealant are identified in the service procedure. Do not use paints, lubricants, or corrosion inhibitors on fasteners or fastener joint surfaces unless specified. These coatings affect fastener torque and joint clamping force and may damage the fastener. Use the correct tightening sequence and specifications when installing fasteners in order to avoid damage to parts and systems.
Tighten
Tighten the rear axle flange bolts to 156 N·m (115 lb ft).
Rear Axle Shaft and/or Gasket Replacement 11 Inch Axle
Removal Procedure
- Remove the axle shaft cover bolts.
- Remove the axle shaft cover.
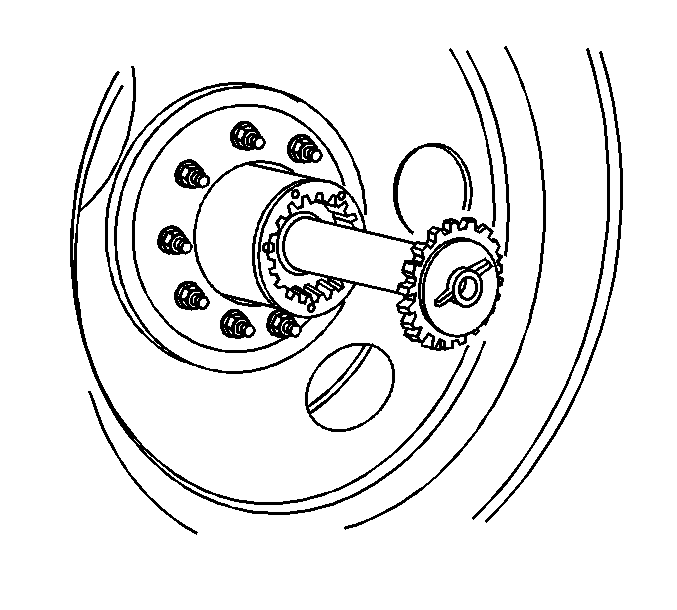
- Insert a bolt into the threaded hole in the axle shaft.
- Remove the axle shaft from the axle tube by pulling on the axle shaft and the bolt.
- Clean the axle shaft cover and the outside face of the hub assembly of sealant.
Lightly tap on the axle shaft cover with a soft-faced hammer to loosen the cover.
Installation Procedure
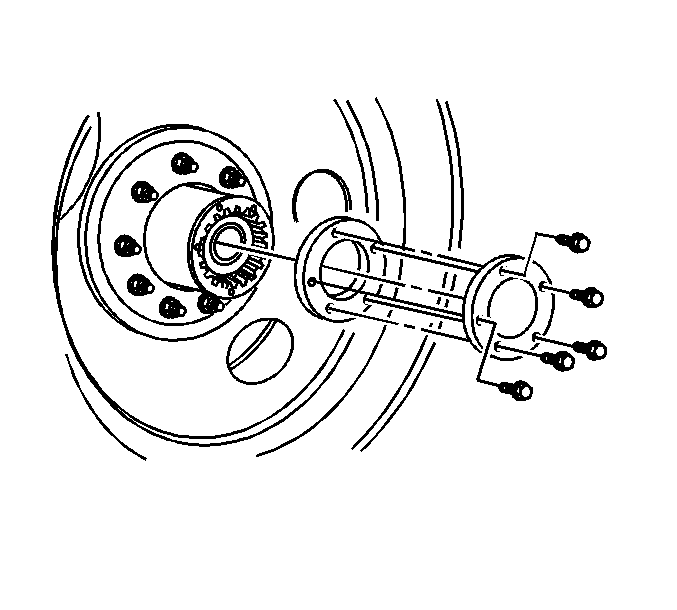
- Install the axle shaft into the wheel hub.
- Install the axle shaft flange into the wheel hub.
- Install the axle shaft cover gasket.
- Install the axle shaft cover.
- Install the axle shaft cover bolts.
- Inspect and add axle lubricant to the axle housing, if necessary. Refer to Lubricant Level Check .
Carefully guide the axle shaft through the axle tube and into the differential side gear turning the axle shaft as necessary in order to align the splines on the axle shaft with the splines on the differential side gear.
Important: The axle shaft is properly installed when the splines on the axle shaft are flush with the splines on the hub.
Notice: Use the correct fastener in the correct location. Replacement fasteners must be the correct part number for that application. Fasteners requiring replacement or fasteners requiring the use of thread locking compound or sealant are identified in the service procedure. Do not use paints, lubricants, or corrosion inhibitors on fasteners or fastener joint surfaces unless specified. These coatings affect fastener torque and joint clamping force and may damage the fastener. Use the correct tightening sequence and specifications when installing fasteners in order to avoid damage to parts and systems.
Tighten
Tighten the axle shaft cover bolts to 21 N·m (15 lb ft).
