Removal Procedure
Other than checking for a worn grommet and loose harness connectors, the only service possible is a unit replacement if the diagnosis shows a malfunctioning manifold absolute pressure (MAP) sensor.
- Disconnect the negative battery cable. Refer to Battery Negative Cable Disconnection and Connection in Engine Electrical.
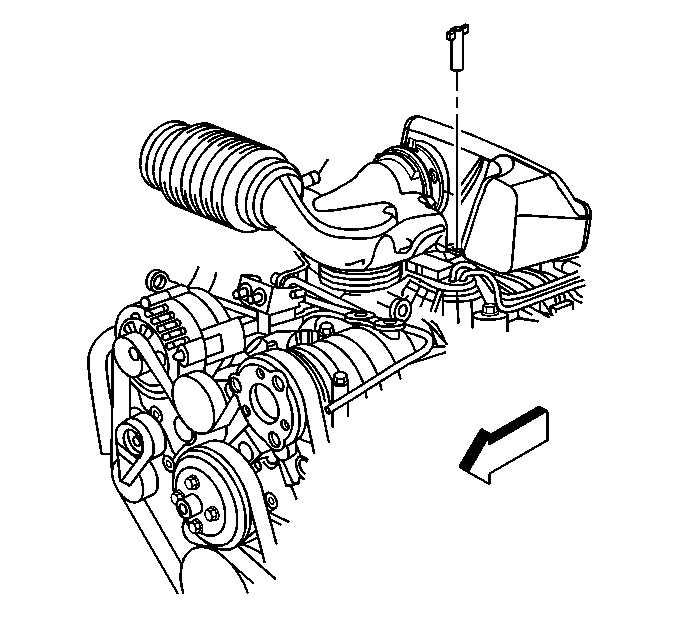
- Remove the air inlet tube and resonator retaining wingnut.
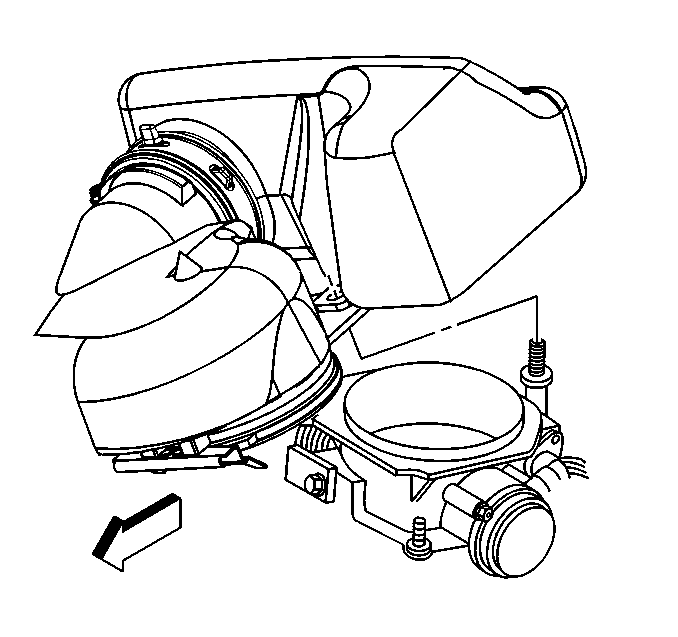
- Remove the air inlet tube and resonator from the throttle body by pivoting the air inlet tube and resonator upward until the hinge clip releases from the lip on the throttle body.
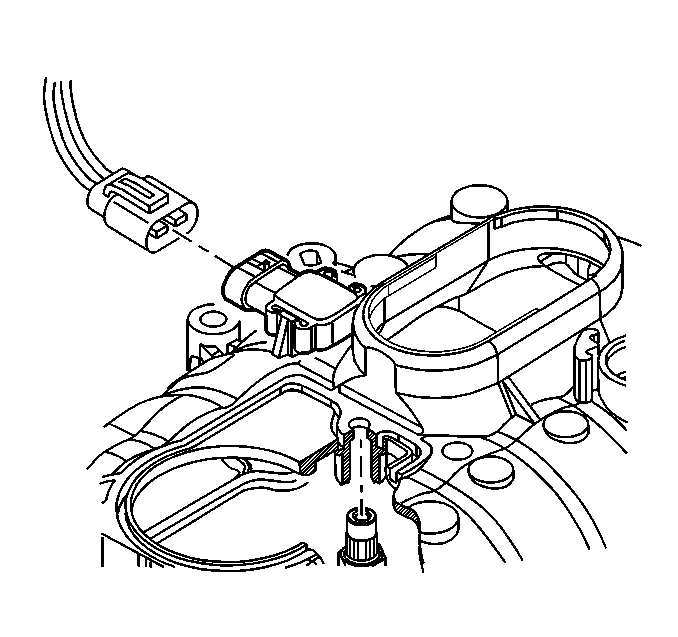
- Disconnect the MAP sensor harness connector.
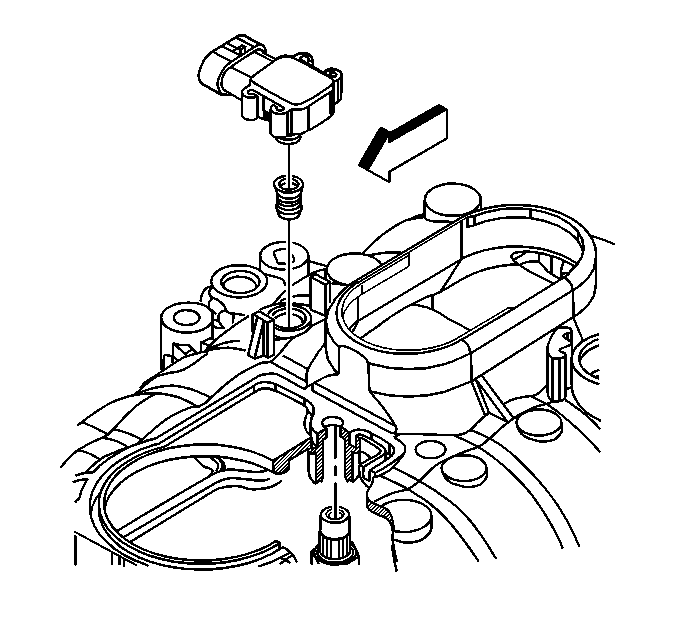
- Remove the MAP sensor.
- Remove the MAP sensor grommet.
- Discard the MAP sensor grommet.
Caution: Unless directed otherwise, the ignition and start switch must be in the OFF or LOCK position, and all electrical loads must be OFF before servicing any electrical component. Disconnect the negative battery cable to prevent an electrical spark should a tool or equipment come in contact with an exposed electrical terminal. Failure to follow these precautions may result in personal injury and/or damage to the vehicle or its components.


Notice: Do not rotate or pry on the MAP sensor when removing. Damage to the MAP sensor or the intake manifold may result.
Important: After removing the MAP sensor from the intake manifold, replace the MAP sensor to intake manifold grommet.
Installation Procedure
- Install the new MAP sensor grommet on the MAP sensor.
- Install the MAP sensor.
- Connect the MAP sensor harness connector.
- Align the hinge clip with the lip on the throttle body.
- Install the resonator retaining wingnut.
- Connect the negative battery cable. Refer to Battery Negative Cable Disconnection and Connection in Engine Electrical.


Install the air inlet tube and resonator to the throttle body by pivoting the air inlet tube and resonator downward until the mounting stud is through the hole in the air inlet tube.

