Tools Required
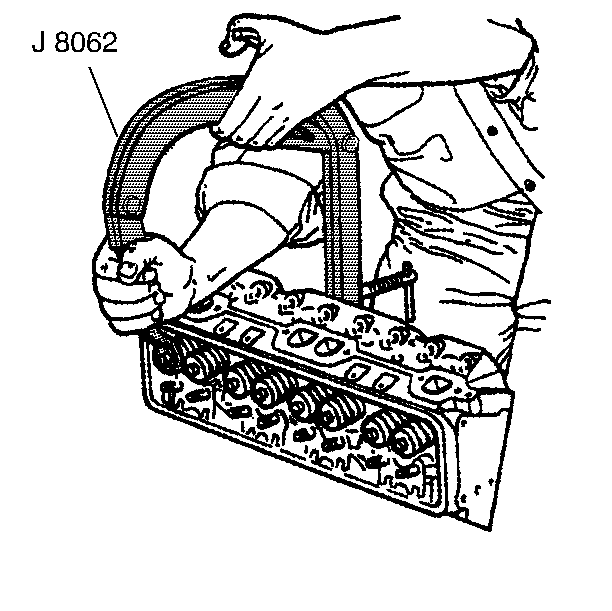
J 8062 Valve Spring
Compressor
- Lubricate the valve stems with clean engine oil.
- Insert the valves into their proper location.
- Install the oil seals over the valve stems.
- Install the rotators.
- Install the valve springs.

- Install the caps using the following procedure:
| 6.1. | Compress the valve spring using J 8062
. Compress the spring enough in order to clearly see the valve
stem grooves. |
| 6.2. | Apply a small amount of grease to the area of the upper valve
keys using grease to hold the keys in place. Make sure that the keys seat
properly in the valve stem grooves. |
| 6.3. | Release the compressor tool. Make sure the valve keys stay in
place. |
| 6.4. | Repeat the preceding steps on the remaining valves. |

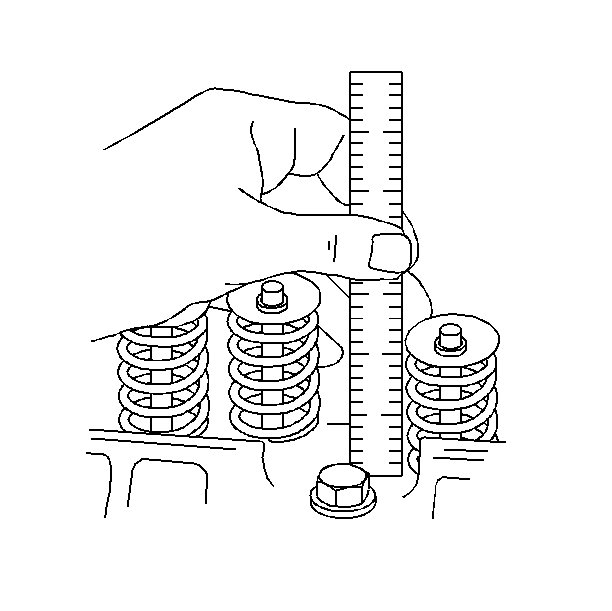
- Measure the installed height of each valve spring using the following
procedure:
| 7.1. | Use a narrow, thin scale. A cutaway scale may be helpful. |
| 7.2. | Measure from the cylinder head spring seat to the top of the cap. |
| | Important: Never shim the spring so as to give an installed height under the specified
amount.
|
| 7.2. | If this measurement exceeds the amount given in Engine Specifications,
install the valve spring seat shims of the sufficient thickness between the
rotator and the cylinder head in order to give the desired measurement. |
- Install the coolant temperature gauge sensor in the right cylinder
head.
Tighten
Tighten the sensor to 20 N·m (15 lb ft).
Notice: Use the correct fastener in the correct location. Replacement fasteners
must be the correct part number for that application. Fasteners requiring
replacement or fasteners requiring the use of thread locking compound or sealant
are identified in the service procedure. Do not use paints, lubricants, or
corrosion inhibitors on fasteners or fastener joint surfaces unless specified.
These coatings affect fastener torque and joint clamping force and may damage
the fastener. Use the correct tightening sequence and specifications when
installing fasteners in order to avoid damage to parts and systems.


