For 1990-2009 cars only
Instrument Panel Extension Replacement Luxury
Removal Procedure
- Remove the console bezel. Refer to Floor Console Bezel Replacement .
- Remove the driver information center (DIC). Refer to Driver Information Center Replacement .
- Remove the CD player. Refer to Remote Compact Disc Player Replacement .
- Remove the console bin. Refer to Front Floor Console Compartment Replacement .
- Remove the amplifier, if equipped. Refer to Radio Speaker Amplifier Replacement in Entertainment.
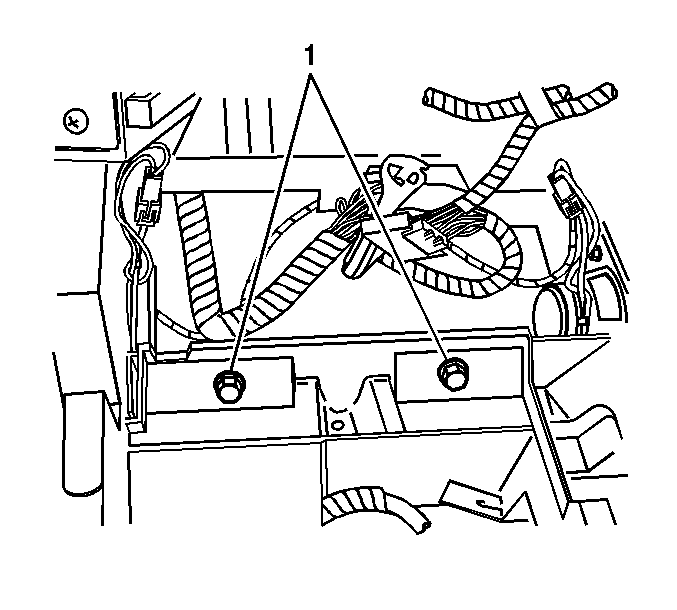
- Remove the bolts retaining the console to the mounting bracket.
- Remove the 2 bolts (1) retaining the console to the extension.
- Carefully lift the front of the console up and then rearwards.
- Disconnect any wire connections that prevents further rearward movement.
- Move the console rearwards in order to make room for the IP extension to be removed.
- Disconnect the wire connector to the extension.
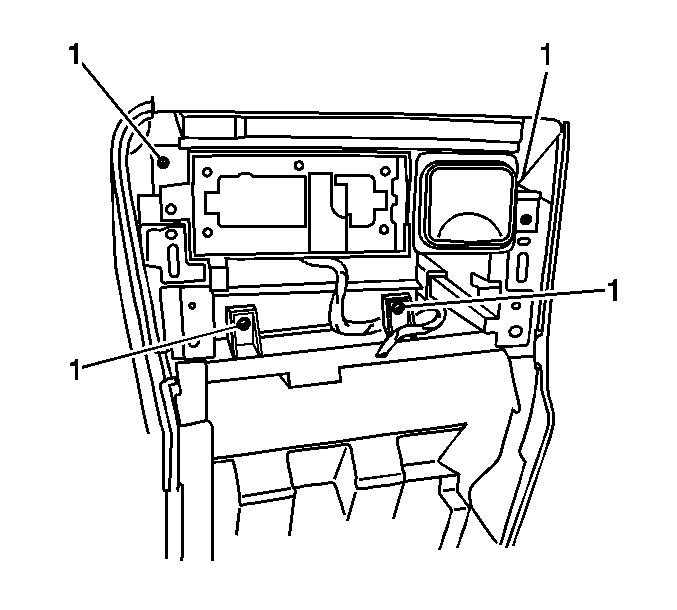
- Remove the 4 screws (1) that retains the extension to the IP.
- Ensure all wires are disconnected from the extension.
- Remove the extension from the vehicle.
- Remove the speakers from the extension, if equipped.
- Remove the DIC and power outlet bracket from the extension.
Installation Procedure
- Install the DIC and power outlet bracket to IP extension.
- Install the speaker. Refer to Radio Front Floor Console Speaker Replacement .
- Install the extension to the IP.
- Install the 4 retaining screws.
- Connect the wire connector and attach to the extension.
- Carefully move the console forward to attach to the extension.
- Install the console to the extension by slightly lifting up over the extension hooks and then downwards.
- Install the 2 retaining screws.
- Connect the wire connectors and attach to the console to prevent rattling during vehicle movement.
- Install the bolts retaining the console to the mounting bracket.
- Install the amplifier, if equipped. Refer to Radio Speaker Amplifier Replacement in Entertainment.
- Install the console bin. Refer to Front Floor Console Compartment Replacement .
- Install the CD player. Refer to Remote Compact Disc Player Replacement .
- Install the DIC. Refer to Driver Information Center Replacement .
- Install the console bezel. Refer to Floor Console Bezel Replacement .
Notice: Refer to Fastener Notice in the Preface section.

Tighten
Tighten the bracket screws to 1.6 N·m (14 lb in).
Tighten
Tighten the screws to 1.6 N·m (14 lb in).
Important: Verify that the wire or connector is NOT outside the console.

Tighten
Tighten the screws to 1.6 N·m (14 lb in).
Tighten
Tighten the bolts to 3.5 N·m (31 lb in).
Instrument Panel Extension Replacement Non-Luxury
Removal Procedure
- Open the console door.
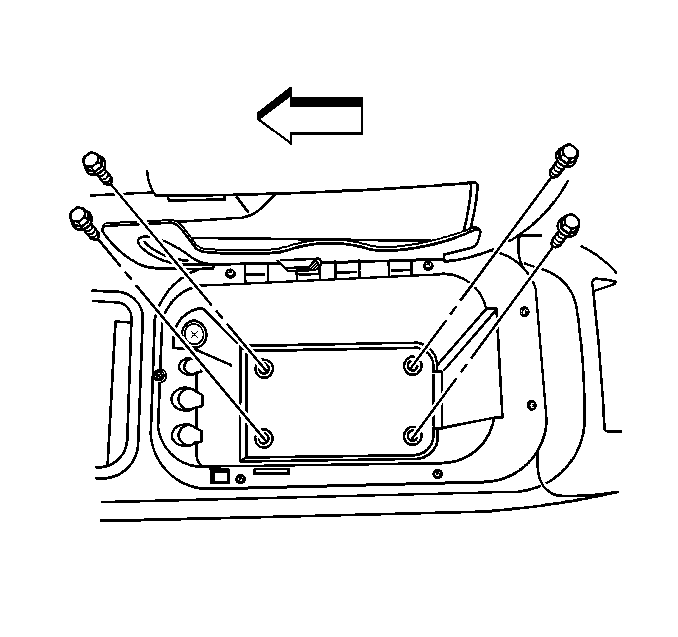
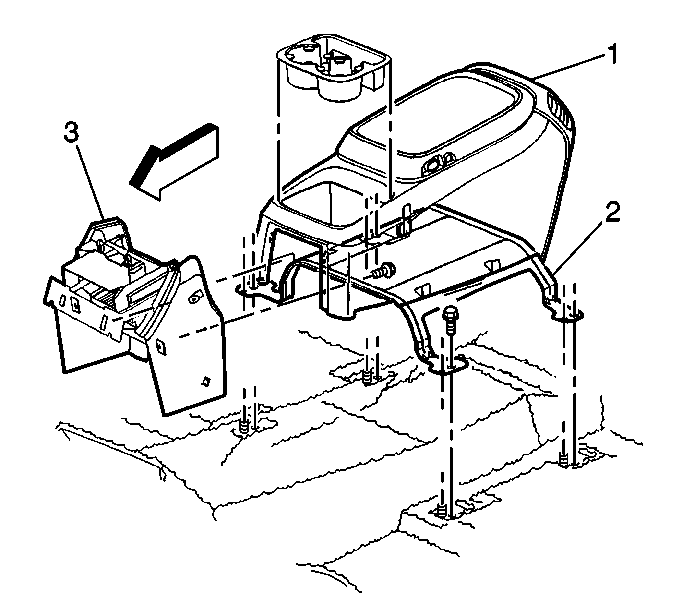
- Remove the 4 bolts attaching the center console to the console bracket.
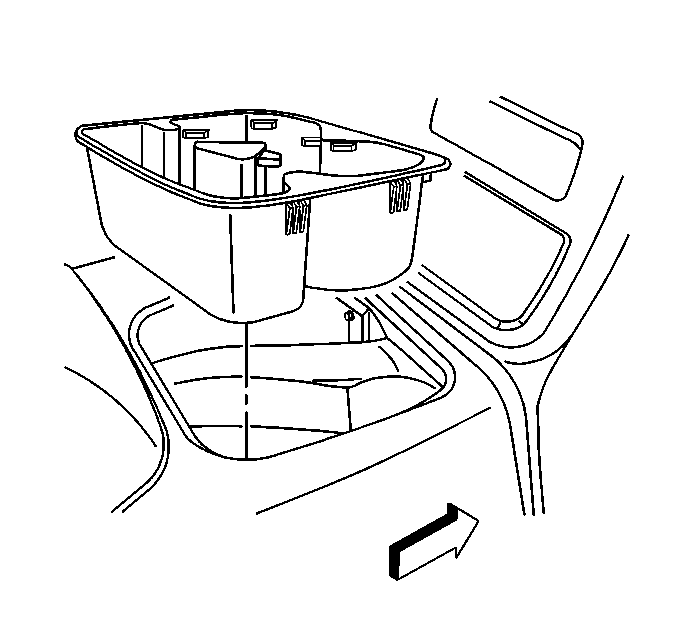
- Remove the cupholder from the console by using a flat bladed tool to pry the cupholder out.
- Remove the 2 screws retaining the center console (1) to the console extension (3).
- Remove the center console from the bracket.
- Remove the screws securing the trim bezel to the console extension.
- Use a small prying device to gently push in the tabs underneath the trim bezel securing the top of the trim bezel.
- Remove the trim bezel.
- Remove the console extension upper compartment insert.
- Remove the remote CD player, if equipped. Refer to Remote Compact Disc Player Replacement in Entertainment.
- Remove the bolts attaching the console extension to the instrument panel (IP).
- Slide the extension rearward and unclip the extension from the upper fasteners.
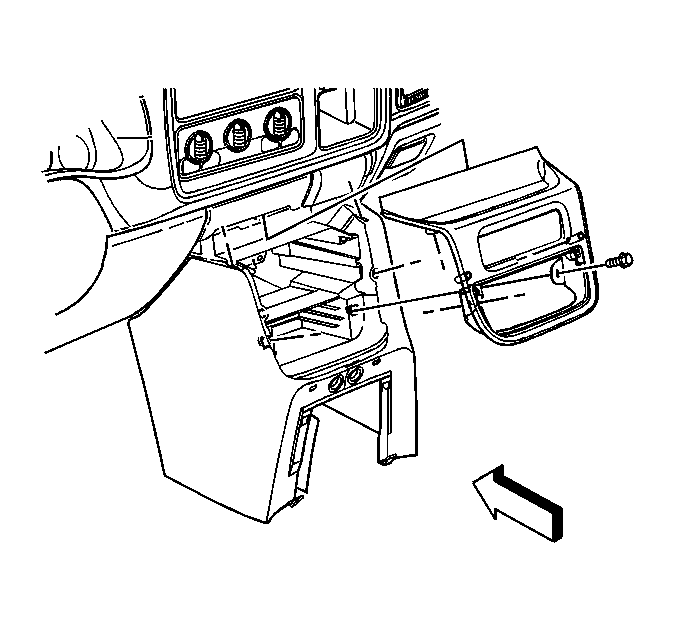
Important: Do not grab or pull on the CD storage door when removing the trim bezel
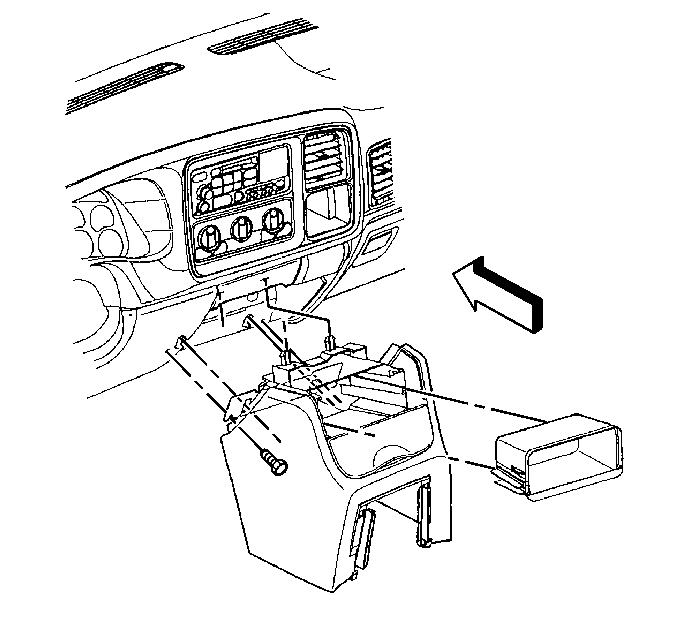
Installation Procedure
- Slide the extension forward and onto the upper fasteners.
- Install the bolts attaching the console extension to the IP.
- Install the console extension upper compartment insert.
- Install the remote CD player, if equipped. Refer to Remote Compact Disc Player Replacement in Entertainment.
- Install the trim bezel.
- Position the center console on the bracket (2).
- Install the screws attaching the center console to the console extension.
- Install the cupholder by push until the unit locks into place.
- Install the 4 retaining bolts to the bracket.
- Close the console door.
Notice: Refer to Fastener Notice in the Preface section.

Tighten
Tighten the bolts to 2 N·m (18 lb in).
Tighten
Tighten the screws to 2 N·m (18 lb in).

Tighten
Tighten the screws to 2 N·m (18 lb in).


Tighten
Tighten the bolts to 3.5 N·m (31 lb in).
