Transfer Case Control Lever Replacement for Chevrolet Chevy K Silverado - 4WD 2002
Removal Procedure
- Raise the vehicle. Refer to Lifting and Jacking the Vehicle in General Information.
- Remove the transfer case shield. Refer to Transfer Case Fluid Replacement .
- Remove the front propeller shaft. Refer to Front Propeller Shaft Replacement in Propeller Shaft.
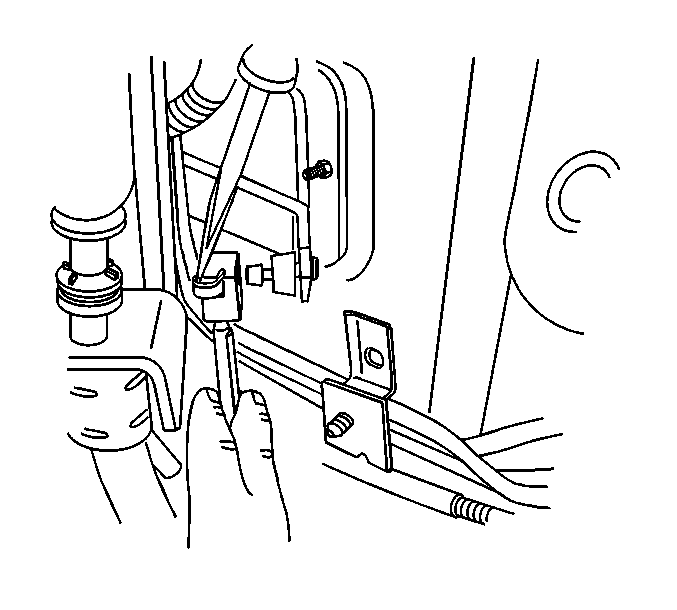
- Remove the shift control rod from the transfer case control lever. Refer to Transfer Case Control Rod Replacement .
- Lower the vehicle. Refer to Lifting and Jacking the Vehicle in General Information.
- Remove the transfer case control lever knob in the following manner.
- Remove the transfer case control lever bezel mounting screws.
- Remove the transfer case control lever bezel.
- Remove the transfer case control lever mounting bolts.
- Remove the transfer case control lever assembly.
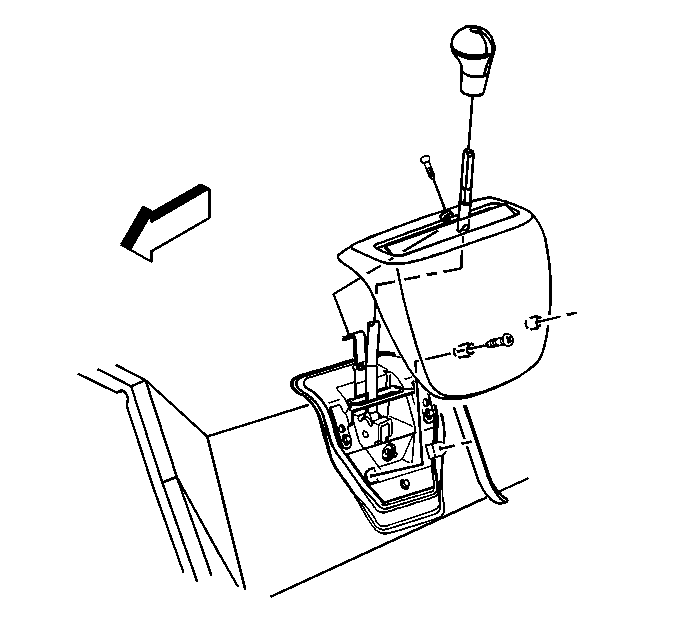
| 6.1. | Using a adjustable wrench, adjust the wrench to fit the transfer case control lever rod just below the knob. |
| 6.2. | With the adjustable wrench touching the control lever knob, gently tap the control lever knob in an upward motion until the control lever knob is off the rod. |
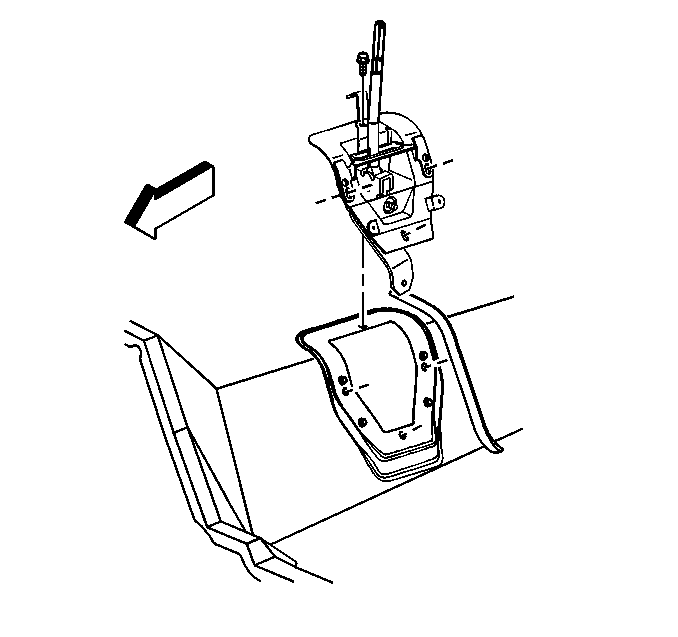
Important: When performing the following service procedure, the transfer case control lever mounting bracket does not have to be removed from the vehicle.
Installation Procedure
- Install the transfer case shift lever control mounting bolts.
- Install the transfer case control lever mounting bolts.
- Install the transfer case control lever bezel to the floor panel.
- Install the transfer case control lever bezel mounting screws.
- Install the transfer case control lever knob.
- Raise the vehicle. Refer to Lifting and Jacking the Vehicle in General Information.
- Reconnect the shift rod to the shift control lever.
- Install the front propeller shaft. Refer to Front Propeller Shaft Replacement in Propeller Shaft.
- Install the transfer case shield. Refer to Transfer Case Fluid Replacement .
- Lower the vehicle. Refer to Lifting and Jacking the Vehicle in General Information.
Notice: Use the correct fastener in the correct location. Replacement fasteners must be the correct part number for that application. Fasteners requiring replacement or fasteners requiring the use of thread locking compound or sealant are identified in the service procedure. Do not use paints, lubricants, or corrosion inhibitors on fasteners or fastener joint surfaces unless specified. These coatings affect fastener torque and joint clamping force and may damage the fastener. Use the correct tightening sequence and specifications when installing fasteners in order to avoid damage to parts and systems.
Tighten
Tighten the transfer case control lever mounting bolts to 2 N·m
(18 lb in).
Tighten
Tighten the transfer case control lever bezel screws to 2 N·m
(18 lb in).
Important: When performing the following service procedure, make sure that the shift rod is firmly seated on the shift control lever. A snap should be heard or felt when installing shift rod. If the snap is not heard or felt, replace the shift rod.
