For 1990-2009 cars only
Removal Procedure
- Remove the grille. Refer to Grille Replacement .
- Remove the air conditioning (A/C) condenser. Refer to Condenser Replacement .
- Remove the valve lifters. Refer to Valve Lifter Replacement .
- Remove the timing chain and sprocket. Refer to Timing Chain and Sprocket Replacement .
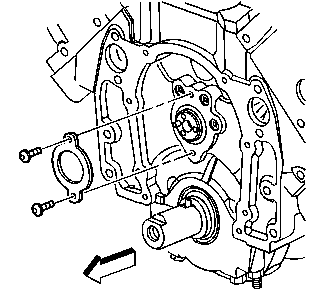
- Remove the camshaft retainer bolts.
- Remove the camshaft retainer.
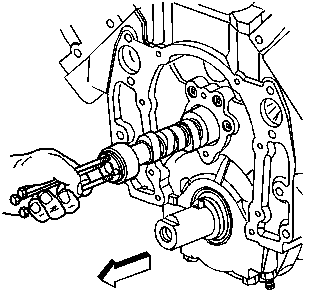
- Install three 8 - 1.25 x 100 mm bolts into the camshaft front bolt holes.
- Using the bolts as a handle, carefully rotate and pull the camshaft out of the engine block.
- Remove the bolts from the front of the camshaft.
- Clean and inspect the camshaft. Refer to Camshaft and Bearings Cleaning and Inspection .


Installation Procedure
- Apply lubricant to the following components:
- Install three 8 - 1.25 x 100 mm bolts into the camshaft threaded bolt holes.
- Using the bolts as a handle, carefully install the camshaft.
- Remove the bolts from the front of the camshaft.
- Install the camshaft retainer and bolts.
- Install the timing chain and sprocket. Refer to Timing Chain and Sprocket Replacement .
- Install the valve lifters. Refer to Valve Lifter Replacement .
- Install the A/C condenser. Refer to Condenser Replacement .
- Install the grille. Refer to Grille Replacement .

Notice: All camshaft journals are the same diameter, so care must be used in removing or installing the camshaft to avoid damage to the camshaft bearings.
| • | The camshaft lobes |
| • | The camshaft bearing journals |
| • | The camshaft bearings |
| • | Refer to Adhesives, Fluids, Lubricants, and Sealers for the correct part number. |
Notice: Refer to Fastener Notice in the Preface section.

Tighten
Tighten the bolts to 12 N·m (106 lb in).
