Radiator Outlet Hose Replacement 4.3L Engine
Removal Procedure
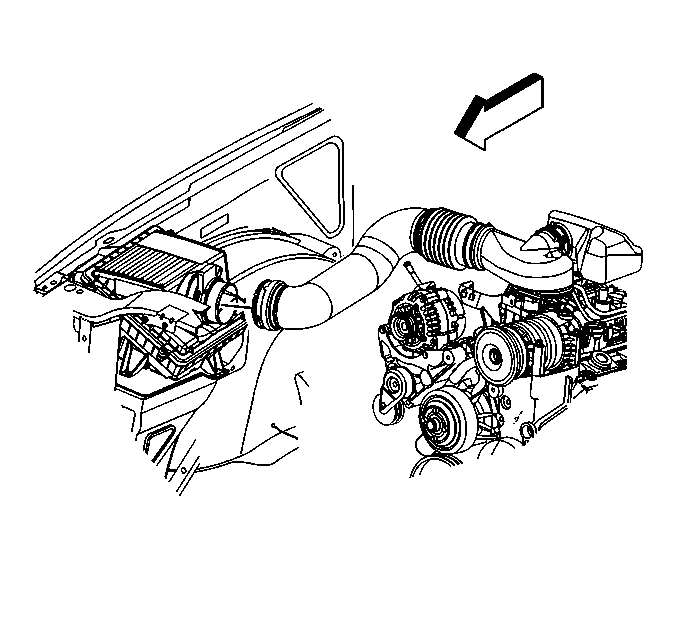
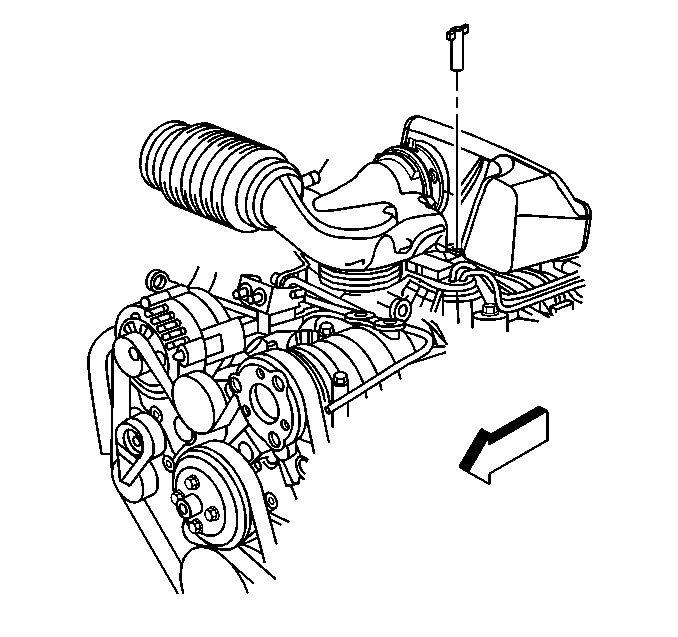
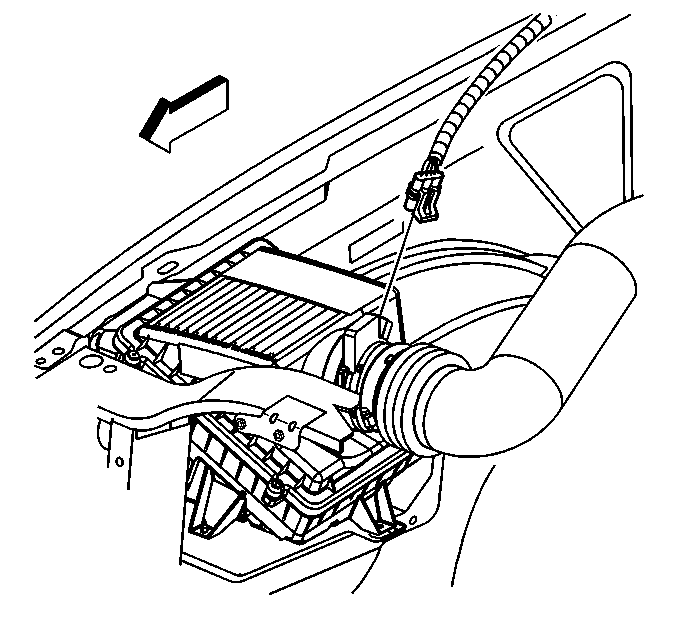
- Separate the MAF/IAT sensor assembly and the air inlet tube by loosening the hose clamp.
- Disconnect the PCV hose from the air cleaner outlet duct.
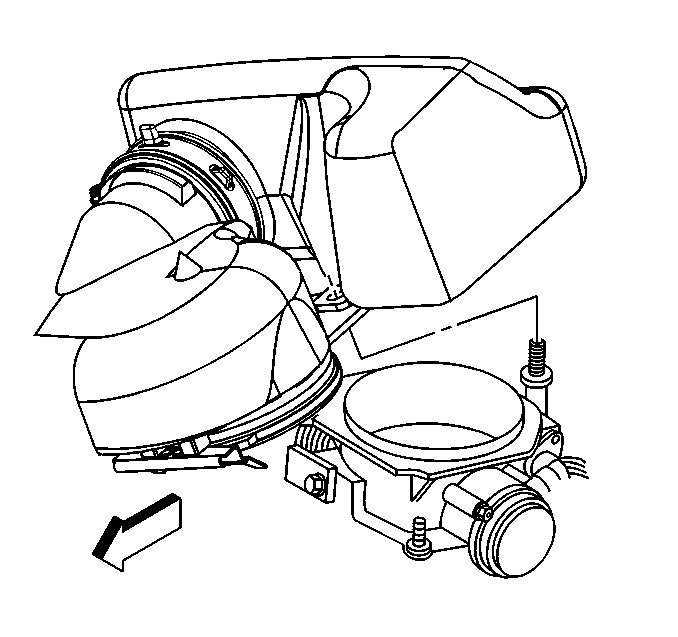
- Remove the air inlet tube and resonator retaining wing nut.
- Remove the air inlet tube and resonator from the throttle body by pivoting the air inlet tube and resonator upward until the hinge clip releases from the lip on the throttle body.
- Drain the cooling system. Refer to Cooling System Draining and Filling .
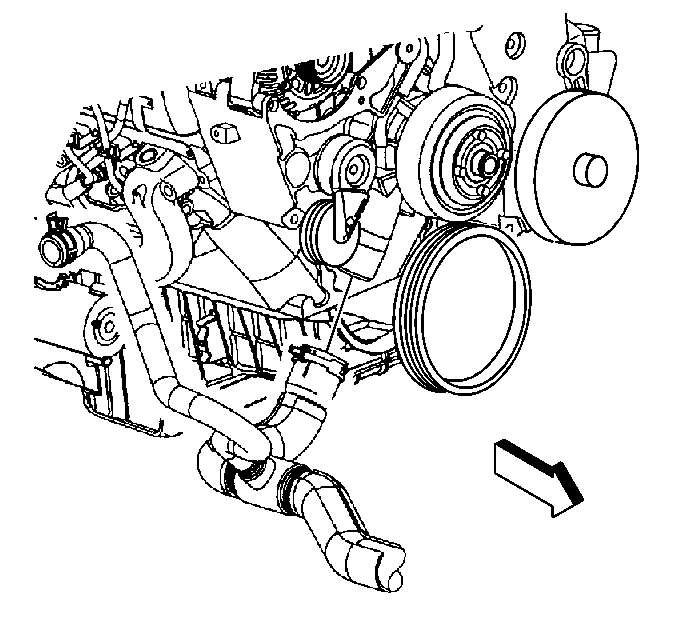
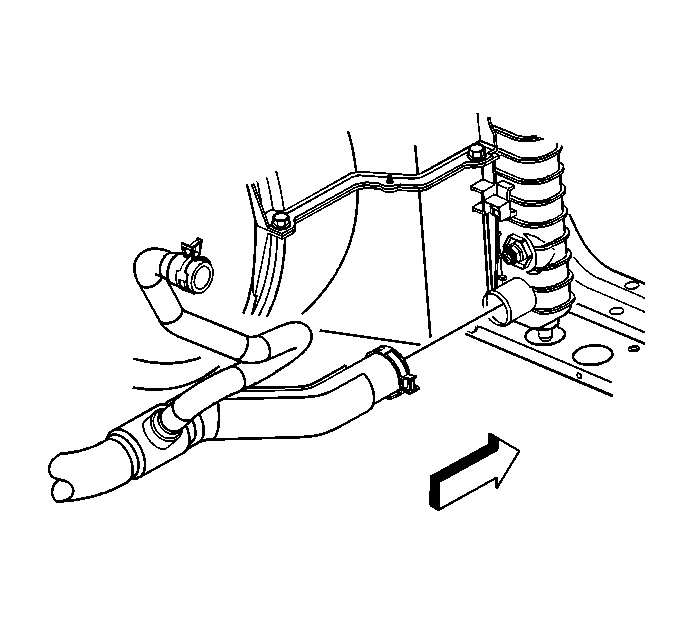
- Remove the radiator outlet hose from the surge tank.
- Remove the radiator outlet hose from the water pump.
- Remove the radiator outlet hose from the radiator.
- Remove the radiator outlet hose.

Installation Procedure
- Install the radiator outlet hose to the radiator.
- Install the radiator outlet hose to the water pump.
- Install the radiator outlet hose to the surge tank.
- Align the hinge clip with the lip on the throttle body.
- Install the resonator retaining wing nut.
- Connect the PCV hose to the air cleaner outlet duct.
- Connect the MAF/IAT sensor assembly harness connector.
- Fill the cooling system. Refer to Cooling System Draining and Filling .


Install the air inlet tube and resonator to the throttle body by pivoting the air inlet tube and resonator downward until the mounting stud is through the hole in the air inlet tube.

Radiator Outlet Hose Replacement 4.8, 5.3, and 6.0L Engines
Removal Procedure
- Drain the cooling system. Refer to Cooling System Draining and Filling .
- Loosen the air cleaner outlet duct clamps at the following locations:
- Remove the radiator inlet hose clip from the outlet duct.
- Remove the air cleaner outlet duct.
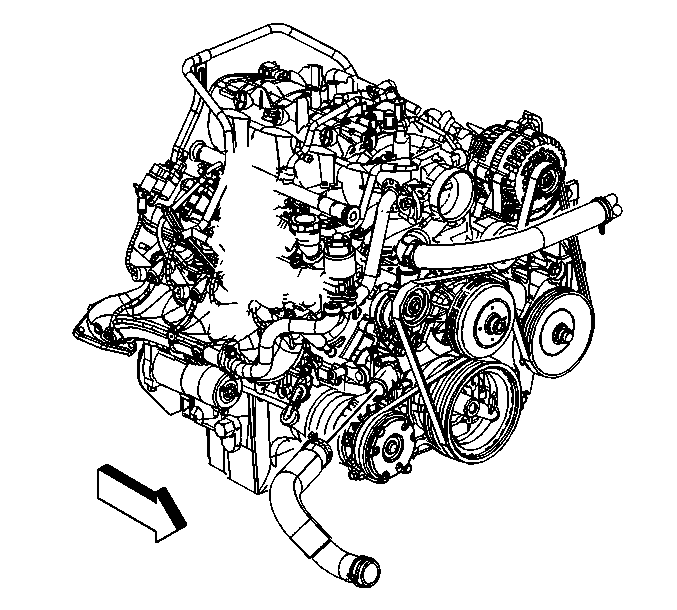
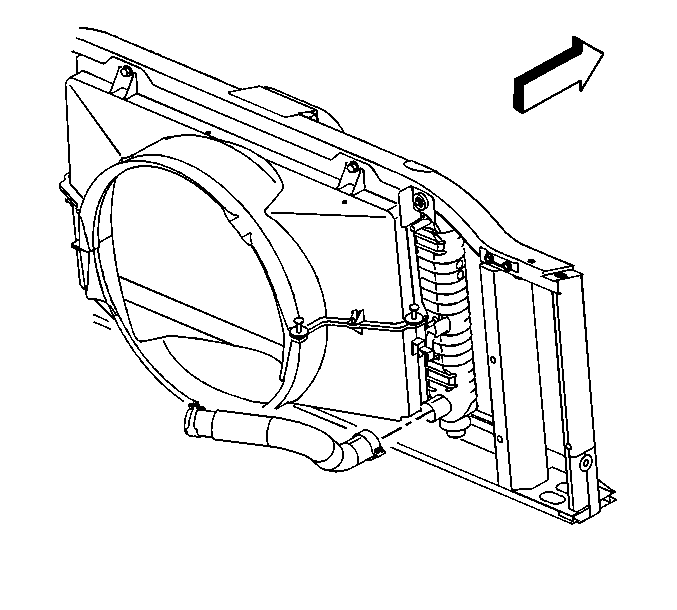
- Reposition the outlet hose clamp at the water pump.
- Remove the outlet hose from the water pump.
- Reposition the outlet hose clamp at the radiator.
- Remove the outlet hose from the radiator.
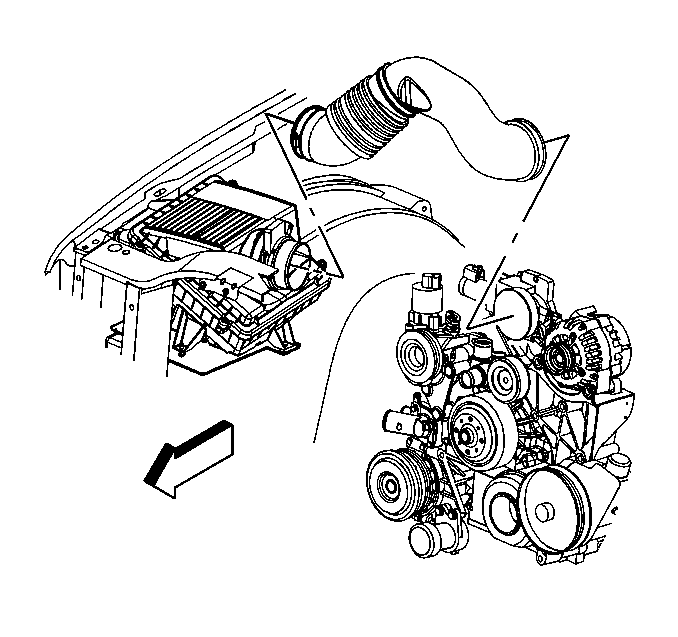
| • | Throttle body |
| • | Mass airflow/intake air temperature (MAF/IAT) sensor |
Installation Procedure
- Install the outlet hose to the radiator.
- Position the outlet hose clamp at the radiator.
- Install the outlet hose to the water pump.
- Position the outlet hose clamp at the water pump.
- Install the air cleaner outlet duct.
- Install the radiator inlet hose clip to the outlet duct.
- Tighten the air cleaner outlet duct clamps at the following locations:
- Fill the cooling system. Refer to Cooling System Draining and Filling .


Important: Align the arrow at the throttle body end of the duct with the throttle body attaching stud.
| • | Throttle body |
| • | MAF/IAT sensor |
Tighten
Tighten the air cleaner outlet duct clamp screws to 7 N·m
(62 lb in).
Radiator Outlet Hose Replacement 6.6L
Removal Procedure
- Drain the engine coolant. Refer to Cooling System Draining and Filling .
- Remove the upper and lower fan shroud. Refer to Engine Coolant Fan Upper Shroud Replacement and Engine Coolant Fan Lower Shroud Replacement .
- Remove the surge tank outlet hose (2) from the surge tank.
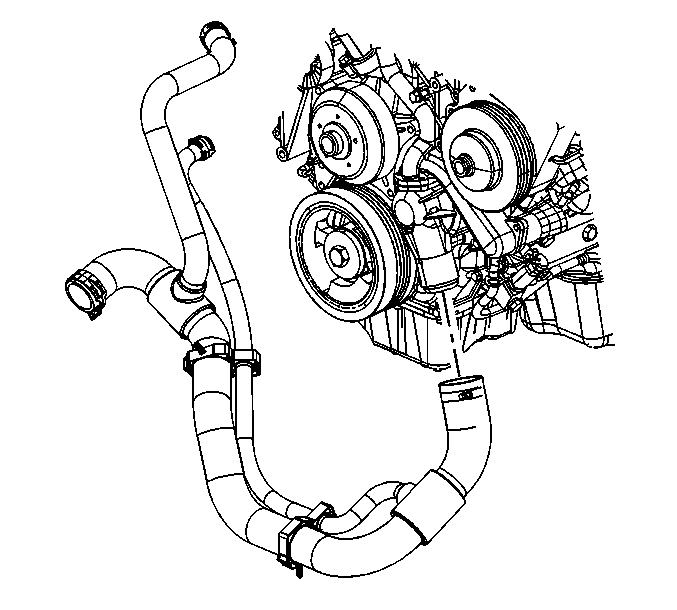
- Remove the radiator outlet hose from the water pump.
- Remove the heater outlet hose from the radiator outlet hose.
- Remove the radiator outlet hose from the radiator.
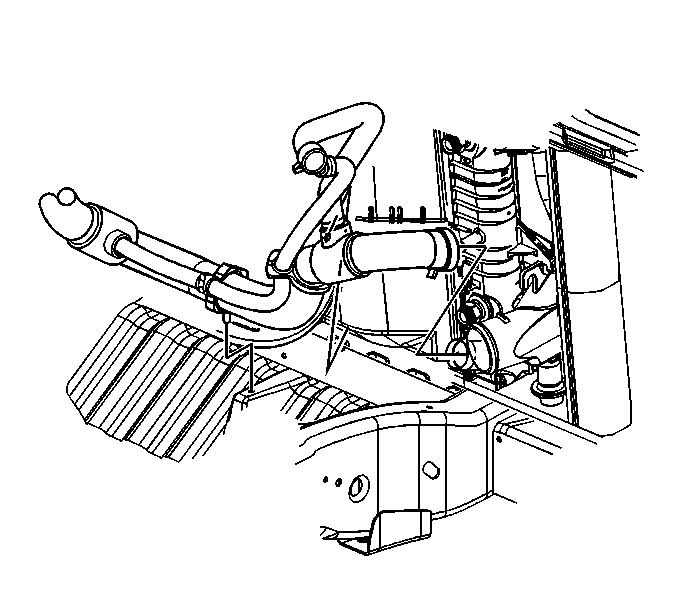
- Remove the radiator outlet hose clip retainers from the brackets.
- Remove the radiator outlet hose from the vehicle.
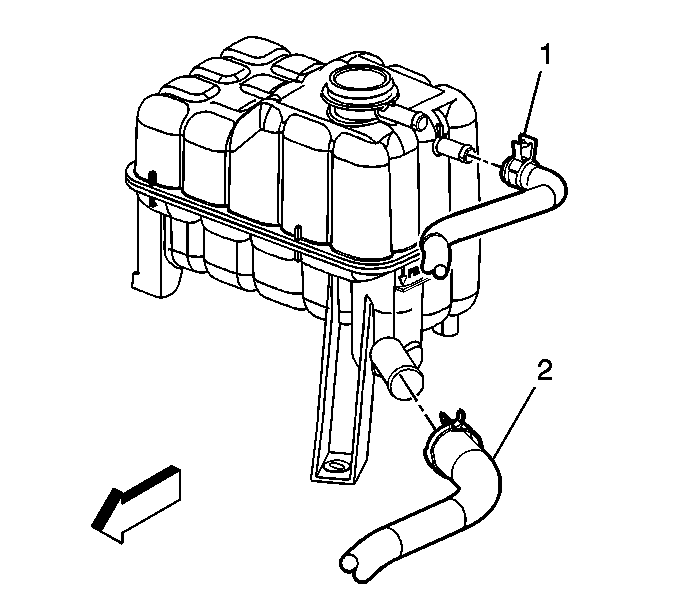
Installation Procedure
- Install the radiator outlet hose to the vehicle.
- Install the radiator outlet hose and clamp to the radiator. Ensure the hose is positioned properly in order to prevent interference with the fan shroud.
- Install the radiator outlet hose clip retainers to the brackets.
- Install the surge tank outlet hose (2) to the surge tank.
- Install the radiator outlet hose and clamp to the water pump.
- Install the heater outlet hose to the radiator outlet hose.
- Install the upper and lower fan shroud. Refer to Engine Coolant Fan Upper Shroud Replacement and Engine Coolant Fan Lower Shroud Replacement .
- Fill the engine coolant. Refer to Cooling System Draining and Filling .


Radiator Outlet Hose Replacement 8.1L
Tools Required
J 43181 Heater Line Quick Connect Release Tool
Removal Procedure
Important: Most truck models use a spring-type hose clamp at the hose connections. When using this type of clamp, install the radiator hoses on dry, non-painted surfaces in order to ensure proper sealing. Reusing the spring-type clamps on aftermarket hoses is not recommended.
- Drain the cooling system. Refer to Cooling System Draining and Filling .
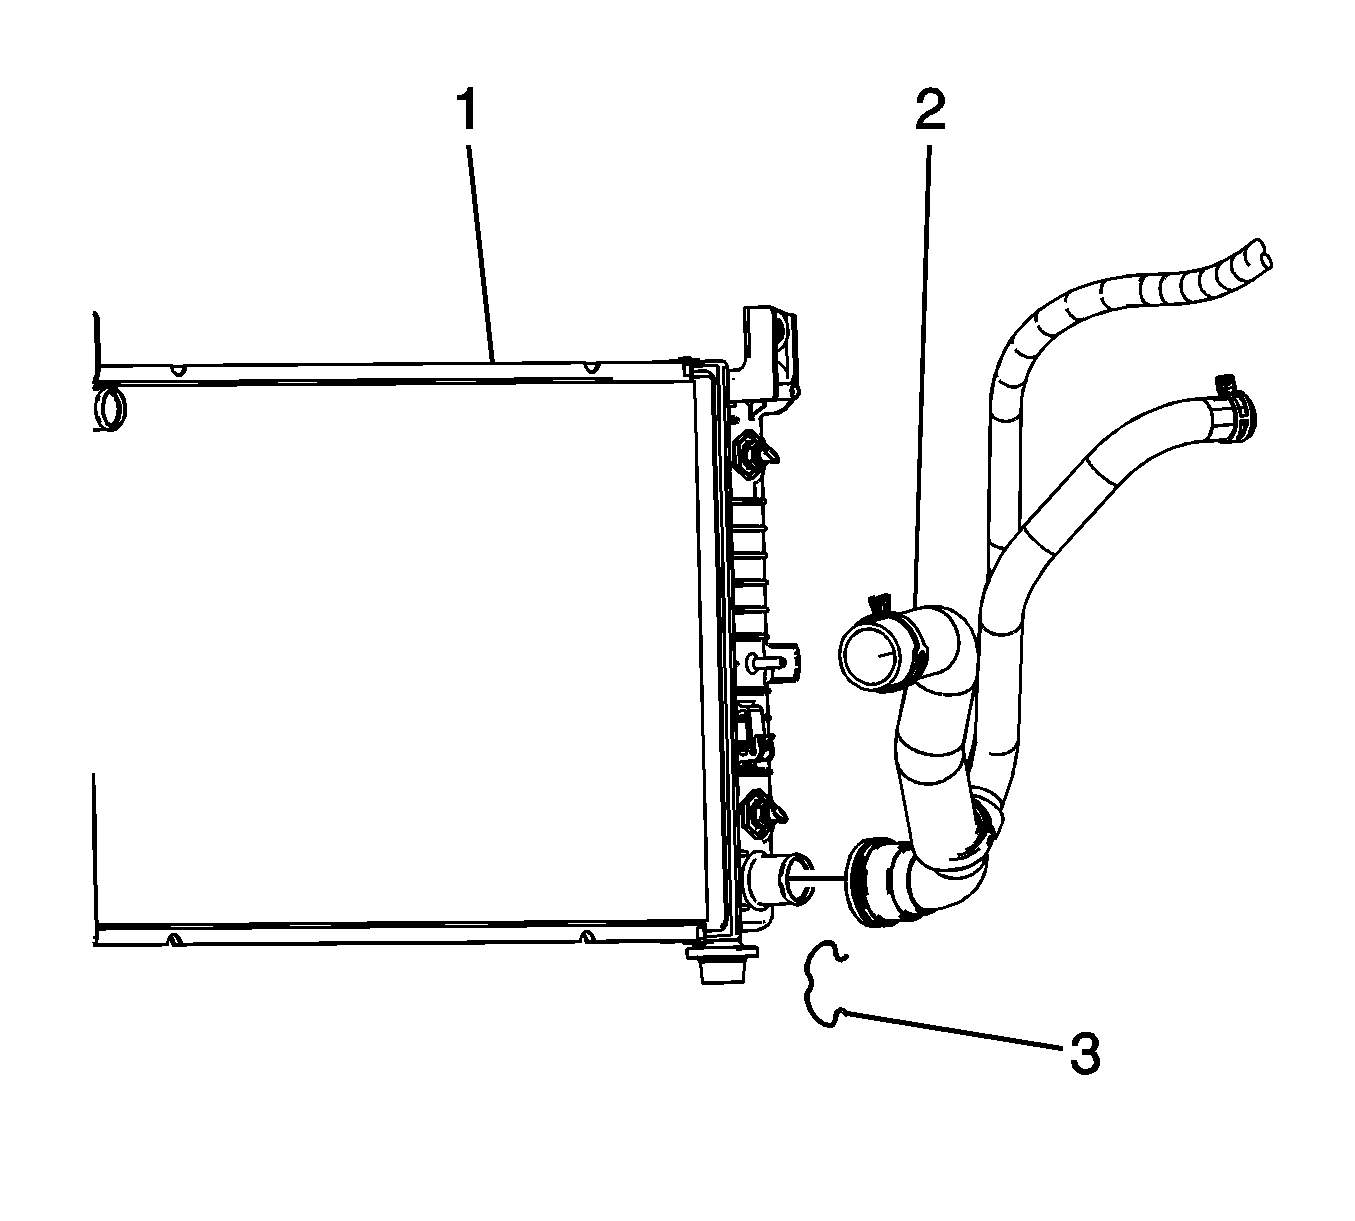
- Remove the radiator outlet hose from the radiator. Refer to Radiator Hose Quick Connect Fitting .
- Using the J 43181 disconnect the heater hoses from the heater core outlet.
- Reposition the surge tank outlet hose clamp at the surge tank.
- Remove the surge tank outlet hose (2) from the surge tank.
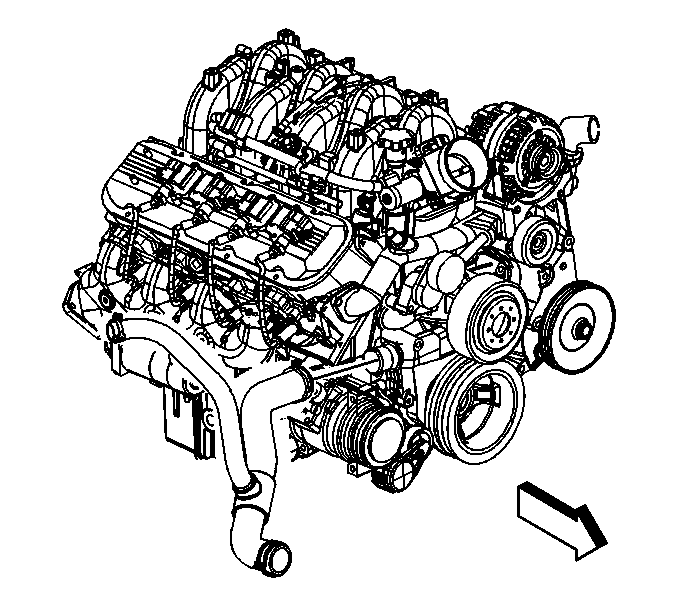
- Reposition the outlet hose clamp the water pump.
- Remove the outlet hose from the water pump.
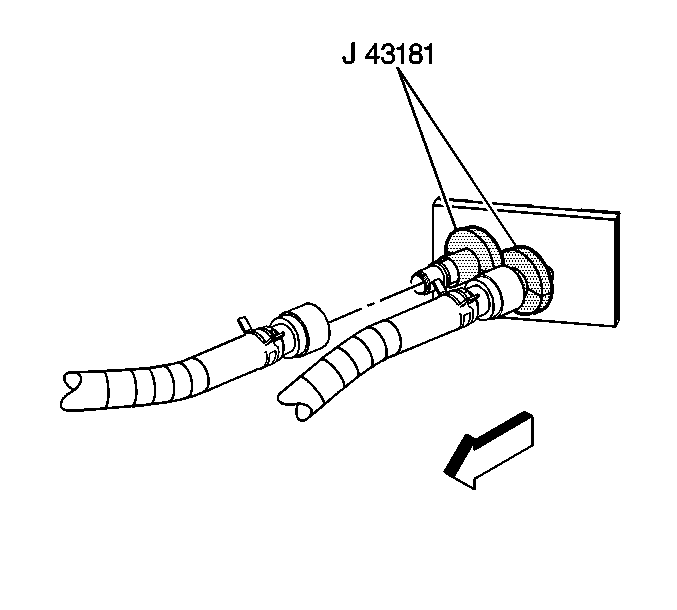
| 3.1. | Install the J 43181 to the heater core pipe. |
| 3.2. | Close the tool around the heater core pipe. |
| 3.3. | Firmly pull the tool into the quick connect end of the heater hose. |
| 3.4. | Firmly grasp the heater hose. Pull the heater hose forward in order to disengage the hose from the heater core. |

Installation Procedure
- Install the outlet hose to the water pump.
- Position the outlet hose clamp to the water pump.
- Install the surge tank outlet hose (2) from the surge tank.
- Position the surge tank outlet hose clamp to the surge tank.
- Connect the heater and surge tank hoses to the heater core.
- Install the radiator outlet hose to the radiator. Refer to Radiator Hose Quick Connect Fitting .
- Fill the cooling system. Refer to Cooling System Draining and Filling .


Firmly push the quick connect onto the heater core pipe until you hear an audible click.

