Steering Gear Replacement Rack and Pinion
Removal Procedure
- Raise the vehicle on a hoist. Support the vehicle with suitable safety stands. Refer to Lifting and Jacking the Vehicle .
- Remove both of the front tire and wheel assemblies. Refer to Tire and Wheel Removal and Installation .
- Remove the engine shield, if equipped. Refer to Engine Protection Shield Replacement .
- Remove the outer tie rod end from the steering knuckle. Refer to Rack and Pinion Outer Tie Rod End Replacement .
- Remove the stabilizer bar mounting brackets from the frame and lower the stabilizer bar.
- Place a drain pan under the lines in order to catch the fluid.
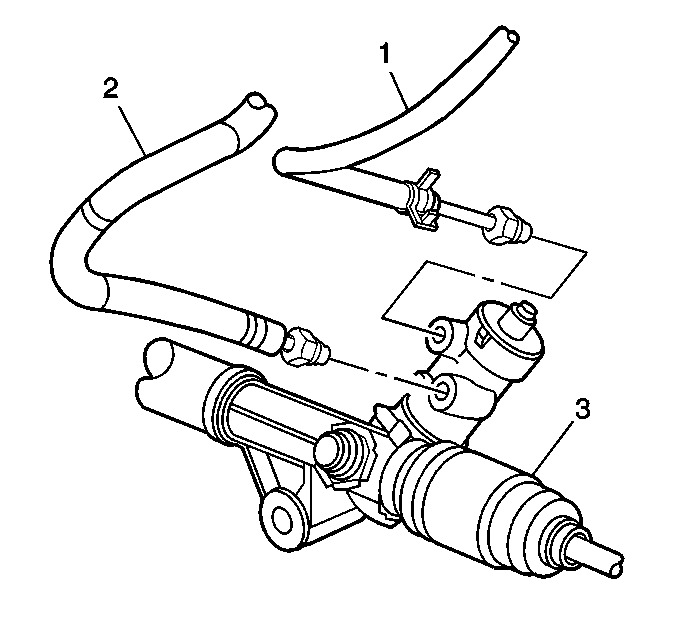
- Remove the power steering high pressure line (2) from the rack and pinion assembly (3).
- Remove the power steering low pressure line (1) from the rack and pinion assembly (3).
- Disconnect the intermediate shaft from the rack and pinion assembly. Refer to Lower Intermediate Steering Shaft Replacement .
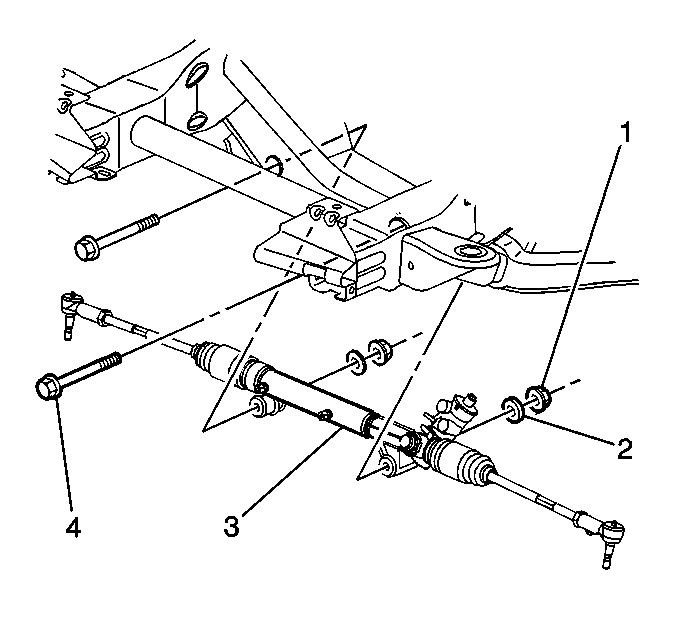
- Remove the rack and pinion assembly mounting nuts (1), the washers (2) and the bolts (4).
- Remove the rack and pinion assembly (3) from the vehicle.
Installation Procedure
- Install the rack and pinion assembly (3) into the vehicle.
- Install the rack and pinion assembly mounting bolts (4), the washers (2) and the nuts (1).
- Connect the intermediate shaft to the rack and pinion assembly. Refer to Lower Intermediate Steering Shaft Replacement .
- Install the power steering low pressure hose (1) to the rack and pinion assembly (3).
- Install the power steering high pressure hose (2) to the rack and pinion assembly (3).
- Install the engine protection shield, if equipped. Refer to Engine Protection Shield Replacement .
- Install the outer tie rod end to the steering knuckle. Refer to Rack and Pinion Outer Tie Rod End Replacement .
- Install the stabilizer bar mounting brackets to the frame.
- If the steering gear is equipped with a ground strap, install the ground strap to the crossmember bracket.
- Install both of the front tire and wheel assemblies. Refer to Tire and Wheel Removal and Installation .
- Remove the safety stands.
- Lower the vehicle.
- Bleed the power steering system. Refer to Power Steering System Bleeding .

Notice: Refer to Fastener Notice in the Preface section.
Tighten
Tighten the nuts to 185 N·m (136 lb ft).

Tighten
Tighten both hoses to 28 N·m (20 lb ft).
Tighten
Tighten the bolts to 33 N·m (24 lb ft).
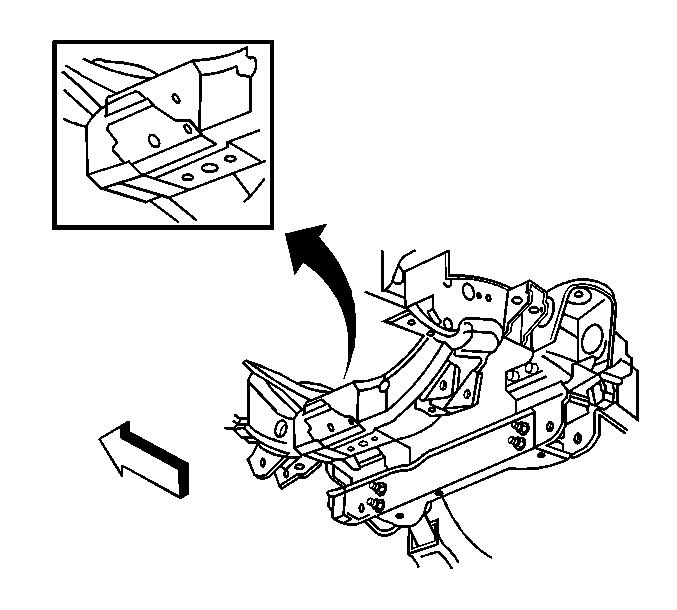
| • | Place the ground strap on the left side of the bracket and mark the location. |
| • | Center punch the bolt hole location. |
| • | Drill a hole using a 7 mm (9/32 in) drill bit. |
| • | Install the bolt and washer retaining the ground strap to the crossmember. |
Tighten
Tighten the bolt to 10 N·m (89 lb in).
Steering Gear Replacement Non-Rack and Pinion
Removal Procedure
Tools Required
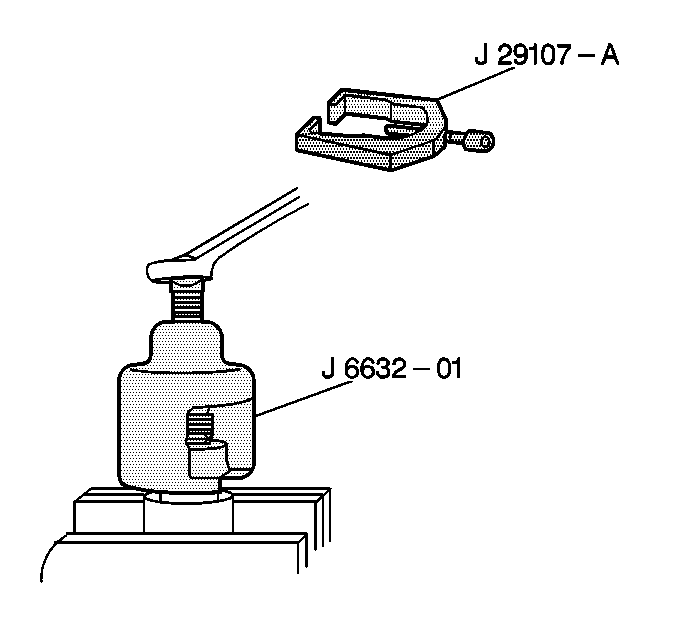
| • | J 6632-01 Pitman Arm Puller |
| • | J 24319-B Universal Steering Linkage Puller |
| • | J 29107-A Pitman Arm Puller |
- Place a drain pan under the vehicle.
- Remove the engine protection shield, if equipped. Refer to Engine Protection Shield Replacement in Frame and Underbody.
- For vehicles equipped with a 6.6L Diesel, remove the left charge air cooler hose. Refer to Charged Air Cooler Hoses/Pipes Replacement in Engine Mechanical 6.6L.
- Remove the power steering hoses from the steering gear.
- Cap the ends of the hoses and the power steering gear in order to prevent any entrance of dirt.
- Disconnect the intermediate shaft from the steering gear. Refer to Lower Intermediate Steering Shaft Replacement in Steering Wheel and Column.
- Remove the pitman arm to relay rod nut.
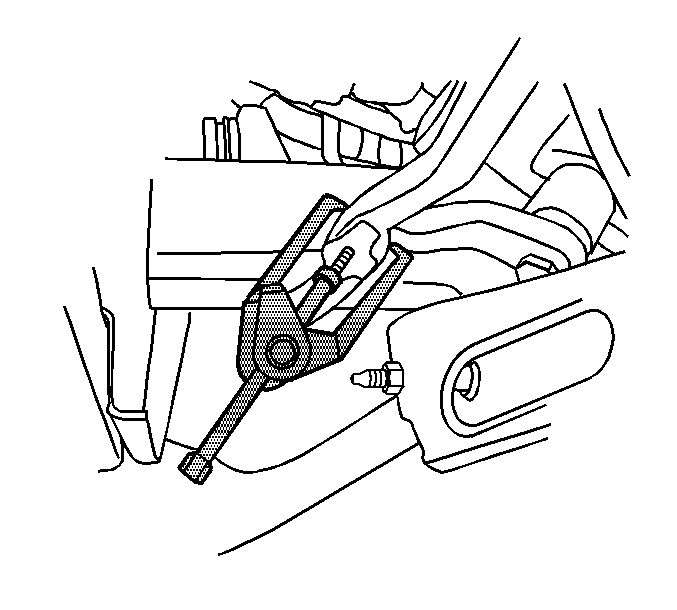
- Disconnect the pitman arm from the relay rod using J 24319-B .
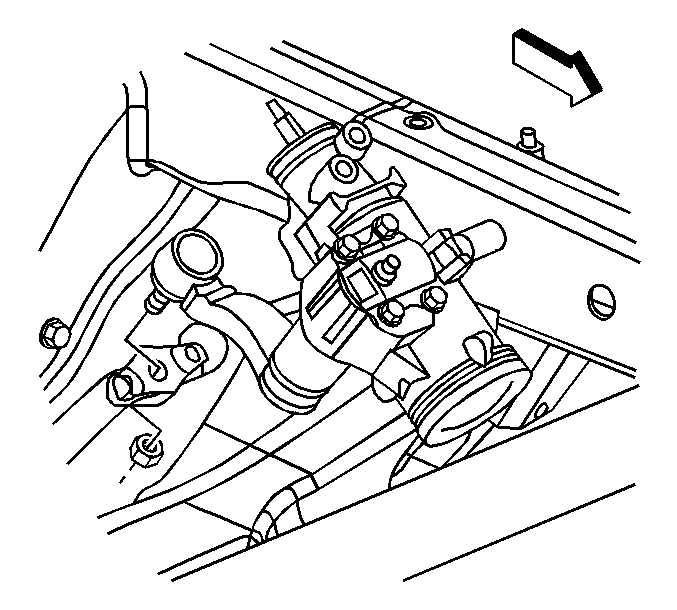
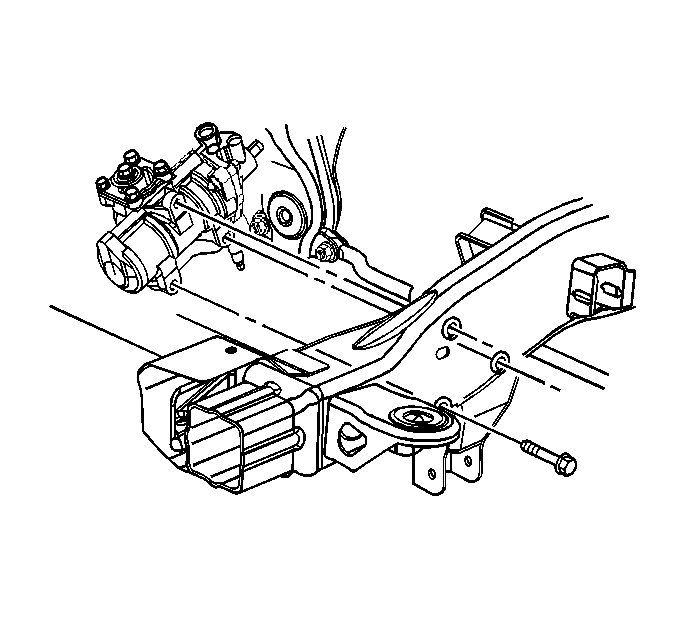
- Remove the bolts retaining the steering gear to the frame.
- Remove the steering gear from the vehicle.
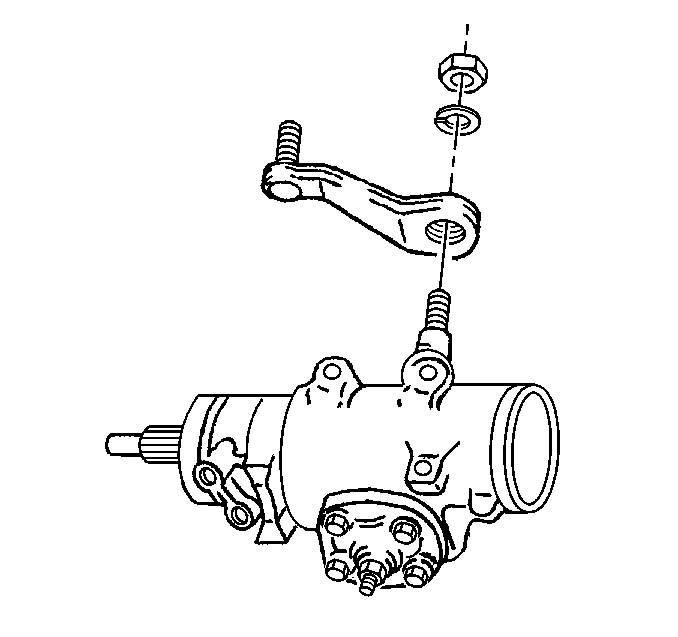
- Remove the pitman arm to the power steering gear retaining nut.
- Remove the pitman arm from the power steering gear using J 6632-01 or J 29107-A .
Notice: Do not start the vehicle with any power steering gear inlet or outlet hoses disconnected. When disconnected, plug or cap all openings of components. Failure to do so could result in contamination or loss of power steering fluid and damage to the system.
Installation Procedure
- Install the pitman arm to the power steering gear.
- Install the pitman arm to power steering gear retaining nut and washer.
- Install the steering gear to the frame and install the retaining bolts.
- Install the pitman arm to the relay rod.
- Install the pitman arm to the relay rod nut.
- Install the intermediate shaft to the steering gear. Refer to Lower Intermediate Steering Shaft Replacement in Steering Wheel and Column.
- Remove the caps or plugs from the steering gear and hoses.
- Install the hoses to the steering gear.
- For vehicles equipped with a 6.6L Diesel, install the left charge air cooler hose. Refer to Charged Air Cooler Hoses/Pipes Replacement in Engine Mechanical 6.6L.
- Install the engine protection shield, if equipped. Refer to Engine Protection Shield Replacement in Frame and Underbody.
- Remove the safety stands.
- Lower the vehicle.
- Bleed the power steering system. Refer to Power Steering System Bleeding .

Notice: Use the correct fastener in the correct location. Replacement fasteners must be the correct part number for that application. Fasteners requiring replacement or fasteners requiring the use of thread locking compound or sealant are identified in the service procedure. Do not use paints, lubricants, or corrosion inhibitors on fasteners or fastener joint surfaces unless specified. These coatings affect fastener torque and joint clamping force and may damage the fastener. Use the correct tightening sequence and specifications when installing fasteners in order to avoid damage to parts and systems.
Tighten
Tighten the nut to 250 N·m (184 lb ft).

Tighten
Tighten the bolts to 150 N·m (110 lb ft).

Tighten
Tighten the nut to 62N·m (46 lb ft).
Tighten
Tighten the hoses fittings to 28 N·m (20 lb ft).
