Jump Starting in Case of Emergency Non HP2
Caution: Batteries produce explosive gases. Batteries contain corrosive acid.
Batteries supply levels of electrical current high enough to cause burns.
Therefore, in order to reduce the risk of personal injury while working
near a battery, observe the following guidelines:
• Always shield your eyes. • Avoid leaning over the battery whenever possible. • Do not expose the battery to open flames or sparks. • Do not allow battery acid to contact the eyes or the skin. - Flush any contacted areas with water immediately and thoroughly. - Get medical help.
Notice: This vehicle has a 12 volt, negative ground electrical system. Make sure the vehicle or equipment being used to jump start the engine is also 12 volt, negative ground. Use of any other type of system will damage the vehicle's electrical components.
This vehicle has a 12-volt positive, negative ground electrical system. Do not try to jump start a vehicle, if you are unsure of the other vehicle's positive voltage or ground position. The booster battery and the discharged battery should be treated carefully when using jumper cables.
- Position the vehicle with the booster battery so that the jumper cables will comfortably reach the battery of the other vehicle.
- Perform the following steps on both vehicles:
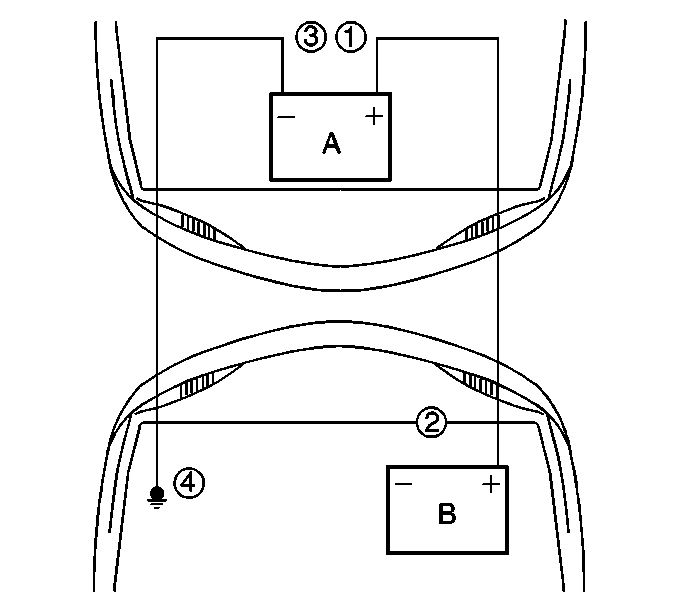
- Attach the end of one jumper cable to the positive terminal of the discharged battery.
- Attach the other end of the first cable to the positive terminal of the booster battery.
- Attach one end of the remaining jumper cable to the negative terminal of the booster battery.
- Make the final connection of the negative jumper cable to the block or suitable bracket connected directly to the block, away from the battery.
- Start the engine of the vehicle that is providing the jump start and turn off all electrical accessories. Raise the engine RPM to approximately 1,500 RPM.
- Crank the engine of the vehicle with the weak battery.
- Reverse the steps exactly when removing the jumper cables. The negative battery cable must first be disconnected from the engine that was jump started .
| • | Do not let the 2 vehicles touch. |
| • | Make sure that the jumper cables do not have loose clamps or missing insulation. |
| 2.1. | Place the automatic transmission in PARK. |
| 2.2. | Block the wheels. |
| 2.3. | Set the parking brake. |
| 2.4. | Turn off all electrical loads that are not needed. Leave the hazard flashers ON. |
| 2.5. | Turn OFF the ignition switch. |

Important: Some vehicles have a battery remote positive stud. ALWAYS use the battery remote positive stud in order to give or to receive a jump start. Consult the vehicle's owner's manual for proper connections.
Notice: Do not connect the negative charger lead to the housings of other vehicle electrical accessories or equipment. The action of the battery charger may damage such equipment.
If the engine does not crank or cranks too slowly, perform the following steps:
| 8.1. | Turn the ignition OFF. |
| 8.2. | Allow the booster vehicle engine to run at approximately 1,500 RPM for 5 minutes. |
| 8.3. | Attempt to start the engine of the vehicle with the discharged battery. |
Jump Starting in Case of Emergency HP2
Caution: Batteries produce explosive gases. Batteries contain corrosive acid.
Batteries supply levels of electrical current high enough to cause burns.
Therefore, in order to reduce the risk of personal injury while working
near a battery, observe the following guidelines:
• Always shield your eyes. • Avoid leaning over the battery whenever possible. • Do not expose the battery to open flames or sparks. • Do not allow battery acid to contact the eyes or the skin. - Flush any contacted areas with water immediately and thoroughly. - Get medical help.
Notice: This vehicle has a 12 volt, negative ground electrical system. Make sure the vehicle or equipment being used to jump start the engine is also 12 volt, negative ground. Use of any other type of system will damage the vehicle's electrical components.
This vehicle has a 12-volt positive, negative ground electrical system. Do not try to jump start a vehicle if you are unsure of the other vehicle's positive voltage or ground position. The booster battery and the discharged battery should be treated carefully when using jumper cables.
- Position the vehicle with the booster battery so that the jumper cables will comfortably reach the battery of the other vehicle.
- Perform the following steps on both vehicles:
- Attach the end of one jumper cable to the positive terminal or remote stud of the discharged battery. Refer to .
- Attach the other end of the first cable to the positive terminal of the booster battery.
- Attach one end of the remaining jumper cable to the negative terminal of the booster battery.
- Make the final connection of the negative jumper cable to the block or suitable bracket connected directly to the block, away from the battery.
- Turn and hold key in the CRANK position for 5 seconds.
- Turn the key to the OFF position.
- Reverse the steps exactly when removing the jumper cables. The negative battery cable must first be disconnected from the engine that was jump started .
| • | Do not let the 2 vehicles touch. |
| • | Make sure that the jumper cables do not have loose clamps or missing insulation. |
| 2.1. | Place the automatic transmission in PARK. |
| 2.2. | Block the wheels. |
| 2.3. | Set the parking brake. |
| 2.4. | Turn OFF all electrical loads that are not needed. Leave the hazard flashers ON. |
| 2.5. | Turn OFF the ignition switch. |

Important: Some vehicles have a battery remote positive stud. ALWAYS use the battery remote positive stud in order to give or to receive a jump start.
Notice: Do not connect the negative charger lead to the housings of other vehicle electrical accessories or equipment. The action of the battery charger may damage such equipment.
The starter generator control module (SGCM) will command the 14-volt to 42-volt power to charge the energy storage box (ESB) batteries as long as battery voltage is greater the 11.2 volts.

If the battery (or batteries) on the vehicle has run down and the vehicle will not start, you may want to use another vehicle to provide power to start the vehicle.
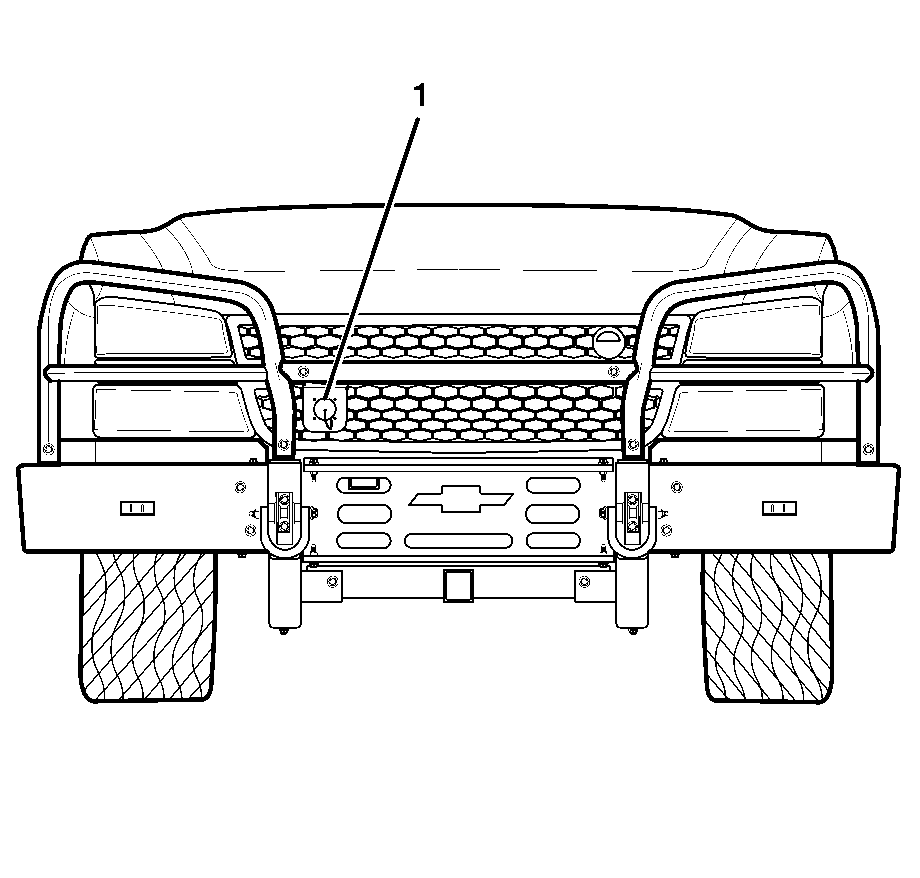
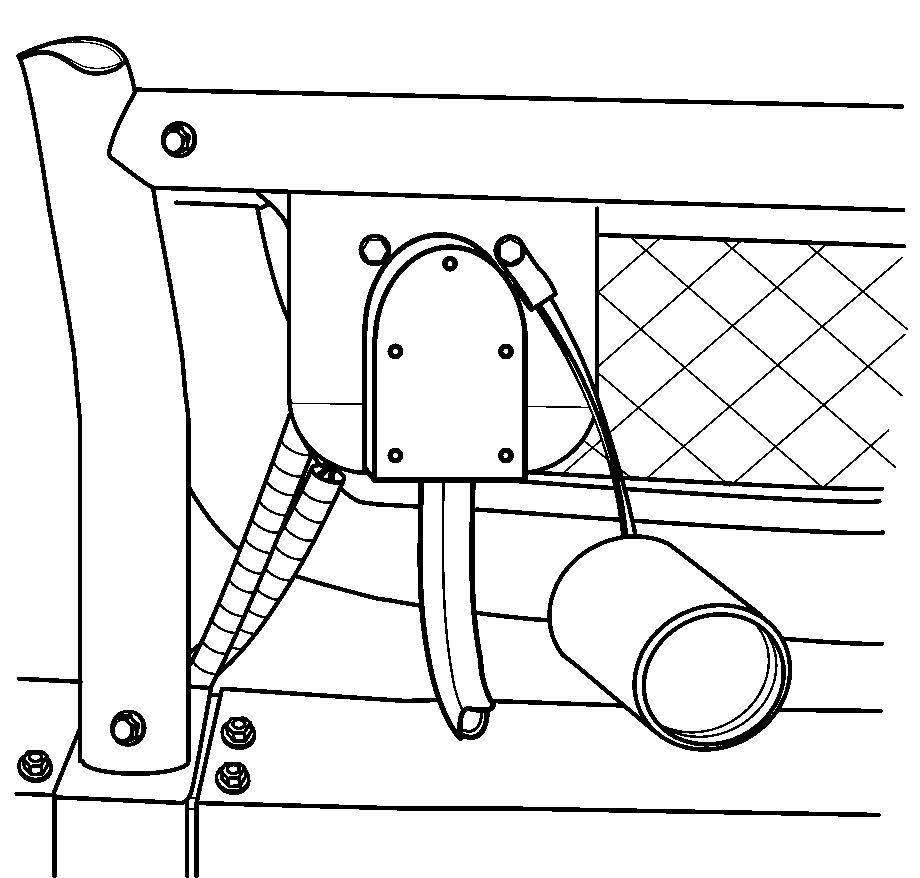
The NATO term for this system is slave start receptacle (1). In the event the system must be replaced, refer to Slave Receptacle Replacement .
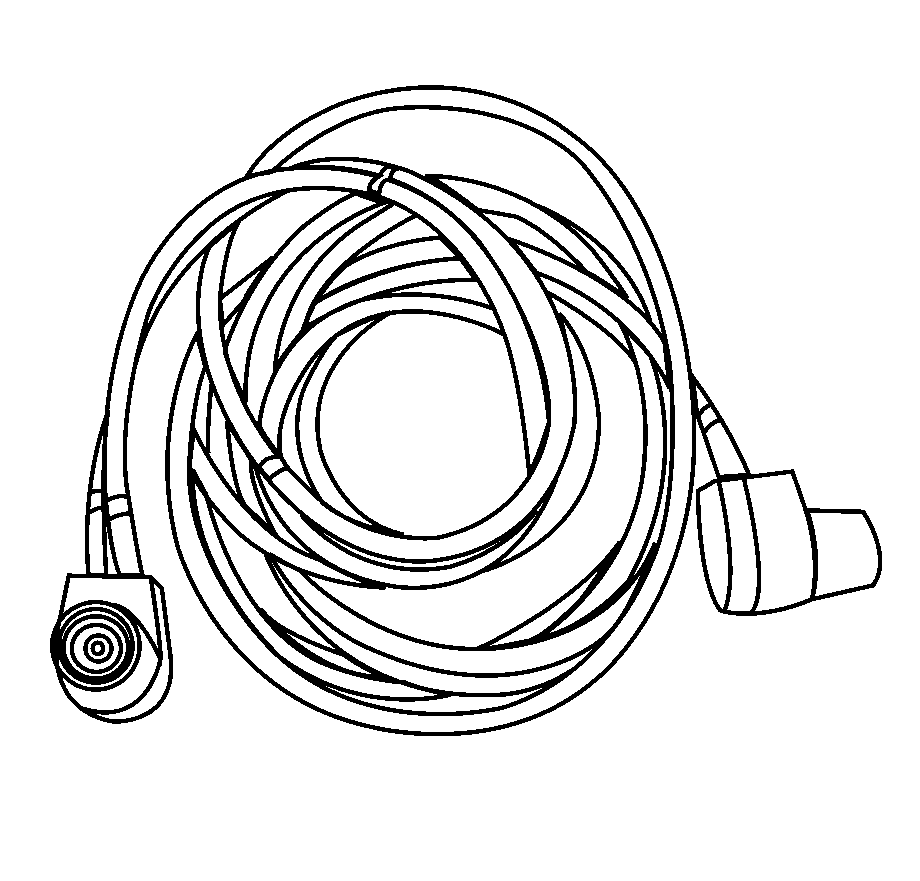
NATO Slave Cables are the only recommended method of jump starting similar vehicles.
Slave Starting

Caution: Batteries produce explosive gases. Batteries contain corrosive acid.
Batteries supply levels of electrical current high enough to cause burns.
Therefore, in order to reduce the risk of personal injury while working
near a battery, observe the following guidelines:
• Always shield your eyes. • Avoid leaning over the battery whenever possible. • Do not expose the battery to open flames or sparks. • Do not allow battery acid to contact the eyes or the skin. - Flush any contacted areas with water immediately and thoroughly. - Get medical help.
You should always use the slave receptacle (1) and NATO Slave Cable when performing this operation.
- Position the vehicles close enough so the slave cable can reach, but be sure the vehicles are not touching each other. If they are, it could cause a ground connection. You would not be able to start your vehicle, and the bad grounding could damage the electrical systems. To avoid the possibility of the vehicles rolling, set the parking brake firmly on both vehicles involved in the jump start procedure. Put the automatic transmission in PARK (P). Be sure the transfer case is not in NEUTRAL (N).
- Turn OFF the ignition on both vehicles. Unplug unnecessary accessories plugged into the cigarette lighter or accessory power outlets. Turn OFF all lamps that are not needed as well as radios. This will avoid sparks and help save both batteries.
- Locate the slave receptacles on both vehicles, and unscrew the covers.
- Connect the slave cable to the vehicle with the dead battery.
- Start the vehicle with the good batteries.
- Connect the slave cable to the vehicle with the good battery.
- Allow the vehicle with the dead battery to charge for 10 minutes.
- Start the vehicle with the dead battery.
- Remove the slave cable in the reverse order that it was installed. Take care not to let the cables touch a metal surface.
- Reinstall the slave start covers.


Caution: Using an open flame near a battery can cause battery gas to explode. People have been hurt doing this, and some have been blinded. Use a flashlight if you need more light.
Be sure the batteries have enough water. You do not need to add water to the Optima battery (or batteries) installed in the vehicle. But if a battery has filler caps, be sure the right amount of fluid is there. If it is low, add water to take care of that first. If you do not, explosive gas could be present. Battery fluid contains acid that can burn you. Do not get it on you. If you accidentally get it in your eyes or on your skin, flush the place with water and get medical help immediately.Caution: Keep hands, tools, and clothing away from the electric engine coolant fans in order to help prevent personal injury. These fans are electric and can turn on whether or not the engine is running. The fans can start automatically with the ignition in the ON position.
Important: It may take up to 30 minutes to charge the battery enough to start the vehicle depending on its state of charge.
Important: Never remove the cables with the starter engaged.
