For 1990-2009 cars only
Tools Required
| • | J 33791 Carrier Bushing Remover/Installer |
| • | J 36616 Axle Mount Bushing Remover/Installer |
Removal Procedure
- Remove the differential carrier assembly. Refer to Differential Carrier Assembly Replacement .
- Remove the upper differential carrier assembly bushing by performing the following steps:
- Remove the lower differential carrier assembly bushing by performing the following steps:

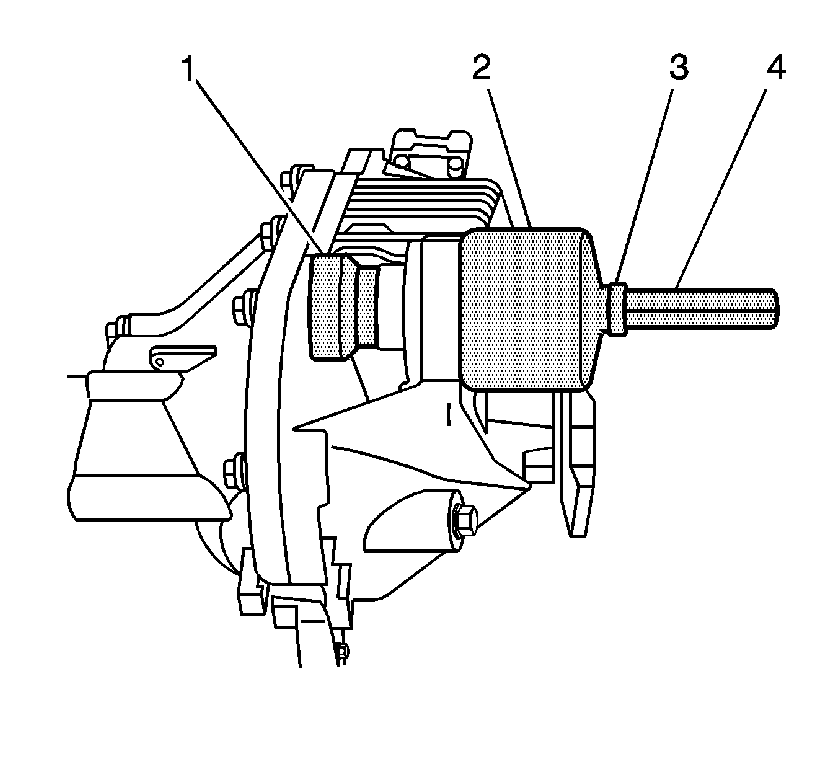
| 2.1. | Install the J 36616-2 (1), the J 33791-1 (2), the thrust bearing (3), the J 21474-18 (4), and the forcing screw as shown. |
| 2.2. | Remove the upper differential carrier assembly bushing by holding the forcing screw and slowly tightening the J 21474-18. |

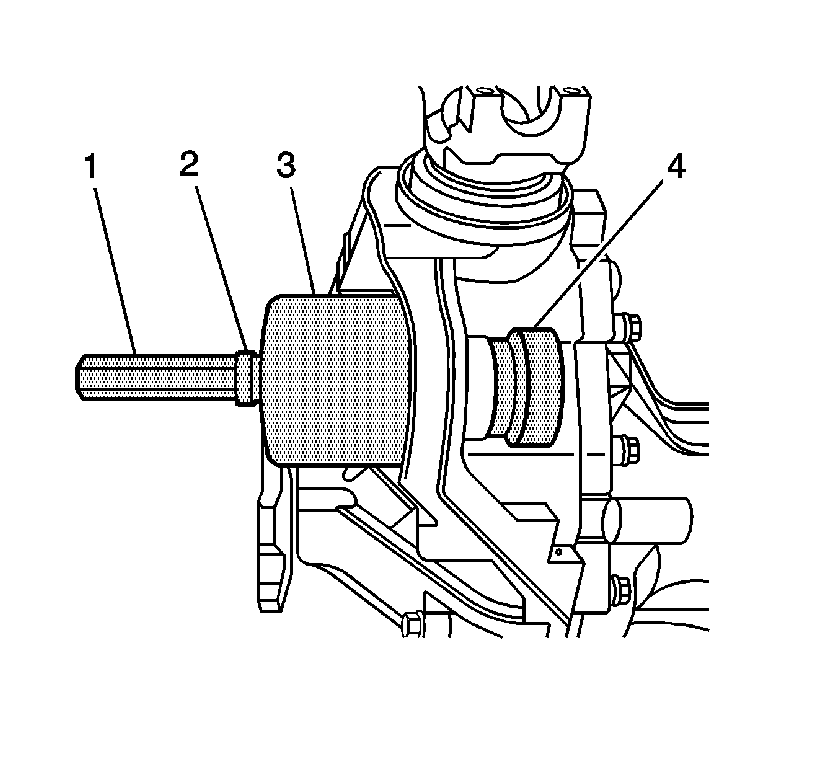
| 3.1. | Install the J 21474-18 (1), the thrust bearing (2), the J 33791-1 (3), the J 36616-2 (4), and the forcing screw as shown. |
| 3.2. | Remove the lower differential carrier assembly bushing by holding the forcing screw and slowly tightening the J 21474-18. |
Installation Procedure
- Install the lower differential carrier assembly bushing by performing the following steps:
- Install the upper differential carrier assembly bushing by performing the following steps:
- Install the differential carrier assembly. Refer to Differential Carrier Assembly Replacement .

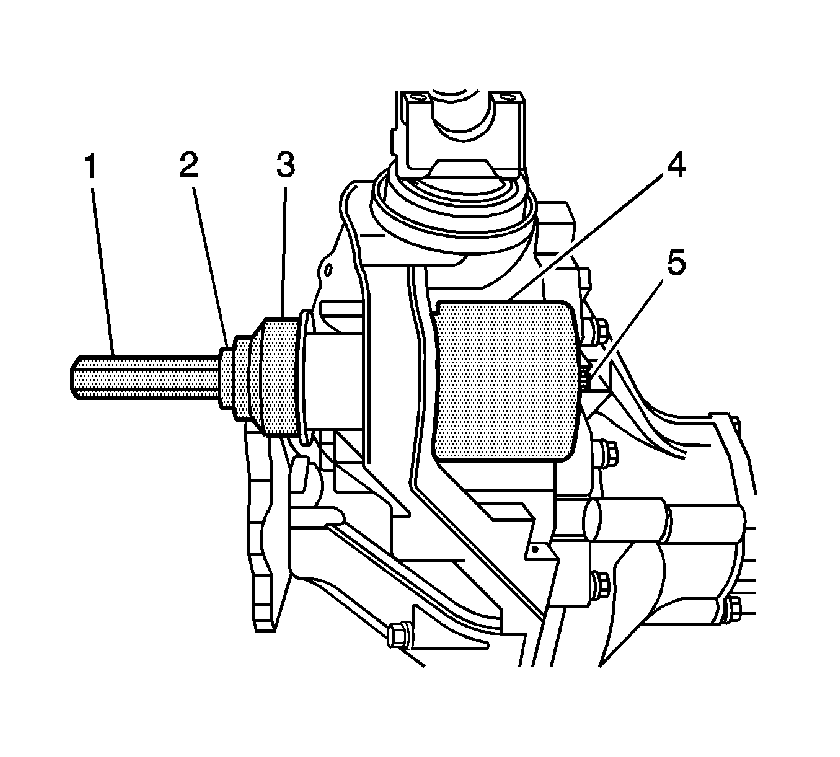
| 1.1. | Install the J 21474-18 (1), the thrust bearing (2), the J 36616-2 (3), the J 36616-1 (4), and the forcing screw (5) as shown. |
| 1.2. | While holding the forcing screw, slowly tighten the J 21474-18 until the bushing has stopped against the step on the bushing and is centered within the differential carrier assembly bushing bore. |

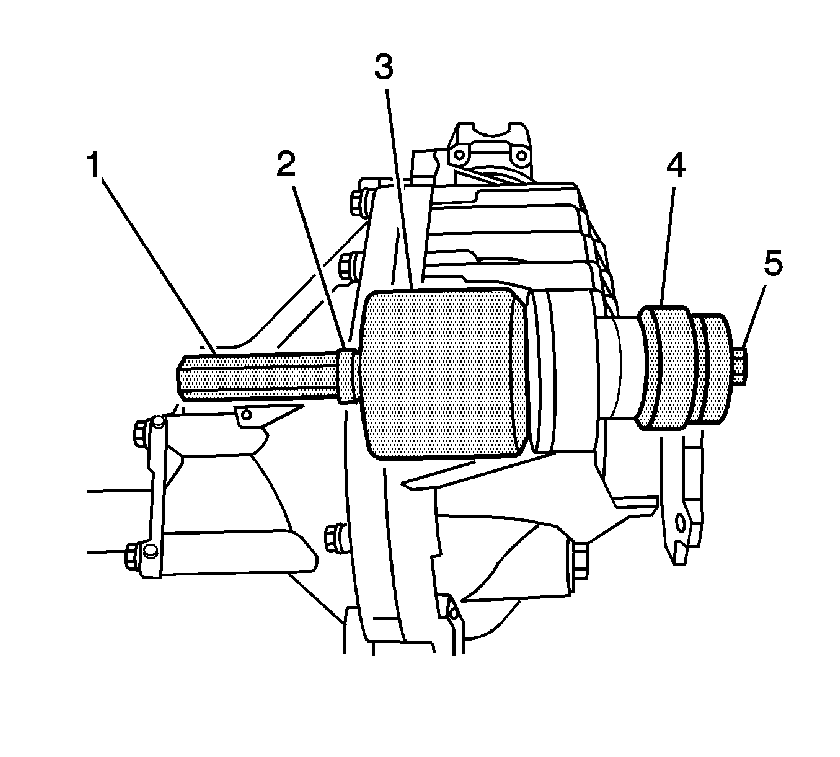
| 2.1. | Install the J 21474-18 (1), the thrust bearing (2), the J 36616-2 (3), the J 36616-1 (4), and the forcing screw (5) as shown. |
| 2.2. | While holding the forcing screw, slowly tighten the J 21474-18 until the bushing has stopped against the step on the bushing and is centered within the differential carrier assembly bushing bore. |
