For 1990-2009 cars only
Removal Procedure
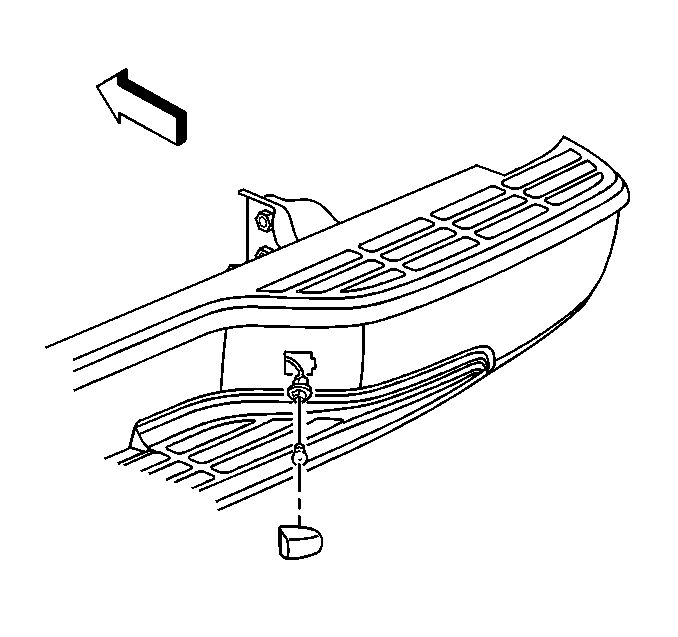
- Disconnect the license plate lamp harness.
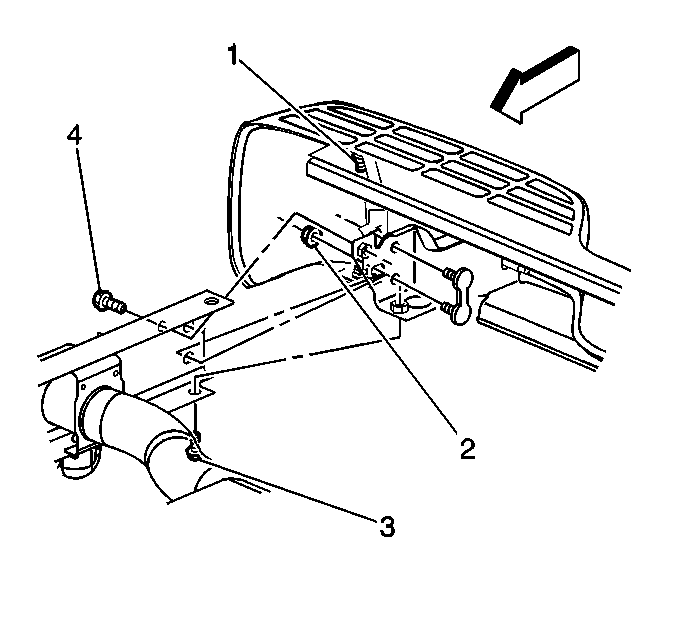
- Remove the impact bar nut (1).
- Remove the plate nuts (2).
- Remove the lower frame rail to bracket bolt (3).
- Remove the side frame rail to bracket bolt (4).
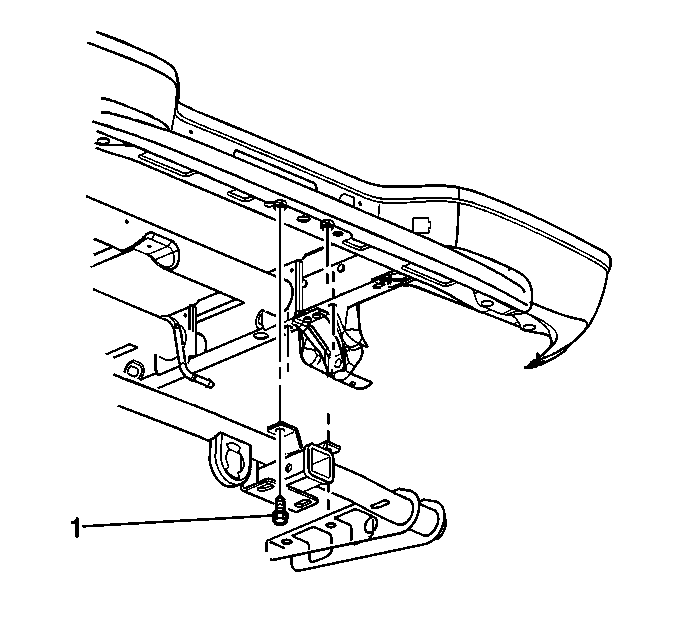
- Remove the rear trailer hitch to bumper bolts (1), if equipped.
- Remove the rear bumper from the vehicle.
Installation Procedure
- Position the rear bumper onto the vehicle.
- Install the rear trailer hitch to bumper bolts (1), if equipped.
- Install the impact bar nut (1).
- Install the plate nuts (2).
- Install the lower frame rail to bracket bolt (3).
- Install the side frame rail to bracket bolt (4).
- Install the bumper step pad. Refer to Rear Bumper Step Pad Replacement .
- Install the license plate lamp harness.

Notice: Refer to Fastener Notice in the Preface section.

Tighten
Tighten the impact bar nut (1) to 50 N·m (37 lb ft).
Tighten
Tighten the plate nuts (2) to 90 N·m (66 lb ft).
Tighten
Tighten the lower frame rail to bracket bolt (3) to 100 N·m (74 lb ft).
Tighten
Tighten the side frame rail to bracket bolt (4) to 40 N·m (30 lb ft).

Rear Bumper Replacement Maintenance Body
Removal Procedure
- Disconnect the battery cables. Refer to Battery Cable Disconnect and Connection in Engine Electrical.
- Remove the D-rings. Refer to Rear D-Ring Replacement in Frame and Underbody.
- Disconnect the trailer wiring harness.
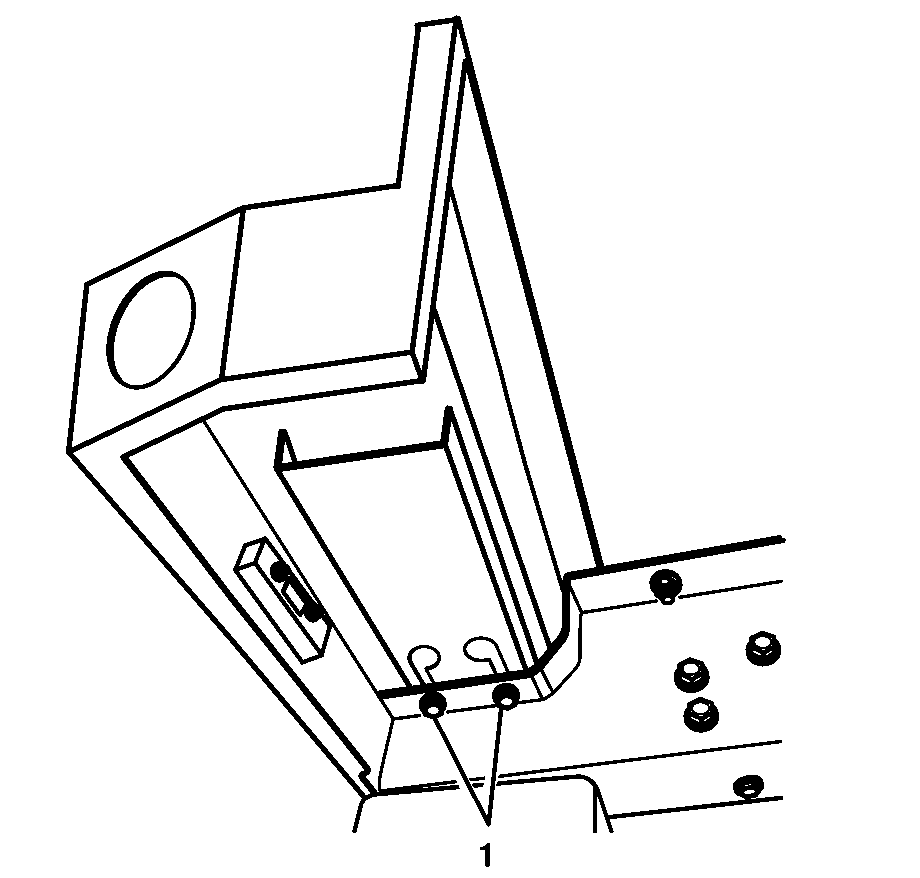
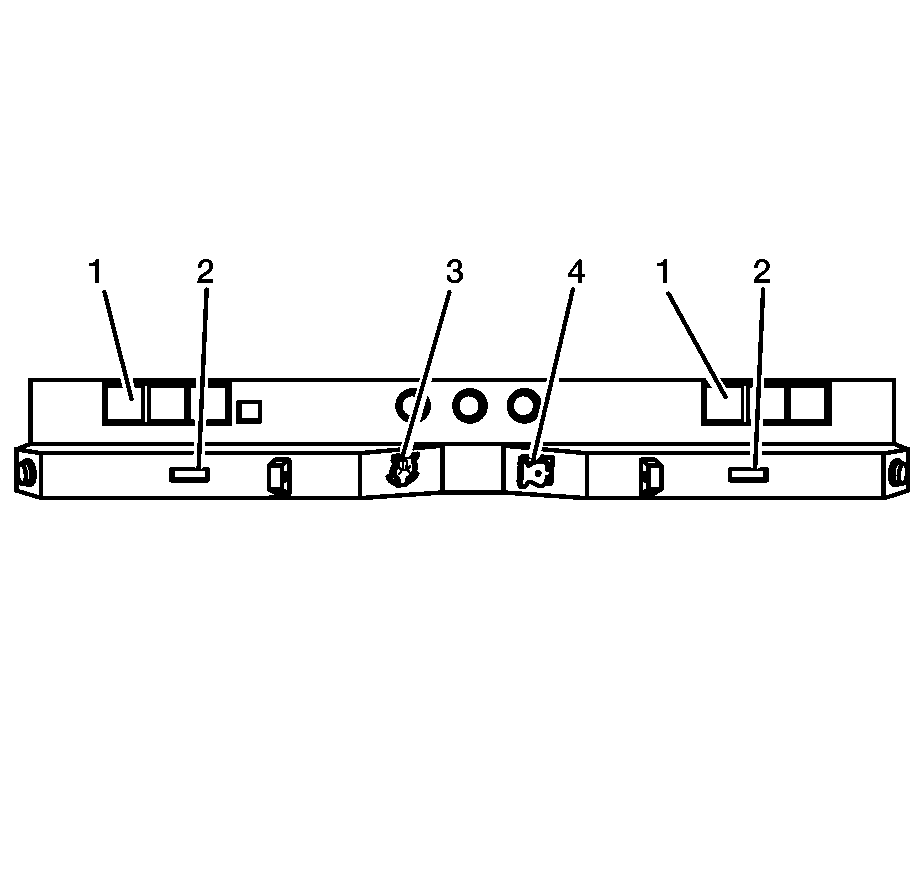
- Remove the 4 bumper bolts (1), right side shown left side similar.
- Using the aid of an assistant, remove the rear bumper from the vehicle by sliding it off the brackets.
- Remove the trailer wiring harness from the rear bumper. Refer to 12V and 24V Harness Replacement in Wiring Systems.
- Remove the marker lamps. Refer to Rear Marker Lamp Replacement in Lighting Systems.
- Remove the taillamps (1). Refer to Taillamp Replacement in Lighting Systems.
- Remove the blackout (B/O) marker lamps (2). Refer to Rear Marker Lamp Replacement in Lighting Systems.
- Remove the 12-pin trailer connector (4). Refer to Military Trailer Connector Replacement in Lighting Systems.
- Remove the commercial trailer connector (3). Refer to Commercial Trailer Connector Replacement in Lighting Systems.
Caution: Refer to Battery Disconnect Caution in the Preface section.

Installation Procedure
- Install the marker lamps. Refer to Rear Marker Lamp Replacement in Lighting Systems.
- Install the taillamps (1). Refer to Taillamp Replacement in Lighting Systems.
- Install the blackout (B/O) marker lamps (2). Refer to Rear Marker Lamp Replacement in Lighting Systems.
- Install the 12-pin trailer connector (4). Refer to Military Trailer Connector Replacement in Lighting Systems.
- Install the commercial trailer connector (3). Refer to Commercial Trailer Connector Replacement in Lighting Systems.
- Install the trailer wiring harness. Refer to 12V and 24V Harness Replacement in Wiring Systems.
- Using the aid of an assistant, position the rear bumper onto the vehicle by sliding it on to the tie down plates.
- Install the 4 bumper bolts (1), right side shown left side similar.
- Connect the trailer wiring harness.
- Connect the battery cables. Refer to Battery Cable Disconnect and Connection in Engine Electrical.
- Install the D-rings. Refer to Rear D-Ring Replacement in Frame and Underbody.


Notice: Refer to Fastener Notice in the Preface section.

Tighten
Tighten the bumper bolts to 79 N·m (59 lb ft).
Rear Bumper Replacement LSSV
Removal Procedure
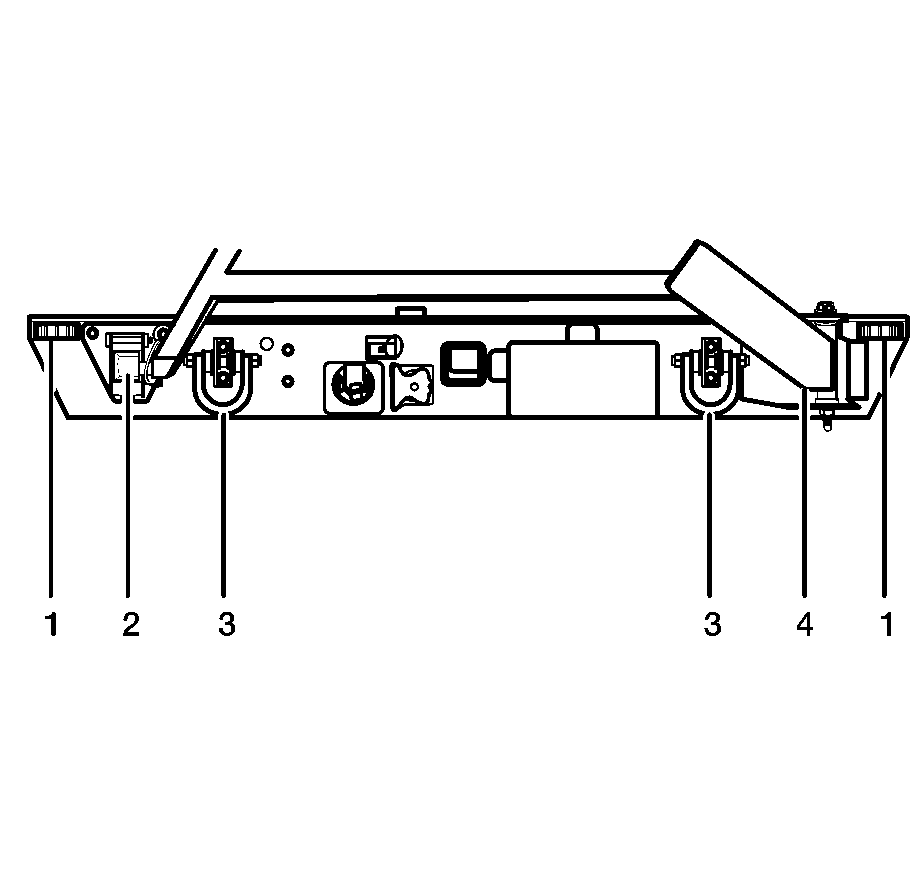
- Remove the swing away spare tire carrier pivot bracket (4) (if equipped). Refer to Spare Tire Carrier Pivot Bracket Replacement in Tires and Wheels.
- Remove the swing away spare tire carrier latch (2) (if equipped). Refer to Spare Tire Carrier Latch Replacement in Tires and Wheels.
- Remove the rear D-ring brackets (3). Refer to Rear D-Ring Bracket Replacement in Frame and Underbody.
- Remove the rear blackout (B/O) taillamps (1). Refer to Blackout (B/O) Taillamp Replacement in Lighting Systems.
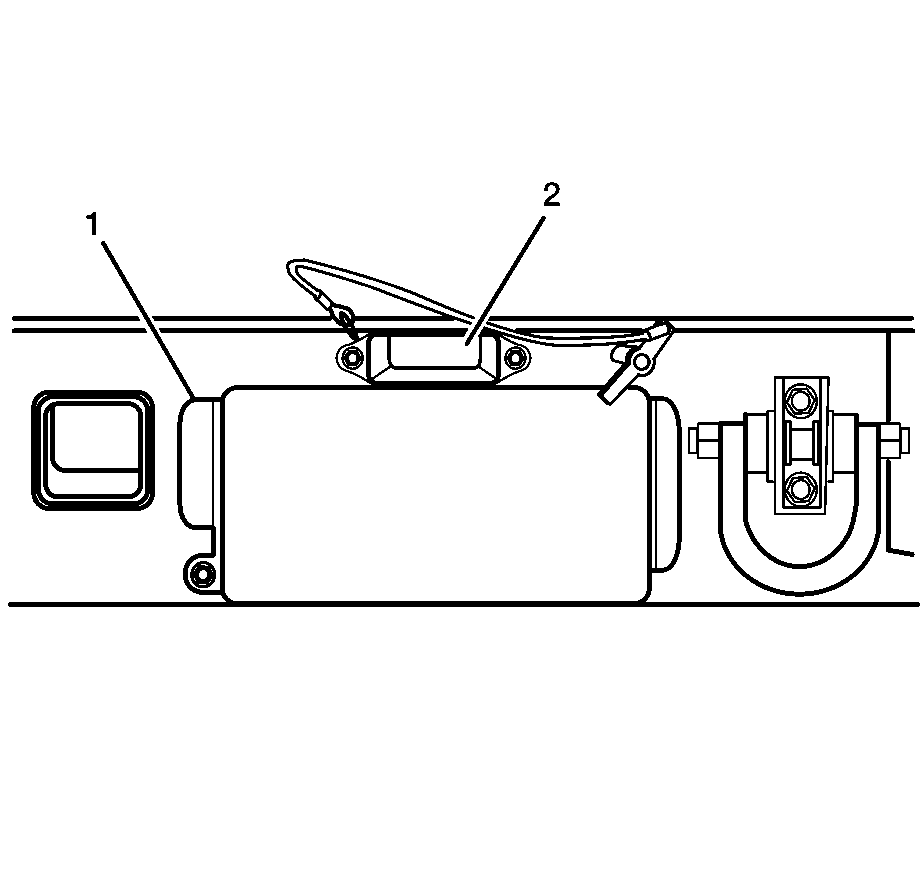
- Remove the license plate lamp (2). Refer to License Plate Lamp Replacement in Lighting Systems.
- Remove the license plate bracket (1). Refer to License Plate Bracket Replacement .
- Remove the rear step pad if equipped. Refer to Rear Bumper Step Pad Replacement .
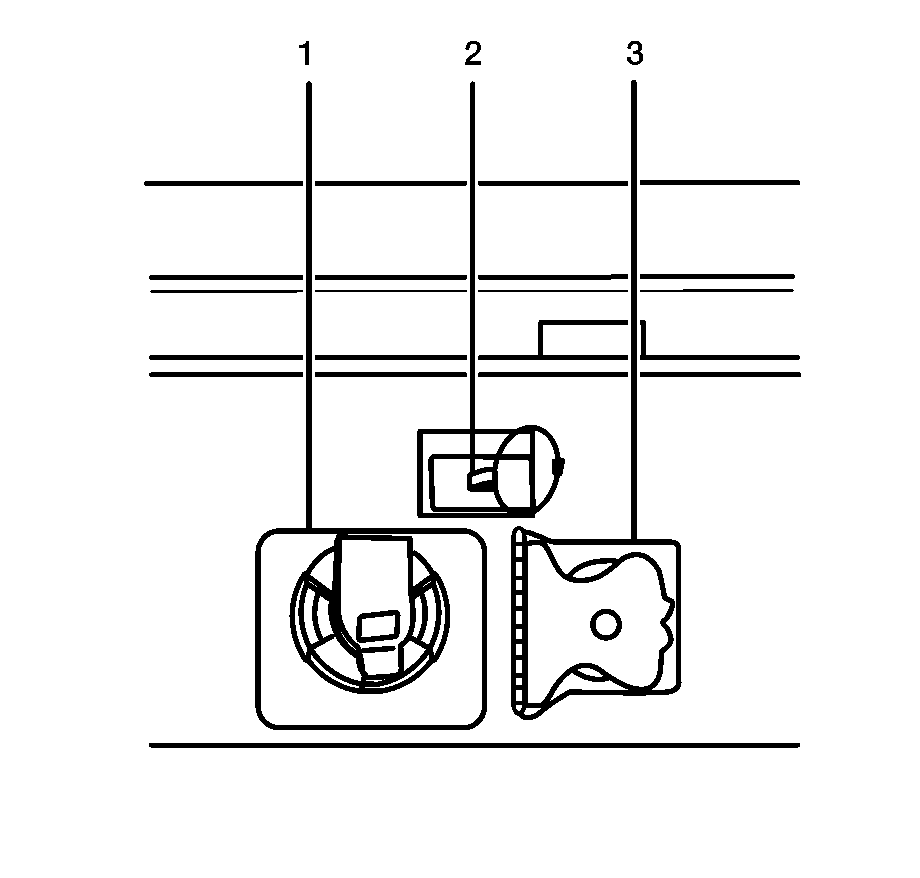
- Remove the 24V trailer connector (3). Refer to Military Trailer Connector Replacement in Lighting Systems.
- Remove the 12V trailer connector (1). Refer to Commercial Trailer Connector Replacement in Lighting Systems.
- Remove the rear winch power disconnect (2) (if equipped). Refer to Rear Winch Harness and Connector Replacement in Engine Electrical.
- Remove the rear relay mounting bracket from the bumper.
- Remove the rear lamp wiring harness. Refer to Lamp Harness Replacement - Rear in Wiring Systems.
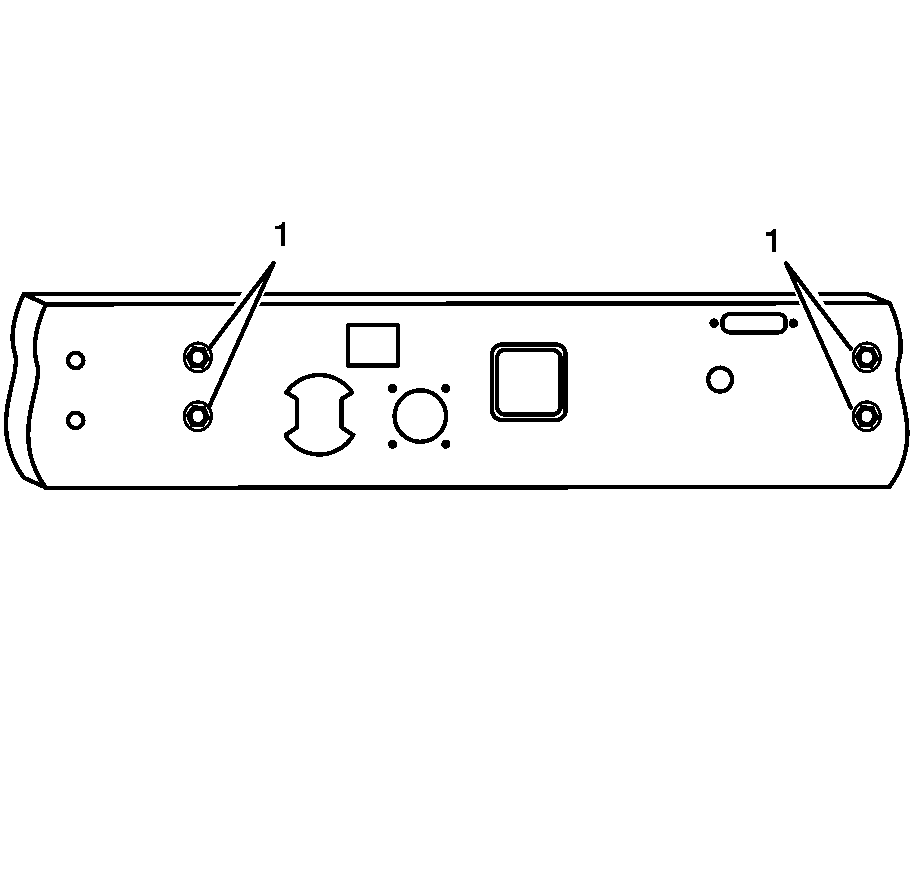
- Remove the bolts (1) securing the bumper to the vehicle.
- Remove the bumper and spacers from the mounting brackets.
Installation Procedure
- Position the bumper and spacers to the vehicle and loosely install the bolts (1).
- Align the bumper from side to side and tighten bolts.
- Install the rear lamp wiring harness. Refer to Lamp Harness Replacement - Rear in Wiring Systems.
- Install the rear relay mounting bracket from the bumper.
- Install the rear winch power disconnect (2) (if equipped). Refer to Rear Winch Harness and Connector Replacement in Engine Electrical.
- Install the 12V trailer connector (1). Refer to Commercial Trailer Connector Replacement in Lighting Systems.
- Install the 24V trailer connector (3). Refer to Military Trailer Connector Replacement in Lighting Systems.
- Install the license plate bracket (1). Refer to License Plate Bracket Replacement .
- Install the license plate lamp (2). Refer to License Plate Lamp Replacement in Lighting Systems.
- Install the rear step pads. Refer to Rear Bumper Step Pad Replacement .
- Install the rear blackout (B/O) taillamps (1). Refer to Blackout (B/O) Taillamp Replacement in Lighting Systems.
- Install the rear D-ring brackets (3). Refer to Rear D-Ring Bracket Replacement in Frame and Underbody.
- Install the swing away spare tire carrier latch (2) (if equipped). Refer to Spare Tire Carrier Latch Replacement in Tires and Wheels.
- Install the swing away spare tire carrier pivot bracket (4) (if equipped). Refer to Spare Tire Carrier Pivot Bracket Replacement in Tires and Wheels.

Notice: Refer to Fastener Notice in the Preface section.
Tighten
Tighten bumper bolts to 97 N·m (72 lb ft).


