Tools Required
| • | J 21368 Pump Body and Cover Alignment Band |
| • | J 36850 Transjel® Lubricant |
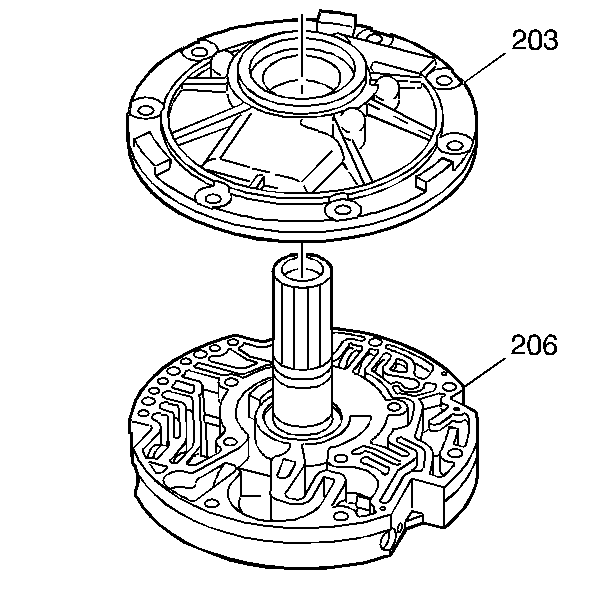
- Assemble the oil pump cover (206) and the oil pump body assembly (203).
- Install the vent passage splash shield (239).
- Install the oil pump cover bolts (220). Tighten the bolts with your fingers only.
- Install an oil pump bolt and seal assembly (3) into an oil pump bolt hole.
- Install the J 21368 onto the transmission oil pump assembly and tighten.
- Tighten the 5 oil pump cover bolts (220).
- Remove the J 21368 and the oil pump bolt and seal assembly (3).
- Install the transmission oil pump seal (5) on the oil pump assembly (4).
- Install the new overrun clutch housing oil seal rings (219) onto the oil pump cover.
- Ensure that the overrun clutch housing oil seal rings (219) move freely in the grooves.
- Use J 36850 or equivalent in order to keep the overrun clutch housing oil seal rings in place.
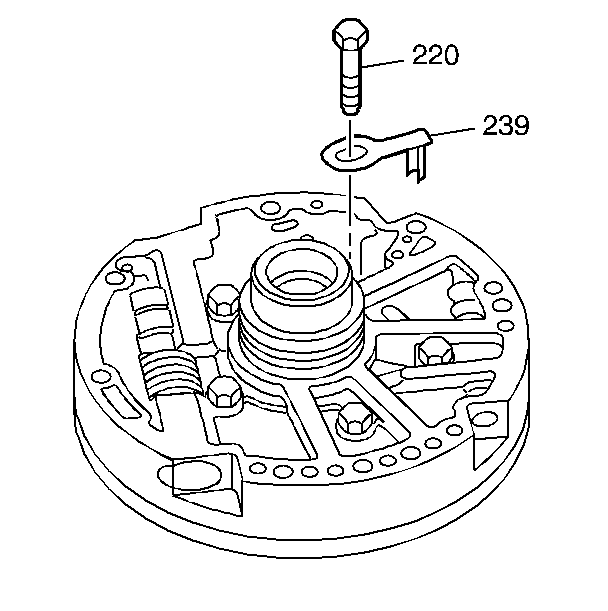
Important: The tab on the vent passage splash shield (239) fits into the hole in the oil pump cover. The hole in the vent passage splash shield (239) fits under the bolt head.
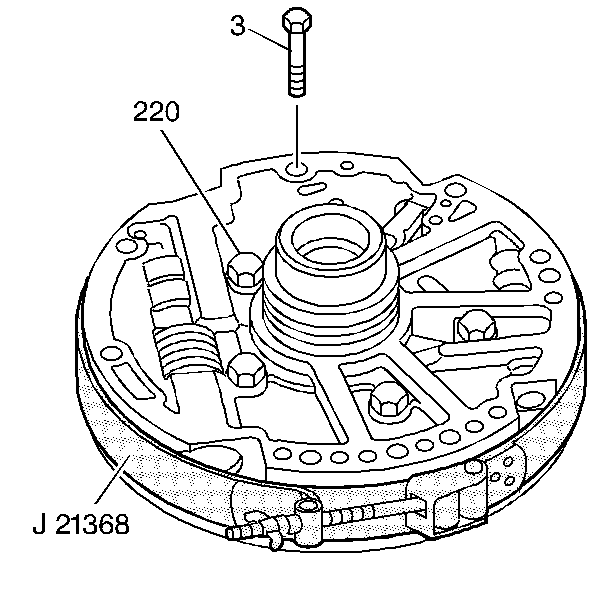
Important: The outside diameter of the oil pump body assembly and oil pump cover must be properly aligned before the alignment band can be tightened. This ensures that the oil pump fits into the transmission case opening and maintains maximum oil pump efficiency.
Notice: Use the correct fastener in the correct location. Replacement fasteners must be the correct part number for that application. Fasteners requiring replacement or fasteners requiring the use of thread locking compound or sealant are identified in the service procedure. Do not use paints, lubricants, or corrosion inhibitors on fasteners or fastener joint surfaces unless specified. These coatings affect fastener torque and joint clamping force and may damage the fastener. Use the correct tightening sequence and specifications when installing fasteners in order to avoid damage to parts and systems.
Tighten
Tighten the bolts to 24 N·m (18 lb ft) in an alternating pattern.
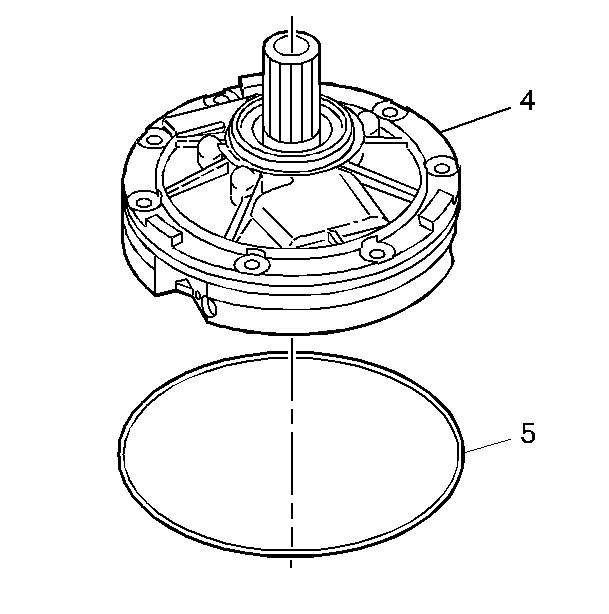
Notice: Coat the transmission oil pump seal with J 36850 or equivalent. This will ease assembly and prevent damage to the seal.
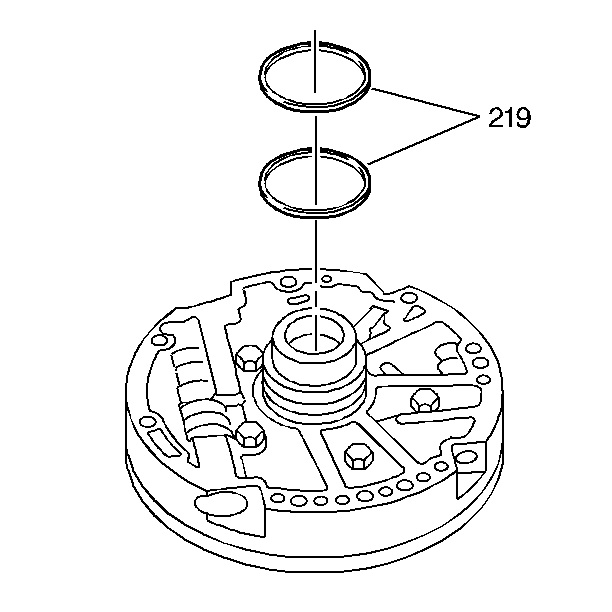
Notice: Do not overexpand the oil seal rings. Damage to the rings may result.
Tools Required
| • | J 21368 Pump Body and Cover Alignment Band |
| • | J 36850 Assembly Lubricant |
- Assemble the oil pump cover (206) and the oil pump body assembly (203).
- Install the vent passage splash shield (239).
- Install the oil pump cover bolts (220). Tighten the bolts with your fingers only.
- Install an oil pump bolt and seal assembly (3) into an oil pump bolt hole.
- Install the J 21368 onto the transmission oil pump assembly and tighten.
- Tighten the 5 oil pump cover bolts (220).
- Remove the J 21368 and the oil pump bolt and seal assembly (3).
- Install the transmission oil pump seal (5) on the oil pump assembly (4).
- Install the new overrun clutch housing oil seal rings (219) onto the oil pump cover.
- Ensure that the overrun clutch housing oil seal rings (219) move freely in the grooves.
- Use J 36850 or equivalent in order to keep the overrun clutch housing oil seal rings in place.


Important: The tab on the vent passage splash shield (239) fits into the hole in the oil pump cover. The hole in the vent passage splash shield (239) fits under the bolt head.

Important: The outside diameter of the oil pump body assembly and oil pump cover must be properly aligned before the alignment band can be tightened. This ensures that the oil pump fits into the transmission case opening and maintains maximum oil pump efficiency.
Notice: Use the correct fastener in the correct location. Replacement fasteners must be the correct part number for that application. Fasteners requiring replacement or fasteners requiring the use of thread locking compound or sealant are identified in the service procedure. Do not use paints, lubricants, or corrosion inhibitors on fasteners or fastener joint surfaces unless specified. These coatings affect fastener torque and joint clamping force and may damage the fastener. Use the correct tightening sequence and specifications when installing fasteners in order to avoid damage to parts and systems.
Tighten
Tighten the bolts to 24 N·m (18 lb ft) in
an alternating pattern.

Notice: Coat the transmission oil pump seal with J 36850 or equivalent. This will ease assembly and prevent damage to the seal.

Notice: Do not overexpand the oil seal rings. Damage to the rings may result.
