Flushing Radiator
Radiator Restrictions
A dirty, obstructed, or leaking radiator core causes overheating. Scale deposits result from using hard (high-mineral) water in the cooling system. Heating these minerals causes the formation of a hard coating on the surfaces within the radiator. Scaling reduces the transfer of heat. Some hard water produces a silt-like deposit that restricts the flow of water. A radiator that is partially restricted should be removed and cleaned by a radiator repair specialist. Replace a radiator core that is plugged or has a heavy scale.
Flushing Procedure
There are different methods to flush the cooling system. Back flushing is recommended. Special equipment is available. Follow the equipment manufacturer's instructions for use.
Important: Remove the coolant thermostat before flushing the cooling system. Refer to Engine Coolant Thermostat Replacement .
Dispose of the used engine coolant properly.
| • | Store the used engine coolant in a used coolant holding tank, while awaiting approved disposal methods |
| • | Never pour used engine coolant down the drain |
| • | Ethylene Glycol based antifreeze is a toxic chemical |
Flushing Oil Cooler System
Removal Procedure
If foreign material has entered the oil cooler or if the engine has been damaged internally, flush the oil cooler system in order to prevent premature engine wear.
- Disconnect the negative battery cable.
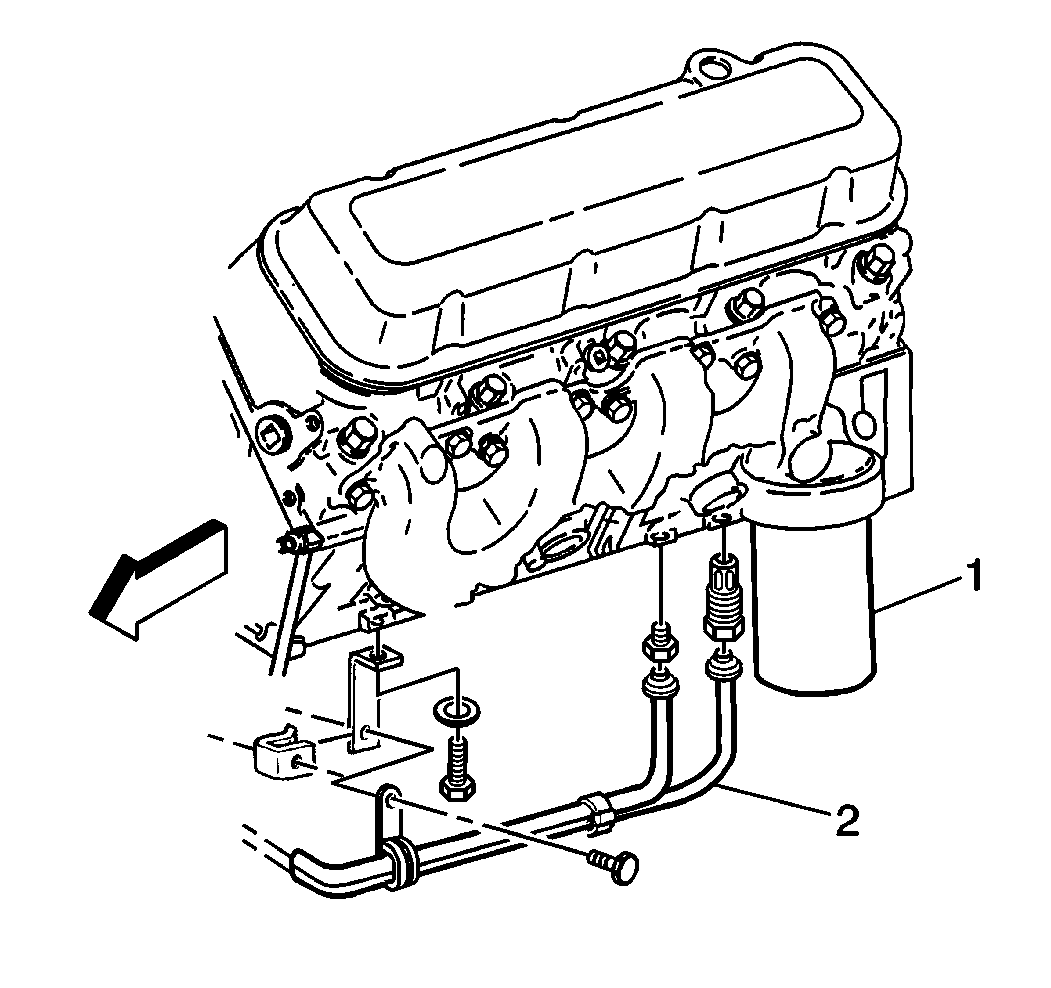
- Remove the engine oil cooler lines (2) from the mounting bracket.
- Place a drain pan under the engine oil cooler line connectors.
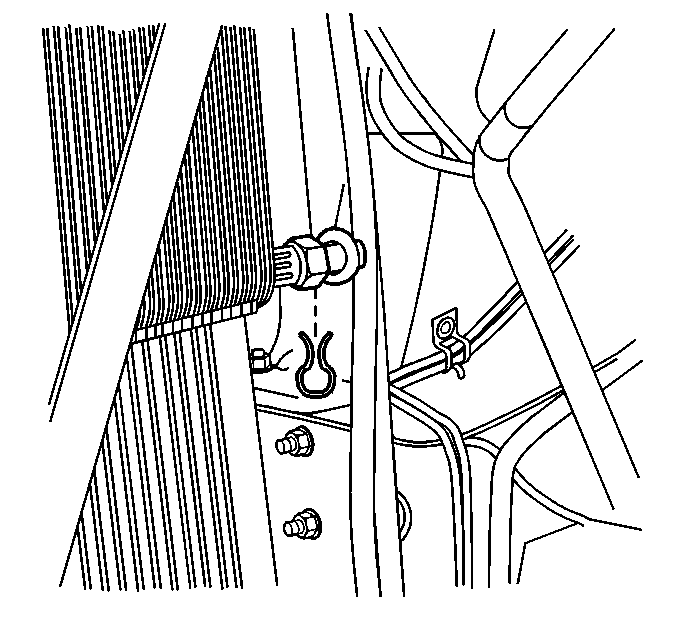
- Remove the plastic clip cover and use a small pick-like tool in order to remove the cooler line quick connector clip.
- Remove the cooler line from the connector.
- Use clean solvent and compressed air in order to back-flush the oil cooler and the lines.
- Flush the system with the same type of engine oil that is normally circulated through the cooler.
- Remove the oil filter (1).
- Discard the oil filter.
- Clean all of the components in a suitable solvent.
- Dry all of the components with compressed air.
- Inspect the following components for damage or distortion:
- Inspect the flow through the cooler.
- Replace the oil cooler if the flow is restricted.
Caution: Unless directed otherwise, the ignition and start switch must be in the OFF or LOCK position, and all electrical loads must be OFF before servicing any electrical component. Disconnect the negative battery cable to prevent an electrical spark should a tool or equipment come in contact with an exposed electrical terminal. Failure to follow these precautions may result in personal injury and/or damage to the vehicle or its components.


Notice: Do not use more than 690 kPa (100psi) air to clean the cooler and lines. Exceeding 690 kPa (100 psi) could damage the cooler or lines.

| • | The fittings |
| • | The connectors |
| • | The bushings |
| • | The cooler lines |
Installation Procedure
Notice: Make sure the connector clip engages all three slots in the connector. Failure to properly install the connector clip could cause the oil cooler line to come loose and cause damage to the engine.
Use the following procedure in order to install the cooler line quick connector clip:
- Use your thumb and forefinger in order to insert the connector clip into one of the three recesses in the connector.
- With one end of the clip engaged in the connector slot, use your thumb to rotate the clip around the connector until all three tabs snap into place.
- Push the plastic clip cover over the connector clip. This clip cover must be in place to secure the connector clip.

Use the following procedure in order to install the cooler line to the quick connector:
- Fully insert the oil cooler line into the quick connector.
- A distinct snap will be heard when the oil cooler line is assembled to the quick connector.
- Pull the fitting forcefully in order to ensure full installation.
- Connect the engine cooler oil lines (2) to the mounting bracket.
- Install a new oil filter (1).
- Refill the engine oil to the correct level.
- Connect the negative battery cable.
- Start the engine.
- Inspect the system for leaks.

Caution: Unless directed otherwise, the ignition and start switch must be in the OFF or LOCK position, and all electrical loads must be OFF before servicing any electrical component. Disconnect the negative battery cable to prevent an electrical spark should a tool or equipment come in contact with an exposed electrical terminal. Failure to follow these precautions may result in personal injury and/or damage to the vehicle or its components.
