Removal Procedure
Tools Required
| • | J 7804-A Puller |
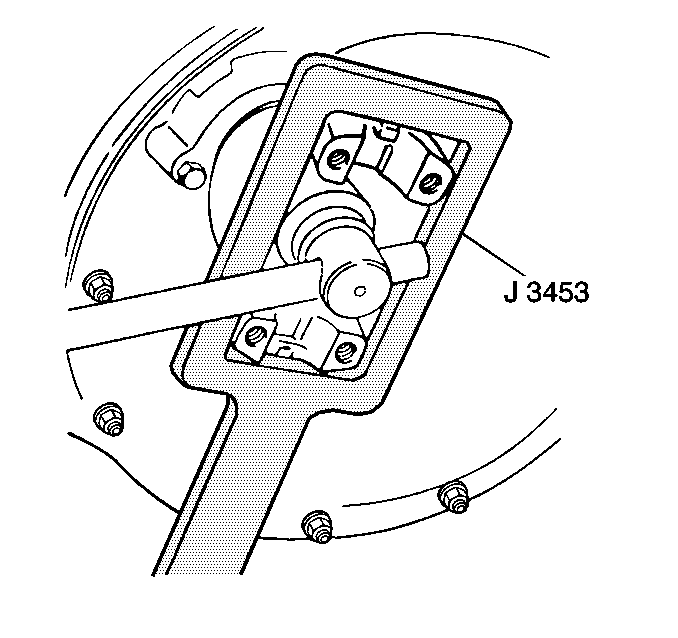
| • | J 3453 Holding Bar |
- Raise the vehicle and suitably support the vehicle with safety stands. Refer to Lifting and Jacking the Vehicle .
- Remove the propeller shaft from the pinion flange. Refer to Three-Piece Propeller Shaft Replacement in Propeller Shaft.
- Hold the pinion flange using the J 3453 .
- Remove the pinion nut from the yoke.
- Remove the pinion flange yoke from the axle carrier using the tool special nut and forcing screw of the J 7804-A .
- Remove the pinion oil seal from the axle carrier.
- Inspect for a smooth oil seal surface, worn drive splines, damaged ears on the pinion flange, and a smooth bearing contact surface.
- Replace parts as necessary.
- Clean foreign material from the contact area.
Important: Observe and accurately mark the positions of all driveline components relative to the propeller shaft and axles prior to disassembly. These components include the propeller shaft, drive axles, pinion flanges, output shafts, etc. Reassemble all components in the exact relationship the components had to each other during removal. Follow specifications and torque values. Follow any measurements made prior to disassembly. Refer to Rear Axle Description .

Installation Procedure
- Pack the cavity between the lips of the oil seal with an extreme pressure lithium-base lubricant.
- Press the oil seal into the bore.
- Install the pinion flange yoke onto the pinion flange.
- Install the washer and the pinion nut using the toolJ 3453 .
- Install the propeller shaft to the pinion flange. Refer to Three-Piece Propeller Shaft Replacement in Propeller Shaft.
- Remove the safety stands and lower the vehicle.
Important: Observe and accurately mark the positions of all driveline components relative to the propeller shaft and axles prior to disassembly. These components include the propeller shaft, drive axles, pinion flanges, output shafts, etc. Reassemble all components in the exact relationship the components had to each other during removal. Follow specifications and torque values. Follow any measurements made prior to disassembly.
Notice: Do not hammer the pinion flange onto the pinion shaft or component damage will occur.

Notice: Use the correct fastener in the correct location. Replacement fasteners must be the correct part number for that application. Fasteners requiring replacement or fasteners requiring the use of thread locking compound or sealant are identified in the service procedure. Do not use paints, lubricants, or corrosion inhibitors on fasteners or fastener joint surfaces unless specified. These coatings affect fastener torque and joint clamping force and may damage the fastener. Use the correct tightening sequence and specifications when installing fasteners in order to avoid damage to parts and systems.
Tighten
Tighten the pinion nut to 1088 N·m (802 lb ft).
