Yoke Replacement for Chevrolet Chevy P32 RV/Van Chassis 1999
Yoke Replacement Manual Transmission
Removal Procedure
- Raise and suitably support the vehicle. Refer to Lifting and Jacking the Vehicle in General Information.
- Remove the propeller shaft. Refer to Propeller Shaft Replacement
- Remove the bolts and retainers.
- Remove the bolt and washer.
- Remove the yoke.
- Inspect the splines for wear, burrs, or twisting.
- Inspect the yoke ears for damage.
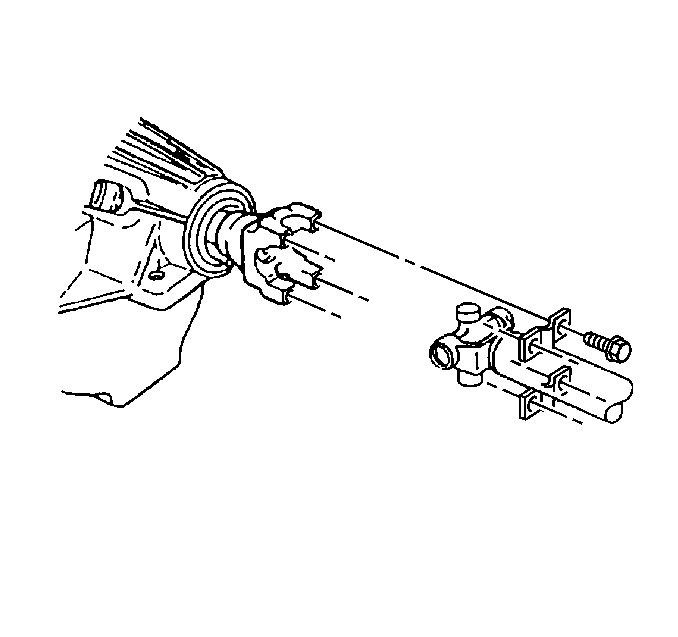
Important: Cap the end of the transmission in order to minimize fluid loss.
Installation Procedure
- Install the front yoke.
- Install the washer and bolt.
- Install the retainers and bolts.
- Install the propeller shaft. Refer to Propeller Shaft Replacement .
- Remove the safety stand, and lower the vehicle.
- Inspect the transmission fluid level. Refer to Fluid Replacement in Manual Transmission.
Notice: Use the correct fastener in the correct location. Replacement fasteners must be the correct part number for that application. Fasteners requiring replacement or fasteners requiring the use of thread locking compound or sealant are identified in the service procedure. Do not use paints, lubricants, or corrosion inhibitors on fasteners or fastener joint surfaces unless specified. These coatings affect fastener torque and joint clamping force and may damage the fastener. Use the correct tightening sequence and specifications when installing fasteners in order to avoid damage to parts and systems.
Tighten
Tighten the bolt to 110 N·m (81 lb ft).
Tighten
Tighten the bolts to 20 N·m (15 lb ft).
Yoke Replacement With Mounted Park Brake
Removal Procedure
- Raise and suitably support the vehicle. Refer to Lifting and Jacking the Vehicle in General Information.
- Remove the propeller shaft. Refer to Two-Piece Propeller Shaft Replacement or Three-Piece Propeller Shaft Replacement .
- Remove the bolt and washer from the center of the yoke.
- Remove the park brake drum and yoke assembly from the transmission.
- Remove the bolts holding the drum to the yoke.
- Inspect the splines for wear, burrs, or twisting.
- Inspect the yoke ears for damage.
Important: On two or three-piece propeller shafts, the front yoke is bolted to the tailshaft.
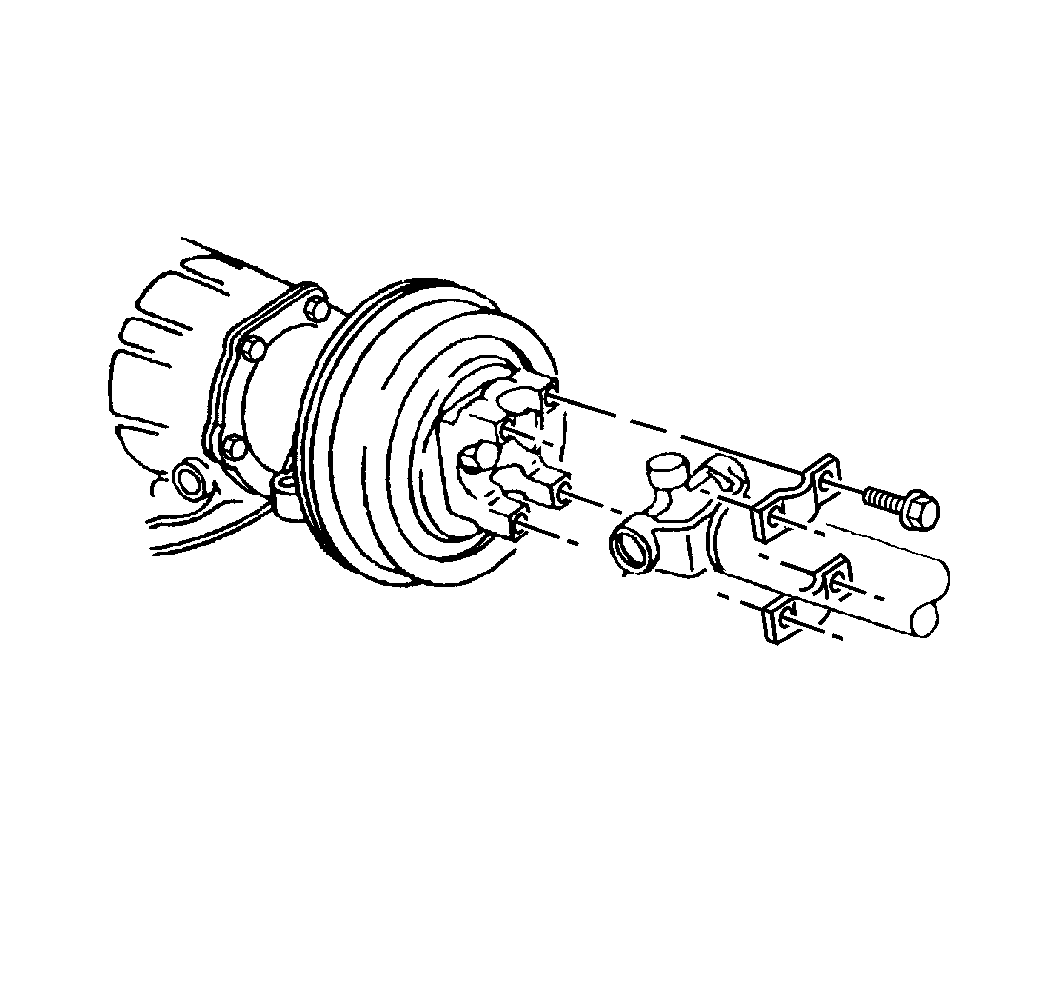
Important: Cap the end of the transmission in order to minimize fluid loss.
Installation Procedure
- Install the bolts holding the drum to the yoke.
- Install the drum and yoke assembly to the transmission.
- Install the new washer and bolt to the transmission mainshaft at the center of the yoke.
- Install the propeller shaft. Refer to Two-Piece Propeller Shaft Replacement or Three-Piece Propeller Shaft Replacement .
- Remove the safety stand, and lower the vehicle.
- Inspect the transmission fluid level. Refer to Automatic Transmission Fluid and Filter Replacement
Notice: Use the correct fastener in the correct location. Replacement fasteners must be the correct part number for that application. Fasteners requiring replacement or fasteners requiring the use of thread locking compound or sealant are identified in the service procedure. Do not use paints, lubricants, or corrosion inhibitors on fasteners or fastener joint surfaces unless specified. These coatings affect fastener torque and joint clamping force and may damage the fastener. Use the correct tightening sequence and specifications when installing fasteners in order to avoid damage to parts and systems.
Tighten
Tighten the bolts to 40 N·m (30 lb ft).
Tighten
Tighten the bolt to 110 N·m (81 lb ft).
Yoke Replacement Automatic Transmission
Removal Procedure
- Raise and suitably support the vehicle. Refer to Lifting and Jacking the Vehicle in General Information.
- Remove the propeller shaft. Refer to Two-Piece Propeller Shaft Replacement or Three-Piece Propeller Shaft Replacement .
- Remove the bolt and washer.
- Remove the yoke.
- Inspect the splines for wear, burrs, or twisting.
- Inspect the yoke ears for damage.
Important: On two or three-piece propeller shafts, the front yoke is bolted to the tailshaft.
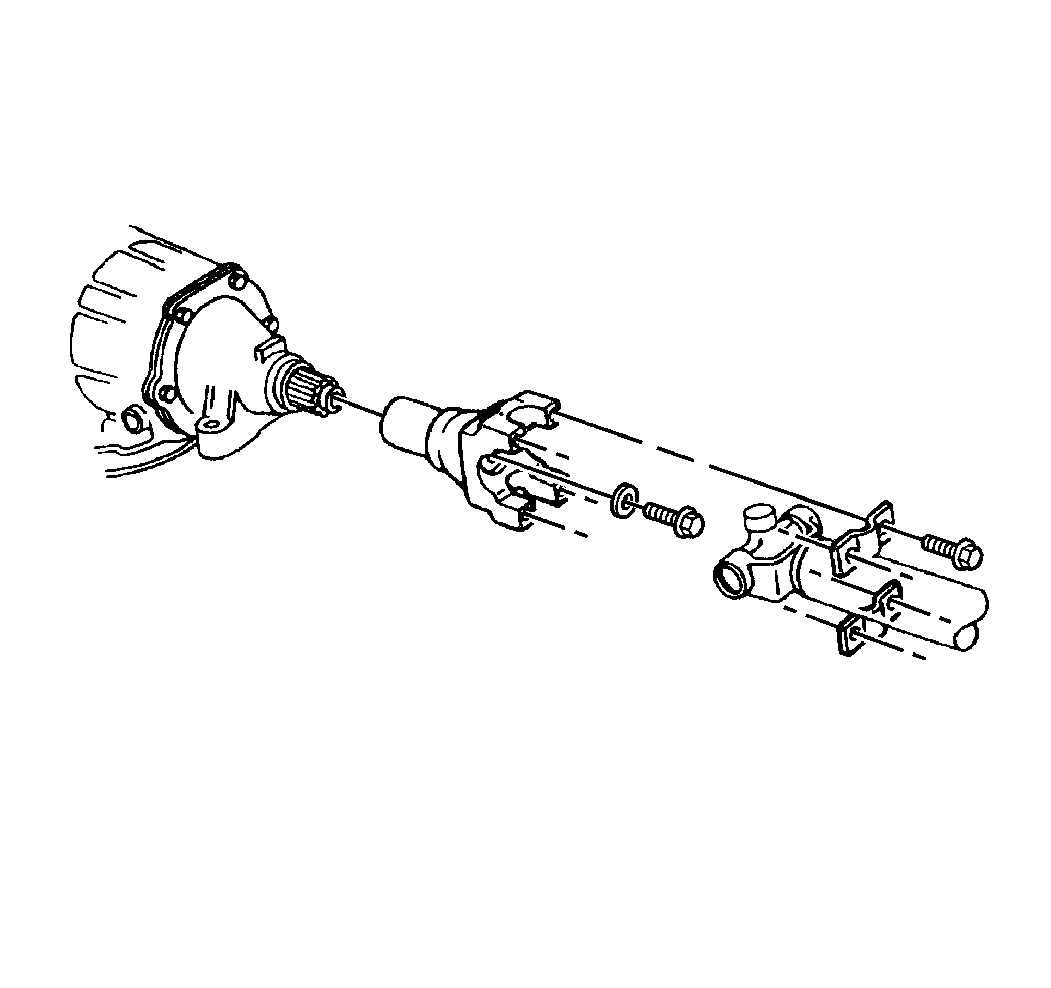
Important: Cap the end of the transmission in order to minimize fluid loss.
Installation Procedure
- Install the front yoke.
- Install the washer and bolt.
- Install the propeller shaft. Refer to Two-Piece Propeller Shaft Replacement or Three-Piece Propeller Shaft Replacement .
- Remove the safety stand, and lower the vehicle.
- Inspect the transmission fluid level. Refer to Automatic Transmission Fluid and Filter Replacement .
Notice: Use the correct fastener in the correct location. Replacement fasteners must be the correct part number for that application. Fasteners requiring replacement or fasteners requiring the use of thread locking compound or sealant are identified in the service procedure. Do not use paints, lubricants, or corrosion inhibitors on fasteners or fastener joint surfaces unless specified. These coatings affect fastener torque and joint clamping force and may damage the fastener. Use the correct tightening sequence and specifications when installing fasteners in order to avoid damage to parts and systems.
Tighten
Tighten the bolt to 110 N·m (81 lb ft).
