Steering Shaft, Lower Bearing, and Steering Column Jacket - Off Vehicle Floor Shift
Removal Procedure
- Remove the upper column. Refer to Steering Column (Upper Column).
- Remove the housing cover. Refer to Steering Column (Housing Cover).
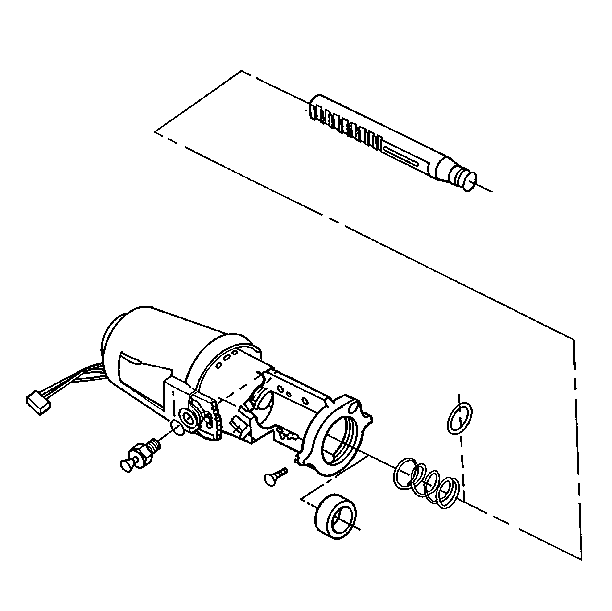
- Remove the upper shaft from the housing.
- Remove the cover pins from the housing (only if replacing the steering column).
- Remove the bearing collar and the compression spring.
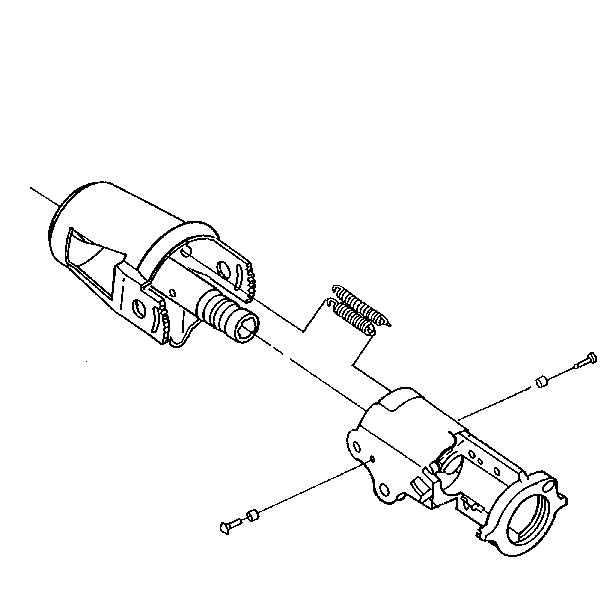
- Remove the steering column mounting bracket.
- Remove the tilt bolts from the housing and outer tube assembly.
- Remove the lower steering column shroud and the column wiring harness.
- Remove the extension springs.
- Remove the screws and the column stop spacers.
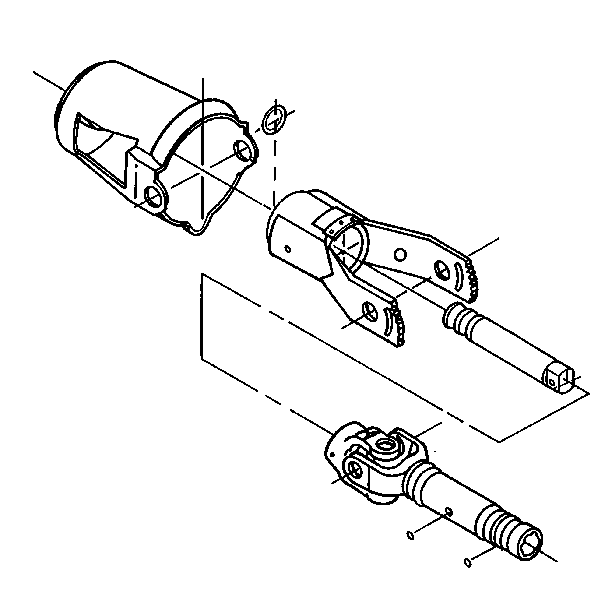
- Remove the snap ring from the yoke assembly.
- Remove the outer tube assembly from the housing.
- Remove the lower shaft retaining ring.
- Remove the lower shaft and yoke assembly from the outer tube assembly.
- Remove the lower shaft from the yoke assembly.
- Remove the ball and the positioning ball from the yoke assembly.
Installation Procedure
- Install the ball and the positioning ball on the yoke assembly.
- Attach the lower shaft to the yoke assembly.
- Install the lower shaft and yoke assembly to the outer tube assembly.
- Install the snap ring onto the outer tube assembly and the lower shaft.
- Install the outer tube assembly onto the housing.
- Install the extension springs on the outer tube assembly and housing.
- Install the column stop spacers on the housing using the screws.
- Install the lower steering column shroud and the column wiring harness onto the outer tube assembly.
- Install the tilt bolts to the housing to secure the shroud.
- Install the steering column mounting bracket onto the outer tube assembly.
- Install the bearing collar and the compression spring onto the shaft.
- Insert the cover pins into the housing (if installing a new steering column).
- Install the upper shaft onto the housing.
- Install the housing cover. Refer to Steering Column (Housing Cover).
- Install the upper column. Refer to Steering Column (Upper Column).
- Inspect the column to ensure that there are no wires, air lines, or hydraulic lines lying on the rotating components.
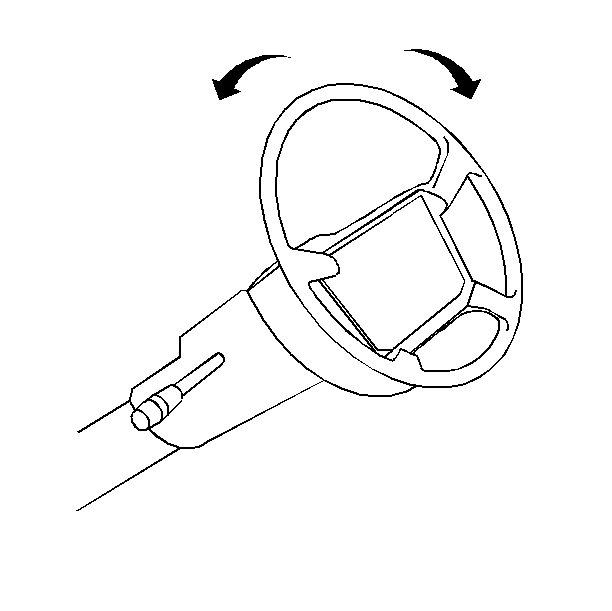
- Rotate the steering wheel to the right and then to the left.
NOTICE: Ensure that all fasteners are securely seated before tightening to the specified torque value. Failure to do so may result in component damage or steering column malfunction.
Notice: Use the correct fastener in the correct location. Replacement fasteners must be the correct part number for that application. Fasteners requiring replacement or fasteners requiring the use of thread locking compound or sealant are identified in the service procedure. Do not use paints, lubricants, or corrosion inhibitors on fasteners or fastener joint surfaces unless specified. These coatings affect fastener torque and joint clamping force and may damage the fastener. Use the correct tightening sequence and specifications when installing fasteners in order to avoid damage to parts and systems.
Important: Following the repair or replacement of the steering column, the technician must perform a steering column function check.
The rotating motion of the shaft will wear through anything lying against it. This will cause problems as the vehicle accumulates miles.
There should be no roughness or catching as the steering wheel is rotated. If there is, inspect the entire steering system and make the necessary adjustments or repairs.
