For 1990-2009 cars only
Removal Procedure
- Disconnect the battery negative cable.
- Remove the evaporator insulator.
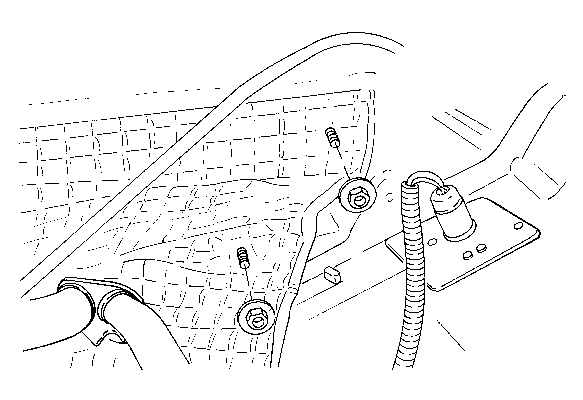
- Remove the cap nuts from the cowl heat shield.
- Move the cowl heat shield to provide clearance.
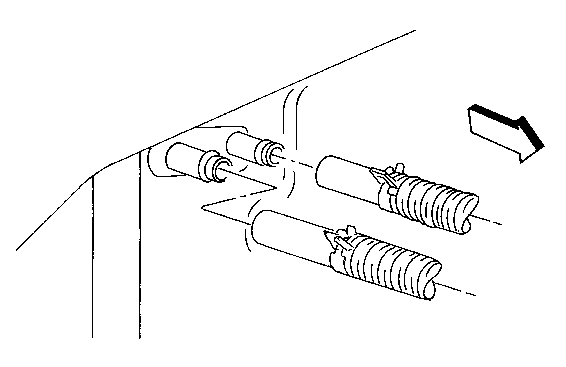
- Loosen the heater hose clamps.
- Remove the heater core hoses.
- Remove the following components that secure the evaporator case to the cowl:
- Remove the evaporator case assembly from the vehicle.
- Remove the screws.
- Separate the evaporator case sections.
- Remove the evaporator core from the case.
- Remove the pushpins.
- Remove the screen from the evaporator core.
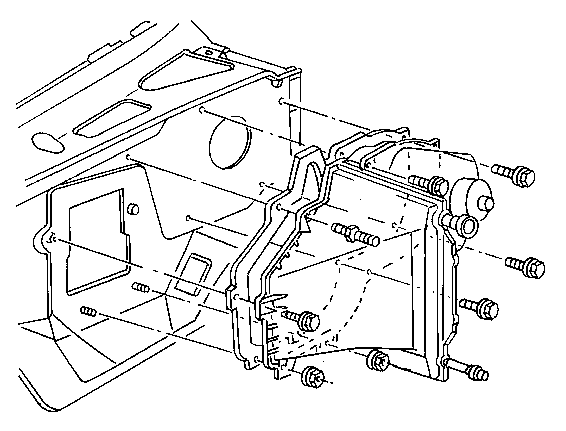
| • | The screw |
| • | The studs |
| • | The nuts |


Installation Procedure
- Install the screen onto the evaporator core.
- Install the evaporator core into the case.
- Assemble the evaporator case sections.
- Install the screws.
- Install the bolts.
- Install the evaporator case assembly to the cowl.
- Install the screw.
- Install the nuts.
- Install the studs.
- Replace the heat shield to the original position against the cowl.
- Install the cap screws.
- Install the heater core hoses and the heater core hose clamps.
- Install the evaporator insulator.
- Connect the negative battery cable.
Tighten
Tighten the screw to 4.5 N·m (40 lb in).
Tighten
Tighten the nuts to 4.5 N·m (40 lb in).
Tighten
Tighten the studs to 4.5 N·m (40 lb in).
Tighten
Tighten the negative battery cable bolt to 17 N·m (13 lb ft).
