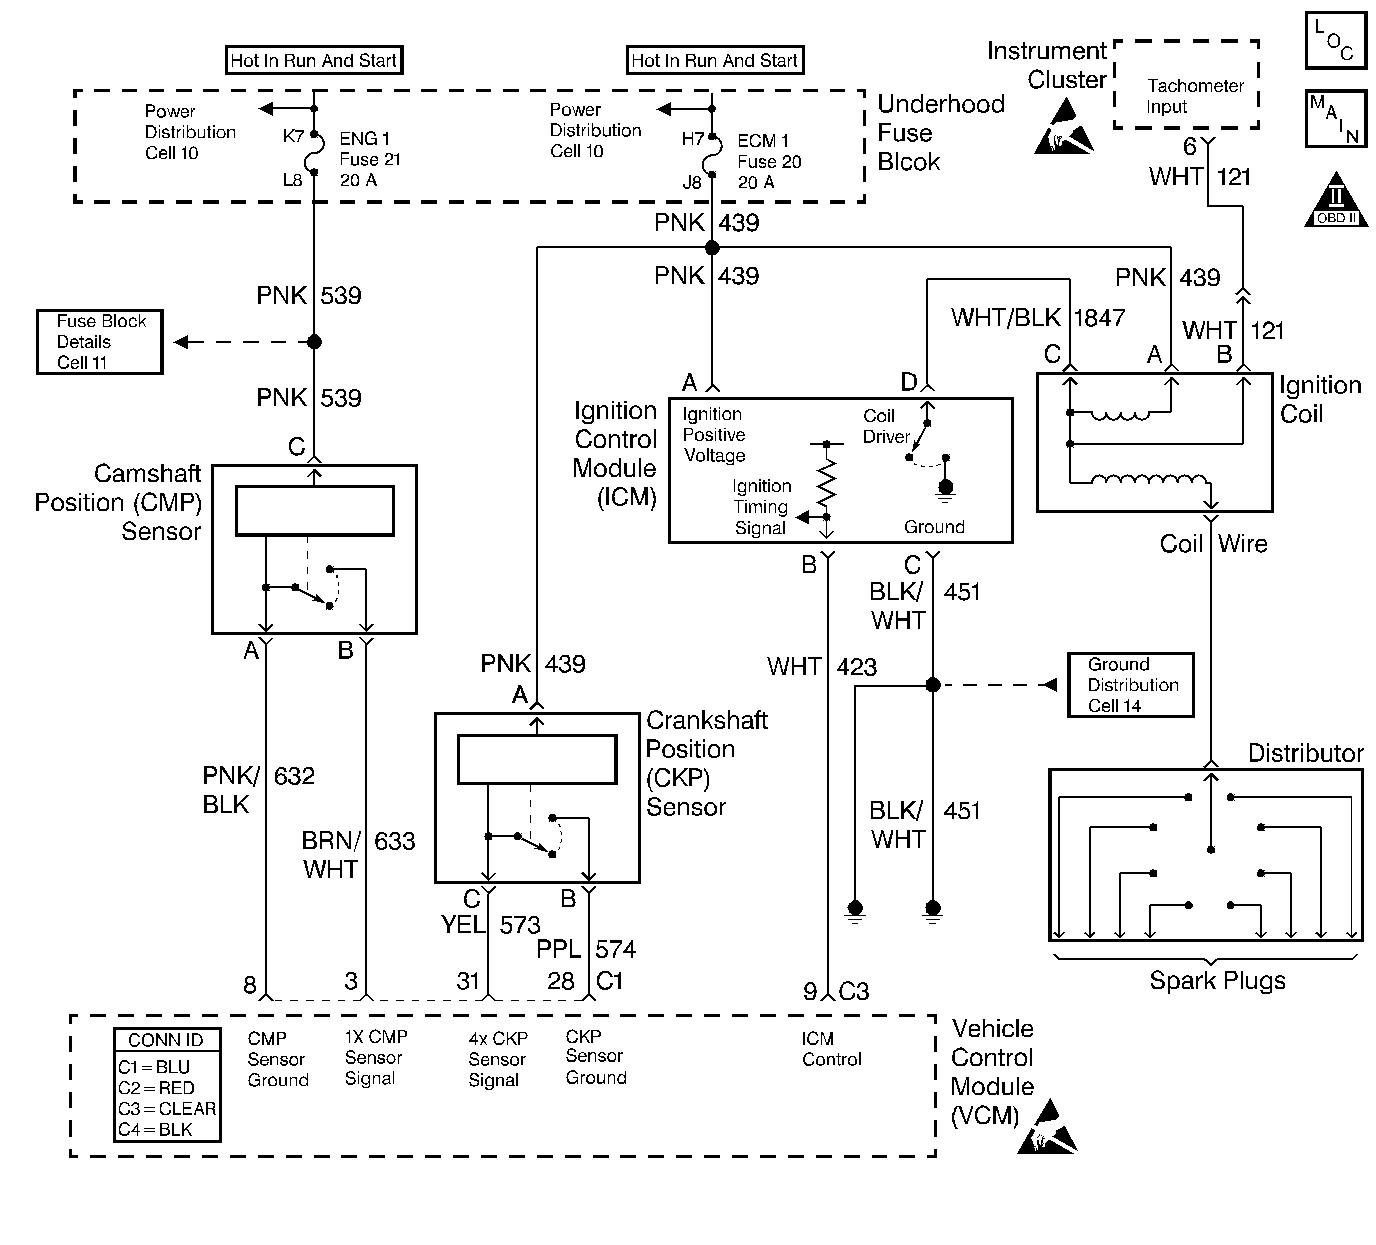
Circuit Description
This diagnostic trouble code (DTC) monitors the crankshaft position (CKP) and the camshaft position (CMP) signals to determine if they are synchronized. If both signals are not observed by the control module within a narrow time window, the vehicle control module (VCM) will determine that an error has occurred.
Conditions for Running the DTC
The engine is running.
Conditions for Setting the DTC
The falling edge of the CMP sensor signal is more than 15 degrees out of phase with the falling edge of the CKP sensor.
Action Taken When the DTC Sets
| • | The control module illuminates the malfunction indicator lamp (MIL) the first time the diagnostic runs and fails. |
| • | The control module will set the DTC and records the operating conditions at the time the diagnostic fails. The control module stores the failure information in the scan tools Freeze Frame/Failure Records. |
Conditions for Clearing the MIL or DTC
| • | The control module turns OFF the MIL after 3 consecutive drive trips when the test has run and passed. |
| • | A history DTC will clear if no fault conditions have been detected for 40 warm-up cycles. A warm-up cycle occurs when the coolant temperature has risen 22°C (40°F) from the startup coolant temperature and the engine coolant reaches a temperature that is more than 70°C (158°F) during the same ignition cycle. |
| • | Use a scan tool in order to clear the DTCs. |
Diagnostic Aids
Check the following items:
| • | A loose CMP sensor causing a variance in the sensor signal |
| • | Excessive free play in the timing chain and gear assembly |
| • | Incorrectly installed distributor--one tooth off in either advance or retard positions |
| • | A loose distributor rotor on the distributor shaft |
| • | A loose or missing distributor hold-down bolt |
An intermittent may be caused by any of the following conditions:
| • | A poor connection |
| • | Rubbed through wire insulation |
| • | A broken wire inside the insulation |
Thoroughly check any circuitry that is suspected of causing the intermittent complaint. Refer to Intermittents and Poor Connections Diagnosis in Wiring Systems.
If a repair is necessary, refer to Wiring Repairs or Connector Repairs in Wiring Systems.
Test Description
The numbers below refer to the step numbers on the table.
-
This test will determine if this DTC is intermittent.
-
When the engine speed is raised to 2000 RPM the camshaft retard offset should not vary more than 2 degrees.
-
If excessive pressure is used when performing this test unintentional damage to the distributor shaft could result.
-
If the distributor is one tooth off in either the advanced or retard positions the vehicle may run but 0 degree camshaft retard offset will not be obtained.
-
If 0 degree cannot be obtained during this procedure refer to Diagnostic Aids.
Step | Action | Value(s) | Yes | No | ||||
|---|---|---|---|---|---|---|---|---|
1 |
Important: Before clearing the DTCs, use the scan tool Capture Info to save the Freeze Frame and Failure Records for reference. The control module's data is deleted once the Clear Info function is used. Did you perform the Powertrain On-Board Diagnostic (OBD) System Check? | -- | ||||||
2 |
Does the engine speed fluctuate (up to twice the desired RPM)? | -- | ||||||
3 | Replace the Crankshaft Position Sensor. Refer to Crankshaft Position Sensor Replacement Removal Procedure. Is the action complete? | -- | -- | |||||
Perform the Camshaft Retard Offset test procedure as follows:
Important: The camshaft retard reading will not be accurate below 1000 RPM. Is the camshaft retard reading within the second specified value? | 1,000 RPM -2° to 2° | |||||||
Does the camshaft retard reading change more than the second specified value? | 2000 RPM 2° | Go to Diagnostic Aids | ||||||
With the engine at operating temperature and the engine OFF, perform the following procedure:
Does the rotor turn on the distributor shaft? | -- | |||||||
Check for proper installation of the distributor. Repair as necessary. Refer to Distributor Installation in Engine Mechanical. Did you find a problem? | -- | |||||||
Perform the Camshaft Retard Offset adjustment procedure as follows:
Did you obtain 0° camshaft retard? | -- | Go to Diagnostic Aids | ||||||
9 | Replace the distributor. Refer to Distributor Replacement in Engine Electrical. Is the action complete? | -- | -- | |||||
10 |
Does the scan tool indicate the diagnostic Passed? | -- | ||||||
11 | Does the scan tool display any additional undiagnosed DTCs? | -- | Go to the applicable DTC table | System OK |
