Tools Required
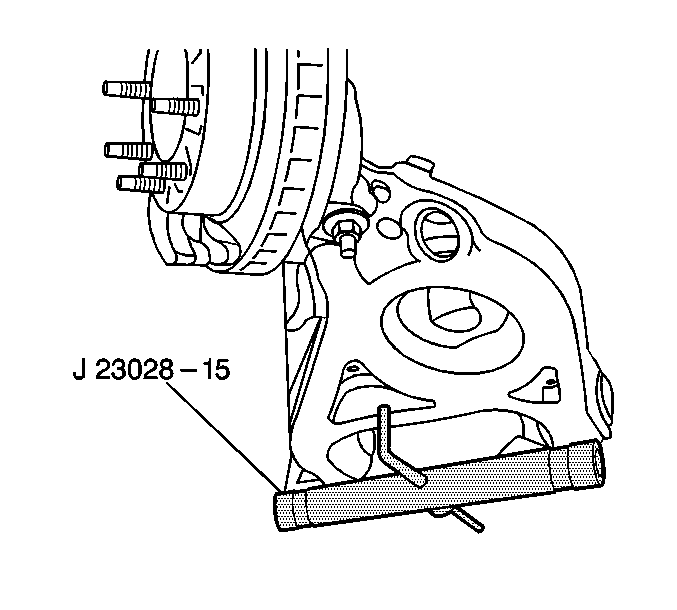
| • | J 23028-15 Coil Spring Compressor Adapter |
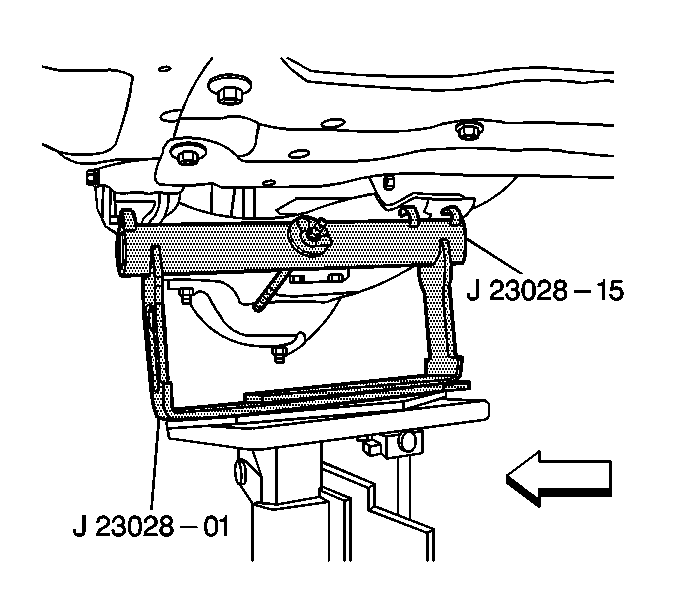
| • | J 23028-A Coil Spring Remover and Installer |
Removal Procedure
- Raise and support the vehicle. Refer to Lifting and Jacking the Vehicle in General Information.
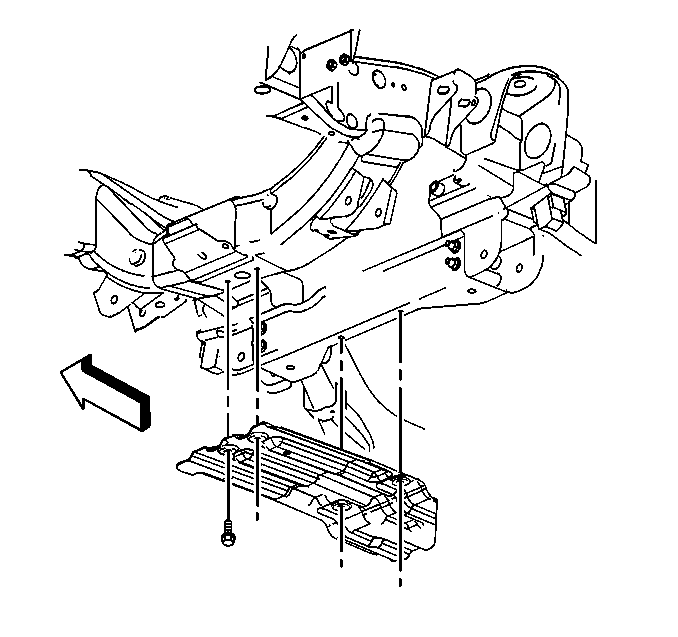
- Remove the engine protection shield. Refer to Engine Protection Shield Replacement in Frame and Underbody.
- Remove the frame cross bar, the 25 series only.
- Remove the tire and wheel assembly. Refer to Tire and Wheel Removal and Installation in Tires and Wheels.
- Remove the shock absorber. Refer to Shock Absorber Replacement .
- Remove the front stabilizer shaft link. Refer to Stabilizer Shaft Replacement .
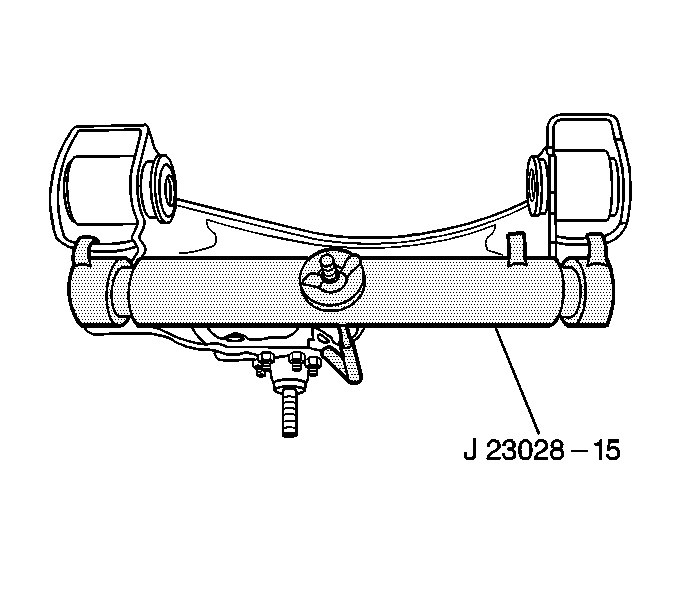
- Install J 23028-15 using the outboard locating tab, the 15 series.
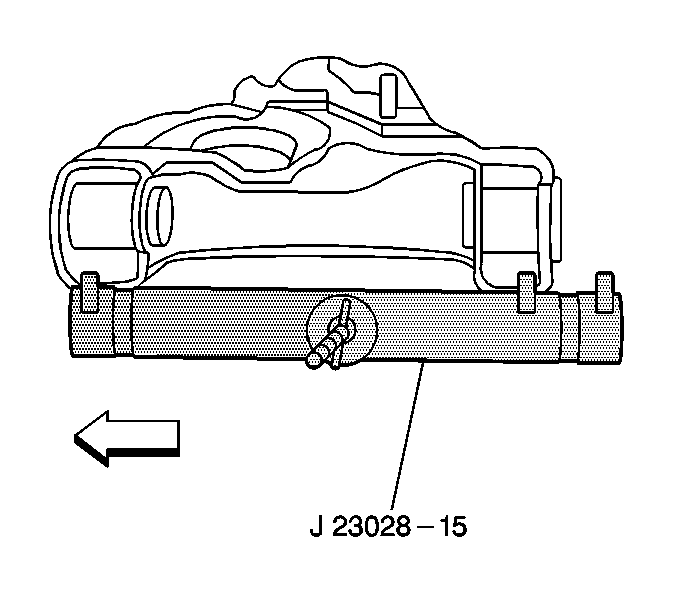
- Install J 23028-15 using the inboard locating tab, the 25 series.
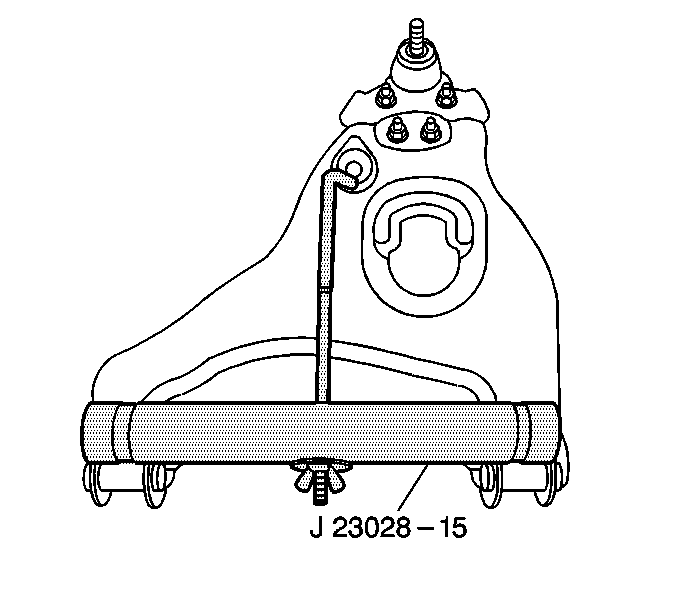
- Attach the retaining hook to the control arm. Tighten the 15-series wing nut until you eliminate any freeplay.
- Attach the retaining hook to the control arm. Tighten the wing nut until you eliminate any freeplay, the 25 series.
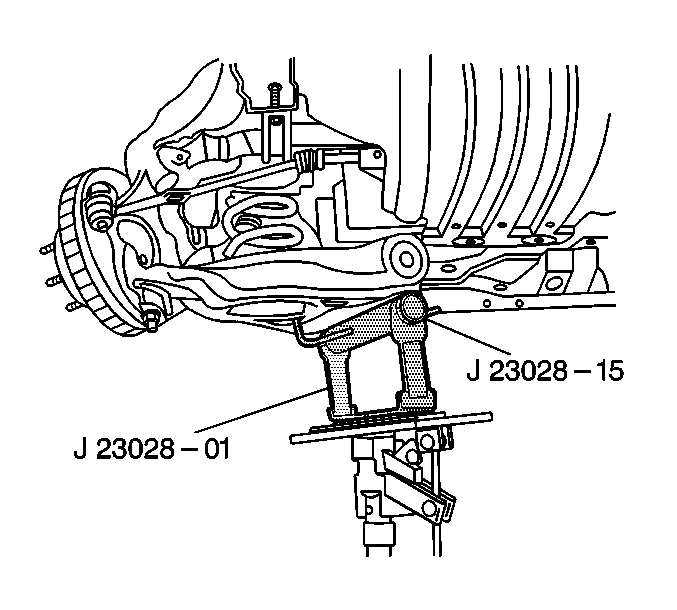
- Securely attach J 23028-A to a suitable transmission jack.
- Raise the jack until the yokes of J 23028-A line up with the notches in J 23028-15 .
- Using the J 23028-A and the J 23028-15 and the transmission jack, relieve the spring tension from the lower control arm pivot bolts.
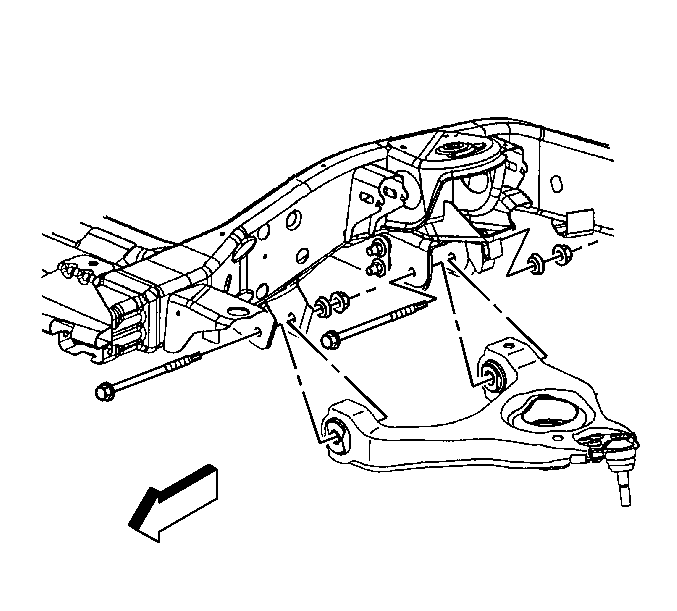
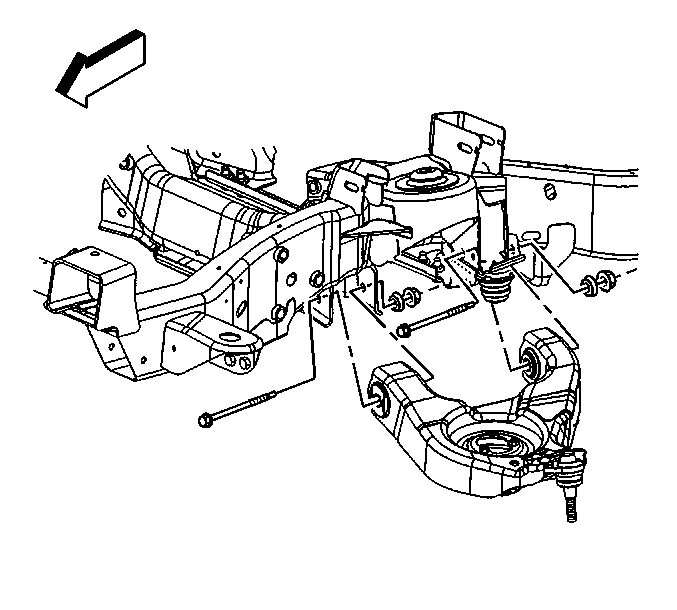
- Remove the lower control arm pivot bolt 15-series nuts.
- Remove the rear pivot bolt.
- Remove the front pivot bolt.
- Remove the lower control arm pivot bolt nuts, the 25 series.
- Remove the rear pivot bolt.
- Remove the front pivot bolt.
- Slowly lower the transmission jack in order to unload the front coil spring. It may be necessary to use a pry bar in order to guide the lower control arm out of position.
- Remove the coil spring and the insulator.
Installation Procedure
- Install the coil spring and the insulator to the lower control arm.
- Raise the transmission jack in order to compress the front coil spring. It may be necessary to use a pry bar in order to guide the lower control arm into position.
- Install the front pivot 15-series bolt.
- Install the rear pivot bolt.
- Install the lower control arm pivot nuts.
- Install the front pivot bolt, the 25 series.
- Install the rear pivot bolt.
- Install the lower control arm pivot nuts.
- Lower the jack. Remove the J 23028-15 from the control arm.
- Install the front stabilizer shaft link. Refer to Stabilizer Shaft Replacement .
- Install the shock absorber. Refer to Shock Absorber Replacement .
- Install the tire and wheel assembly. Refer to Tire and Wheel Removal and Installation in Tires and Wheels.
- Install the frame cross bar (25 series only).
- Install the engine protection shield. Refer to Engine Protection Shield Replacement in Frame and Underbody.
- Remove the safety stands.
- Lower the vehicle.


Notice: Use the correct fastener in the correct location. Replacement fasteners must be the correct part number for that application. Fasteners requiring replacement or fasteners requiring the use of thread locking compound or sealant are identified in the service procedure. Do not use paints, lubricants, or corrosion inhibitors on fasteners or fastener joint surfaces unless specified. These coatings affect fastener torque and joint clamping force and may damage the fastener. Use the correct tightening sequence and specifications when installing fasteners in order to avoid damage to parts and systems.
Tighten
Tighten the pivot bolt nuts to 145 N·m (107 lb ft).

Tighten
Tighten the pivot bolt nuts to 145 N·m (107 lb ft).
Tighten
Tighten the nuts to 100 N·m (74 lb ft).

