Info - Revised Assist Step Installation Procedure

| Subject: | Revised Assist Step Installation Procedure |
| Models: | 2000-2001 Chevrolet and GMC C/K1-2 Utility Models (Suburban, Tahoe, Denali, Yukon, Yukon XL) |
| 2002 Cadillac Escalade |
This bulletin is being revised to change a graphic and fastener tightening information. Please discard Corporate Bulletin Number 00-08-61-001A (Section 08 -- Body and Accessories).
The following information is a revised assist step (running board) installation procedure. The following procedure is for the passenger side and vehicles equipped with auxiliary HVAC. Repeat the appropriate steps for driver's side.
Assist Step and Brackets System View
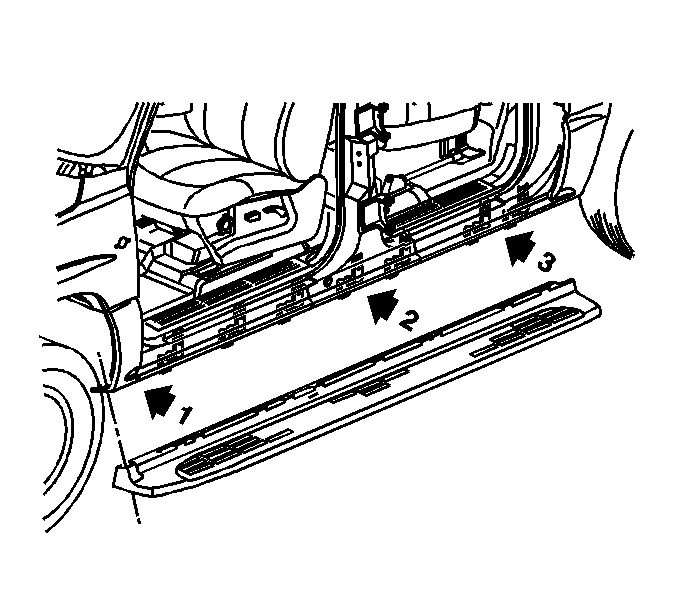
- Before beginning the assist step installation, unpack the kit parts and verify that all of the components are present.
- For vehicles equipped with auxiliary HVAC, reposition the HVAC pipes.
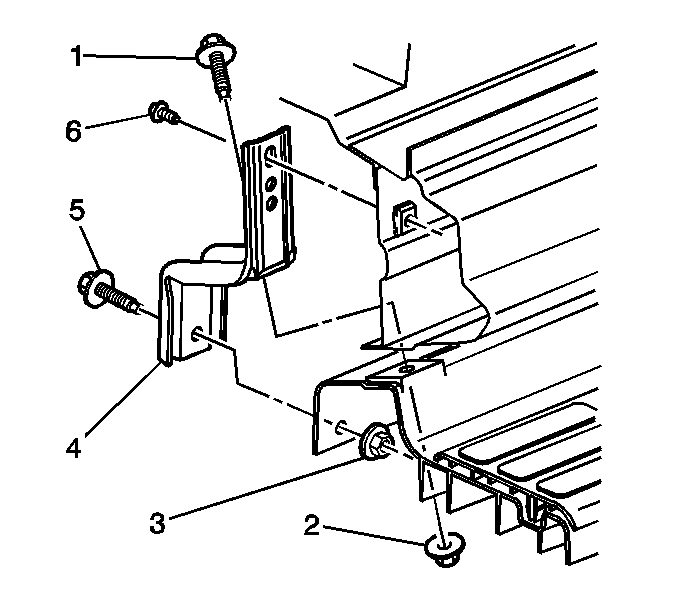
- Loosely install the bolts (6) that attach the upper part of the brackets to the inner rocker panel. Ensure that the bracket shelf is seated securely to the inner rocker panel mating shelf surface. The Yukon and Tahoe require six brackets per side and the Suburban and Yukon XL require seven brackets per side.
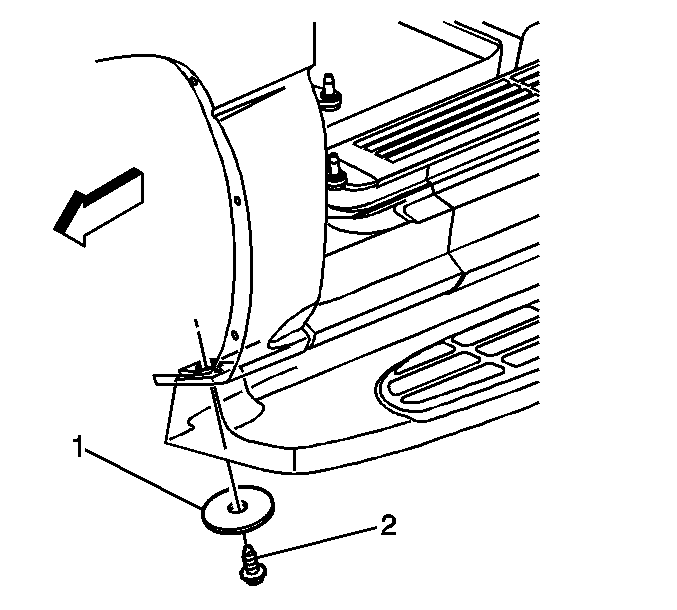
- Remove the front fender bolt (2) and discard.
- Position the assist step into place and loosely install the spacer (1) and the new fender bolt (2).
- Loosely install the bolts (5) and nuts (3) that attach the assist step to the lower part of the brackets.
- Loosely install the bolts (1) and nuts (2) that attach the assist step to the bracket shelf.
- Tighten all of the fasteners in the following sequence:
- Position the HVAC lines into place, if equipped, and install the retention clip nuts. Ensure there is no contact between the brackets and/or fasteners and the HVAC lines when installed.
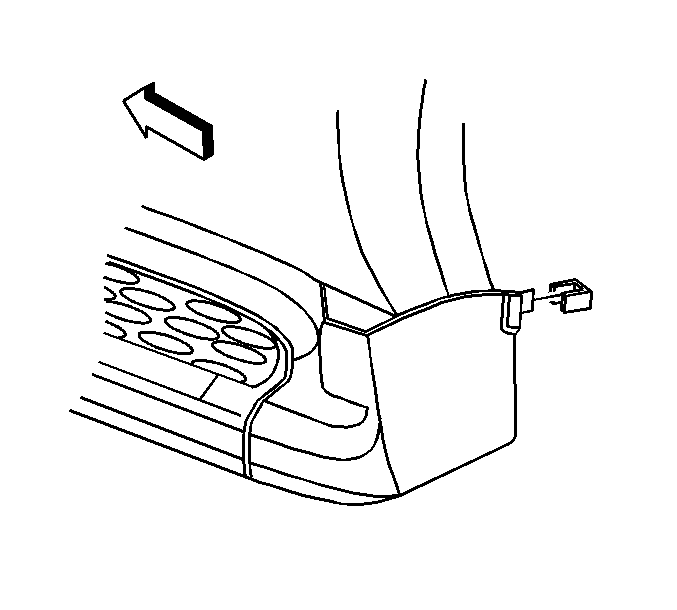
- Install the assist step rear cover to the vehicle with the push-in retainer (Escalade models only) or retainer clip (Denali models only).
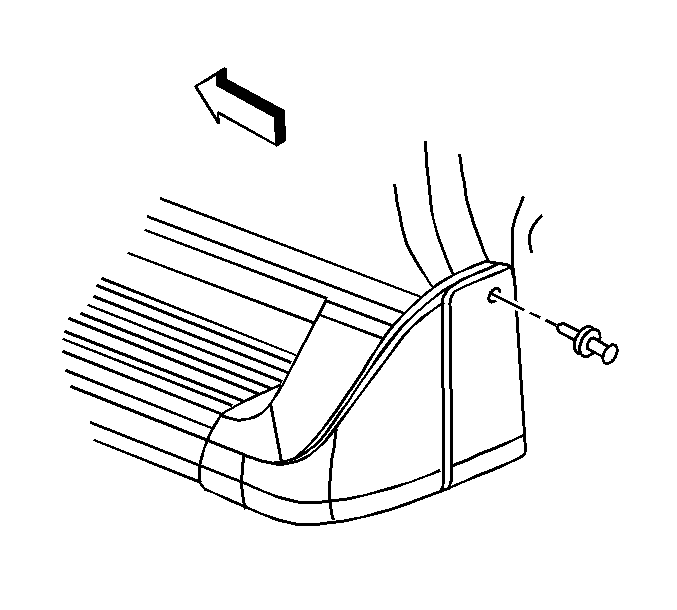
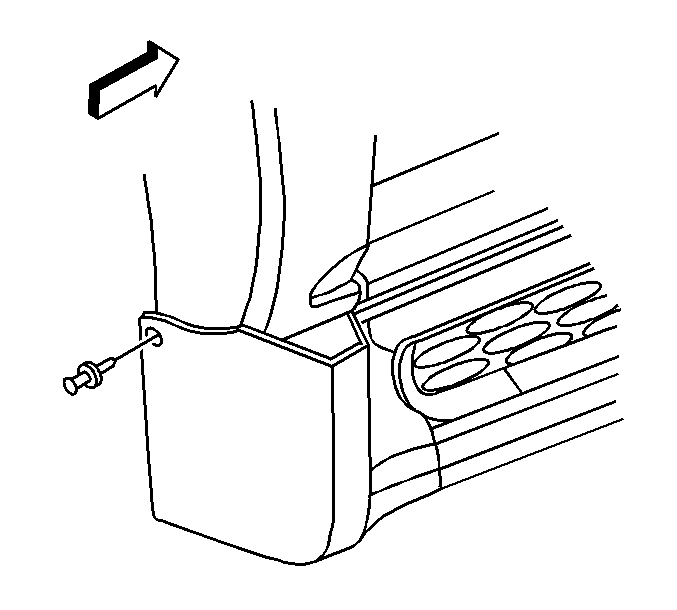
- Install the assist step front cover to the vehicle with the push-in retainer (Denali, Escalade models).
View 3 -- Assist Step Bracket Orientation/HVAC Pipes
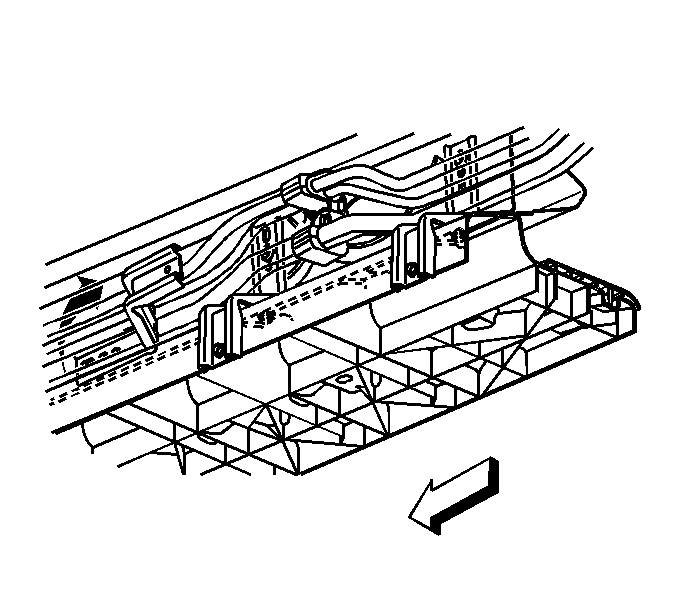
Notice: DO NOT bend the auxiliary HVAC pipes, if equipped. Unspecified bends may result in seal damage, fluid loss, and unnecessary pipe replacement.
Important: For vehicles equipped with auxiliary HVAC, the pipe retention clips must be removed and the pipes repositioned in order to allow the assist step brackets to be installed behind the HVAC pipes horizontally and rotated to the vertical position.
| 2.1. | Remove the pipe retention clip nuts. |
| 2.2. | Remove the clips from their mounting studs and reposition the pipes away from the inner rocker panel. |
View 1 -- Front Fender Bolt and Spacer Installation
View 2 -- Assist Step and Bracket Fasteners Orientation
Notice: Use the correct fastener in the correct location. Replacement fasteners must be the correct part number for that application. Fasteners requiring replacement or fasteners requiring the use of thread locking compound or sealant are identified in the service procedure. Do not use paints, lubricants, or corrosion inhibitors on fasteners or fastener joint surfaces unless specified. These coatings affect fastener torque and joint clamping force and may damage the fastener. Use the correct tightening sequence and specifications when installing fasteners in order to avoid damage to parts and systems.
Tighten
| • | Tighten the new front fender bolt to 25 N·m (18 lb ft). |
| • | Tighten the assist step to bracket shelf bolts (1) to 9 N·m (80 lb in). |
| • | Tighten the assist step to lower bracket bolts (5) to 9 N·m (80 lb in). |
| • | Tighten the upper bracket to rocker panel bolts (6) to 25 N·m (18 lb ft). |
Important: For Suburban and Yukon XL models equipped with auxiliary HVAC, it may be necessary to shim the rear most clips 3-4 mm (0.12-0.16 in) from the rocker panel in order to avoid contact with the upper assist step bracket attachment fastener. Add washer/spacers (not supplied) to the stud on the rocker panel before reinstalling the clip.
Tighten
Tighten the nuts to 9 N·m (80 lb in).
Assist Step Retainer Clip (Denali Models)
Assist Step Push-in Retainer (Escalade Models)
Warranty Information
For Auto or Manual Pre-Delivery Inspection (PDI), use:
Labor Operation | Description | Labor Time |
|---|---|---|
Z7000 | Pre-Delivery Inspection - Base Time (Tahoe, Suburban, Yukon, Yukon XL, Denali, Escalade) | 1.4 hrs |
ADD: B -- To Install Running Boards | ||
-- | Without Rear A/C and/or Heat (Tahoe, Suburban, Yukon, Yukon XL | 1.1 hrs |
-- | With Rear A/C and/or Heat (RPOs C69, C36) (Tahoe, Suburban, Yukon, Yukon XL) | 1.5 hrs |
-- | Escalade, Denali | 1.5 hrs |
