Removal Procedure
Important: The intake manifold, throttle body, fuel rail, and injectors may be
removed as an assembly. If not servicing the individual components, remove
the manifold as a complete assembly.
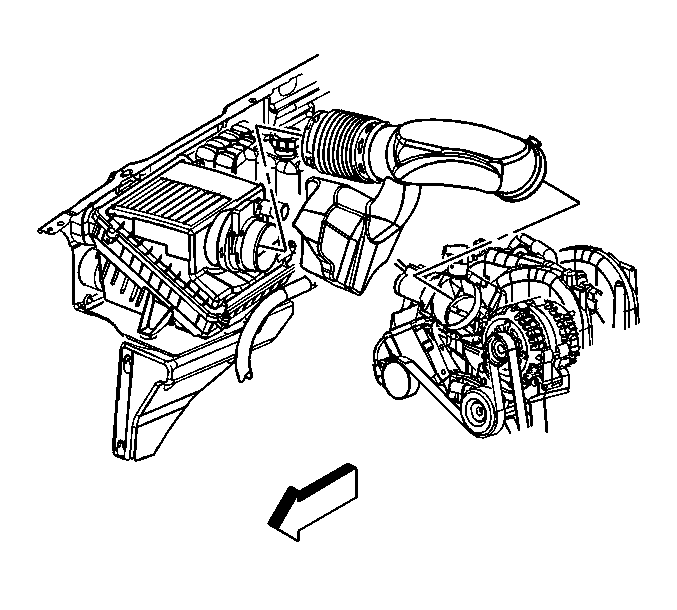
- Loosen the clamps at the
throttle body and air cleaner.
- Remove the air cleaner outlet duct.
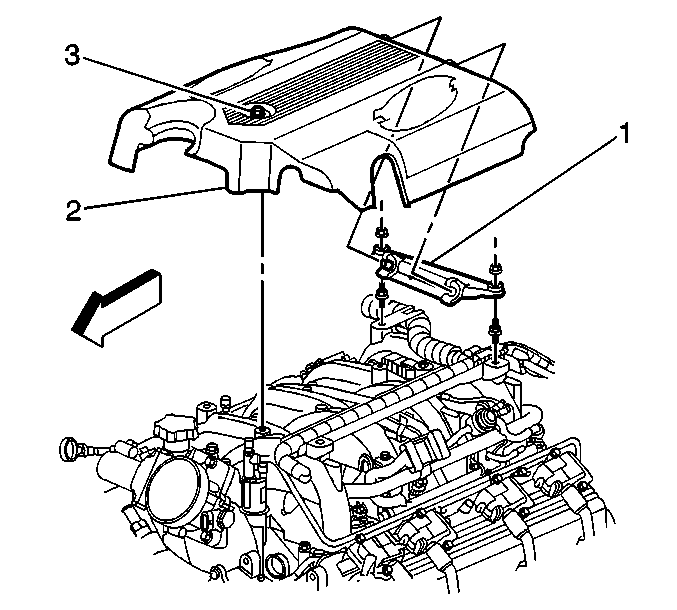
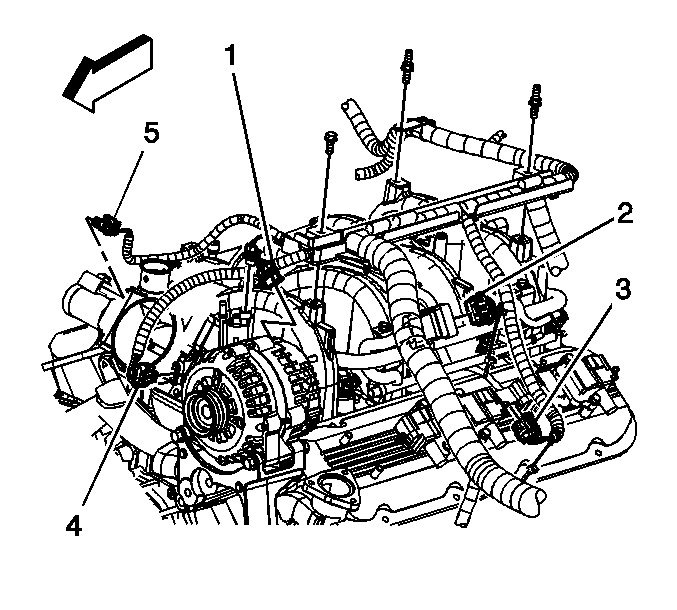
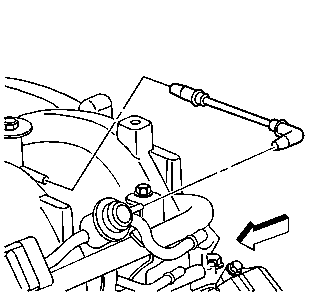
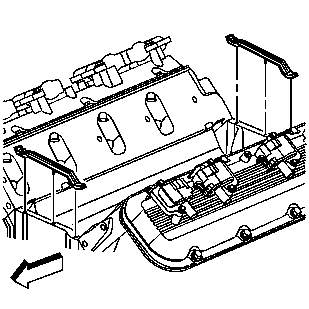
- Loosen the intake manifold
sight shield bolt (3).
- Remove the sight shield from the bracket (1).
- Remove the sight shield bracket (1) and nuts.
- Relieve the fuel system pressure. Refer to
Fuel Pressure Relief
in Engine Controls - 8.1L.
- Disconnect the fuel feed and return lines. Refer to
Metal Collar Quick Connect Fitting Service
in Engine Controls - 8.1L.
- Disconnect the engine
harness clips from the studs on the front of dash.
- Disconnect the engine harness clip from the wheelhouse splash
panel.
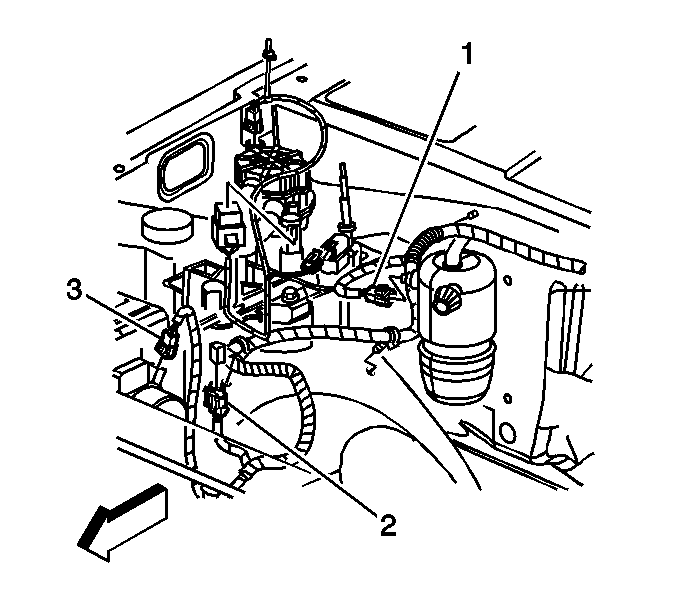
- Disconnect the following electrical connectors:
| • | Pressure cycling switch (1) |
| • | Mass air flow (MAF) sensor (3) |
- Reposition engine harness branch to top of engine.
- Remove the connector position
assurance (CPA) retainer at the ignition coil harness.
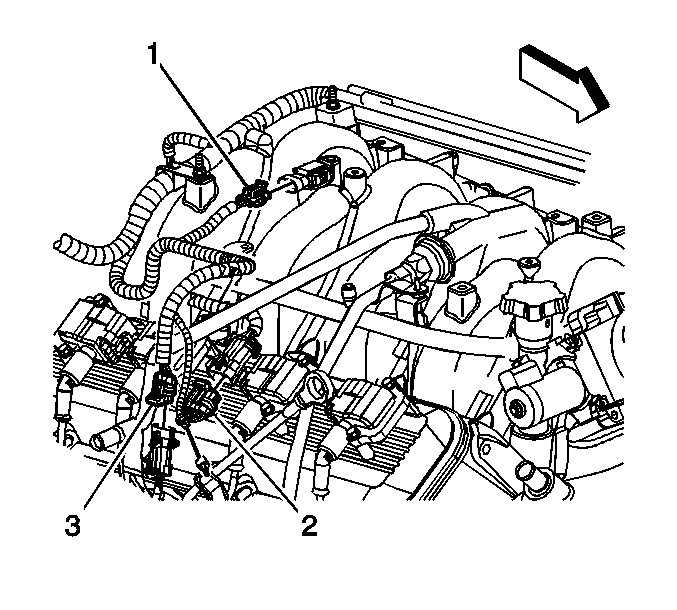
- Disconnect the following electrical connectors:
| • | Manifold absolute pressure (MAP) sensor (1) |
| • | Ignition coil harness (2) |
| • | Engine coolant temperature (ECT) sensor (3) |
- Remove the engine harness
bolt and studs.
- Remove the CPA retainer at the ignition coil harness.
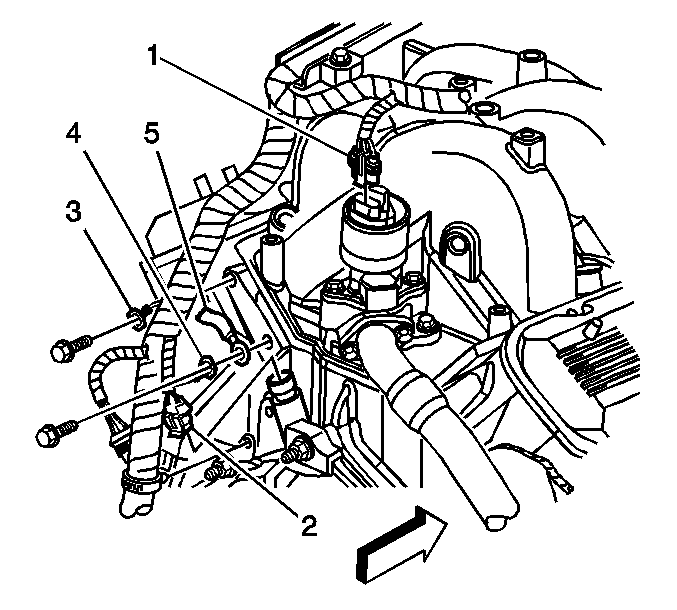
- Disconnect the following electrical connectors:
| • | Ignition coil harness (3) |
| • | Throttle position (TP) sensor (4) |
| • | Electronic throttle control (ETC) (5) |
| • | Purge valve solenoid (6) |
- Reposition the engine harness to the drivers side of the engine
compartment.
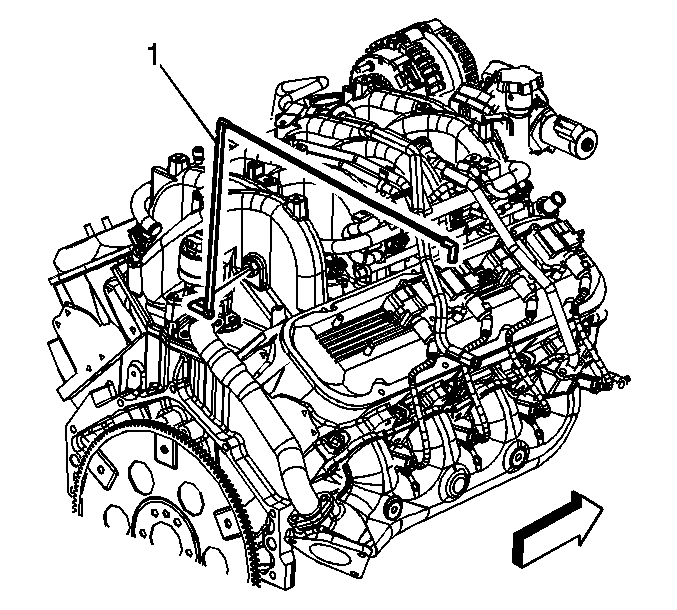
- Remove the bypass valve
vacuum hose (1) from the intake manifold.
- Disconnect the exhaust
gas recirculation (EGR) valve electrical connector (1).
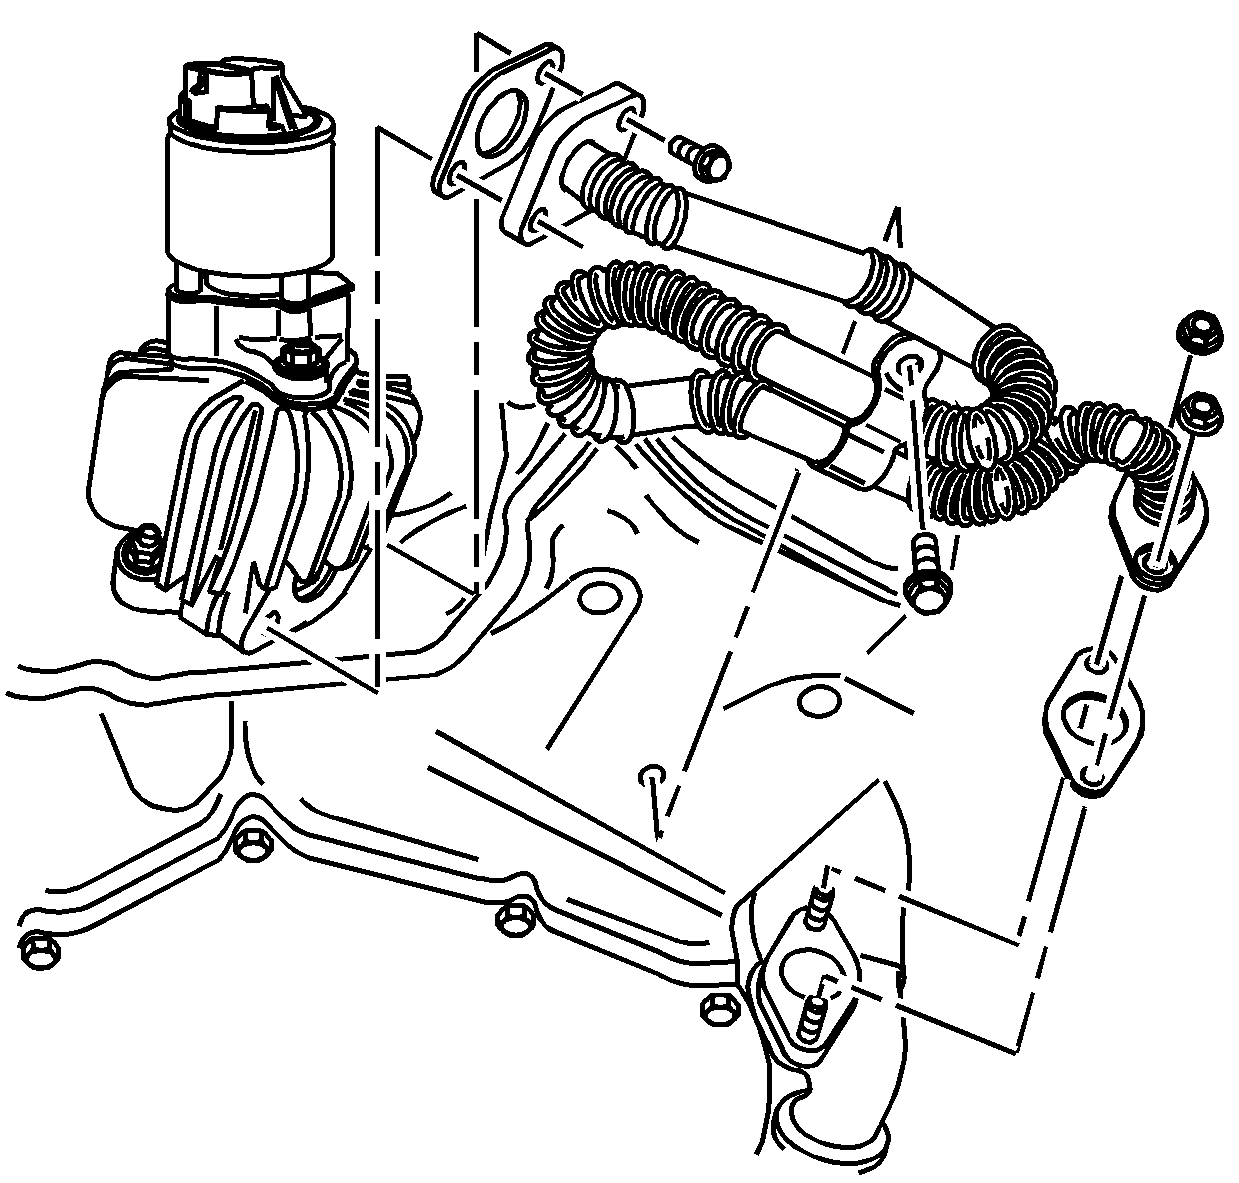
- Remove the EGR pipe bolts
at the EGR adapter.
- Reposition the EGR pipe.
- Remove and discard the EGR valve pipe gasket.
- Remove the fuel pressure
regulator vacuum hose.
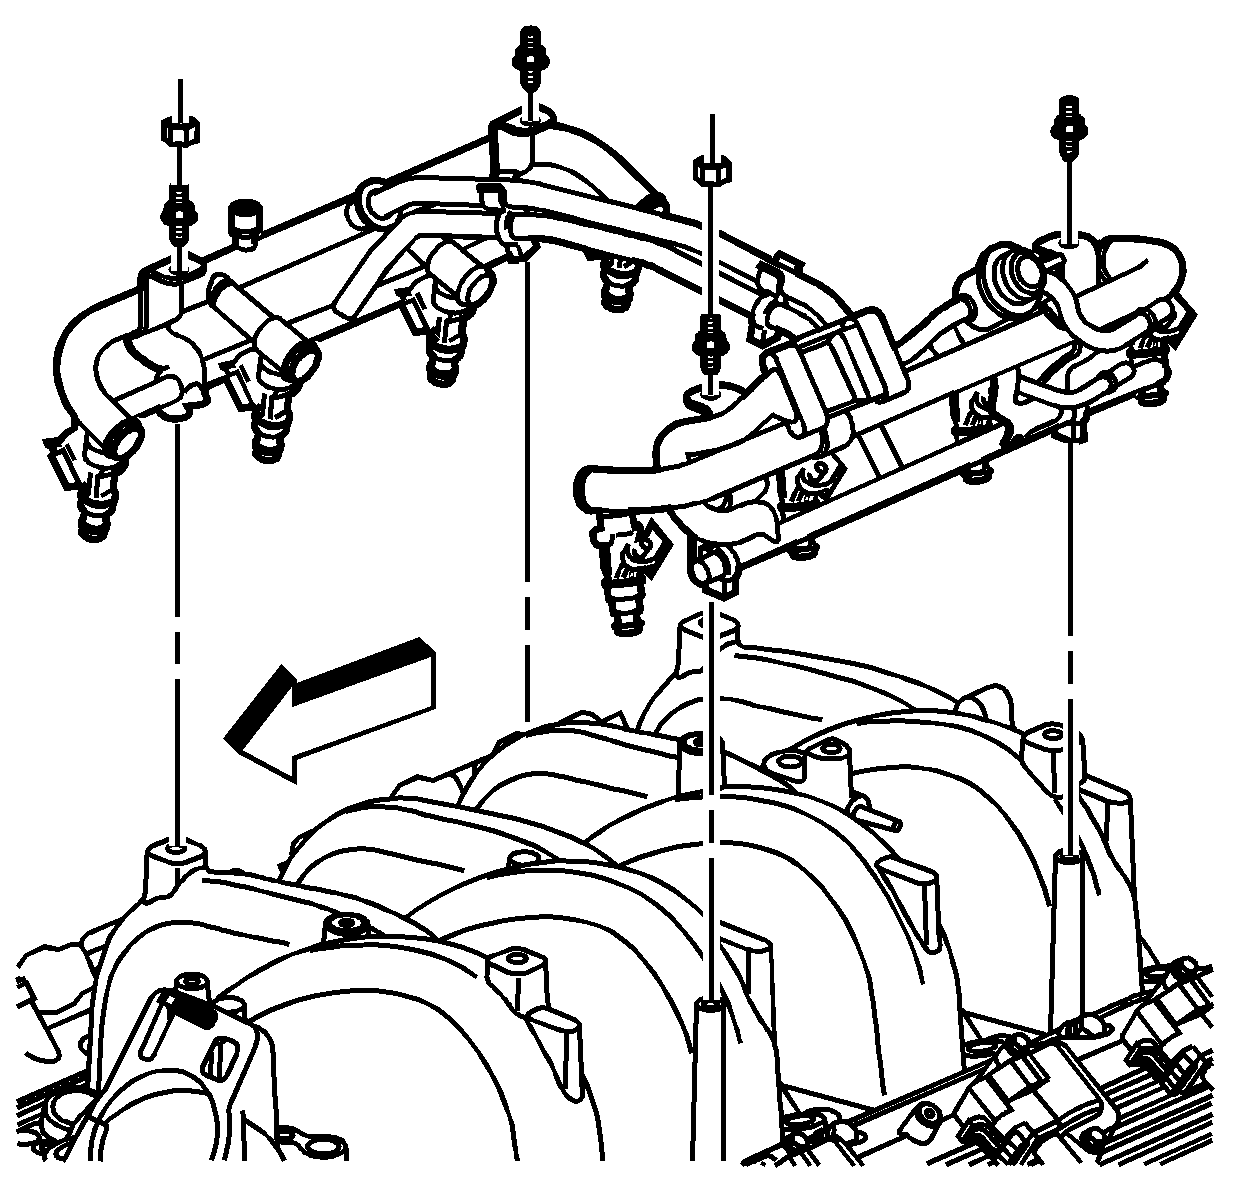
- If replacing the intake
manifold, remove the fuel rail studs.
- Remove the fuel rail.
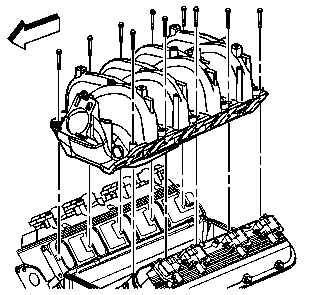
- Remove the intake manifold
bolts.
Important: Do not attempt to loosen the manifold by prying under the gasket surface
with any tool.
- Remove the intake manifold.
Important: The intake manifold gaskets are not reusable.
- Remove and discard the intake manifold side gaskets.
- Remove and discard the
intake manifold end seals.
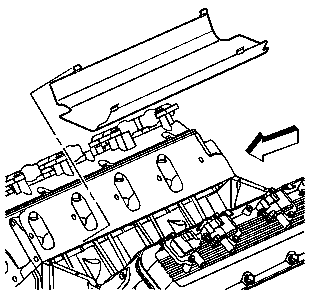
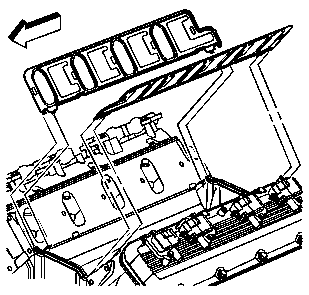
- Remove the splash shield.
- If replacing the intake manifold, refer to
Intake Manifold Disassemble
in Engine Mechanical - 8.1L Unit
Repair.
- Clean and inspect the intake manifold. Refer to
Intake Manifold Cleaning and Inspection
in Engine Mechanical
- 8.1L Unit Repair.
Installation Procedure
- If replacing the intake
manifold, refer to
Intake Manifold Assemble
in Engine Mechanical - 8.1L Unit Repair.
- Install the splash shield.
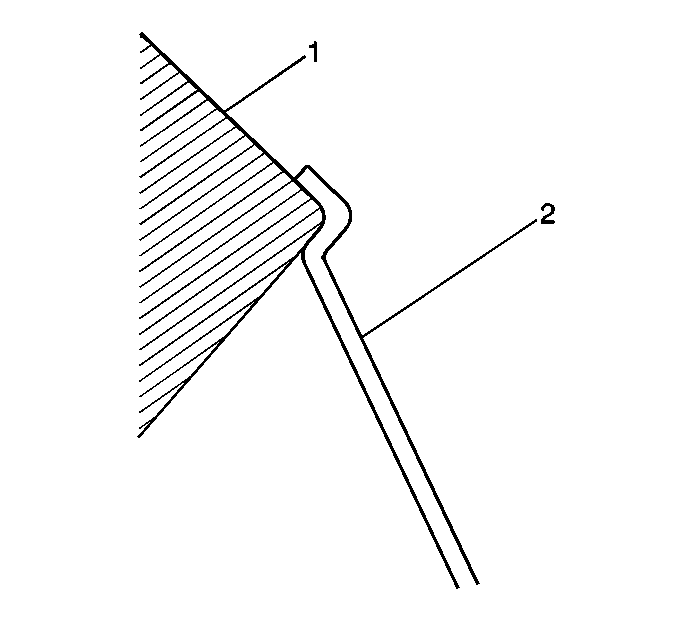
- Ensure the splash shield
(2) snap fits between the cylinder heads (1).
- Install NEW intake manifold
end seals.
- Install NEW intake manifold
side gaskets onto the cylinder heads.
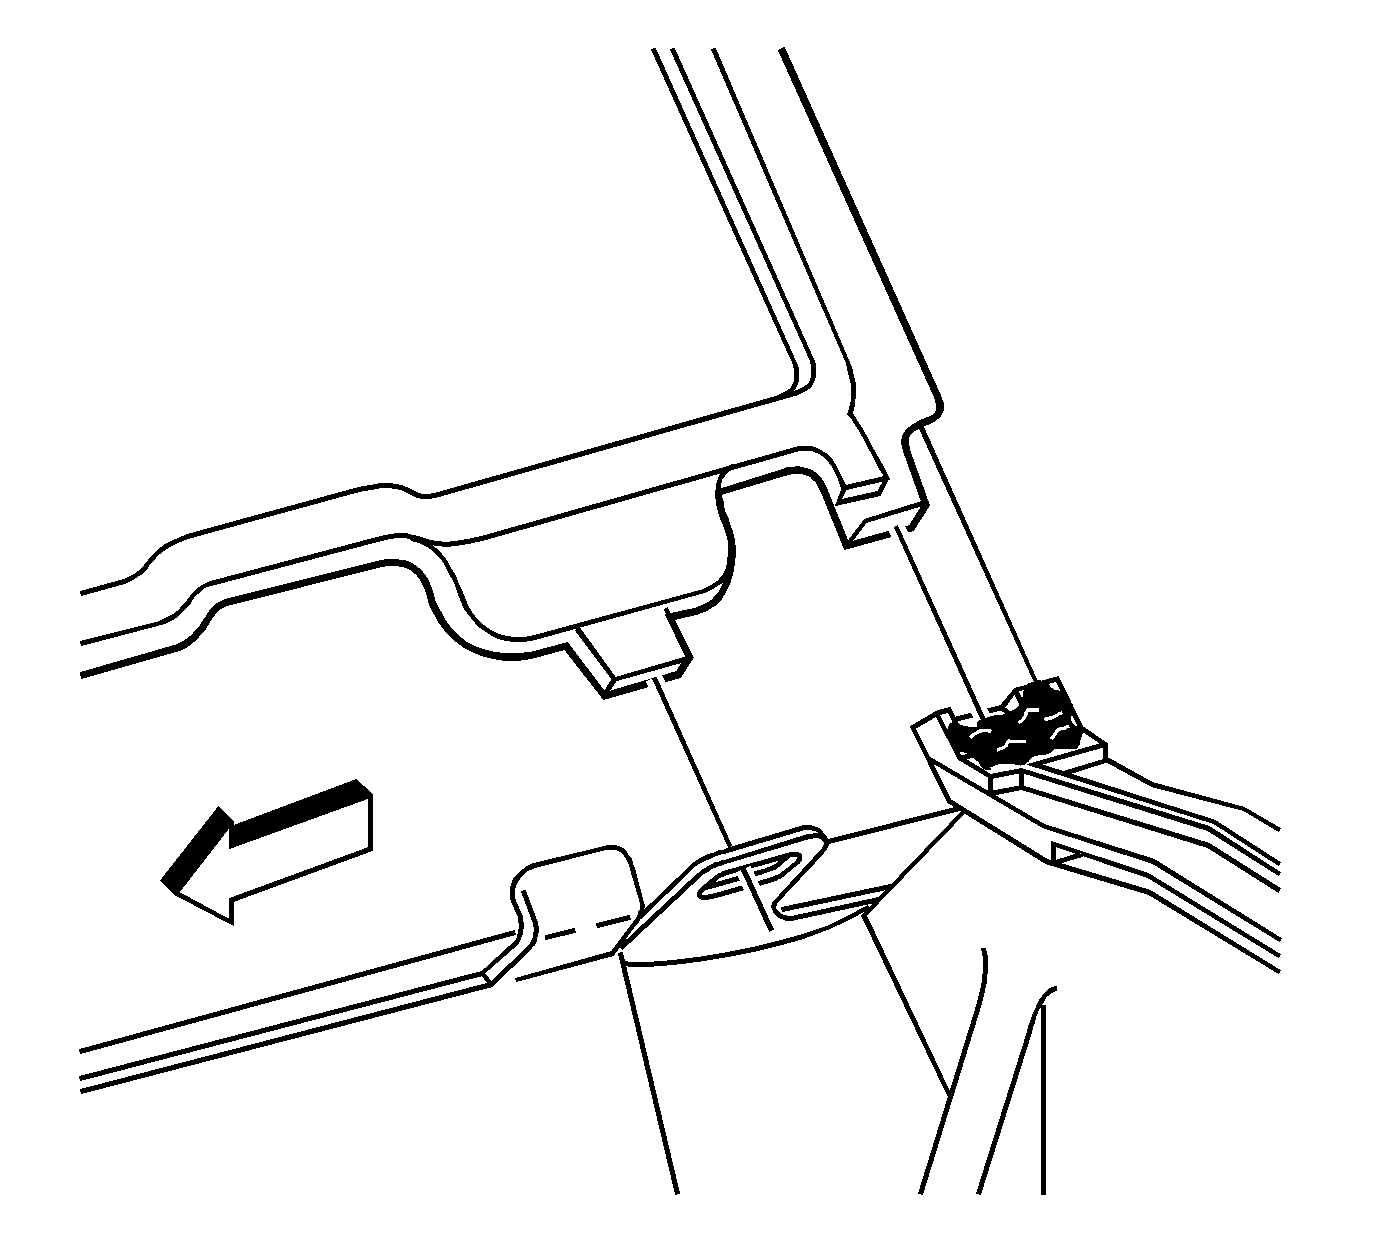
- Ensure the intake manifold
gasket tabs align with the hole in the head gasket.
- Ensure the intake manifold gasket tabs align with the slot in
the intake manifold end seals.
- Install the intake manifold
gaskets to the cylinder head with THIS SIDE UP stamped facing up.
- Install the intake manifold.
- Apply threadlock GM U.S. P/N 12345382, Canada P/N 10953489,
or equivalent to a minimum of eight threads of the intake manifold
bolts.
- Install the intake manifold bolts.
Notice: Use the correct fastener in the correct location. Replacement fasteners
must be the correct part number for that application. Fasteners requiring
replacement or fasteners requiring the use of thread locking compound or sealant
are identified in the service procedure. Do not use paints, lubricants, or
corrosion inhibitors on fasteners or fastener joint surfaces unless specified.
These coatings affect fastener torque and joint clamping force and may damage
the fastener. Use the correct tightening sequence and specifications when
installing fasteners in order to avoid damage to parts and systems.
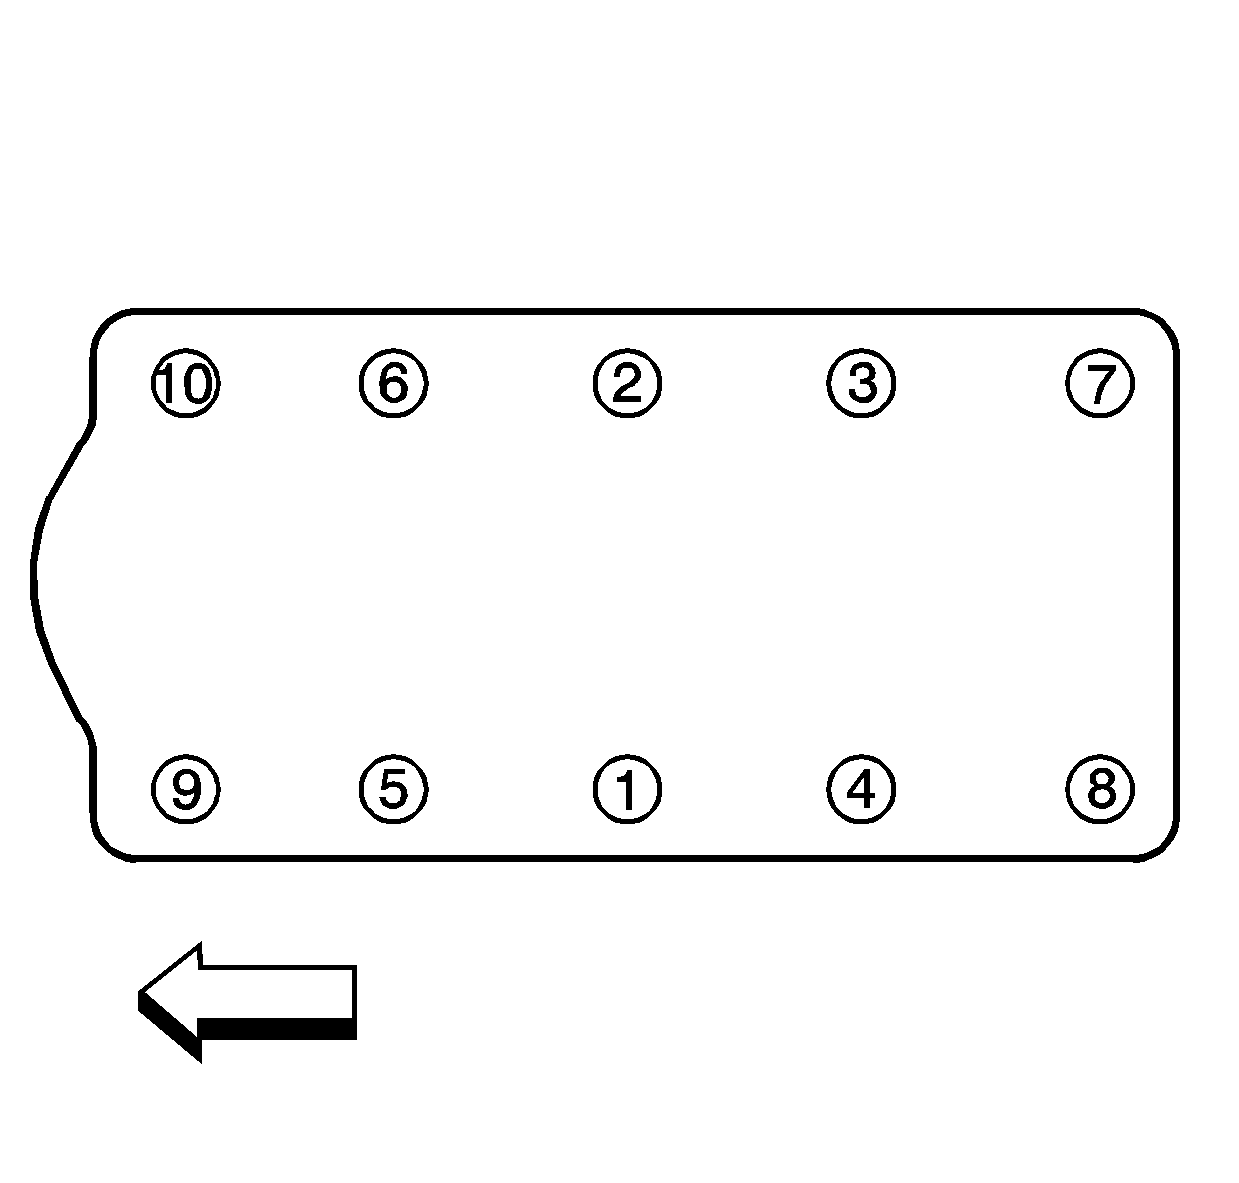
- Tighten the intake manifold bolts in sequence shown, using four
passes.
Tighten
- Tighten the intake manifold bolts to 5 N·m (44 lb in)
on the first pass.
- Tighten the intake manifold bolts to 5 N·m (44 lb in)
on the second pass.
Inspect the intake manifold joints for signs of intake manifold shifting.
Correct as required.
- Tighten the intake manifold bolts to 10 N·m (89 lb in)
on the third pass.
- Tighten the intake manifold bolts to 12 N·m (106 lb in)
on the final pass.
Important: Lubricate the fuel injector O-ring seals with clean engine oil and install
onto the spray tip each injector.
- If replacing the intake manifold, install the fuel rail.
- Install the fuel rail studs.
Tighten
Tighten the fuel rail studs to 12 N·m (106 lb in).
- Install the fuel pressure
regulator vacuum hose.
- Install the EGR valve
pipe gasket.
- Position the EGR pipe.
- Install the EGR pipe bolts at the EGR adapter.
Tighten
Tighten the EGR pipe bolts to 30 N·m (22 lb ft).
- Connect the EGR valve
electrical connector (1).
- Install the bypass valve
vacuum hose (1) to the intake manifold.
- Position the engine harness
over the engine compartment.
- Connect the following electrical connector:
| • | Ignition coil harness (3) |
| • | Purge valve solenoid (6) |
- Install the CPA retainer at the ignition coil harness.
- Install the engine harness bolt and studs.
Tighten
| • | Tighten the engine harness bolt to 5 N·m (44 lb in). |
| • | Tighten the engine harness studs to 10 N·m (89 lb in). |
- Connect the following
electrical connectors:
| • | Ignition coil harness (2) |
- Position the engine harness
branch over the top of the engine.
- Connect the following electrical connectors:
| • | Pressure cycling switch (1) |
- Connect the engine harness clip to the wheelhouse splash shield.
- Connect the engine harness clips to the studs on the front of
dash.
- Connect the fuel feed
and return pipes.
- Install the engine sight shield bracket (1) and nuts.
Tighten
Tighten the sight shield bracket nuts to 5 N·m (44 lb in).
- Install the sight shield to the bracket (1).
- Tighten the intake manifold sight shield bolt (3).
Tighten
Tighten the intake manifold sight shield bolt to 10 N·m
(89 lb in).
- Install the air cleaner
outlet duct.
- Tighten the clamps at the throttle body and air cleaner.
Tighten
Tighten the air cleaner outlet duct clamp to 4 N·m (35 lb in).
