GM Service Manual Online
For 1990-2009 cars only

Exhaust Manifold Pipe Replacement 6.0L, and 8.1L Engines

Removal Procedure


    Object Number: 339429  Size: SH
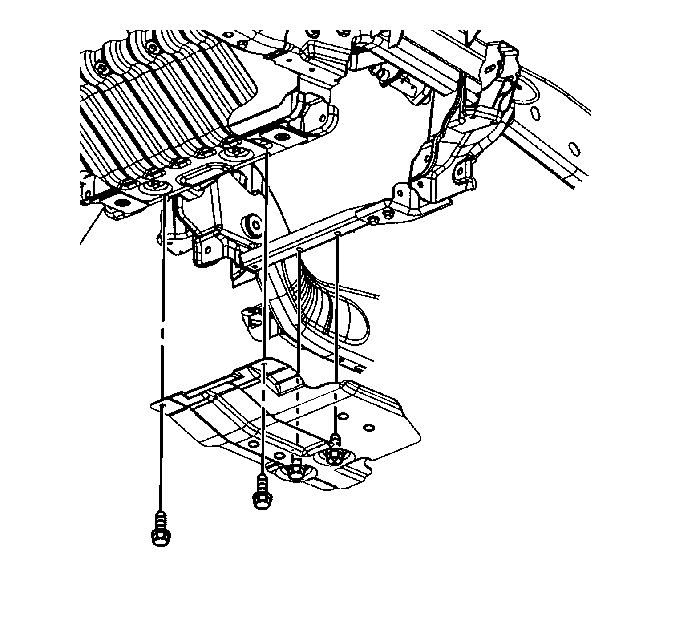
  1. Raise and suitably support the vehicle. Refer to Lifting and Jacking the Vehicle in General Information.
  2. Remove the oil pan skid plate bolts and plate, if necessary.

  3. Object Number: 647997  Size: SH
  4. Support the transmission with a transmission jack.
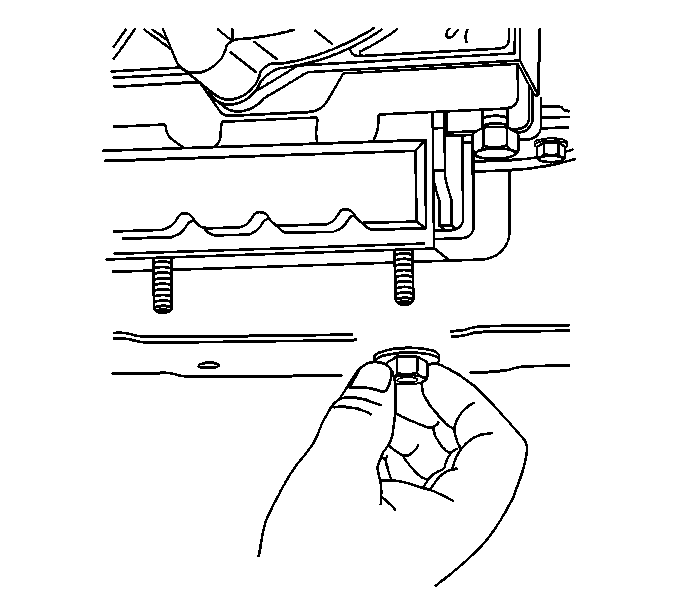
  5. Remove the transmission mount to transmission support nuts.
  6. Raise the transmission off of the transmission support.

  7. Object Number: 788013  Size: SH
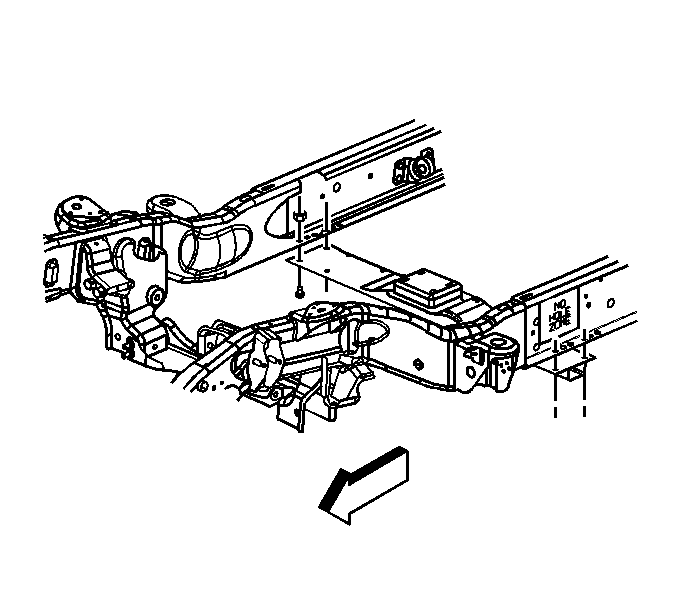
  8. Remove the transmission support crossmember bolts.
  9. Remove the transmission support crossmember.

  10. Object Number: 665520  Size: SH
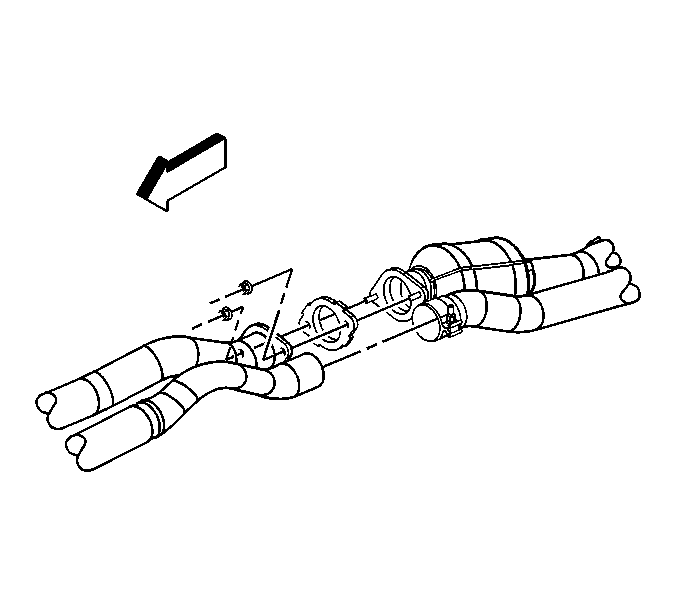
  11. Depending on which side is being replaced, perform one of the following steps:
  12. • Remove the exhaust muffler nuts.
    • or
    • Loosen the exhaust pipe clamp.
  13. Remove the necessary exhaust system hangers so that the pipes can be separated.
  14. Use a jack stand to support the exhaust.

  15. Object Number: 664781  Size: SH
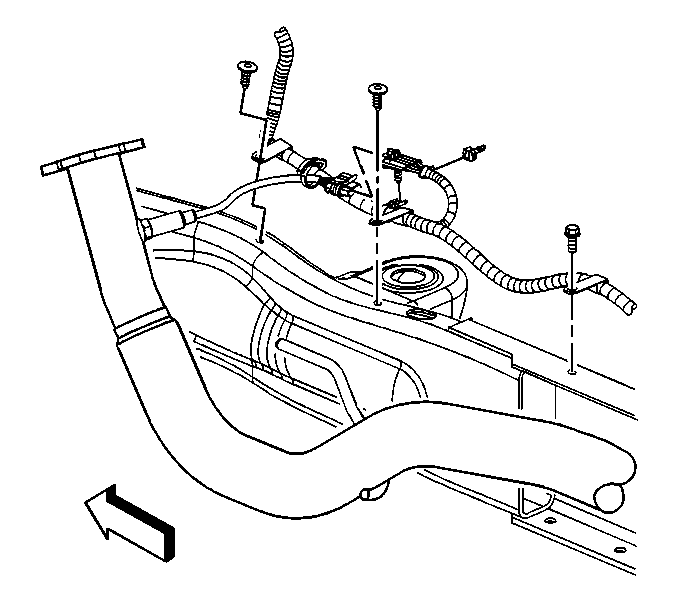
  16. Remove the clip around the engine harness and the oxygen sensor pigtail.
  17. Disconnect the connector position assurance (CPA) retainer.
  18. Disconnect the oxygen sensor electrical connector.
  19. If replacing the exhaust manifold pipe, remove the oxygen sensor.

  20. Object Number: 664826  Size: SH
  21. Remove the exhaust manifold pipe nuts.

  22. Object Number: 344263  Size: SH
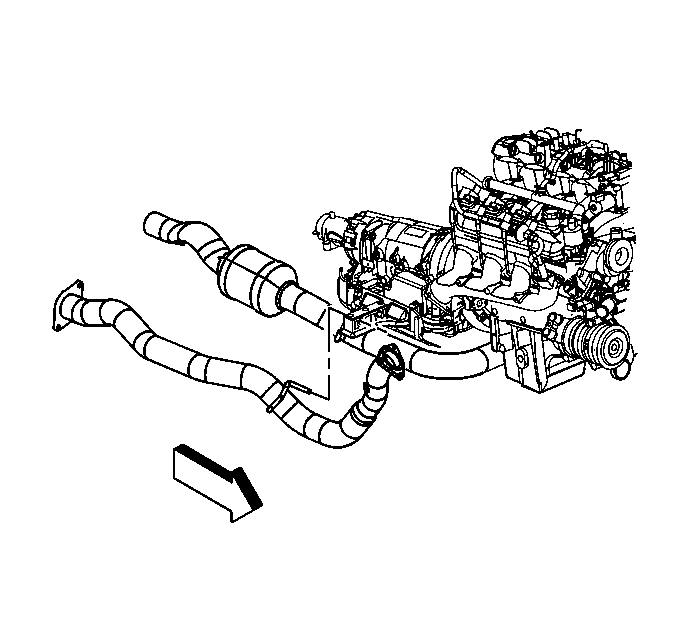
  23. Remove the exhaust manifold pipe.
  24. Slide the exhaust manifold pipe hanger out of the exhaust pipe hanger bracket.
  25. Discard the exhaust manifold pipe seal.

Installation Procedure


    Object Number: 344263  Size: SH
  1. Install a new exhaust manifold pipe seal to the exhaust manifold pipe.
  2. Install the exhaust manifold pipe.
  3. Apply lubricant to the exhaust pipe hanger bracket, in order to aid in installation.
  4. Slide the exhaust manifold pipe hanger into the exhaust pipe hanger bracket.
  5. Notice: Refer to Fastener Notice in the Preface section.
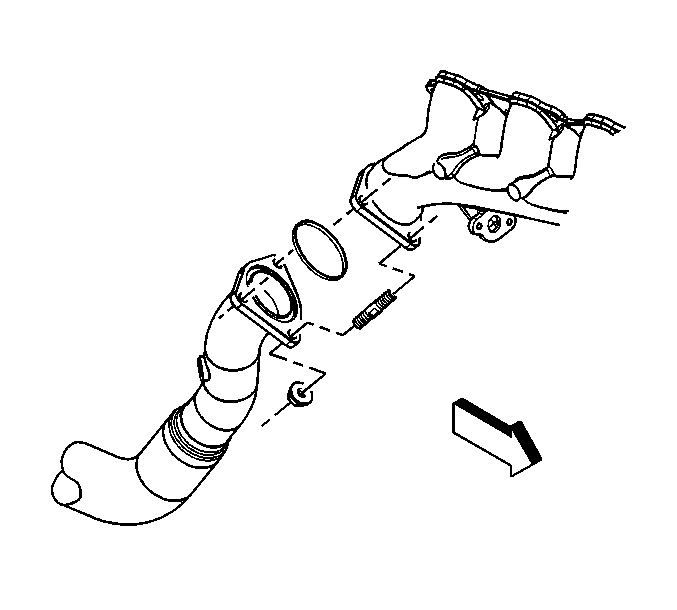

    Object Number: 664826  Size: SH
  6. Install the exhaust manifold pipe nuts.
  7. Tighten
    Tighten the nuts to 50 N·m (39 lb ft).

    Object Number: 664781  Size: SH
  8. If the exhaust manifold pipe was replaced perform the following:
  9. 6.1. Apply anti-seize compound GM P/N 12377953 or equivalent to the threads of the old oxygen sensor.
    6.2. Install the old oxygen sensor.

    Tighten
    Tighten the oxygen sensor to 42 N·m (31 lb ft).

  10. If the exhaust manifold pipe was not replaced perform the following:
  11. 7.1. Connect the oxygen sensor electrical connector.
    7.2. Connect the CPA retainer.
    7.3. Install the clip around the engine harness and the oxygen sensor pigtail.
  12. Install the exhaust pipe/catalytic converter to the vehicle.
  13. Install the exhaust system hangers.

  14. Object Number: 665520  Size: SH
  15. Depending on which side is being replaced, perform one of the following steps:
  16. • Install the exhaust muffler nuts.

    Tighten
    Tighten the nuts to 40 N·m (30 lb ft).

    • or
    • Install a NEW exhaust pipe clamp.

    Tighten
    Tighten the clamp to 44 N·m (33 lb ft).

    Object Number: 788013  Size: SH
  17. Install the transmission support crossmember.
  18. Install the transmission support crossmember bolts.
  19. Tighten
    Tighten the transmission support crossmember bolts to 70 N·m (52 lb ft).

    Object Number: 647997  Size: SH
  20. Lower the transmission onto the transmission support.
  21. Install the transmission mount to transmission support nuts.
  22. Tighten
    Tighten the transmission mount nuts to 40 N·m (30 lb ft).

  23. Remove the transmission jack.

  24. Object Number: 339429  Size: SH
  25. Install the oil pan skid plate and bolts, if necessary.
  26. Tighten
    Tighten the bolts to 20 N·m (15 lb ft).

  27. Lower the vehicle.