For 1990-2009 cars only
Battery Positive Cable Replacement Underhood Junction Block to Starter
Removal Procedure
Important:
• Always use replacement cables that are of the same type, diameter and length of the cables that you are replacing. • Always route the replacement cable the same way as the original cable.
- Disconnect the negative battery cable. Refer to Battery Negative Cable Disconnection and Connection.
- Remove the junction block cover.
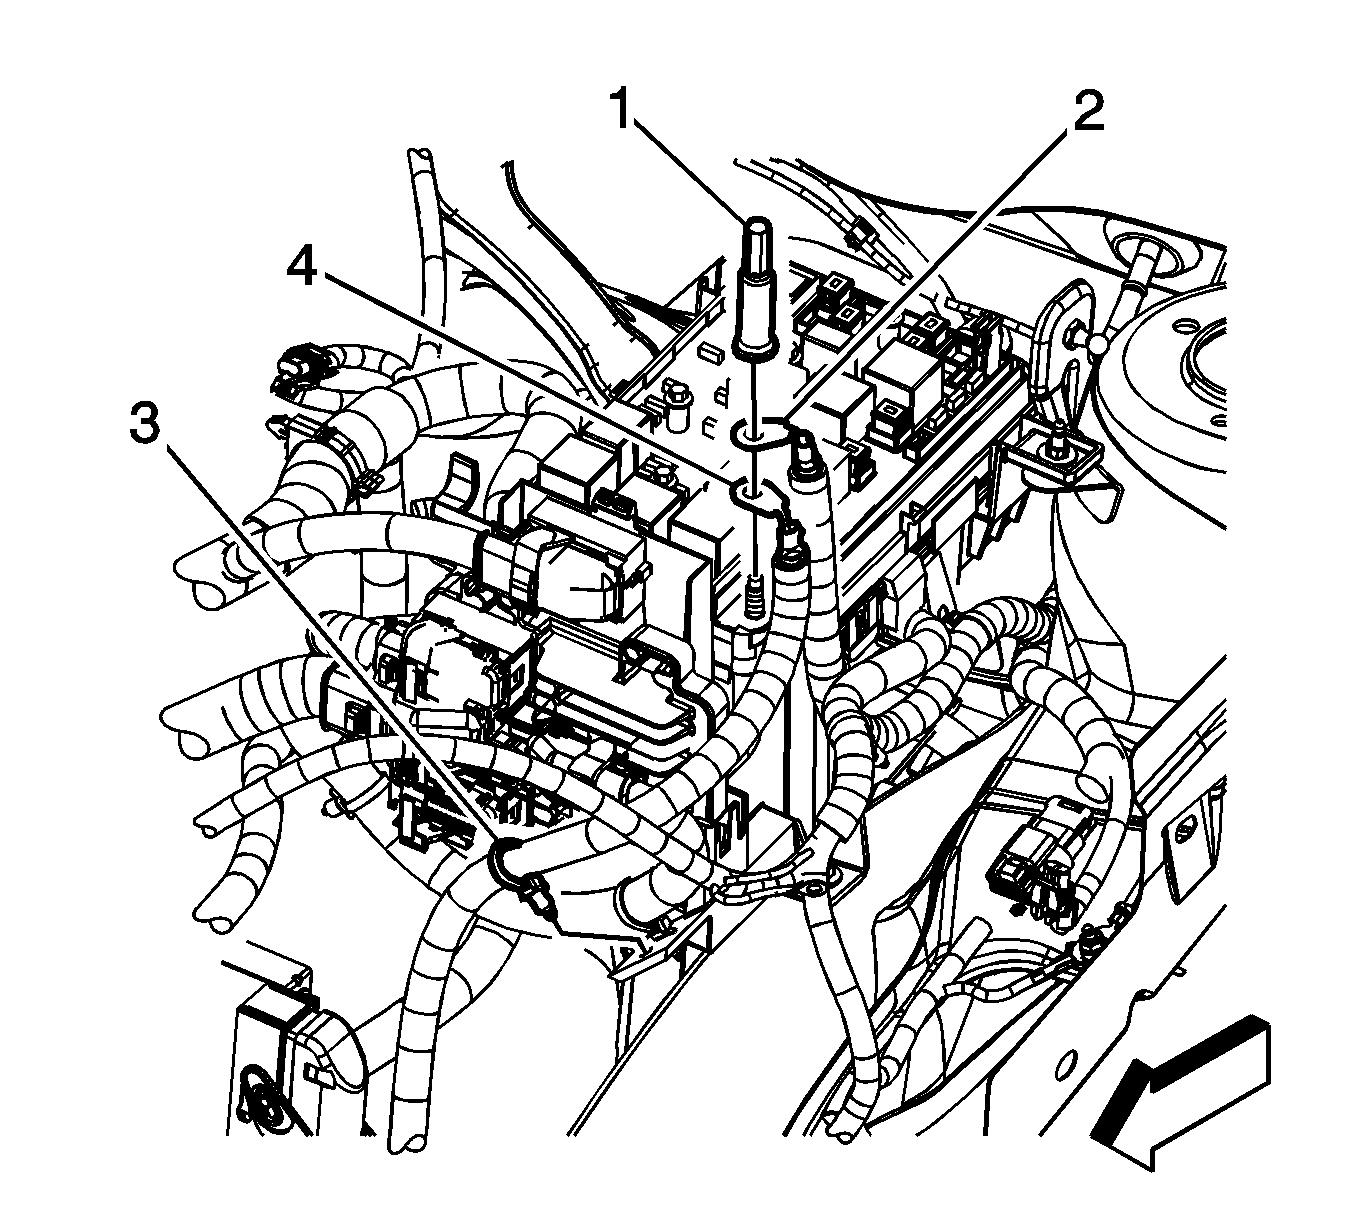
- Remove the junction block nut (1).
- Remove the positive battery cable terminal (2) from the junction block stud.
- Remove the positive battery cable clip (3) from the engine control module (ECM) bracket.
- Raise and support the vehicle. Refer to Lifting and Jacking the Vehicle.
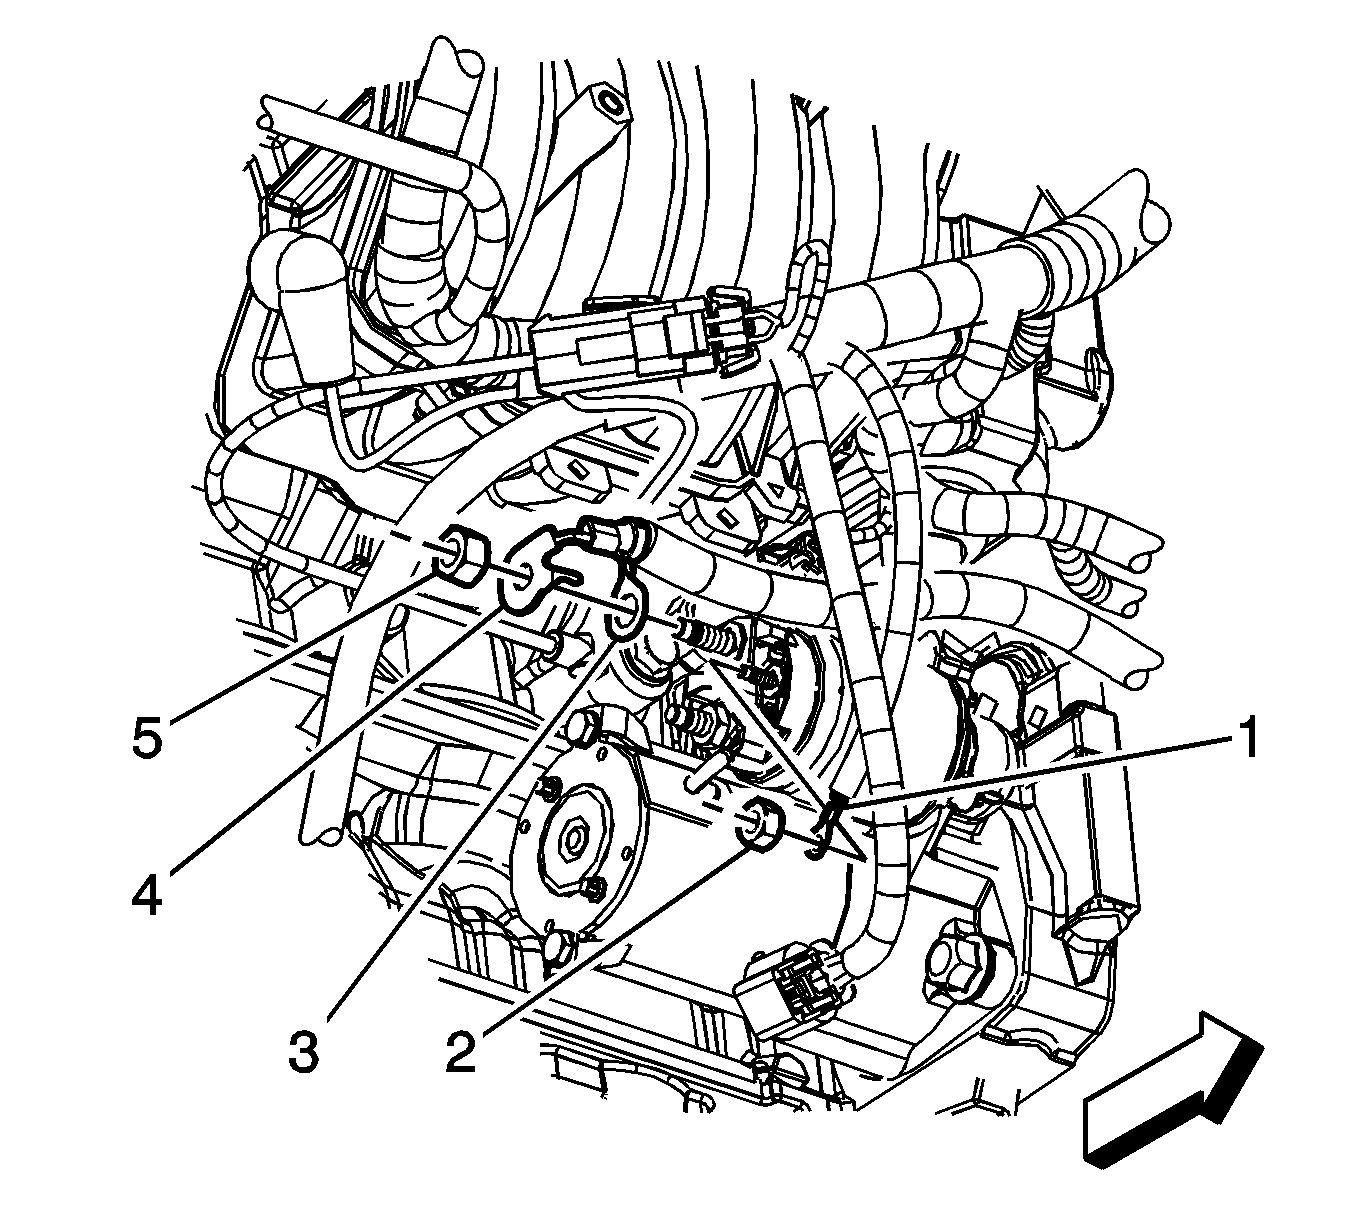
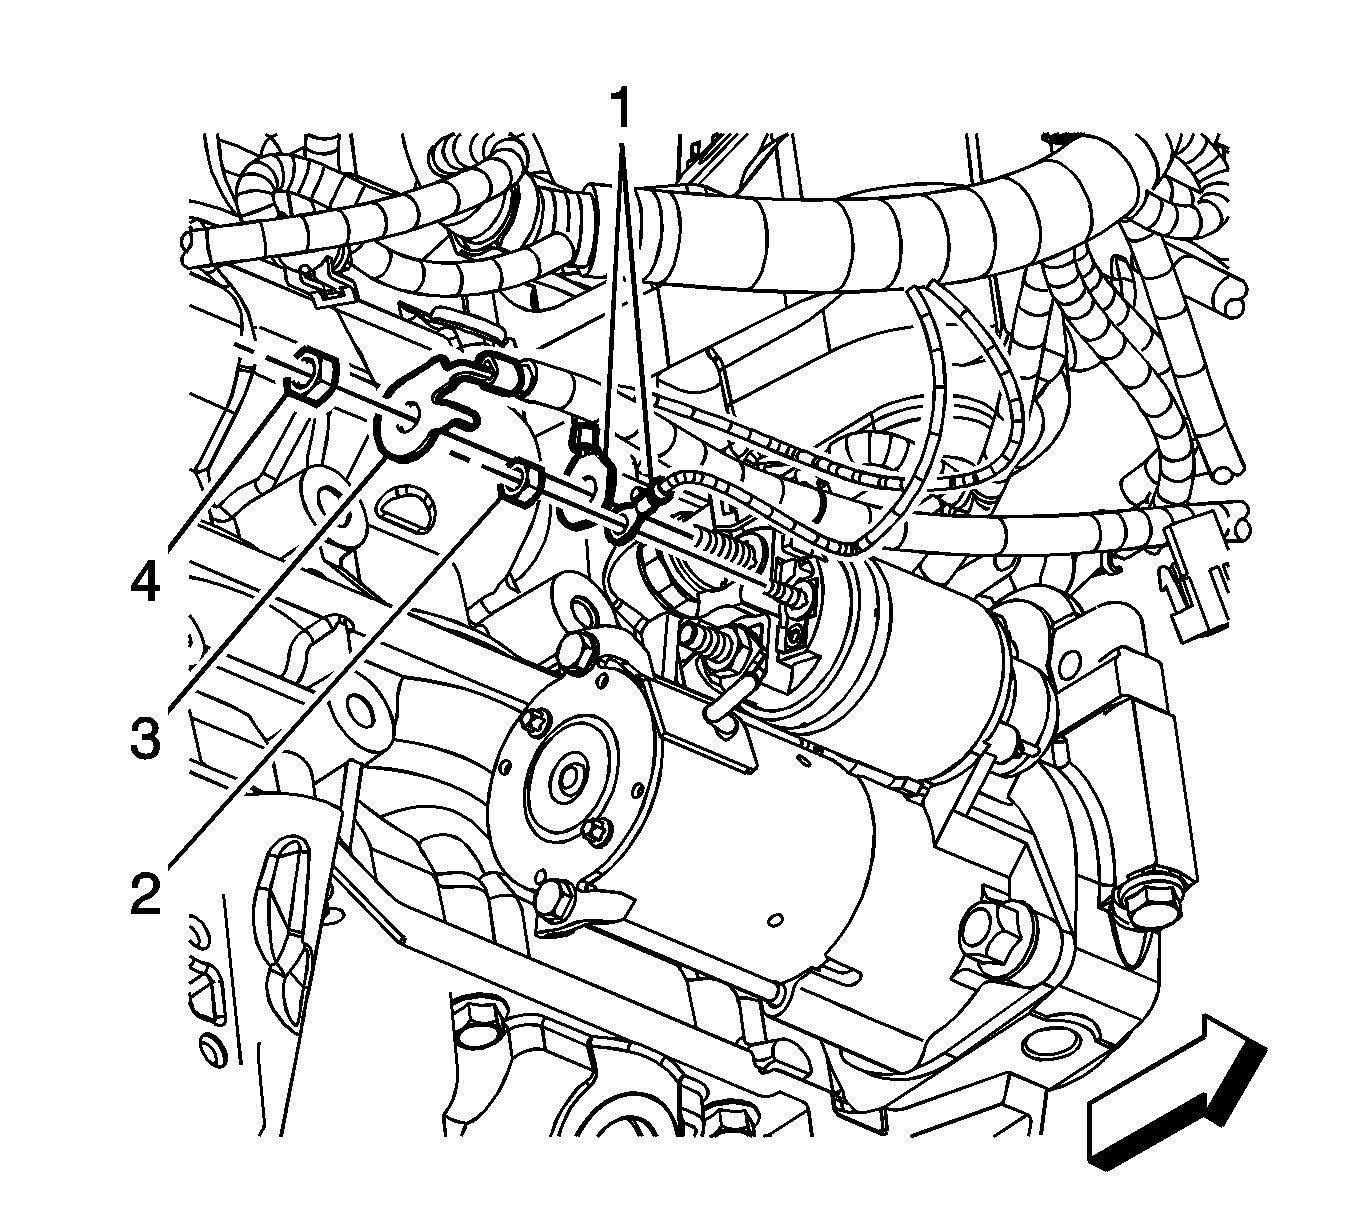
- Remove the starter solenoid terminal nut (5).
- Remove the positive battery cable terminal (4) from the starter solenoid.
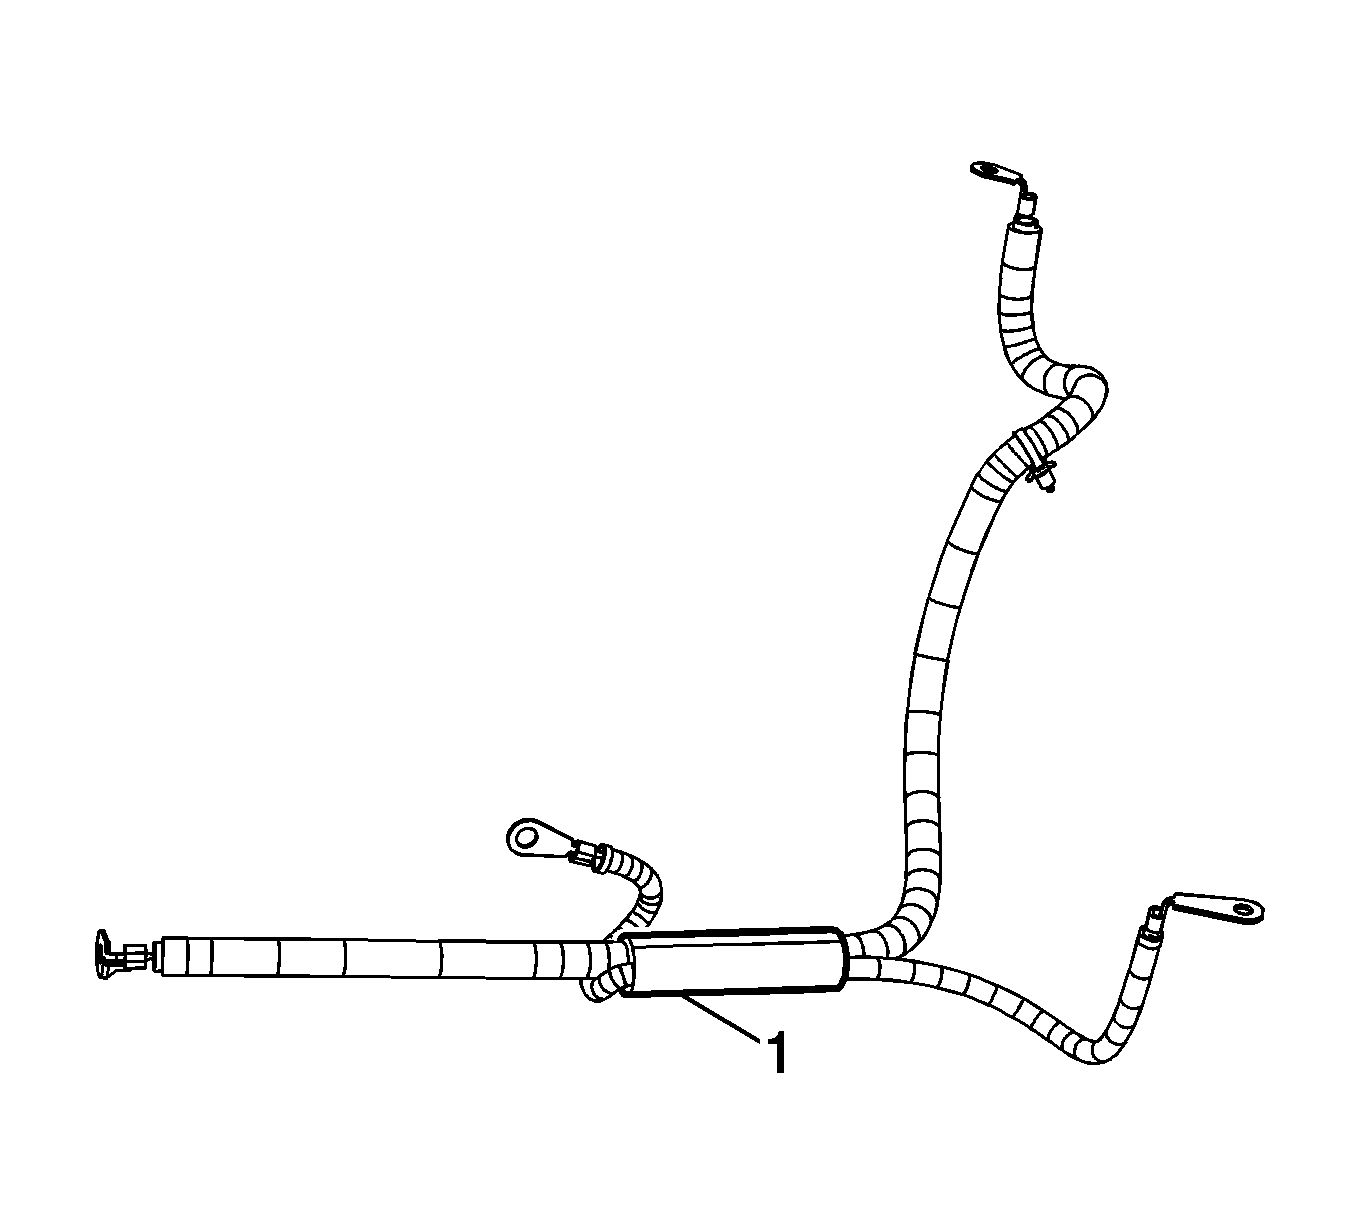
- Cut open the tape on the positive/negative battery cable conduit (1).
- Remove the old tape from the conduit.
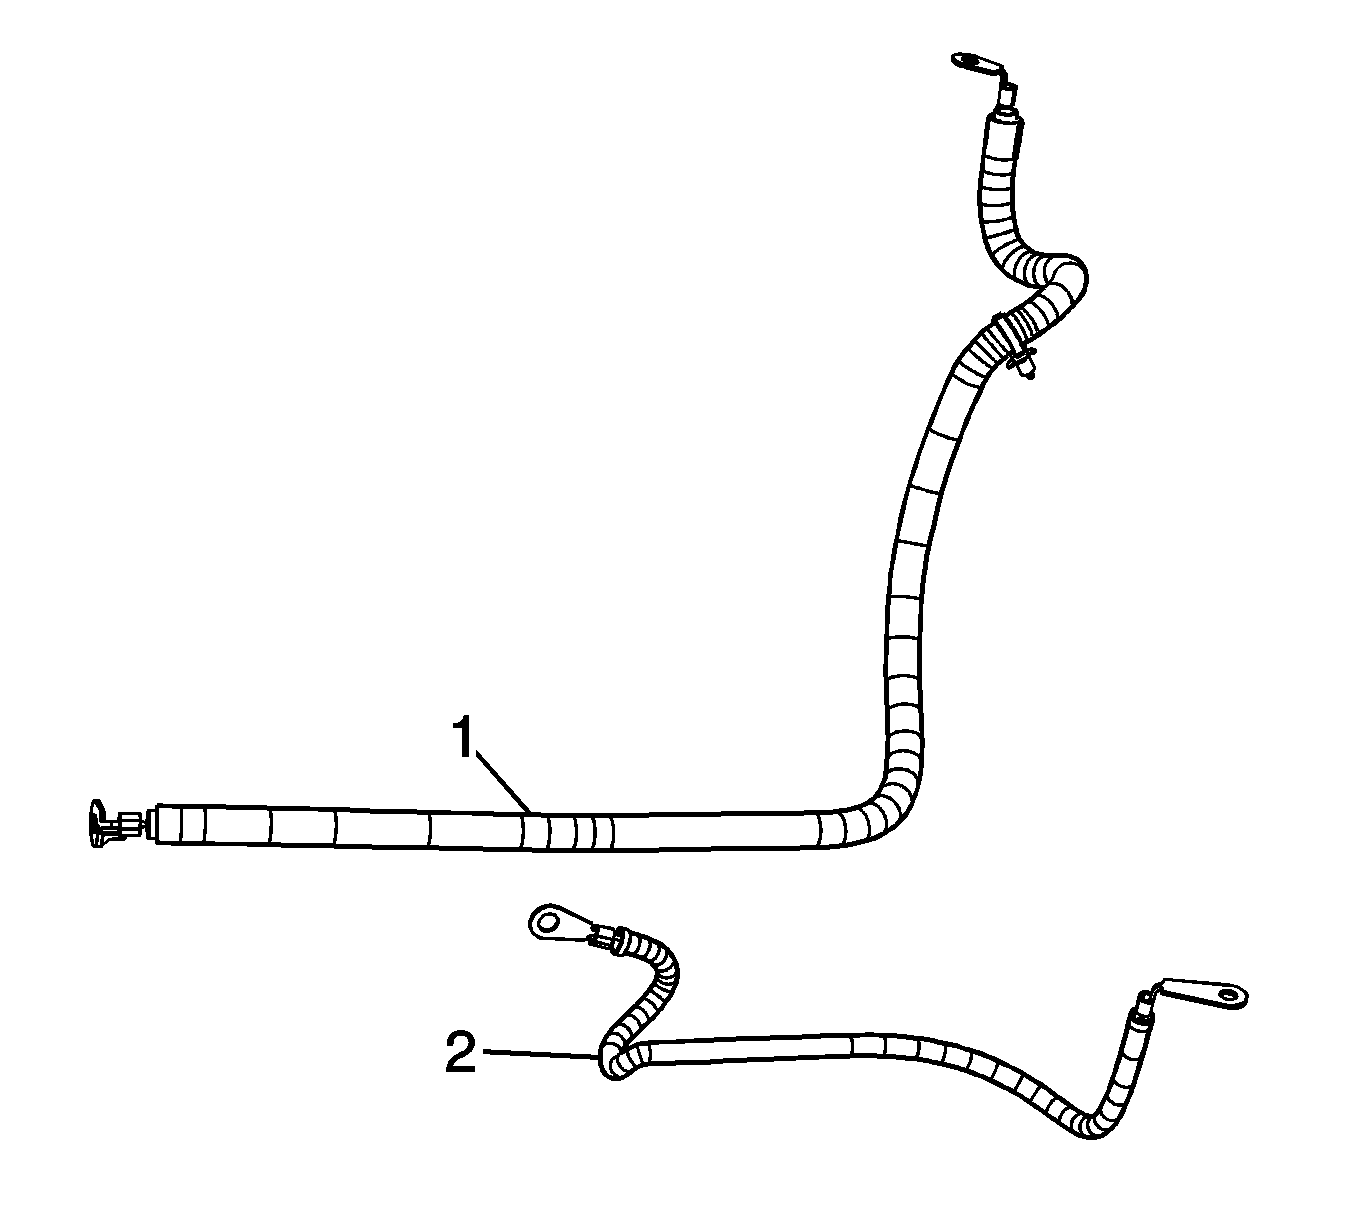
- Remove the positive battery cable (1).
Installation Procedure
- Install the positive battery cable (1) to the conduit.
- Wrap tape around the positive/negative battery cable conduit (1).
- Install the positive battery cable terminal (3) to the starter solenoid.
- Install the starter solenoid terminal nut (4).
- Lower the vehicle.
- Install the positive battery cable terminal (2) to the junction block stud.
- Install the junction block nut (1).
- Install the positive battery cable clip (3) to the ECM bracket.
- Install the junction block cover.
- Connect the negative battery cable. Refer to Battery Negative Cable Disconnection and Connection.


Notice: Refer to Fastener Notice in the Preface section.
Tighten
Tighten the nut to 17 N·m (13 lb ft).

Tighten
Tighten the nut to 17 N·m (13 lb ft).
Battery Positive Cable Replacement Battery to Underhood Junction Block
Removal Procedure
Important:
• Always use replacement cables that are of the same type, diameter and length of the cables that you are replacing. • Always route the replacement cable the same way as the original cable.
- Disconnect the negative battery cable. Refer to Battery Negative Cable Disconnection and Connection.
- Remove the carpet. Refer to Floor Panel Carpet Replacement.
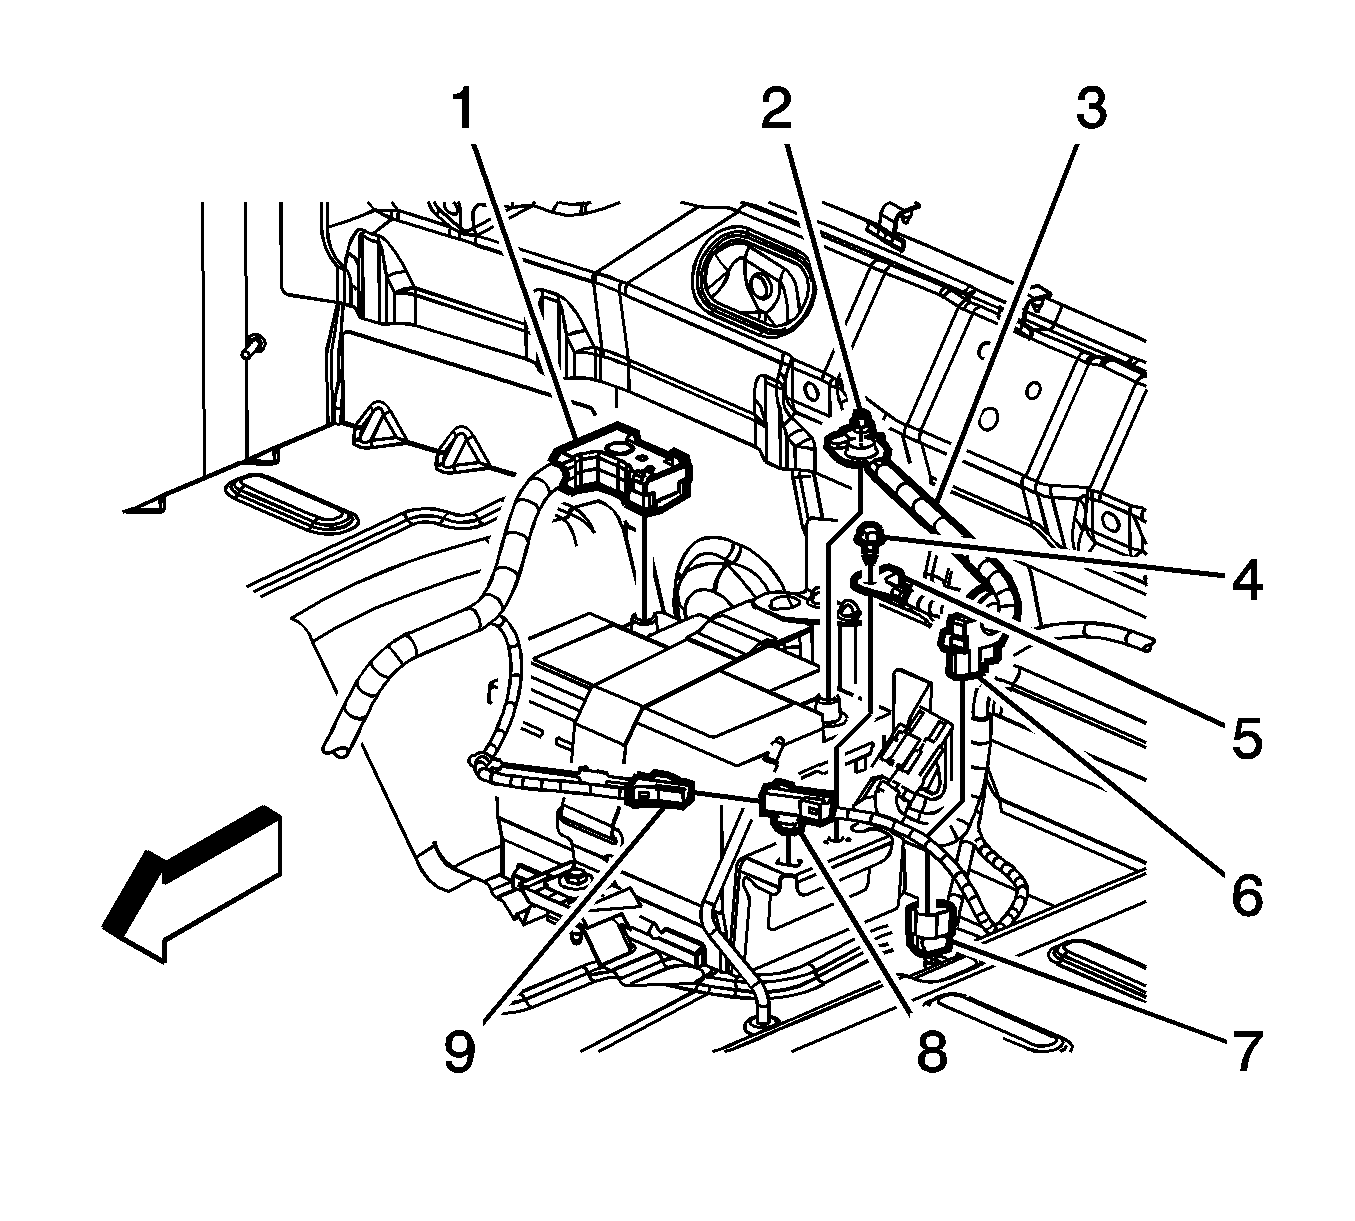
- Open the positive battery cable (1) cover.
- Loosen the positive battery cable bolt.
- Remove the positive battery cable from the battery.
- Disconnect the positive battery cable electrical connector (9) from the body harness electrical connector (8).
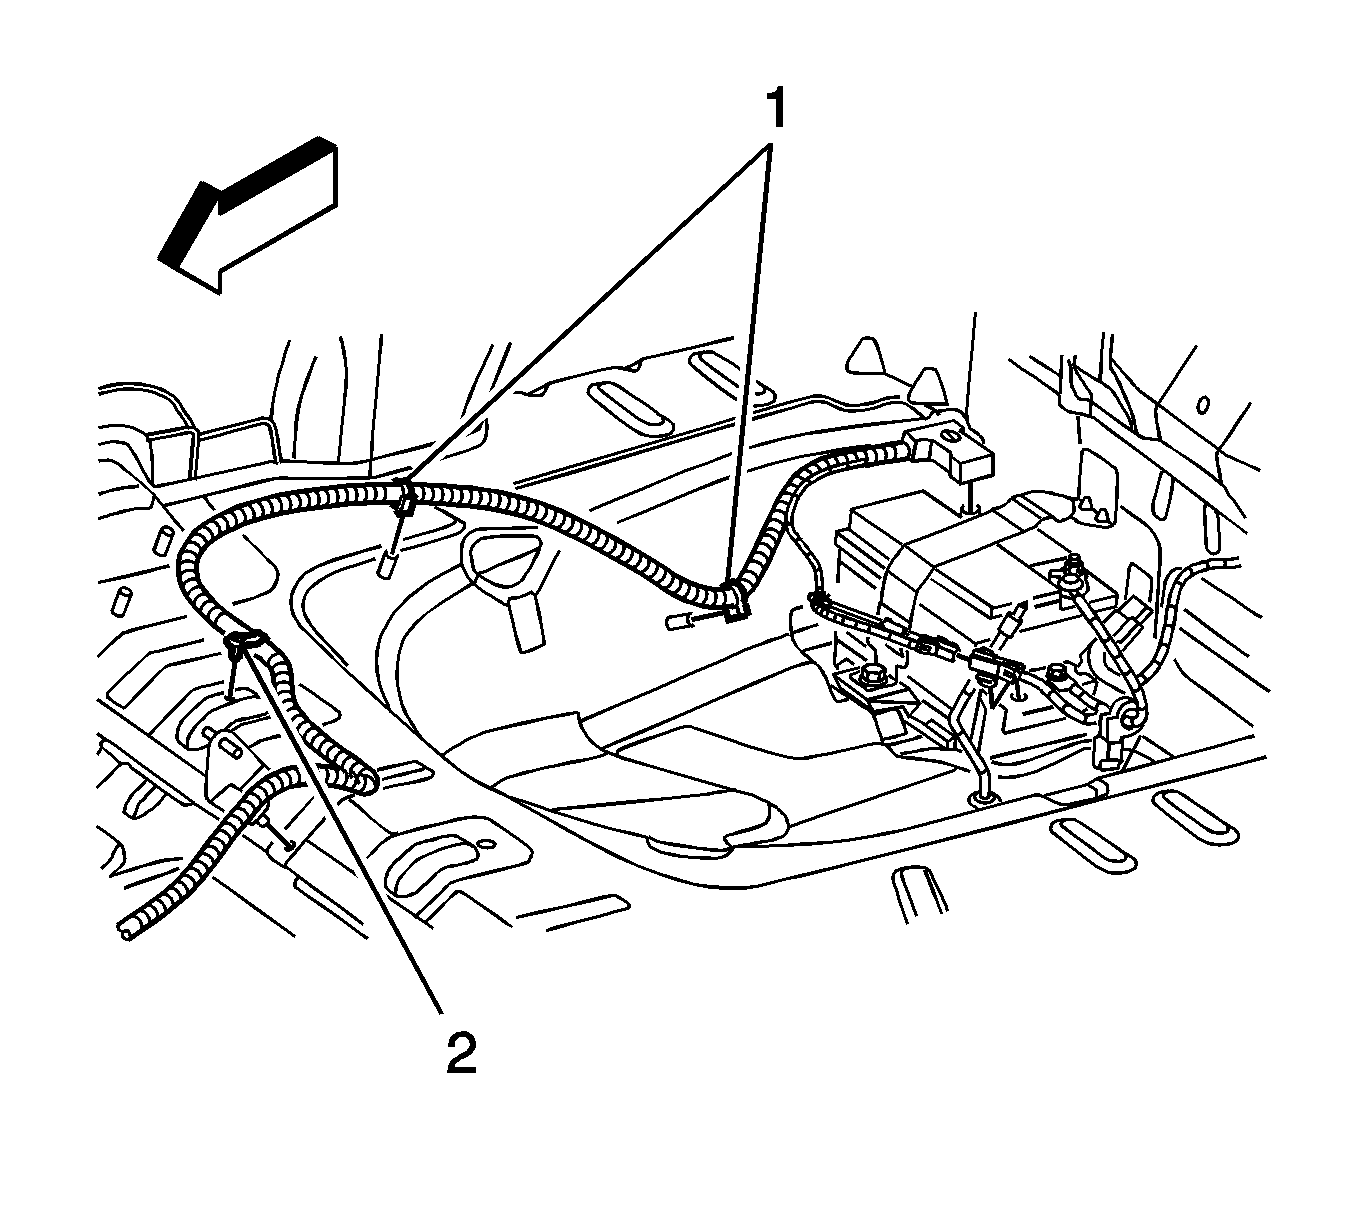
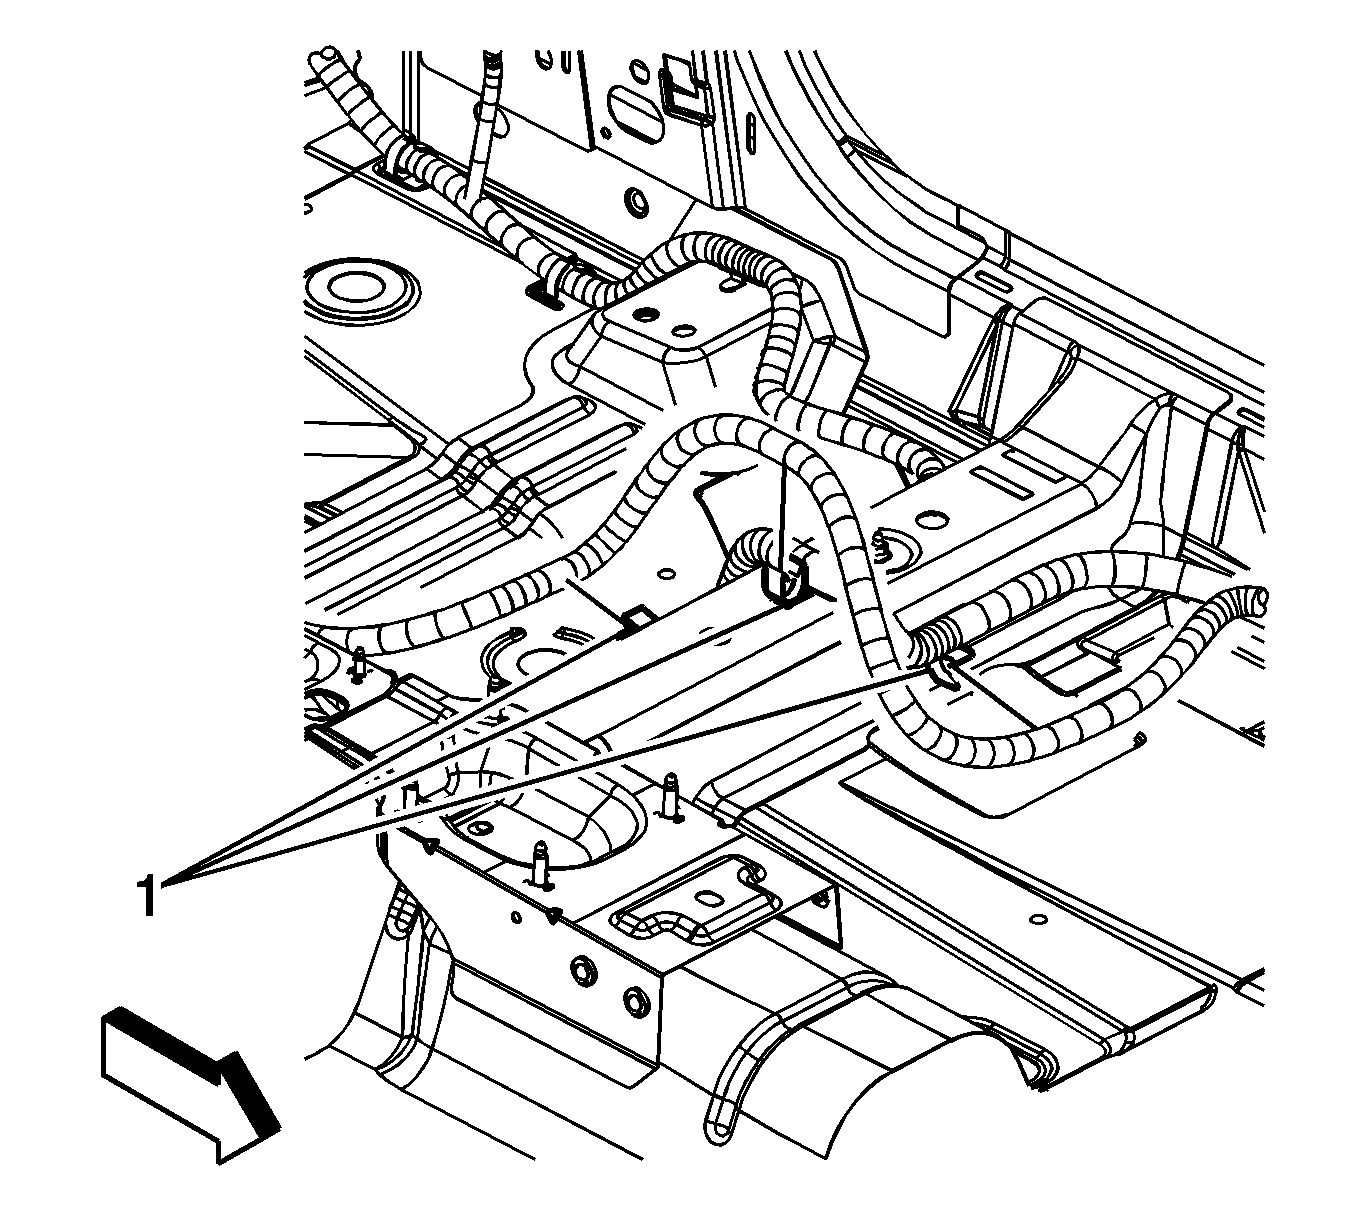
- From inside the vehicle, remove the positive battery cable clips (1) from the weld studs.
- Remove the positive battery cable clip (2) from the floor pan.
- Remove the positive battery cable clip (2) from the latch bar.
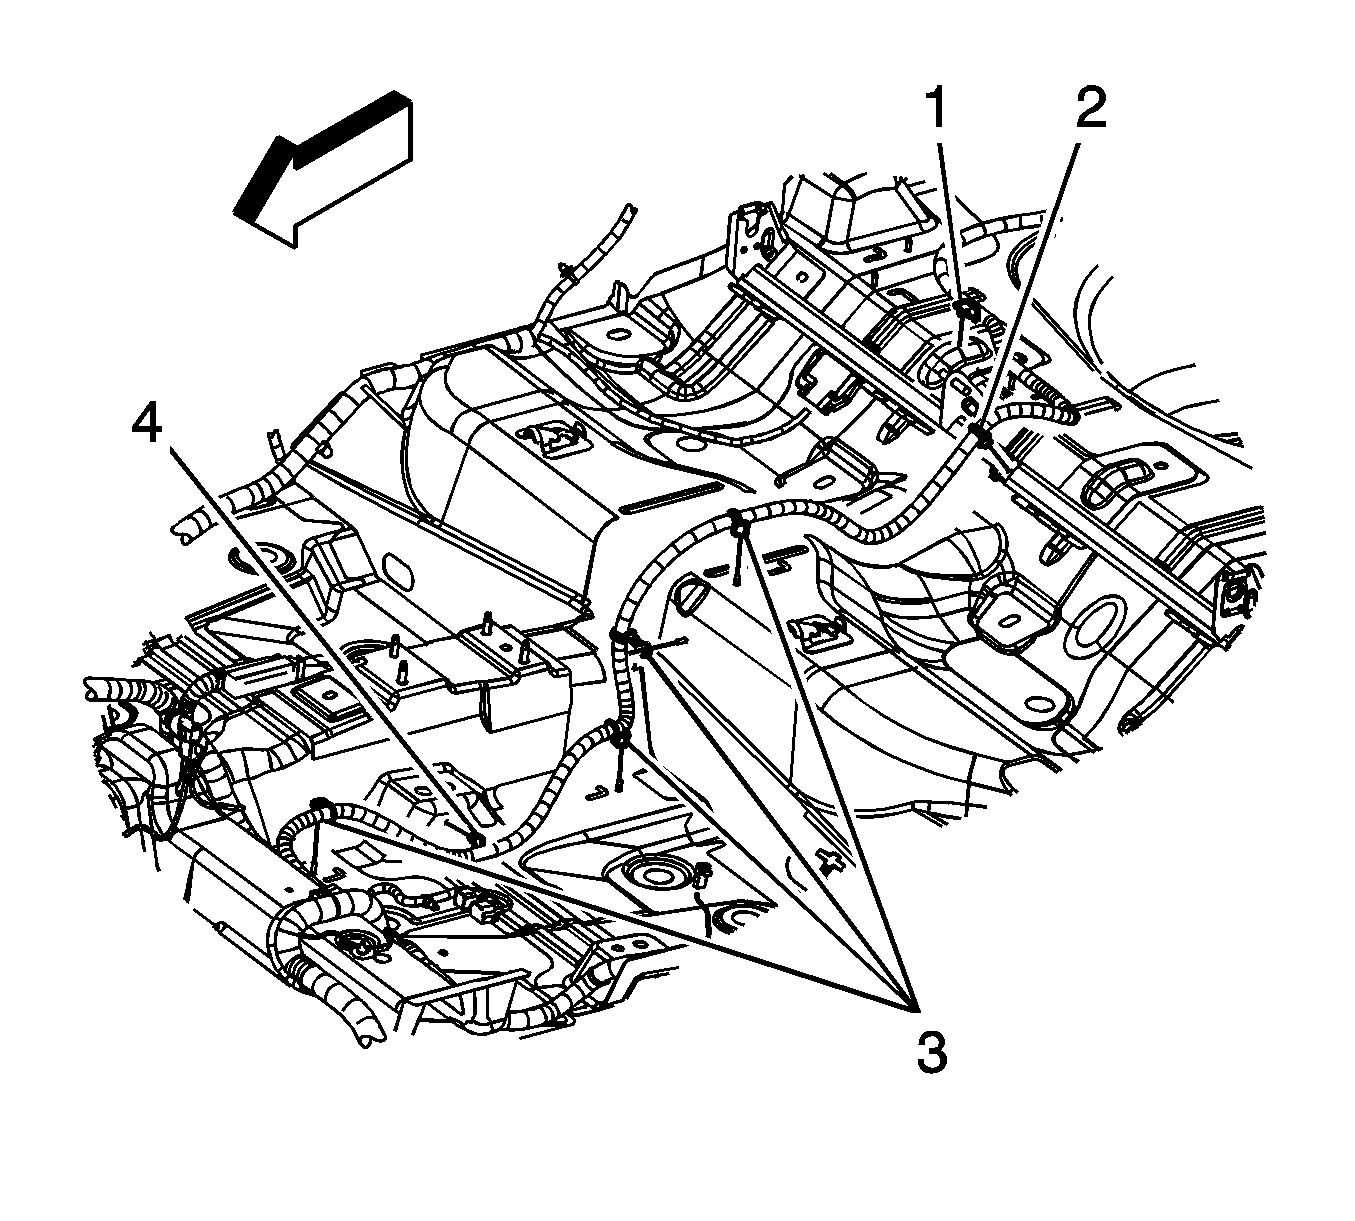
- Remove the positive battery cable from the body clip (3). Unfold the tabs in order to remove the cable.
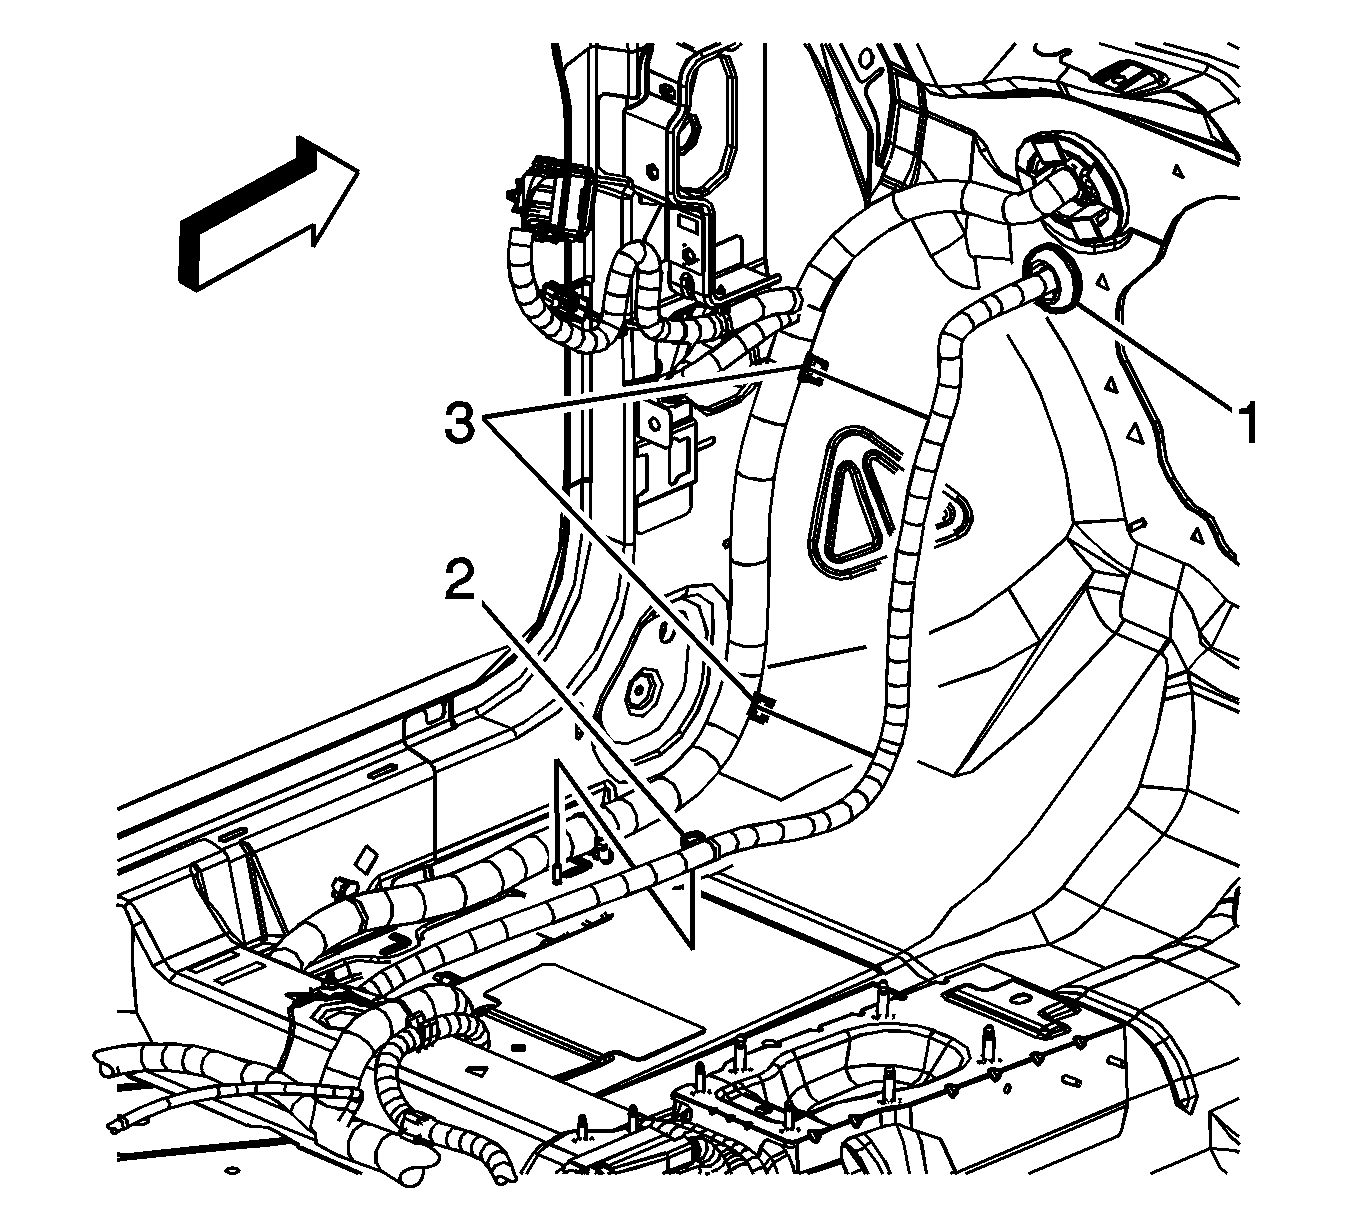
- Remove the positive battery cable clips (3) from the weld studs.
- Remove the positive battery cable clip (4) from the floor pan.
- Remove the positive battery cable from the body wiring harness clips (1).
- Remove the positive battery cable clip (2) from the weld stud.
- Remove the positive battery cable from the body wiring harness clips (3).
- Unseat the grommet (1) from the front of dash.
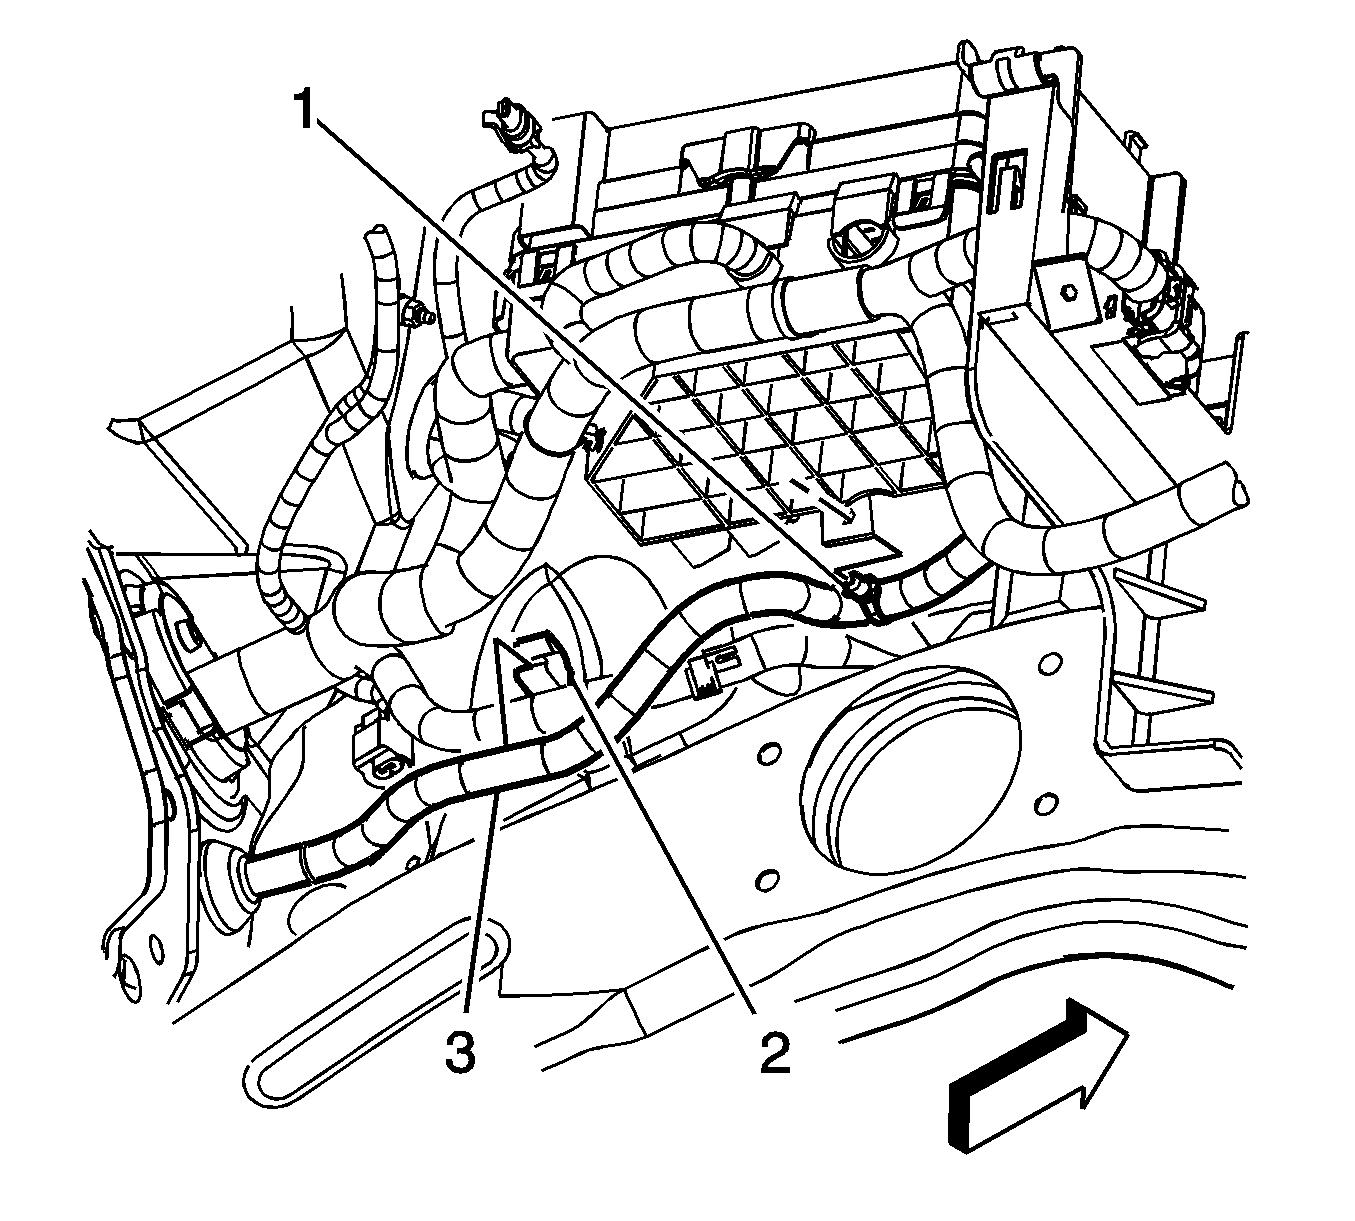
- From under the hood, remove the junction block cover.
- Remove the junction block nut (1).
- Remove the positive battery cable (to starter) terminal (2) from the stud.
- Remove the underhood Junction block bracket. Refer to Underhood Electrical Center or Junction Block Bracket Replacement.
- Remove the positive battery cable (3) from the body wiring harness clip (2).
- Remove the positive battery cable clip (1) from the junction block.
- Remove the positive battery cable from under the junction block.
- Route the positive battery cable through the hole in the front of dash.
- From inside the vehicle, remove the positive battery cable.

Installation Procedure
- From inside the vehicle, layout the positive battery cable assembly.
- Route the positive battery cable through the hole in the front of dash.
- From under the hood, route the positive battery cable under the junction block.
- Install the positive battery cable clip (1) to the junction block.
- Install the positive battery cable (3) from the body wiring harness clip (2).
- Install the underhood Junction block bracket. Refer to Underhood Electrical Center or Junction Block Bracket Replacement.
- Install the positive battery cable (to starter) terminal (2) to the stud.
- Install the junction block nut (1).
- Install the junction block cover.
- From inside the vehicle, seat the grommet (1) to the front of dash.
- Install the positive battery cable to the body wiring harness clips (3).
- Install the positive battery cable clip (2) to the weld stud.
- Install the positive battery cable to the body wiring harness clips (1).
- Install the positive battery cable clip (4) to the floor pan.
- Install the positive battery cable clips (3) to the weld studs.
- Install the positive battery cable to the body clip (3).
- Install the positive battery cable clip (2) to the latch bar.
- Install the positive battery cable clip (2) to the floor pan.
- Install the positive battery cable clips (1) to the weld studs.
- Connect the positive battery cable electrical connector (9) to the body harness electrical connector (8).
- Install the positive battery cable to the battery.
- Tighten the positive battery cable bolt.
- Close the positive battery cable (1) cover.
- Install the carpet. Refer to Floor Panel Carpet Replacement.
- Connect the negative battery cable. Refer to Battery Negative Cable Disconnection and Connection.


Notice: Refer to Fastener Notice in the Preface section.
Tighten
Tighten the nut to 17 N·m (13 lb ft).


Tighten
Tighten the bolt to 17 N·m (13 lb ft).
