Special Tools
J 39194-C Oxygen Sensor Wrench
Removal Procedure
Caution: The oxygen sensor uses a permanently attached pigtail and connector. Do not remove the pigtail from the oxygen sensor. Damage to or removal of the pigtail connector could affect proper operation of the oxygen sensor.
Caution: The use of excessive force may damage the threads in the exhaust manifold/pipe.
Note:
• The in-line connector and louvered end must be kept clear of grease, dirt or other contaminants. Avoid using cleaning solvents of any type. DO NOT drop or roughly handle the heated oxygen sensor (HO2S). • The HO2S may be difficult to remove when the engine temperature is less than 48°C (120°F).
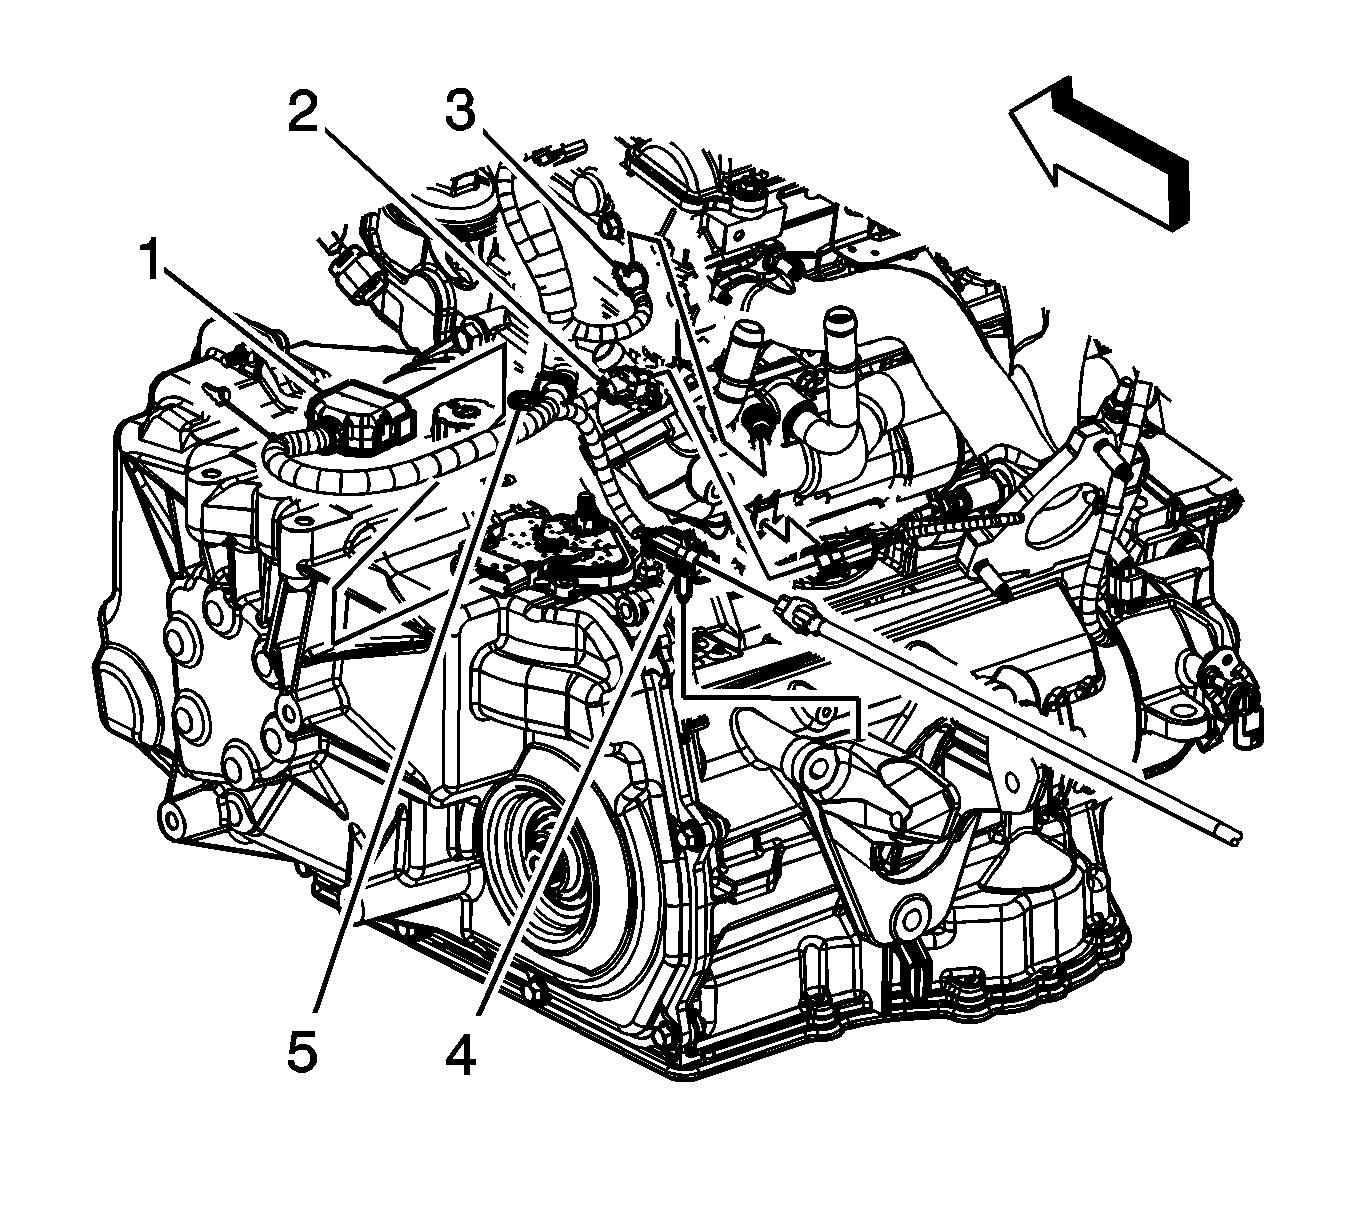
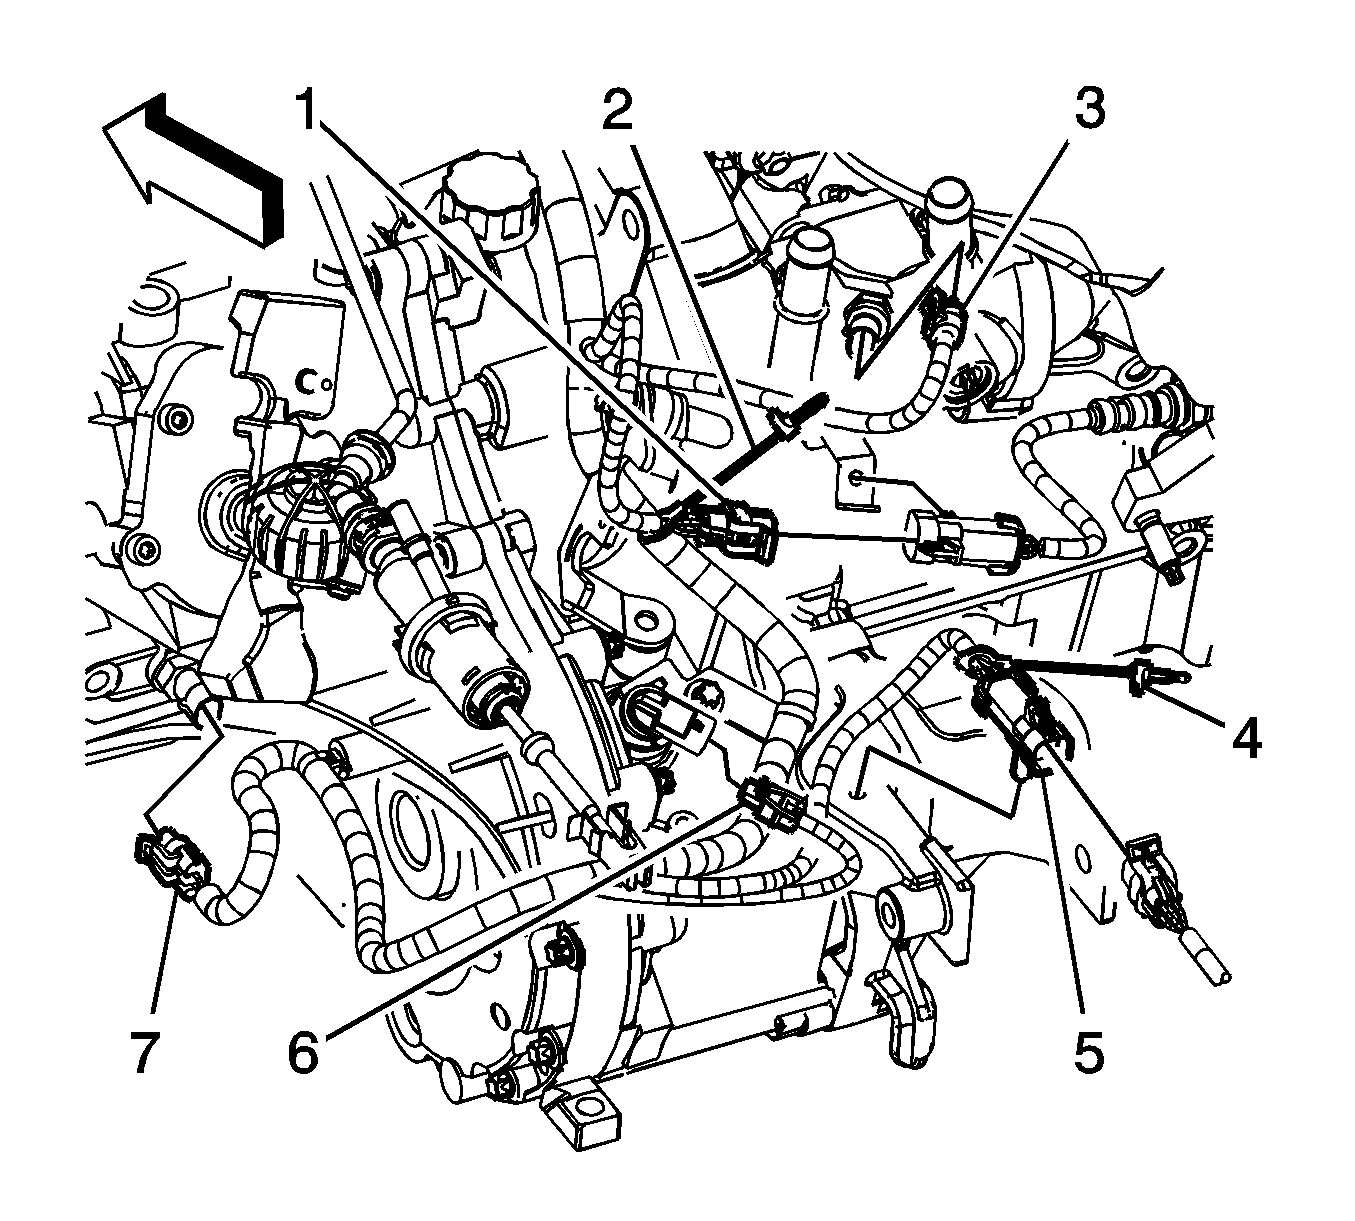
- If equipped with regular production option (RPO) MN5, perform the following steps, remove the connector position assurance (CPA) retainer.
- Disconnect the HO2S electrical connector lead from the engine harness electrical connector (4).
- If equipped with RPO M86, perform the following steps, remove the CPA retainer (4).
- Disconnect the HO2S connector lead from the engine harness electrical connector (5).
- Raise and support the vehicle. Refer to Lifting and Jacking the Vehicle.
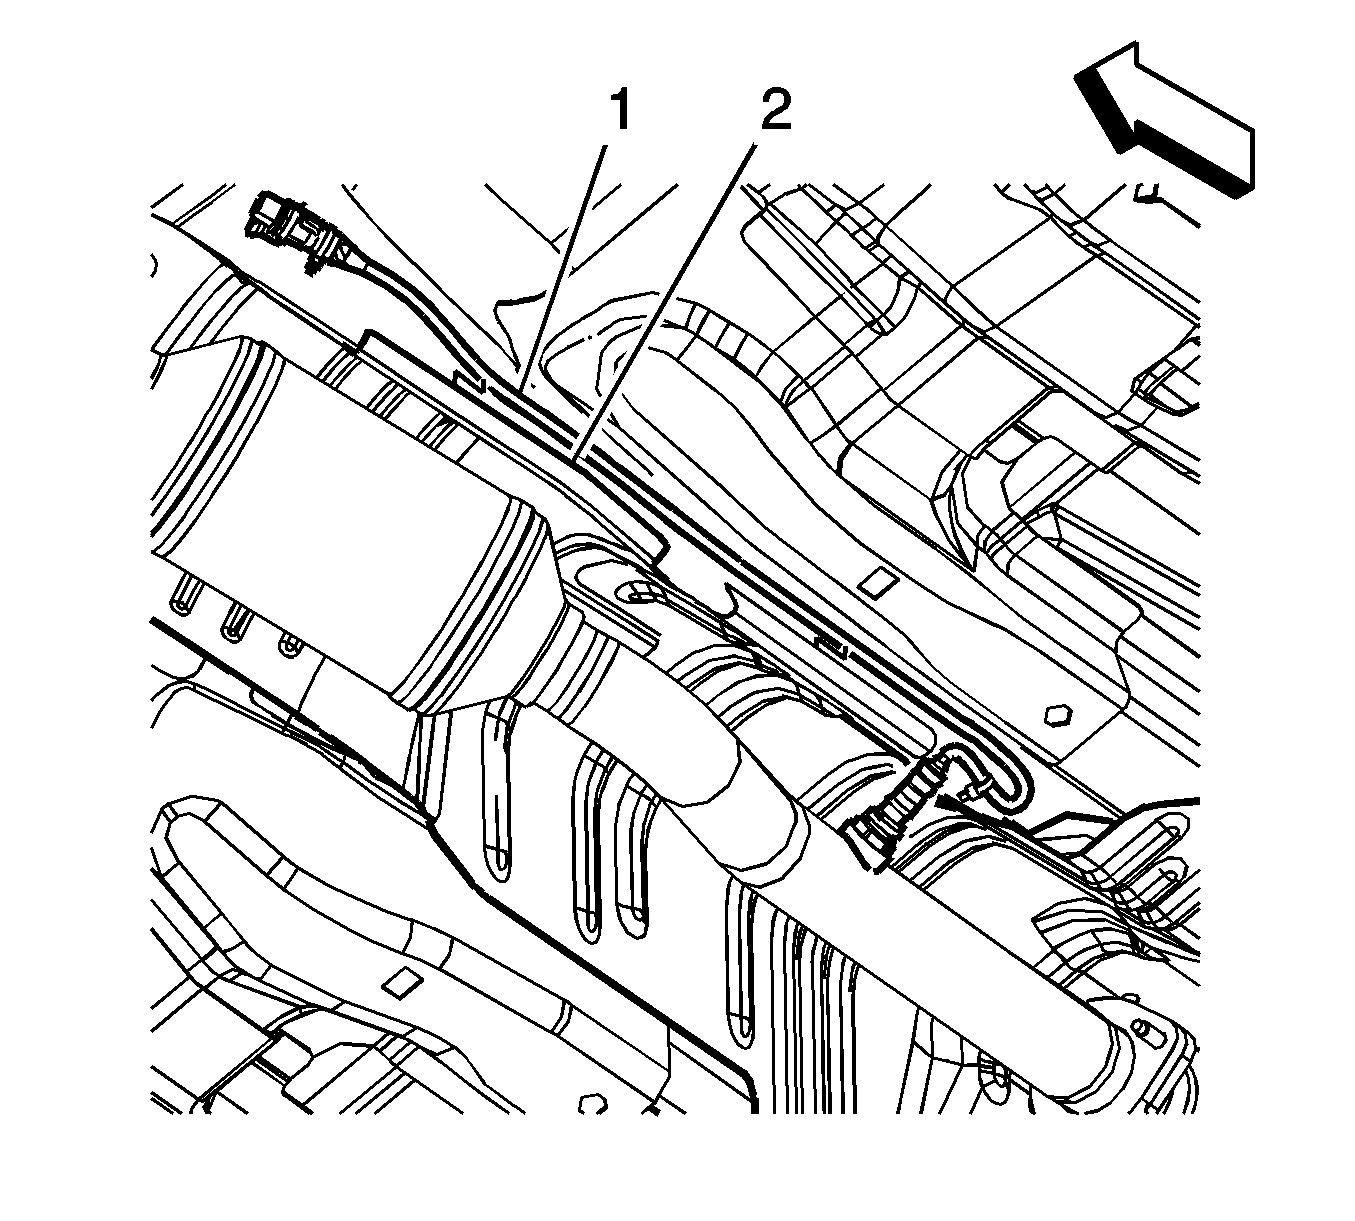
- Bend the heat shield trough (2) down slightly until the HO2S lead (1) can be removed.
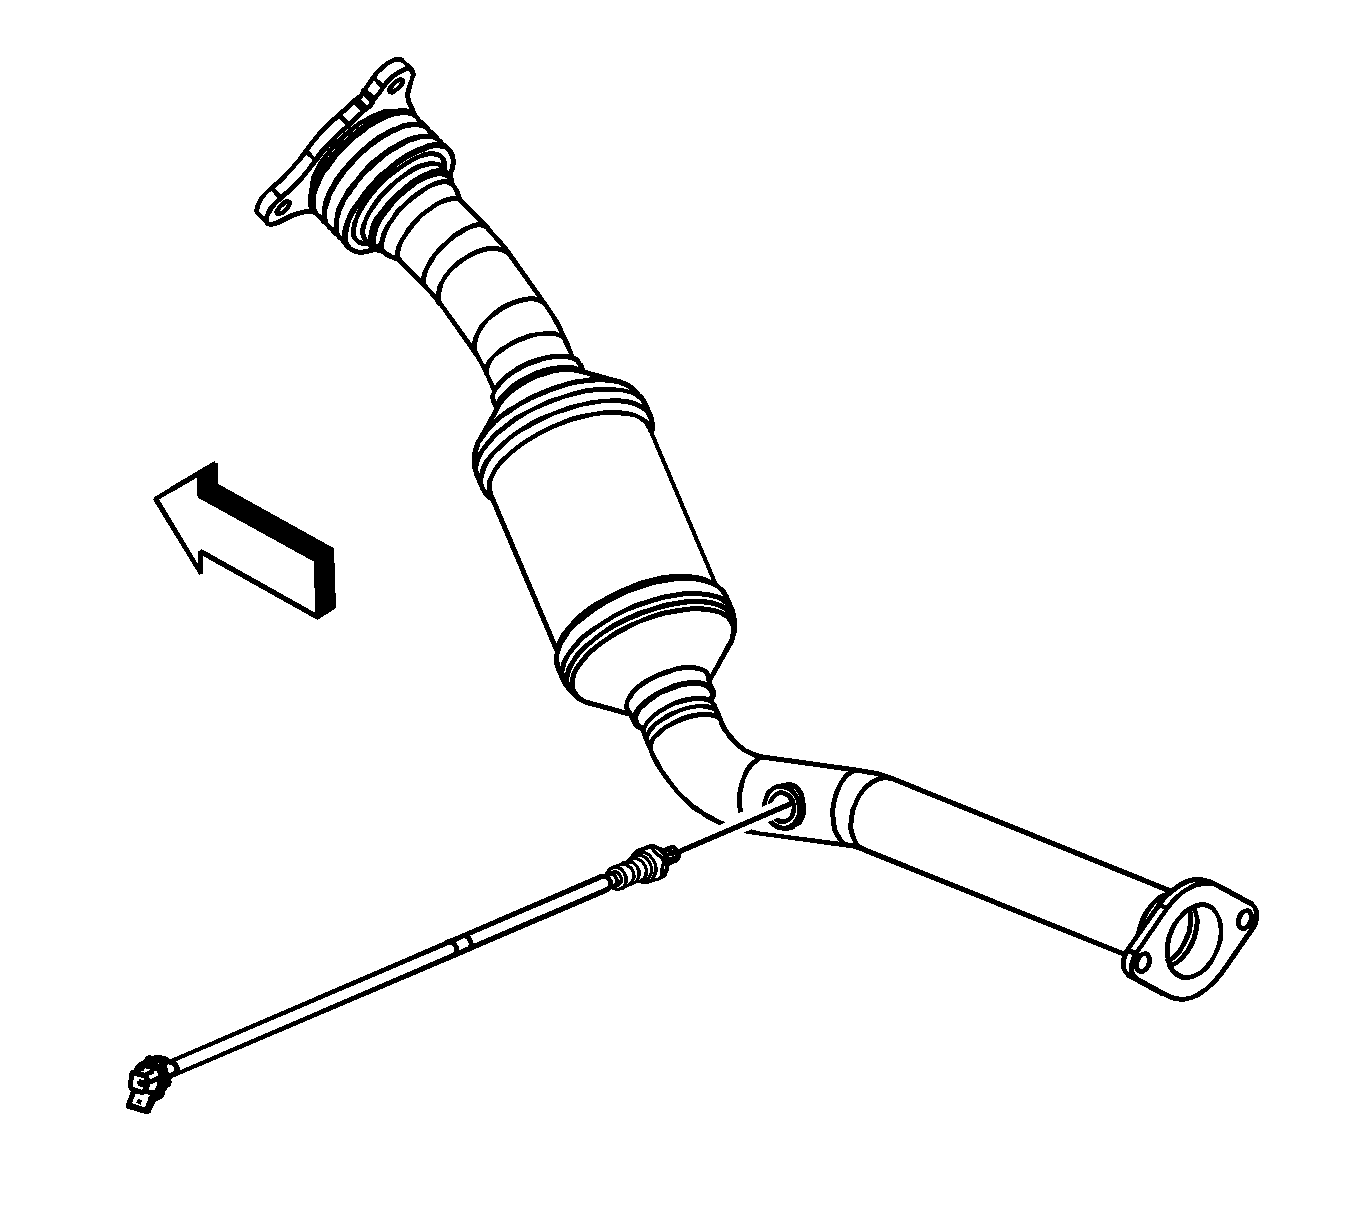
- Using the J 39194-C , remove the HO2S.


Installation Procedure
Note: A special anti-seize compound is used on the heated oxygen sensor threads. The compound consists of a liquid graphite and glass beads. The graphite will burn away, but the glass beads will remain, making the sensor easier to remove. New or service replacement sensors will have the compound applied to the threads. If a sensor is removed and is to be reinstalled, the threads must have an anti-seize compound applied prior to installation.
- If necessary, coat the threads of the HO2S with anti-seize compound GM P/N 12377953 or Saturn P/N 21485279 or equivalent.
- Using the J 39194-C , install the HO2S and tighten to 42 N·m (31 lb ft).
- Bend the heat shield trough (2) up until the HO2S lead (1) is secured.
- Lower the vehicle.
- If equipped with RPO M86, perform the following steps, connect the HO2S connector lead to the engine harness electrical connector (5).
- Install the CPA retainer (4).
- If equipped with RPO MN5, perform the following steps, connect the HO2S electrical connector lead to the engine harness electrical connector (4).
- Install the CPA retainer.

Caution: Refer to Fastener Caution in the Preface section.

Note: Use care when securing the HO2S electrical lead into the trough on the exhaust heat shield, as not to pinch the lead.


