For 1990-2009 cars only
Battery Positive Cable Replacement Junction Block to Starter
Removal Procedure
- Disconnect the negative battery cable. Refer to Battery Negative Cable Disconnection and Connection.
- Remove the junction block cover.
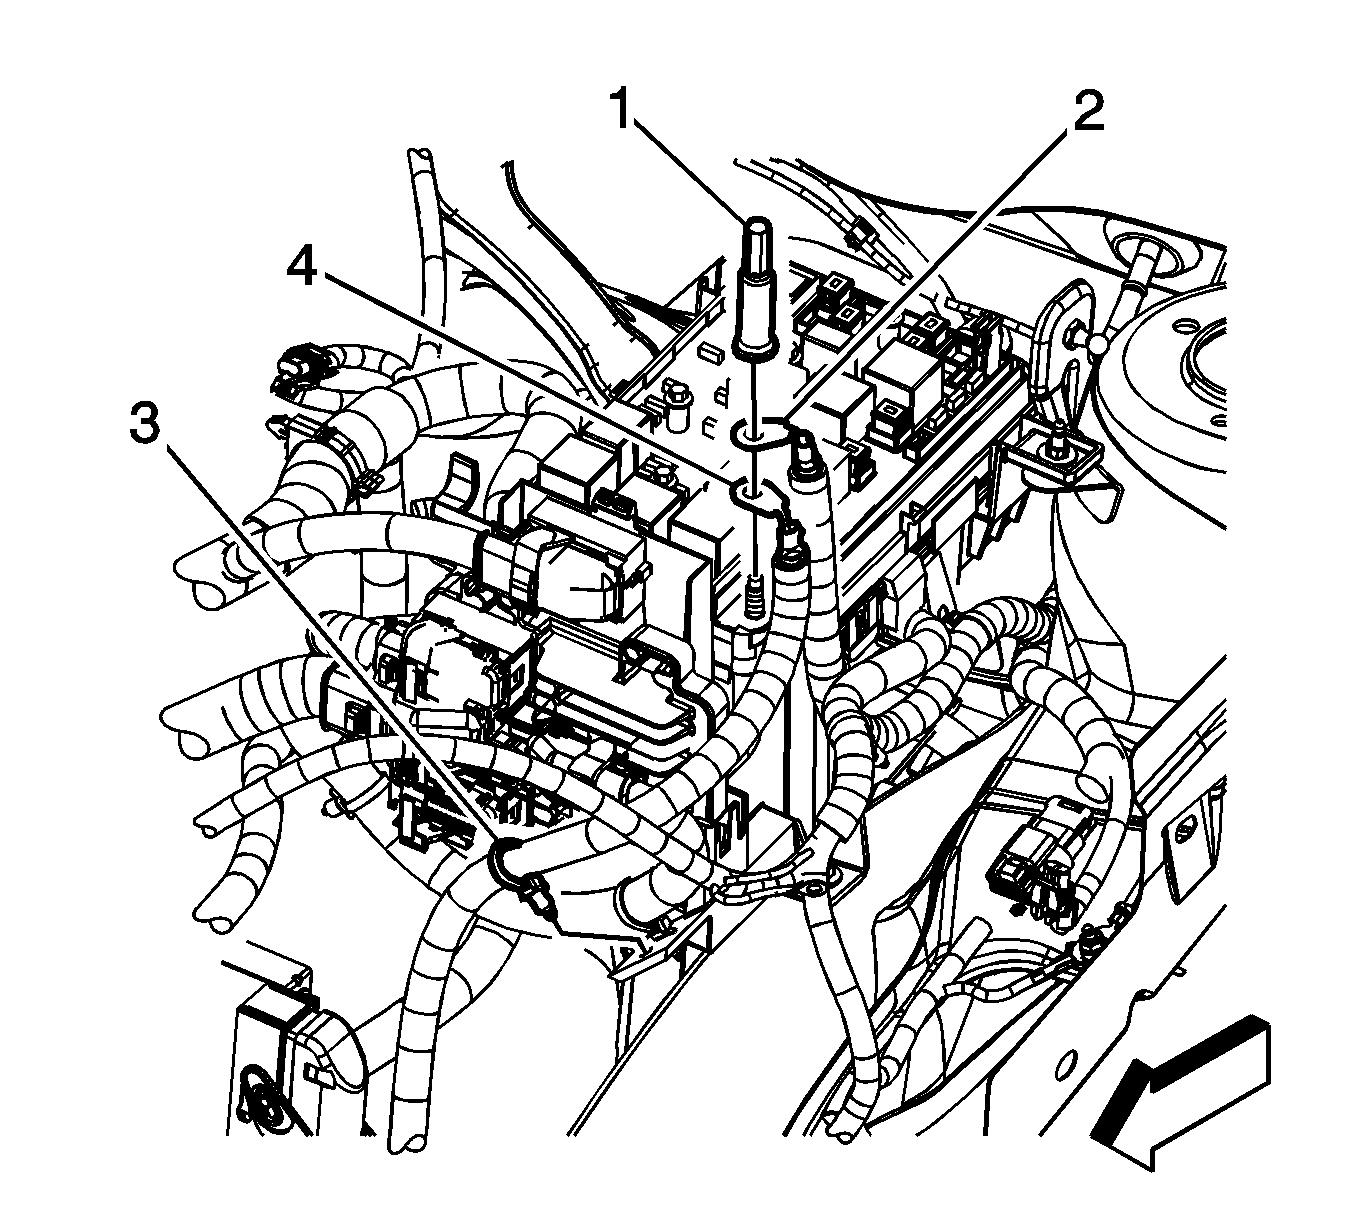
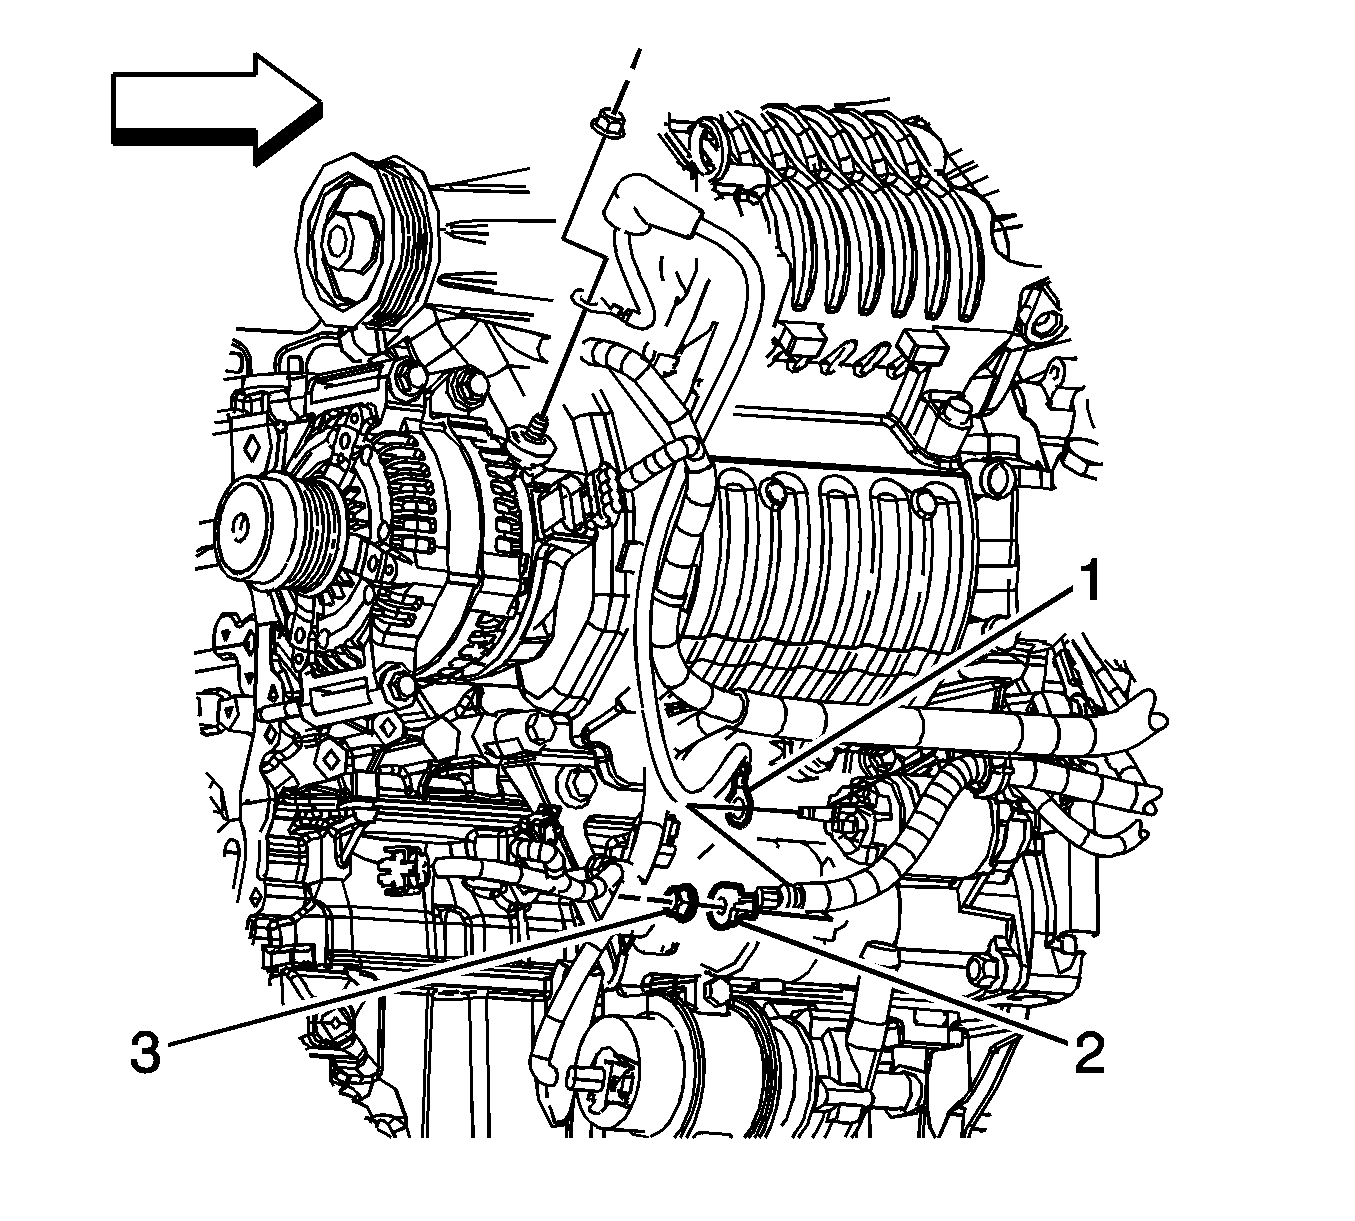
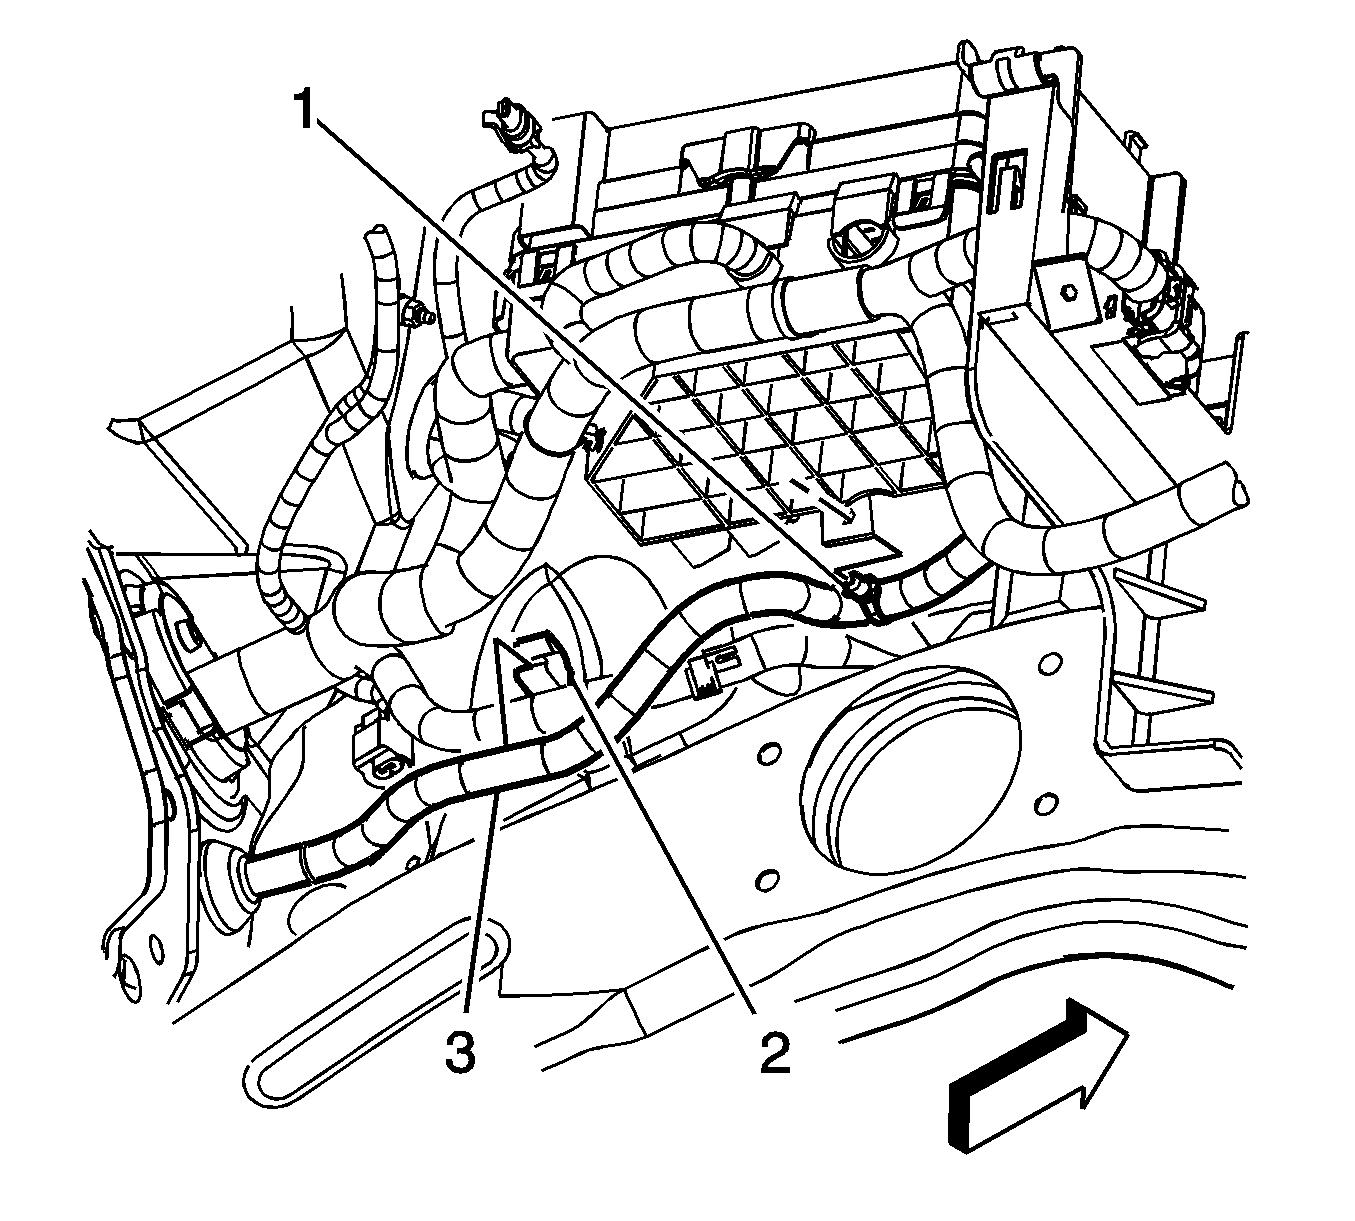
- Remove the junction block nut (1).
- Remove the positive battery cable terminal (2) from the junction block stud.
- Remove the positive battery cable clip (3) from the engine control module (ECM) bracket.
- Raise and support the vehicle. Refer to Lifting and Jacking the Vehicle.
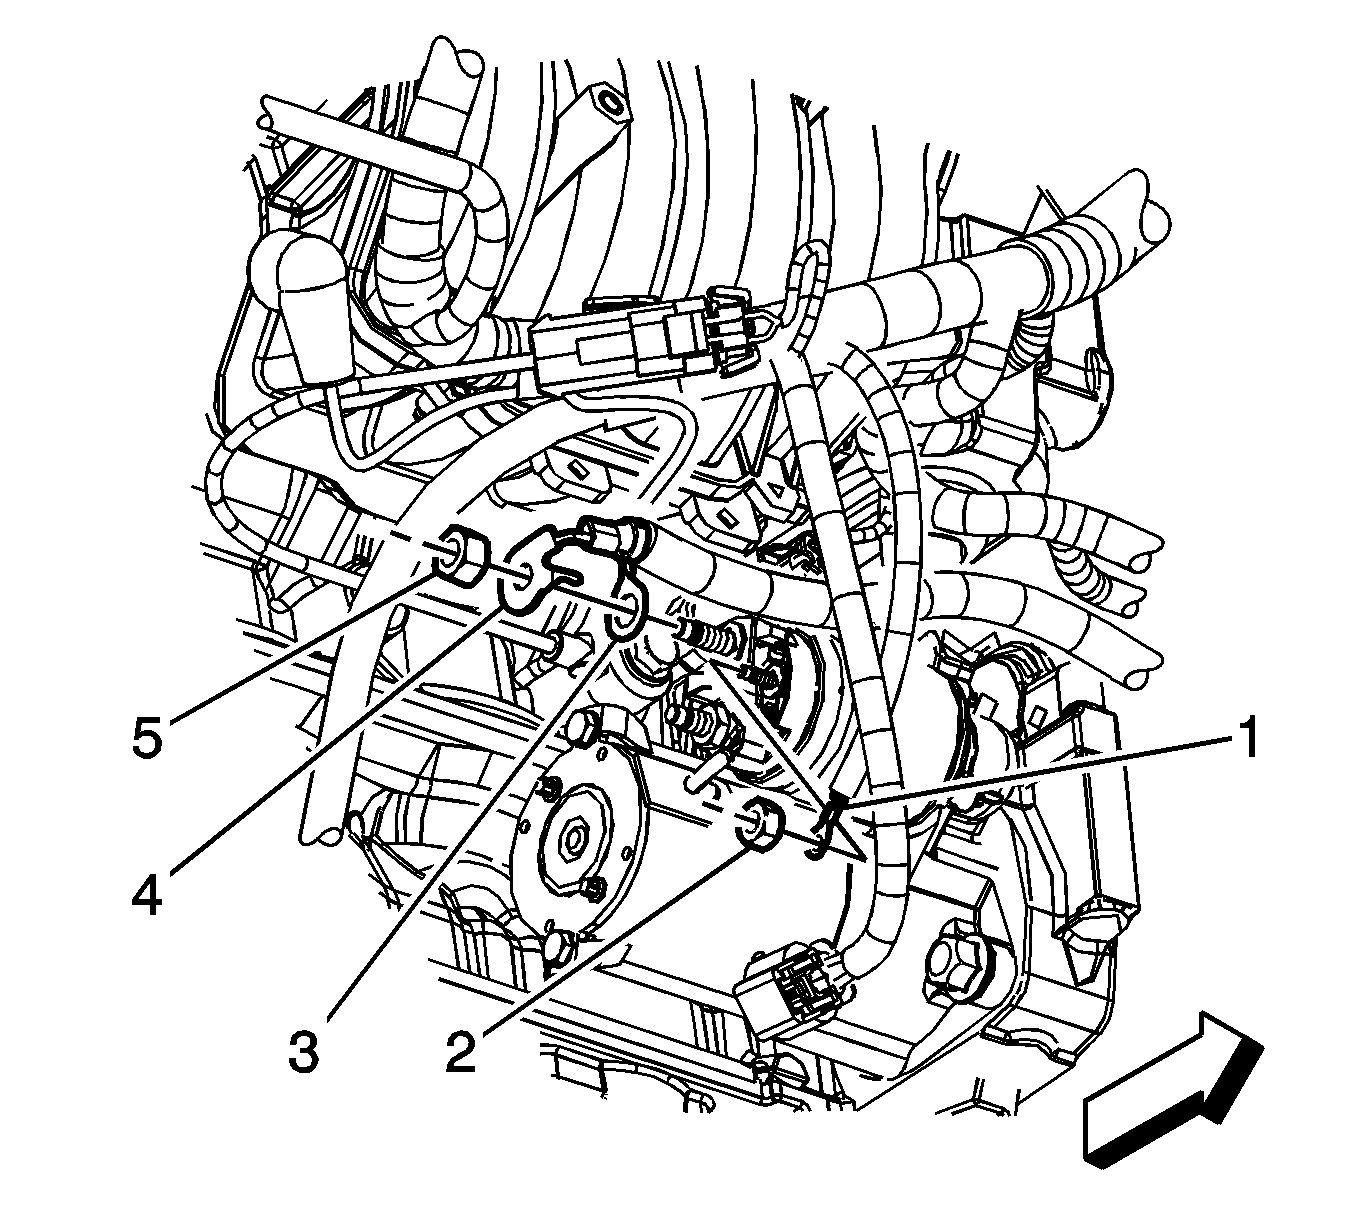
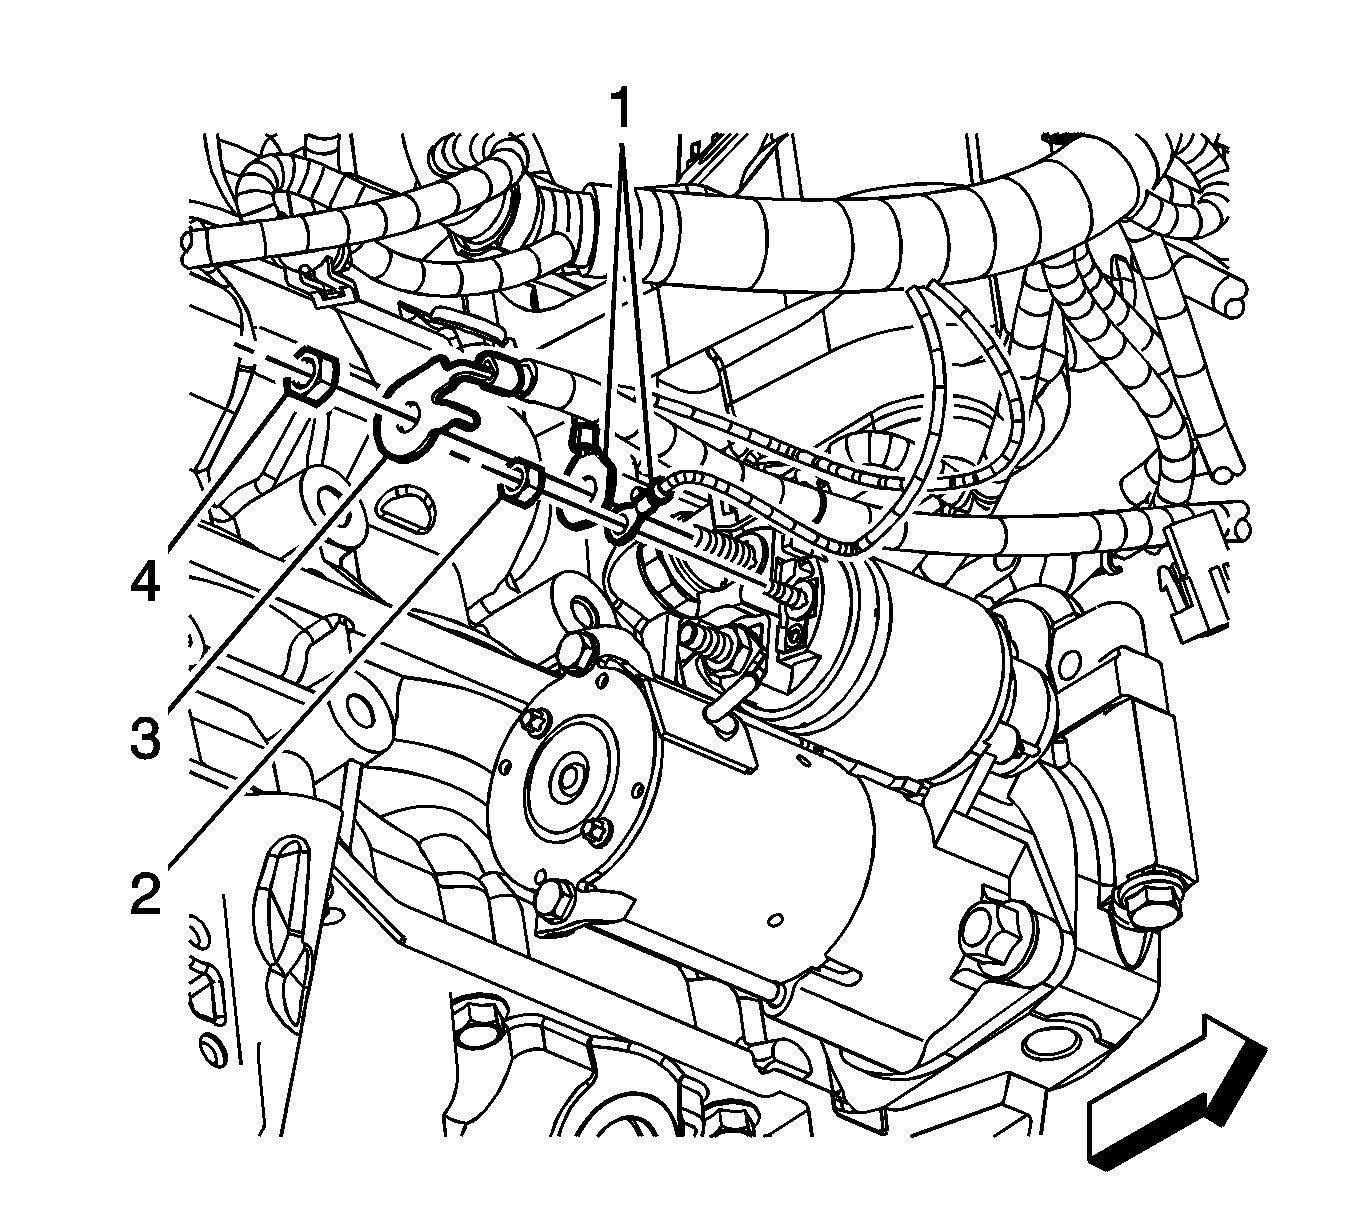
- If equipped with regular production options RPO LAP, perform the following steps, remove the starter solenoid terminal nut (5).
- Remove the positive battery cable terminal (4) from the starter solenoid.
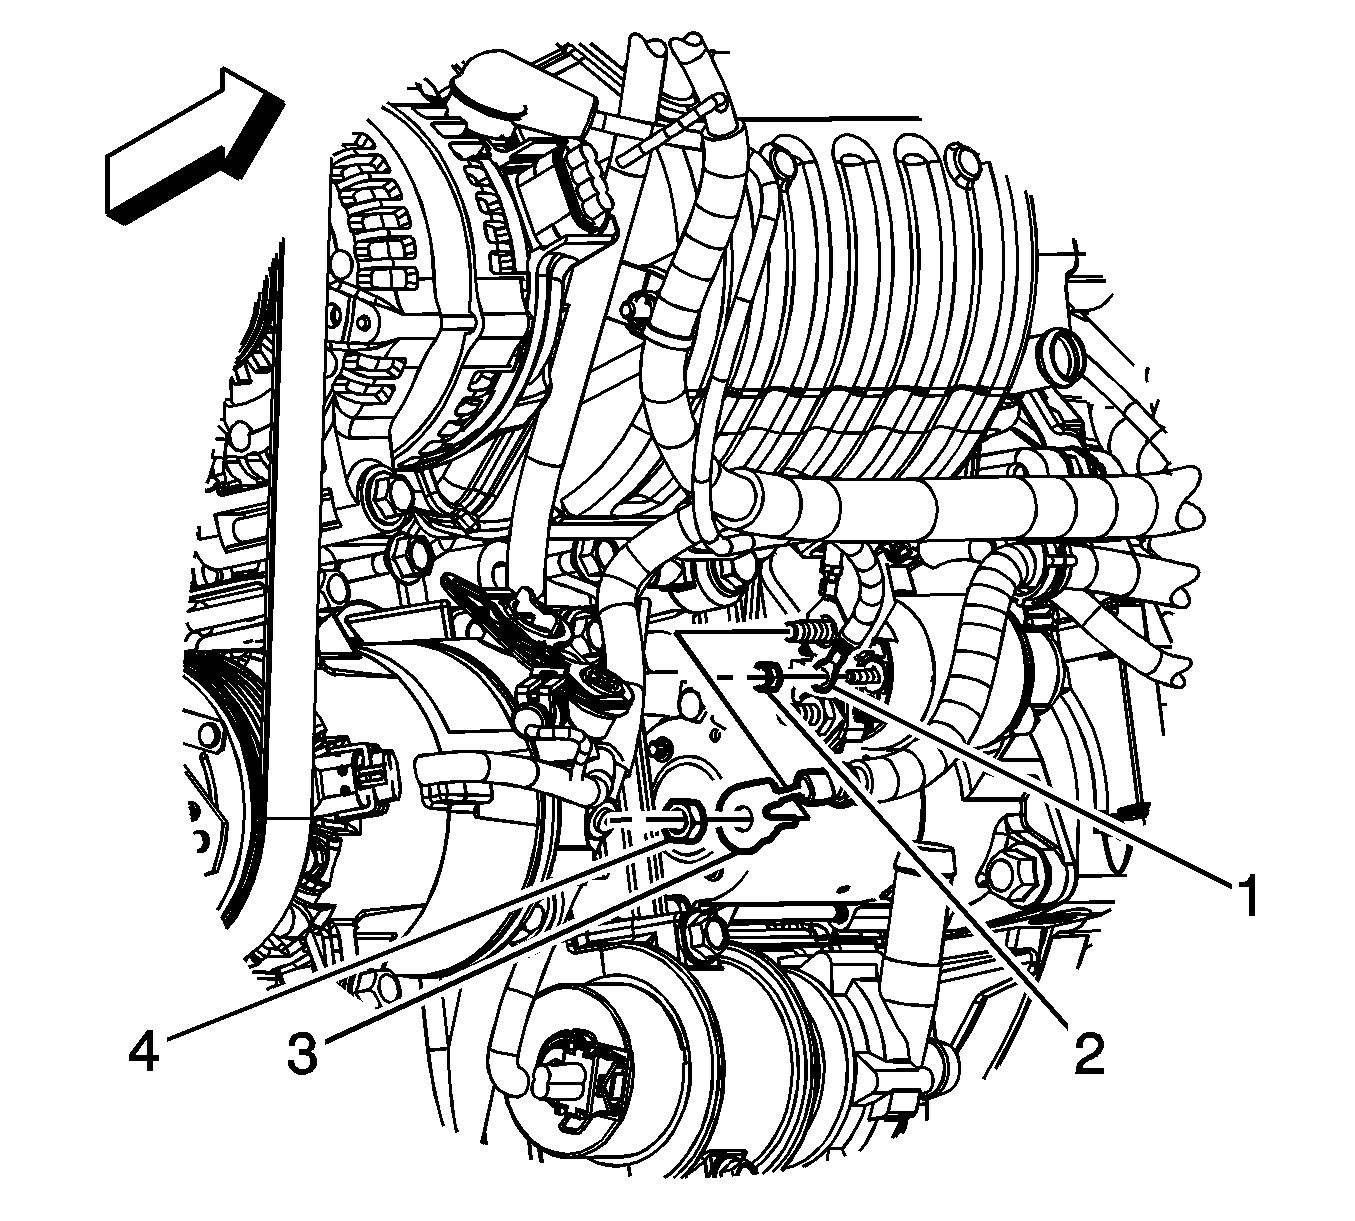
- If equipped with RPO LNF, perform the following steps, remove the starter solenoid terminal nut (4).
- Remove the positive battery cable terminal (3) from the starter solenoid.
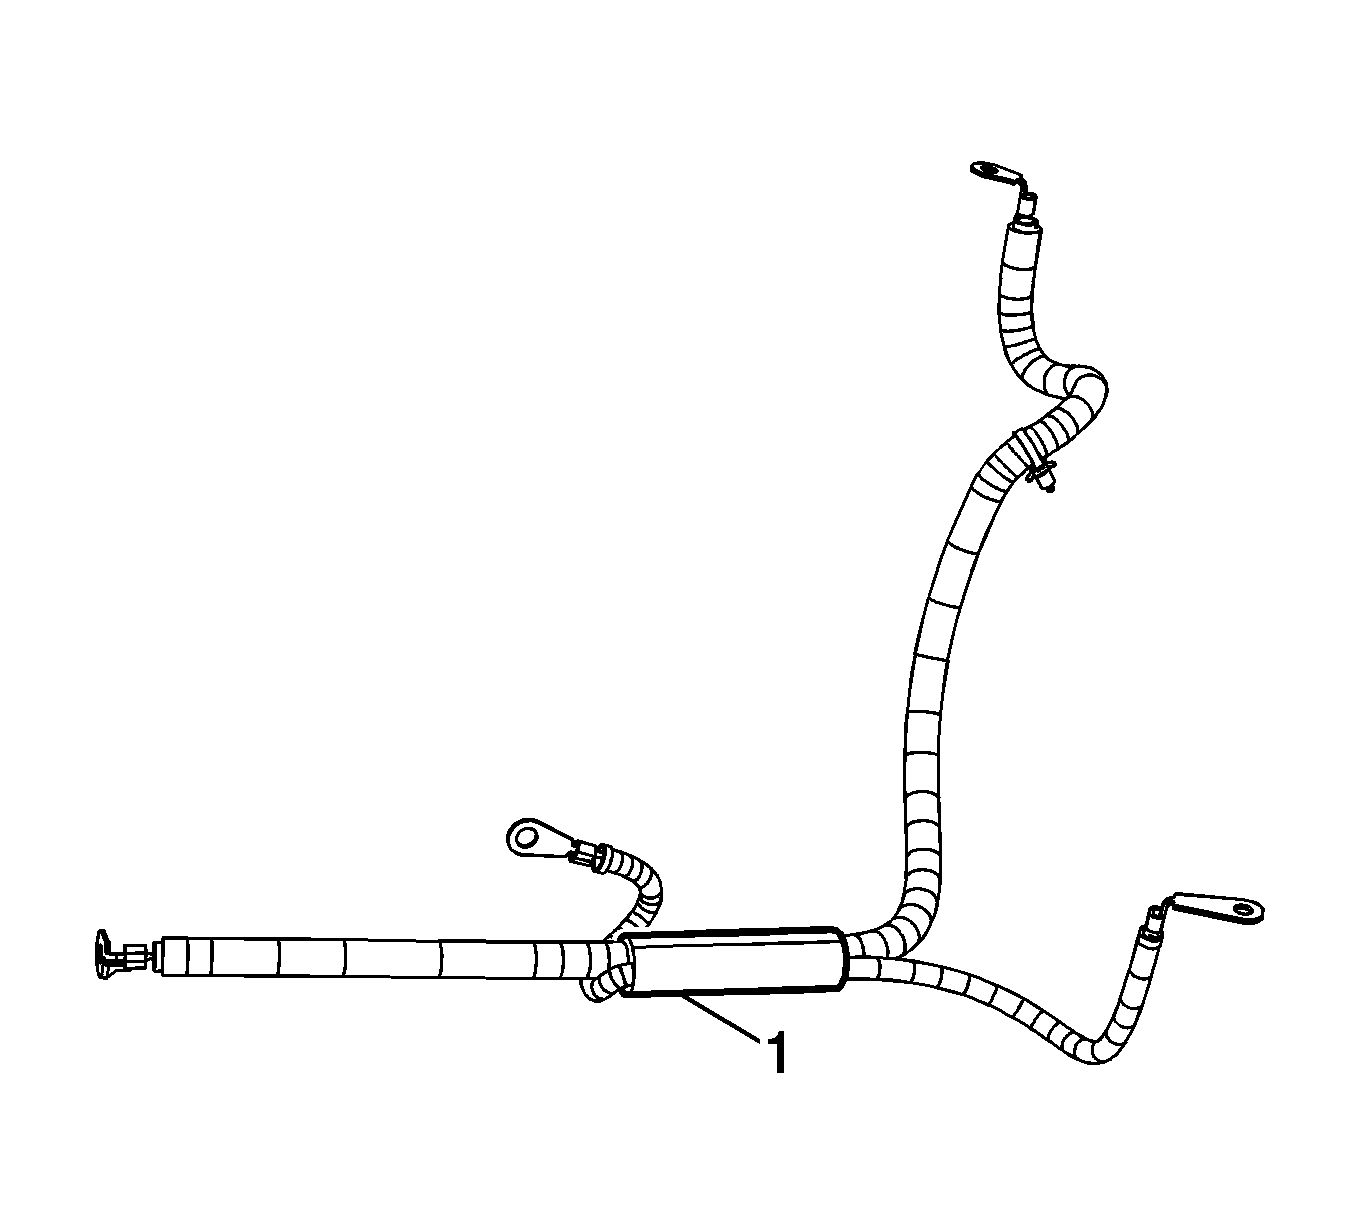
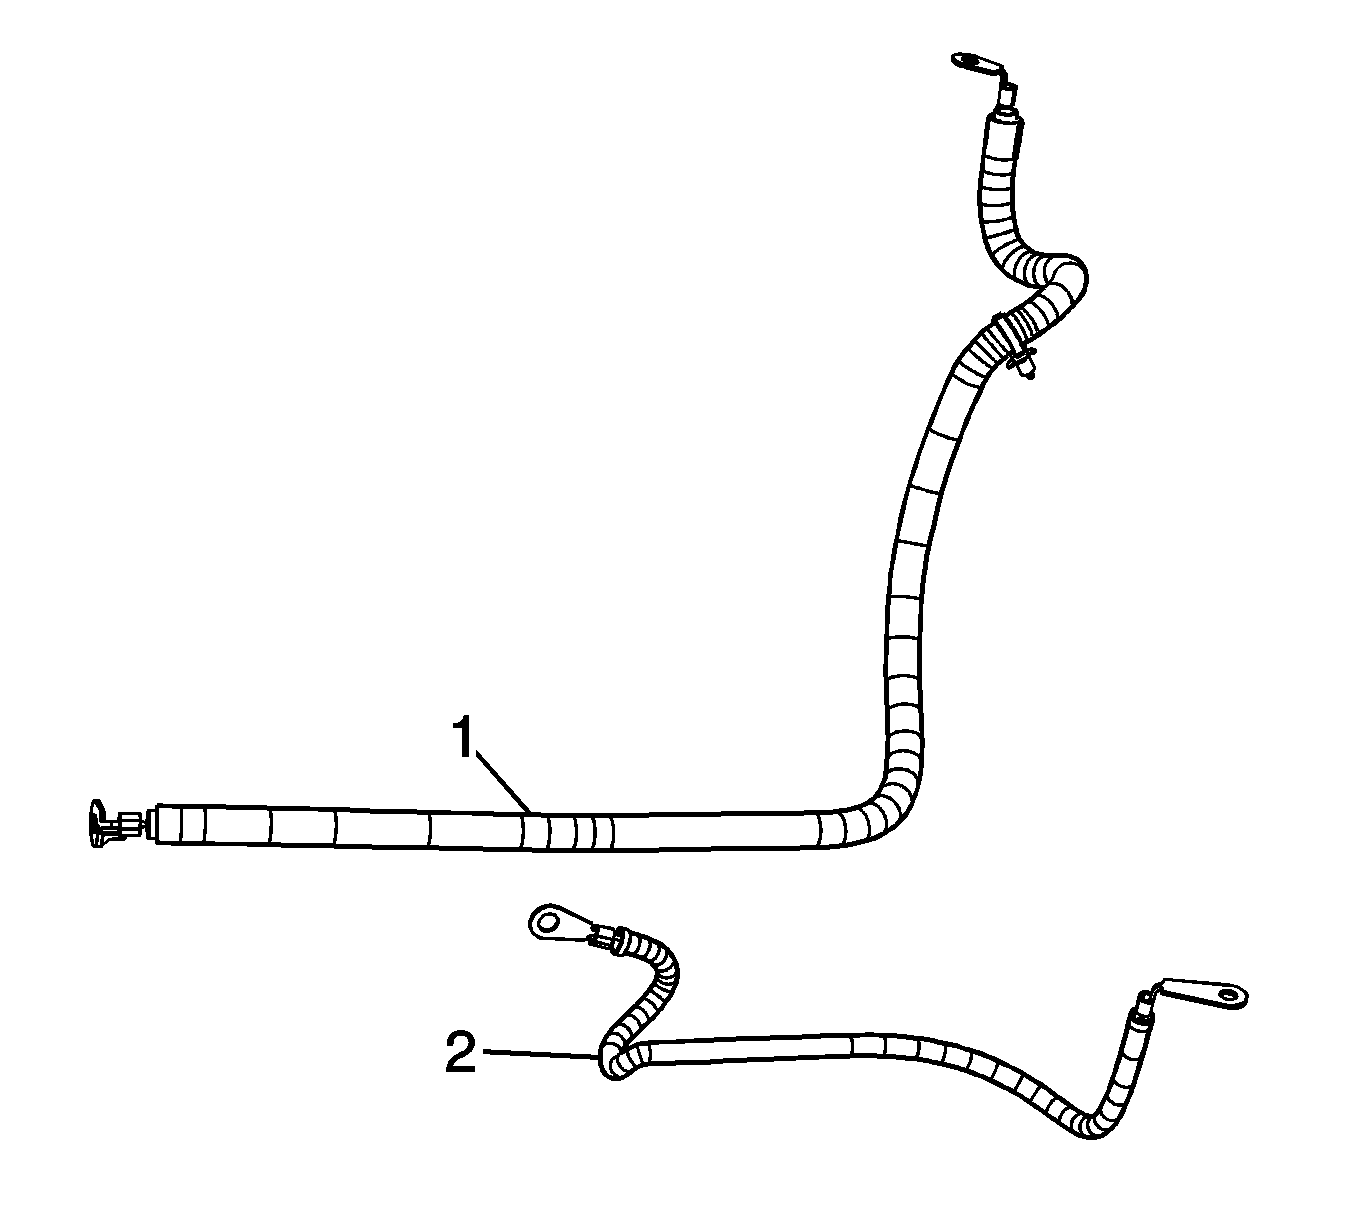
- Cut open the tape on the positive/negative battery cable conduit (1).
- Remove the old tape from the conduit.
- Remove the positive battery cable (1).
Note:
• Always use replacement cables that are of the same type, diameter and length of the cables that you are replacing. • Always route the replacement cable the same way as the original cable.
Installation Procedure
- Install the positive battery cable (1) to the conduit.
- Wrap tape around the positive/negative battery cable conduit (1).
- If equipped with RPO LNF, perform the following steps, install the positive battery cable terminal (2) to the starter solenoid.
- Install the starter solenoid terminal nut (3) and tighten to 17 N·m (13 lb ft).
- If equipped with RPO LAP, perform the following steps, Install the positive battery cable terminal (3) to the starter solenoid.
- Install the starter solenoid terminal nut (4) and tighten to 17 N·m (13 lb ft).
- Lower the vehicle.
- Install the positive battery cable terminal (2) to the junction block stud.
- Install the junction block nut (1) and tighten to 17 N·m (13 lb ft).
- Install the positive battery cable clip (3) to the ECM bracket.
- Install the junction block cover.
- Connect the negative battery cable. Refer to Battery Negative Cable Disconnection and Connection.


Caution: Refer to Fastener Caution in the Preface section.

Battery Positive Cable Replacement Battery to Underhood Junction Block
Removal Procedure
- Disconnect the negative battery cable. Refer to Battery Negative Cable Disconnection and Connection.
- Relocate the carpet, but do not remove the console. Refer to Floor Panel Carpet Replacement.
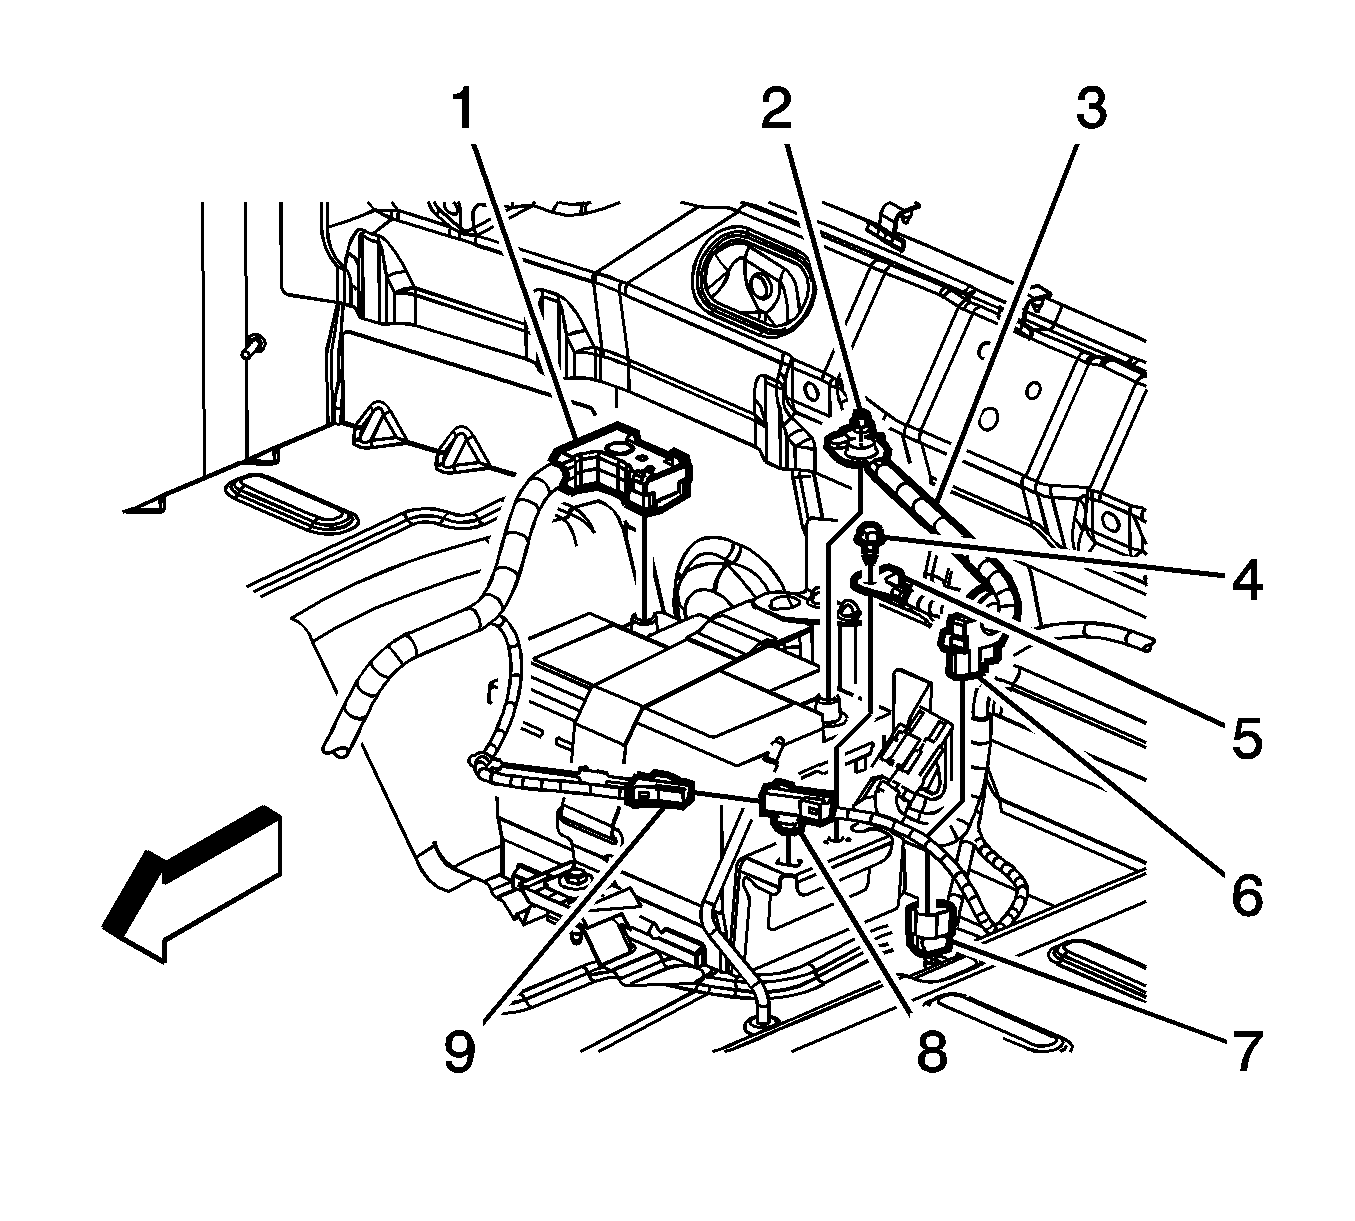
- Open the positive battery cable (1) cover.
- Loosen the positive battery cable nut.
- Remove the positive battery cable from the battery.
- Disconnect the positive battery cable electrical connector (9) from the body harness electrical connector (8).
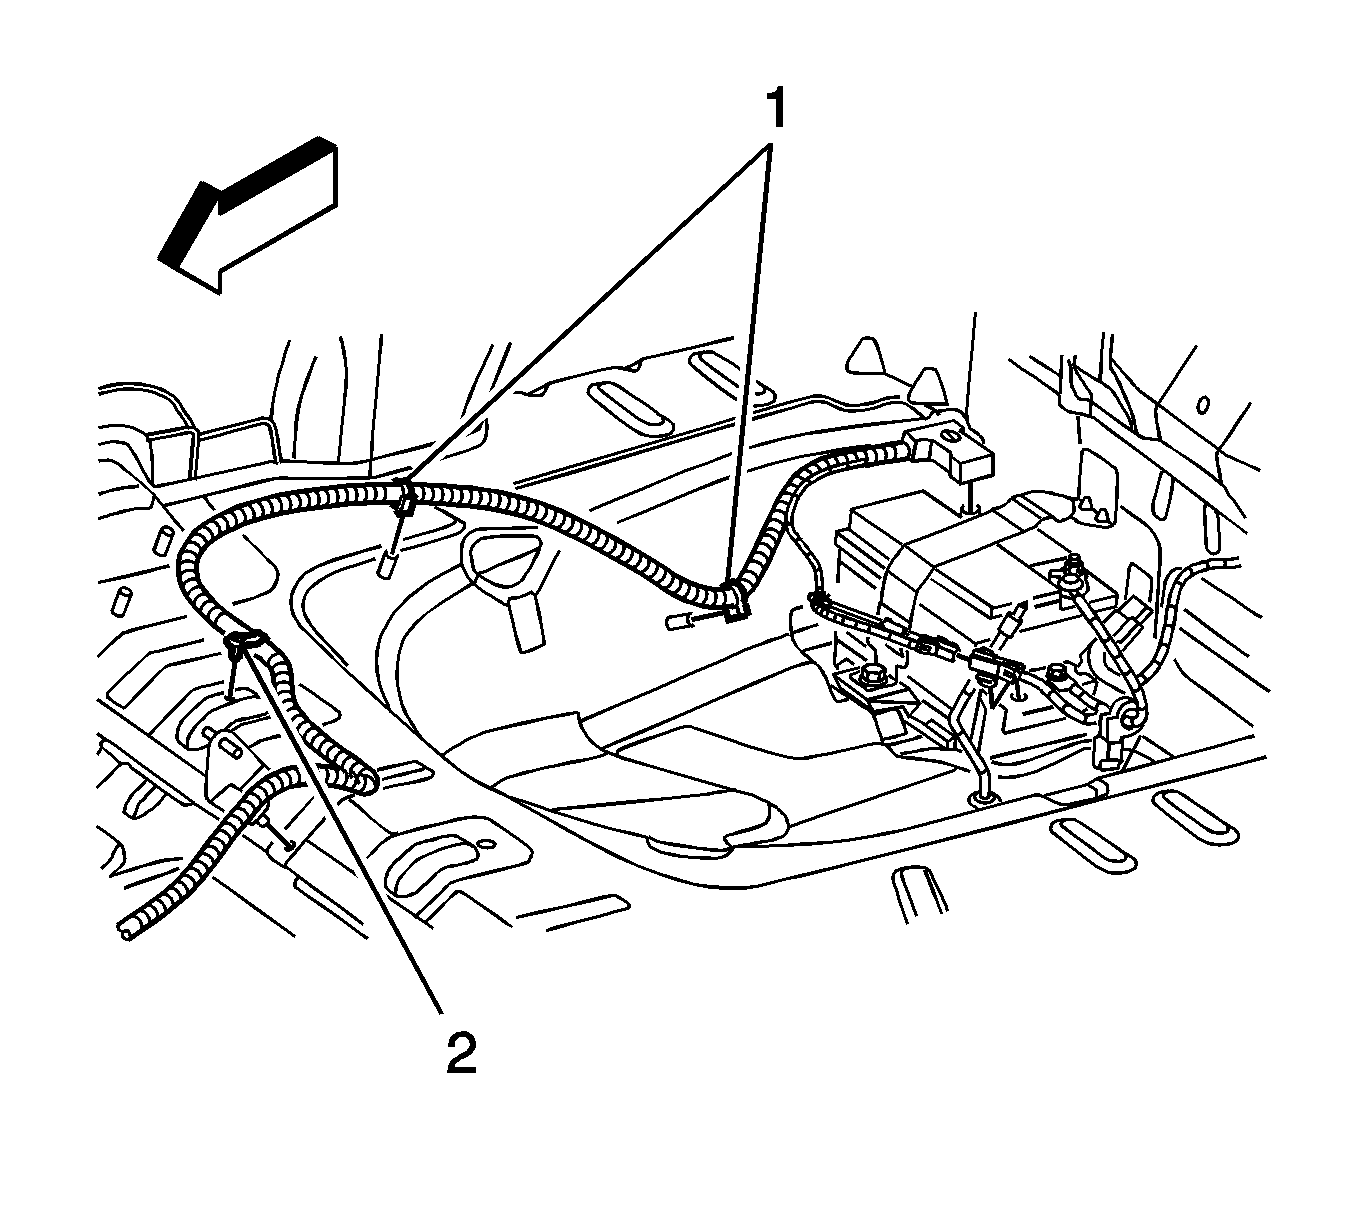
- From inside the vehicle, remove the positive battery cable clips (1) from the weld studs.
- Remove the positive battery cable clip (2) from the floor pan.
- Remove the positive battery cable clip (2) from the latch bar.
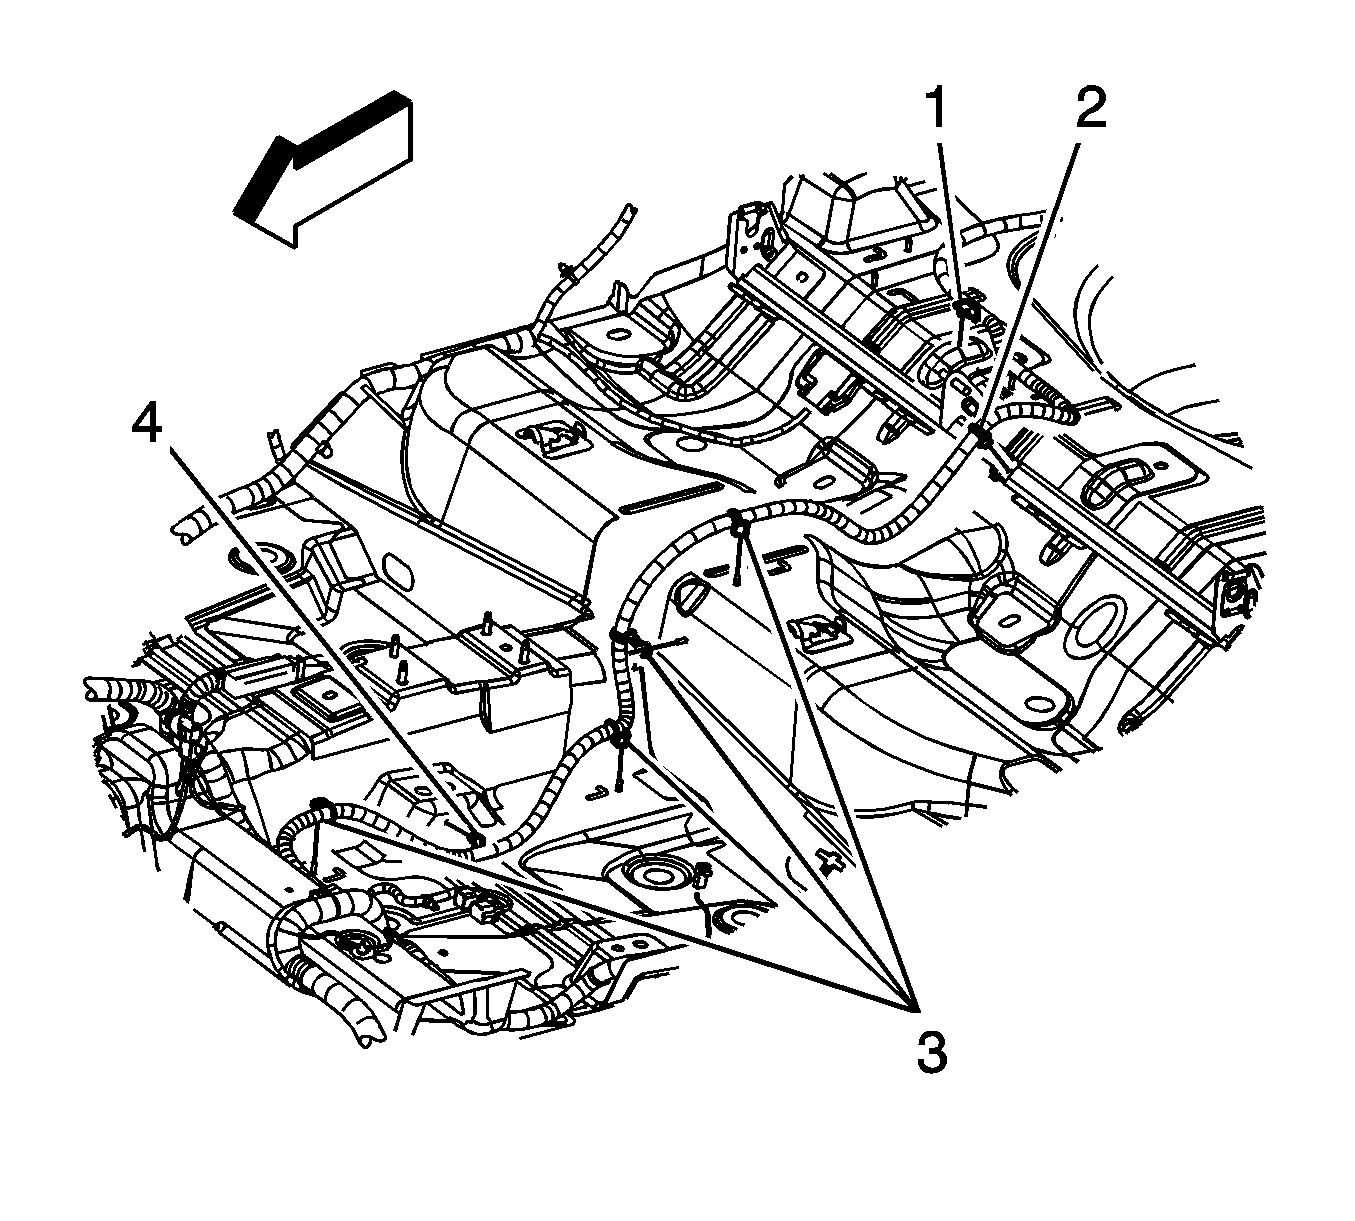
- Remove the positive battery cable from the body clip (3). Unfold the tabs in order to remove the cable.
- Remove the positive battery cable clips (3) from the weld studs.
- Remove the positive battery cable clip (4) from the floor pan.
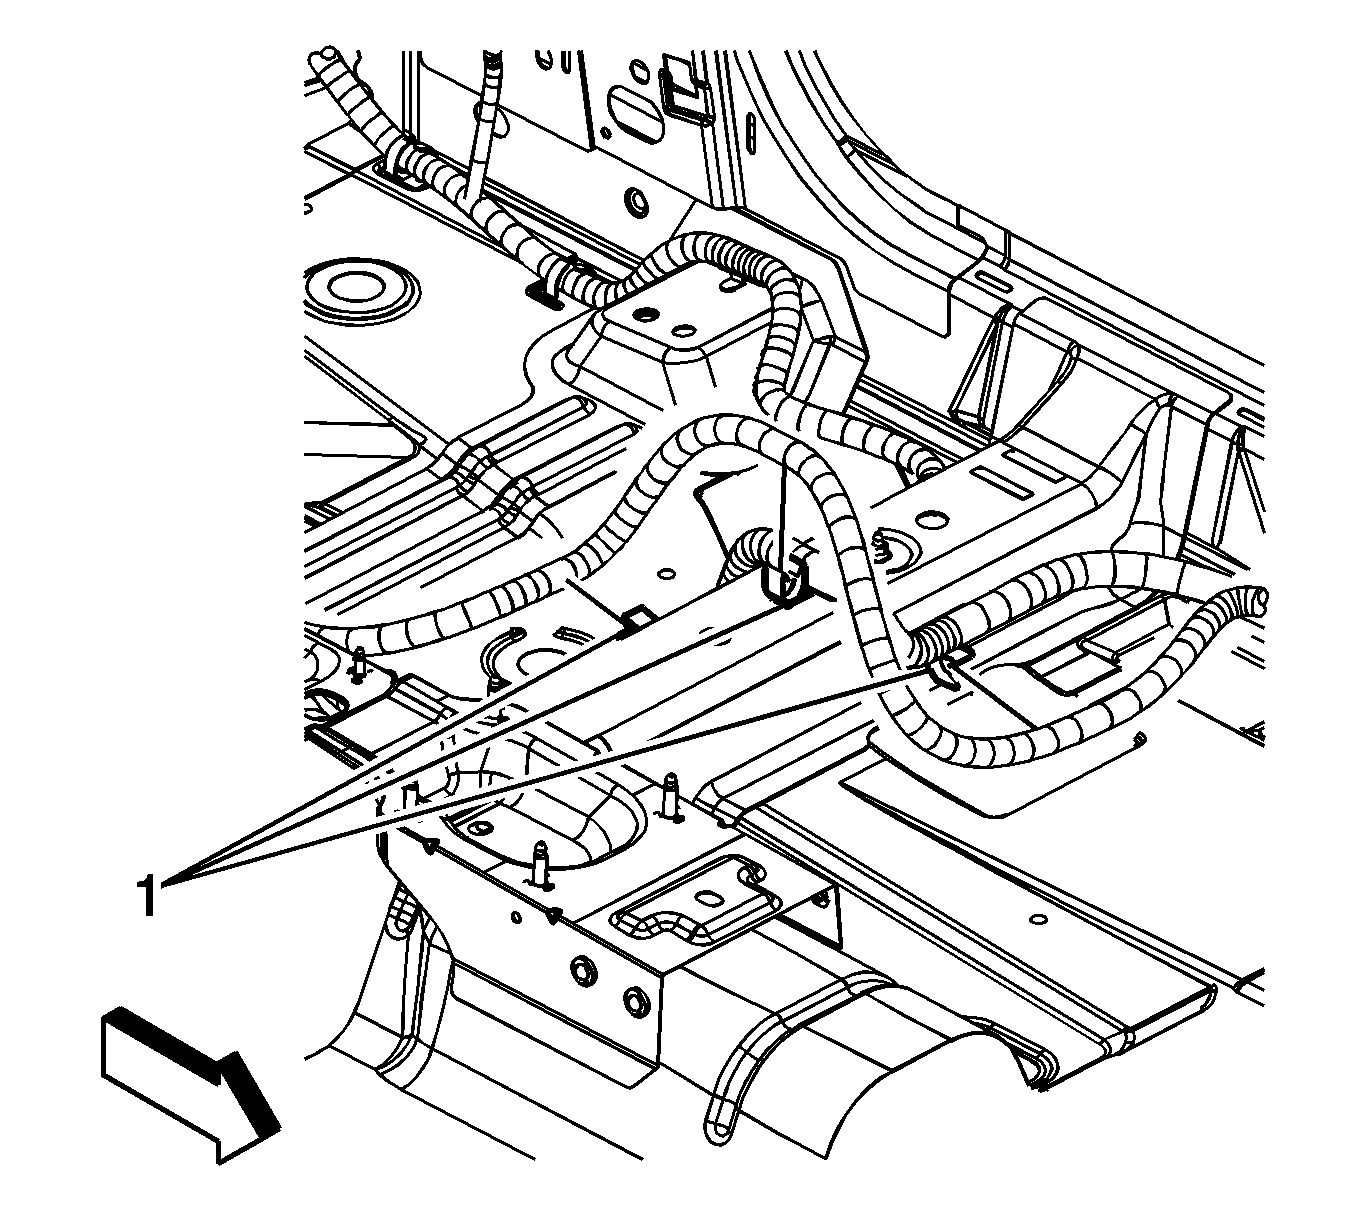
- Remove the positive battery cable from the body wiring harness clips (1).
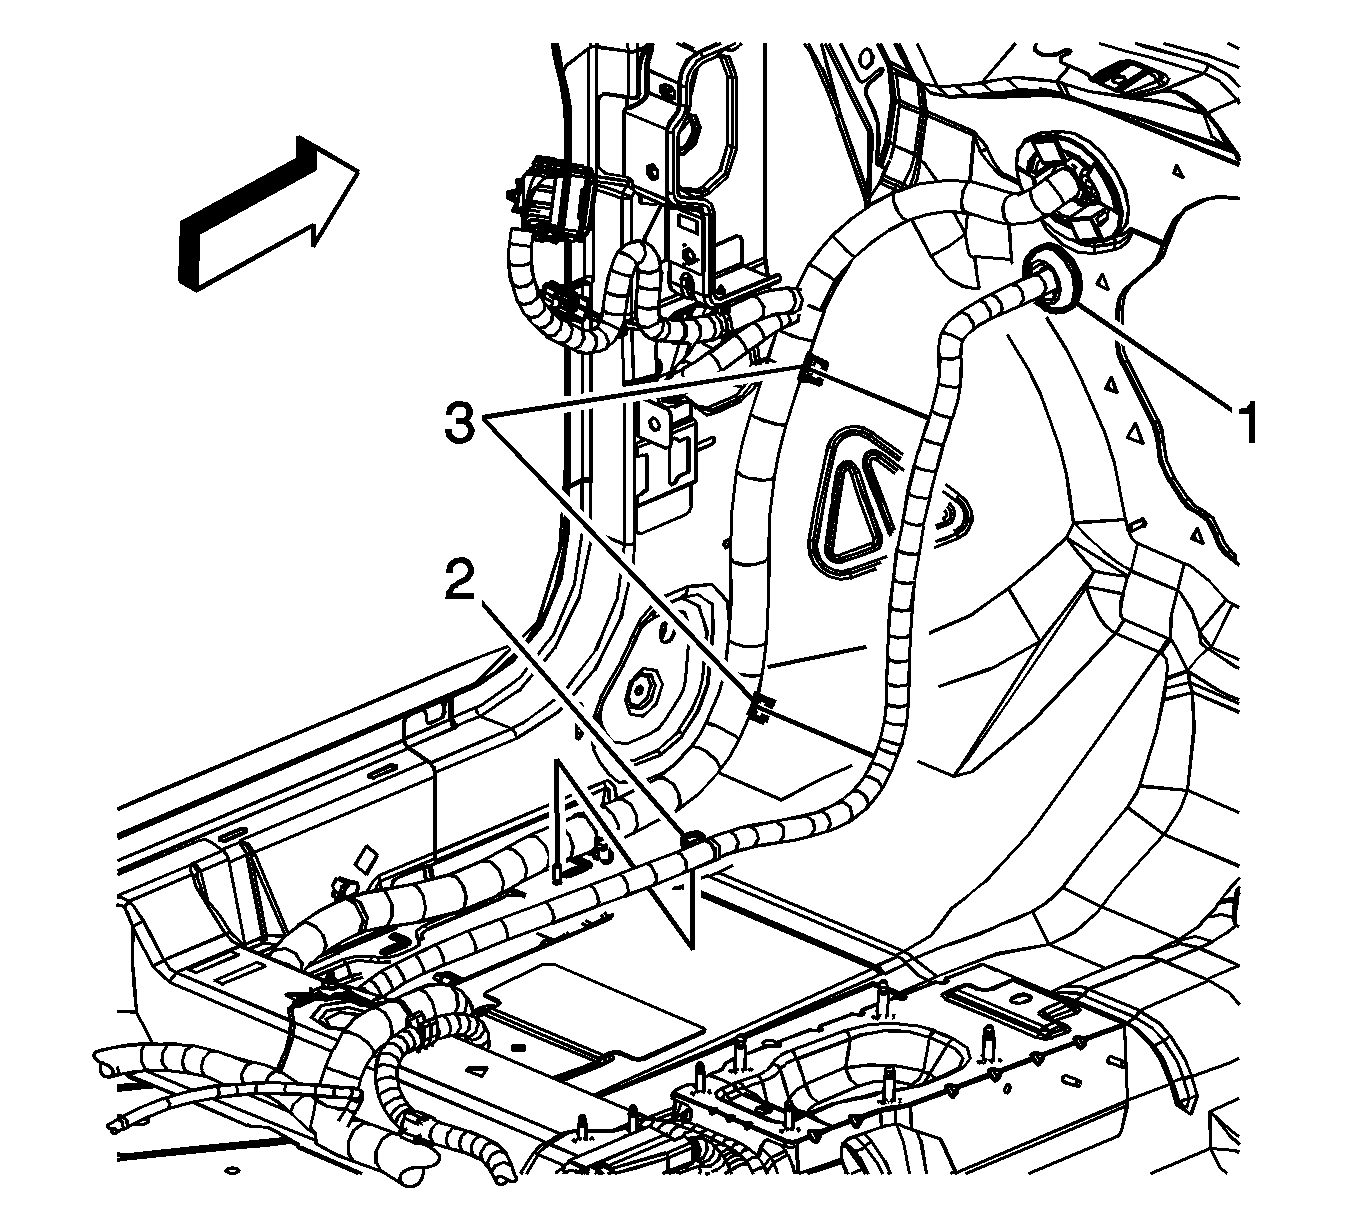
- Remove the positive battery cable clip (2) from the weld stud.
- Remove the positive battery cable from the body wiring harness clips (3).
- Unseat the grommet (1) from the front of dash.
- From under the hood, remove the junction block cover.
- Remove the junction block nut (1).
- Remove the positive battery cable (to starter) terminal (2) from the stud.
- Remove the positive battery cable (3) from the body wiring harness clip (2).
- Remove the positive battery cable clip (1) from the junction block.
- Remove the positive battery cable from under the junction block.
- Route the positive battery cable through the hole in the front of dash.
- From inside the vehicle, remove the positive battery cable.
Note:
• Always use replacement cables that are of the same type, diameter and length of the cables that you are replacing. • Always route the replacement cable the same way as the original cable.

Installation Procedure
- From inside the vehicle, layout the positive battery cable assembly.
- Route the positive battery cable through the hole in the front of dash.
- From under the hood, route the positive battery cable under the junction block.
- Install the positive battery cable clip (1) to the junction block.
- Install the positive battery cable (3) from the body wiring harness clip (2).
- Install the positive battery cable (to starter) terminal (2) to the stud.
- Install the junction block nut (1) and tighten to 17 N·m (13 lb ft).
- Install the junction block cover.
- From inside the vehicle, seat the grommet (1) to the front of dash.
- Install the positive battery cable to the body wiring harness clips (3).
- Install the positive battery cable clip (2) to the weld stud.
- Install the positive battery cable to the body wiring harness clips (1).
- Install the positive battery cable clip (4) to the floor pan.
- Install the positive battery cable clips (3) to the weld studs.
- Install the positive battery cable to the body clip (3).
- Install the positive battery cable clip (2) to the latch bar.
- Install the positive battery cable clip (2) to the floor pan.
- Install the positive battery cable clips (1) to the weld studs.
- Connect the positive battery cable electrical connector (9) to the body harness electrical connector (8).
- Install the positive battery cable to the battery.
- Tighten the positive battery cable nut to 17 N·m (13 lb ft).
- Close the positive battery cable (1) cover.
- Return the carpet and components to there original configuration. Refer to Floor Panel Carpet Replacement.
- Connect the negative battery cable. Refer to Battery Negative Cable Disconnection and Connection.


Caution: Refer to Fastener Caution in the Preface section.


