For 1990-2009 cars only
Special Tools
| • | J 23327 Return Spring Compressor |
| • | J 45398 Forward Clutch Inner Seal Puller |
| • | J 258031-A Puller/Inner Seal Remover |
For equivalent regional tools, refer to Special Tools.
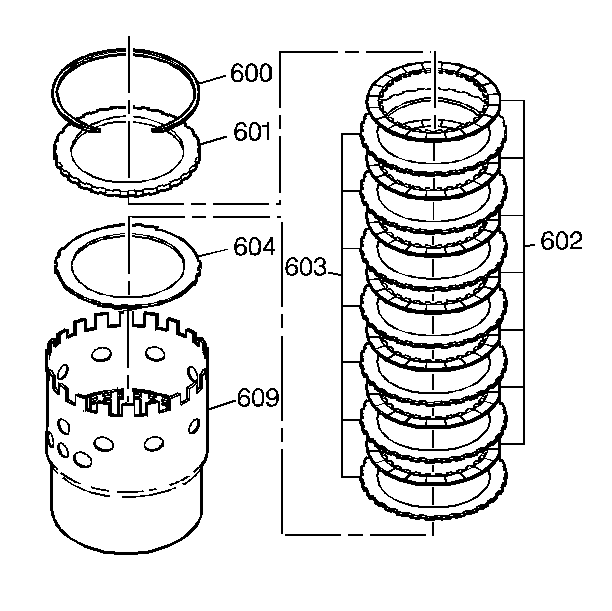
- Remove the snap ring (600) from the housing assembly (609).
- Remove the backing plate (601).
- Remove the seven fiber plates (602).
- Remove the seven steel plates (603).
- Remove the wave plate (604).
- Compress the forward clutch return spring assembly. Use the J 23327 spring compressor .
- Remove the return spring snap ring (605).
- Remove the J 23327 spring compressor .
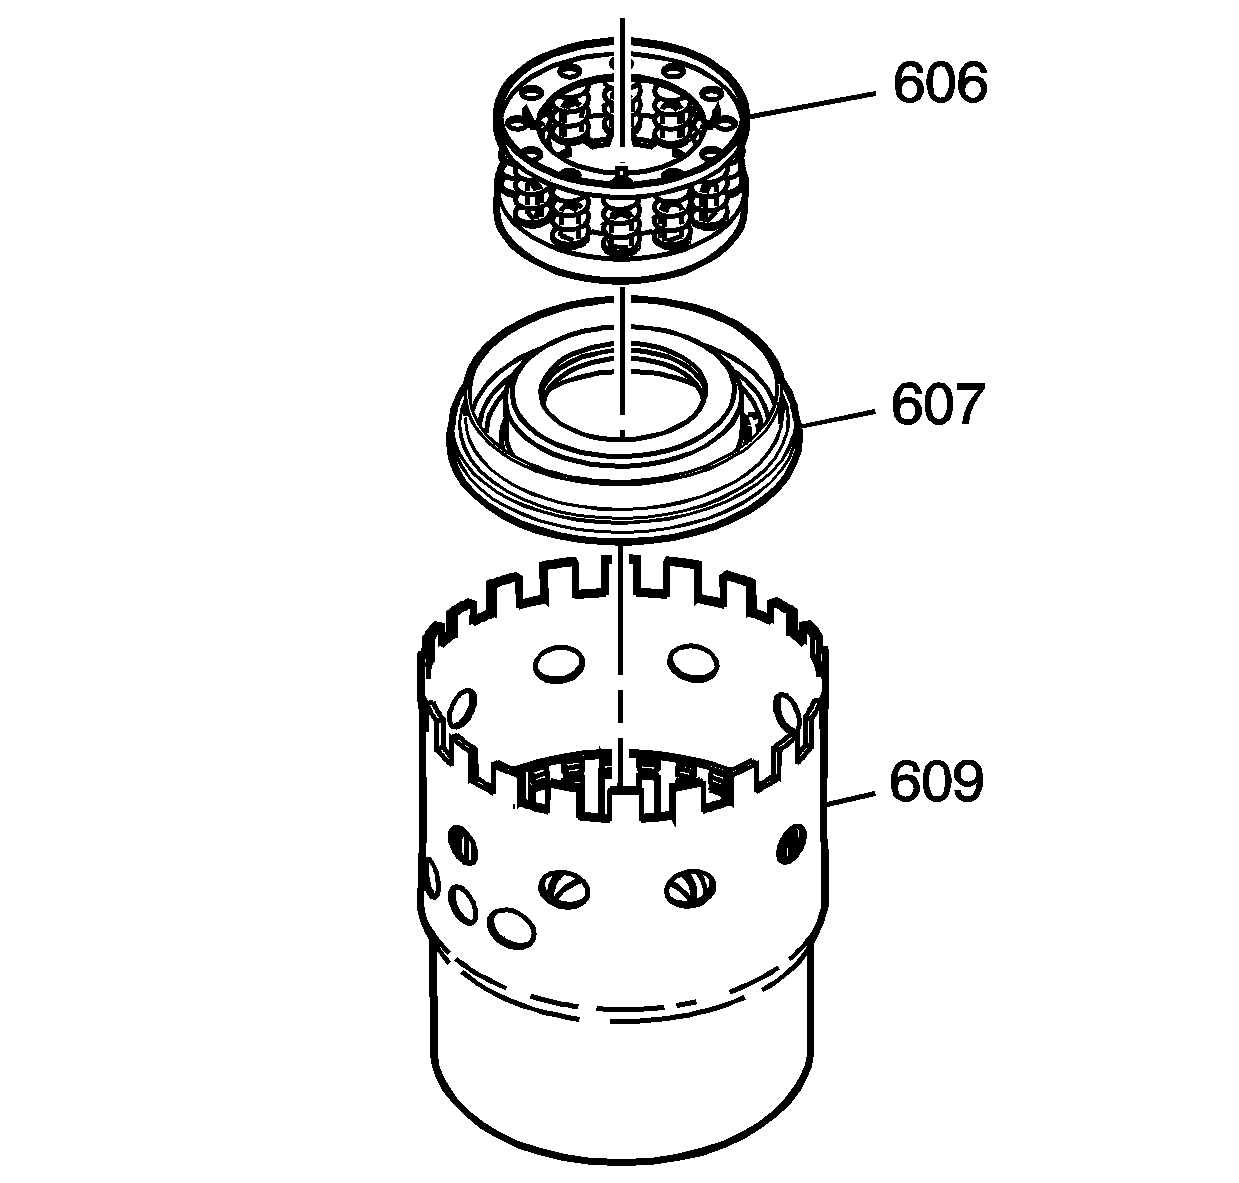
- Remove the forward clutch return spring assembly (606).
- Remove the forward clutch piston and seal assembly (607).
- Inspect the forward clutch inner seal assembly (608) for damage.
- If the seal is damaged, assemble J 45398-1 (3), which is part of J 45398 seal puller , onto the seal. Place the J 45398-2 (2), which is part of J 45398 seal puller , on the inner hub of the clutch housing.
- Use J 258031-A seal remover (1) to remove the seal.
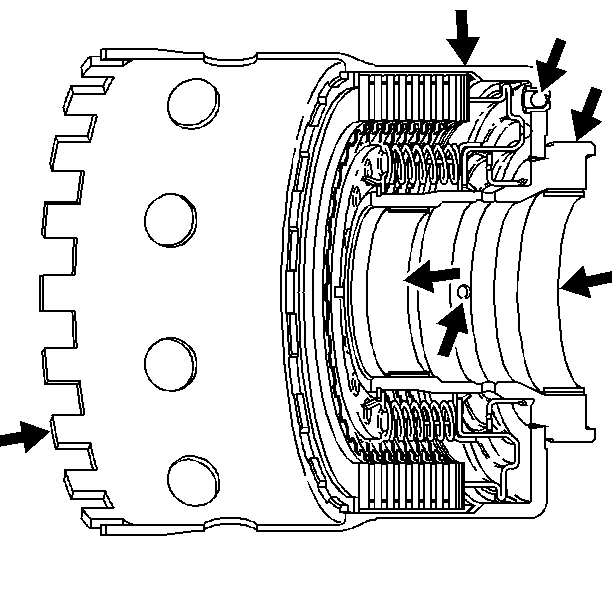
- Inspect the housing, the plates, the bushings, the splines, the band apply surface, the roller clutch race, and the spring assembly.
- Inspect fluid feed holes for proper openings.
- Inspect the retainer and ball assembly for proper openings.
- Inspect the piston and seal assembly for cut seals or other damage. The piston and seal assemblies are reusable, if not damaged.
- Clean and dry all of the components.
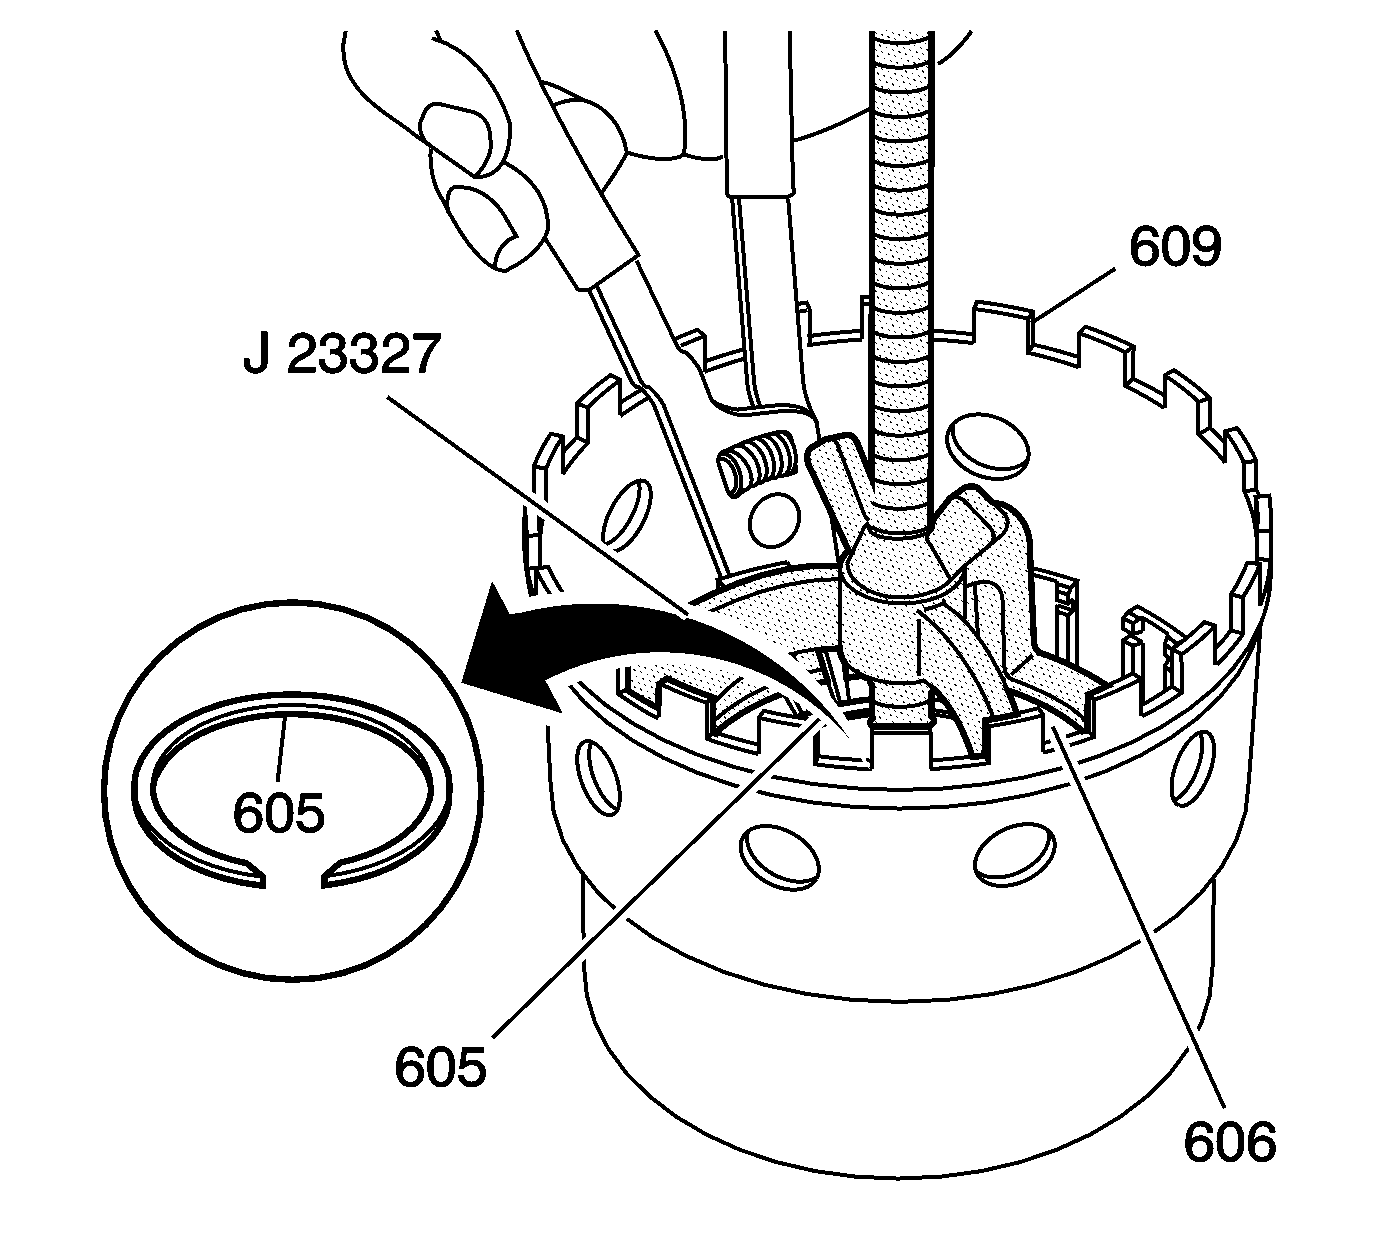
Caution: Compress the return spring assembly (606) only enough to remove the snap ring (605), or damage may occur to the spring assembly (606).
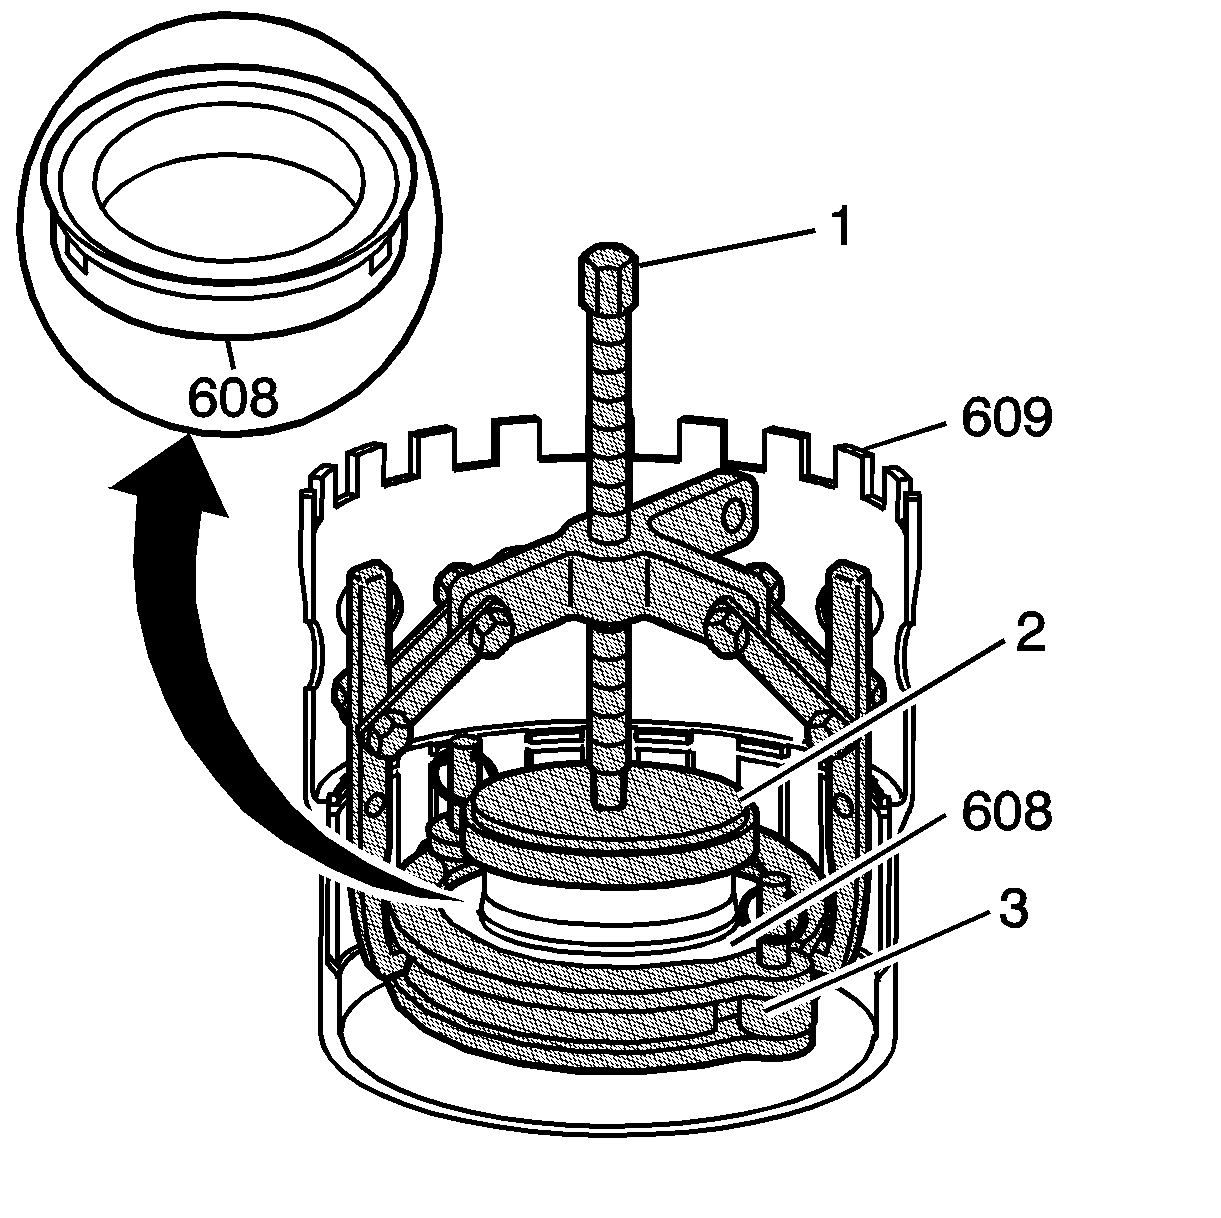
Note: If the seal assembly is not damaged do not remove the seal assembly.
Note: Align puller J 258031-A seal remover (1) with the groove located on the outside of J 45398-1 to aid in removal.
