For 1990-2009 cars only
Special Tools
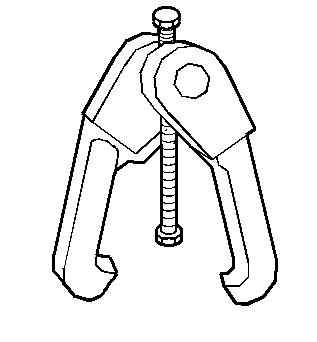
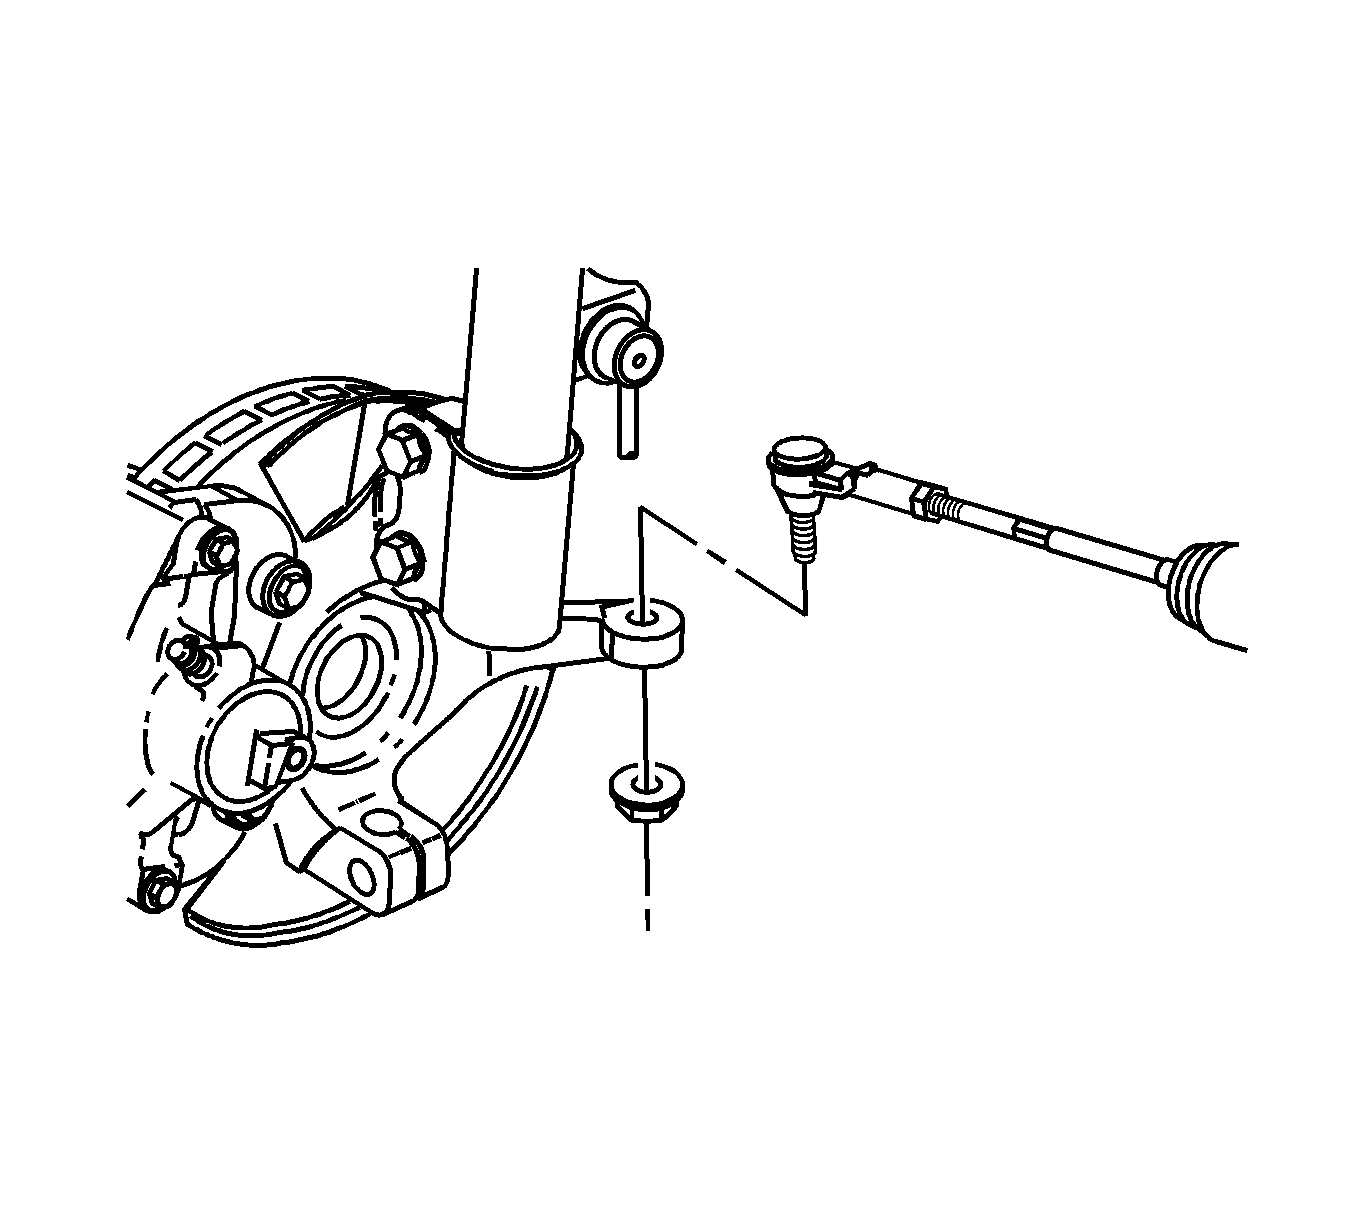
| • | J 24319-B Steering Linkage and Tie Rod Puller |
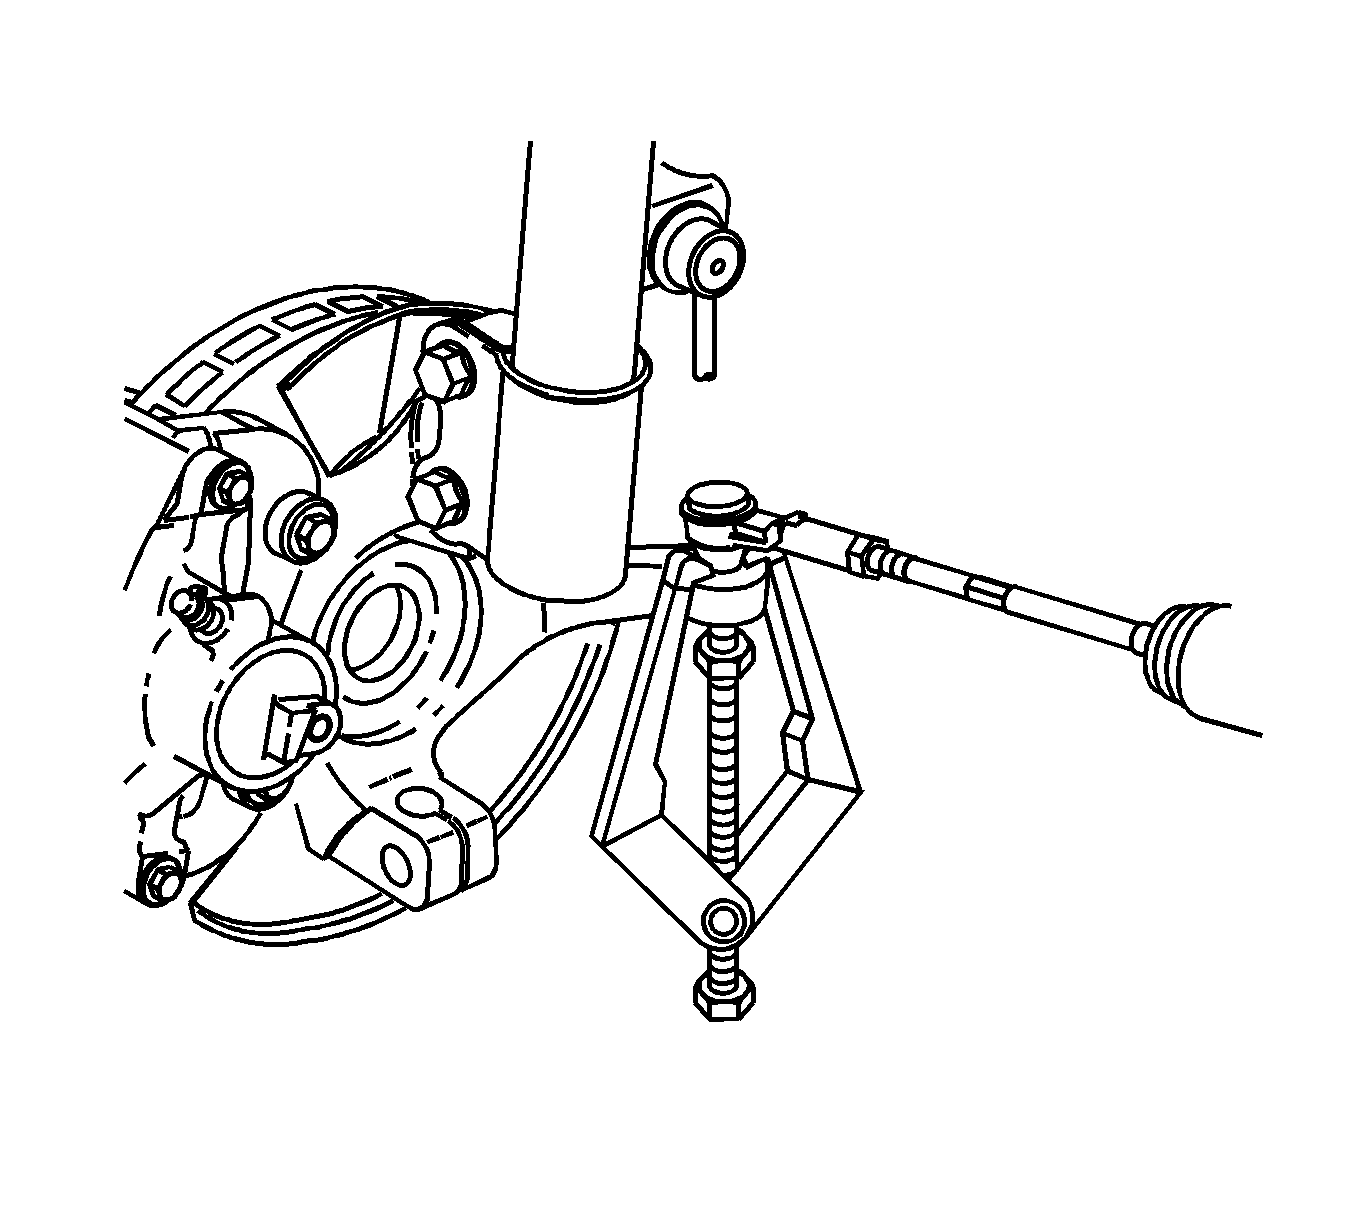
| • | J 43631 Ball Joint Remover |
Removal Procedure
- With the wheels in the straight ahead position, remove the key from the ignition switch.
- Secure the cooling module to the upper body structure.
- Raise and support the vehicle. Refer to Lifting and Jacking the Vehicle.
- Remove the front wheels from the vehicle. Refer to Tire and Wheel Removal and Installation.
- Remove the left and right splash shields and the 3 screws in the inner fenders. Refer to Engine Splash Shield Replacement - Left Side or Engine Splash Shield Replacement - Right Side.
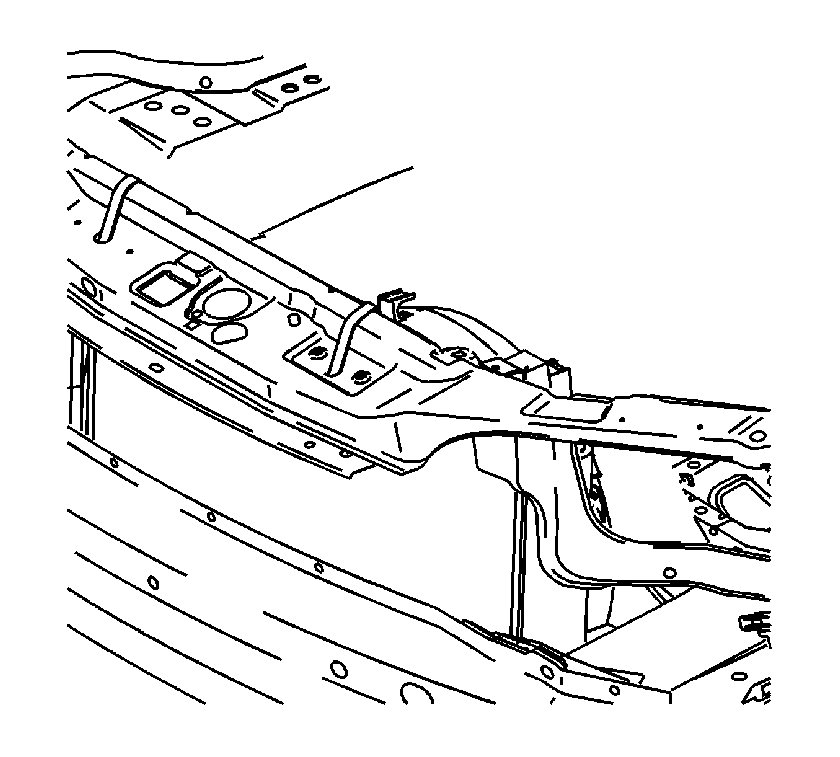
- Remove the lower radiator air deflector from the frame.
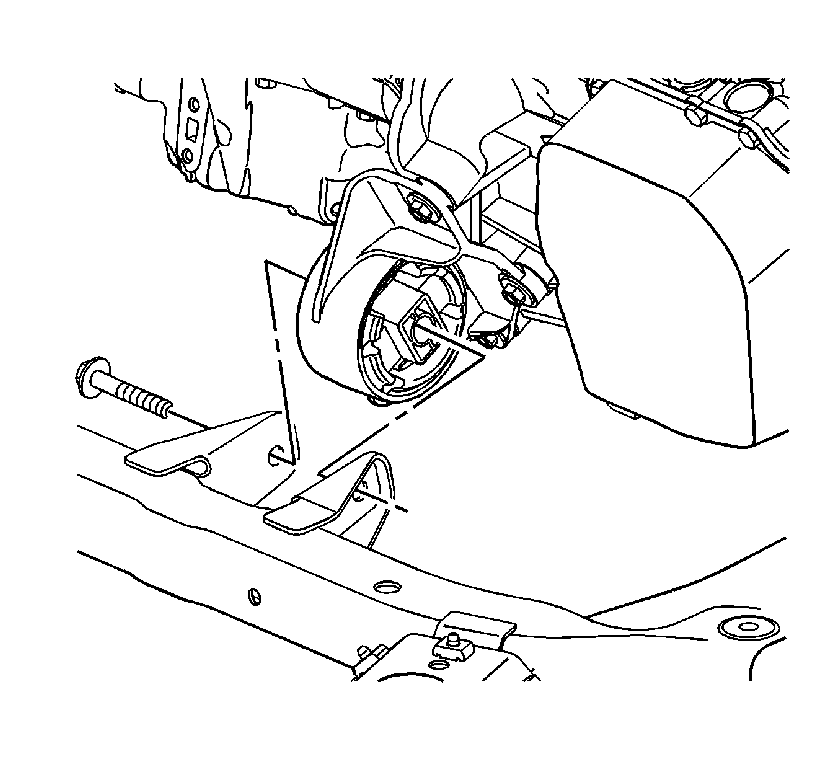
- Remove the front transaxle mount to frame through bolt.
- Remove the rear transaxle mount to frame bolts.
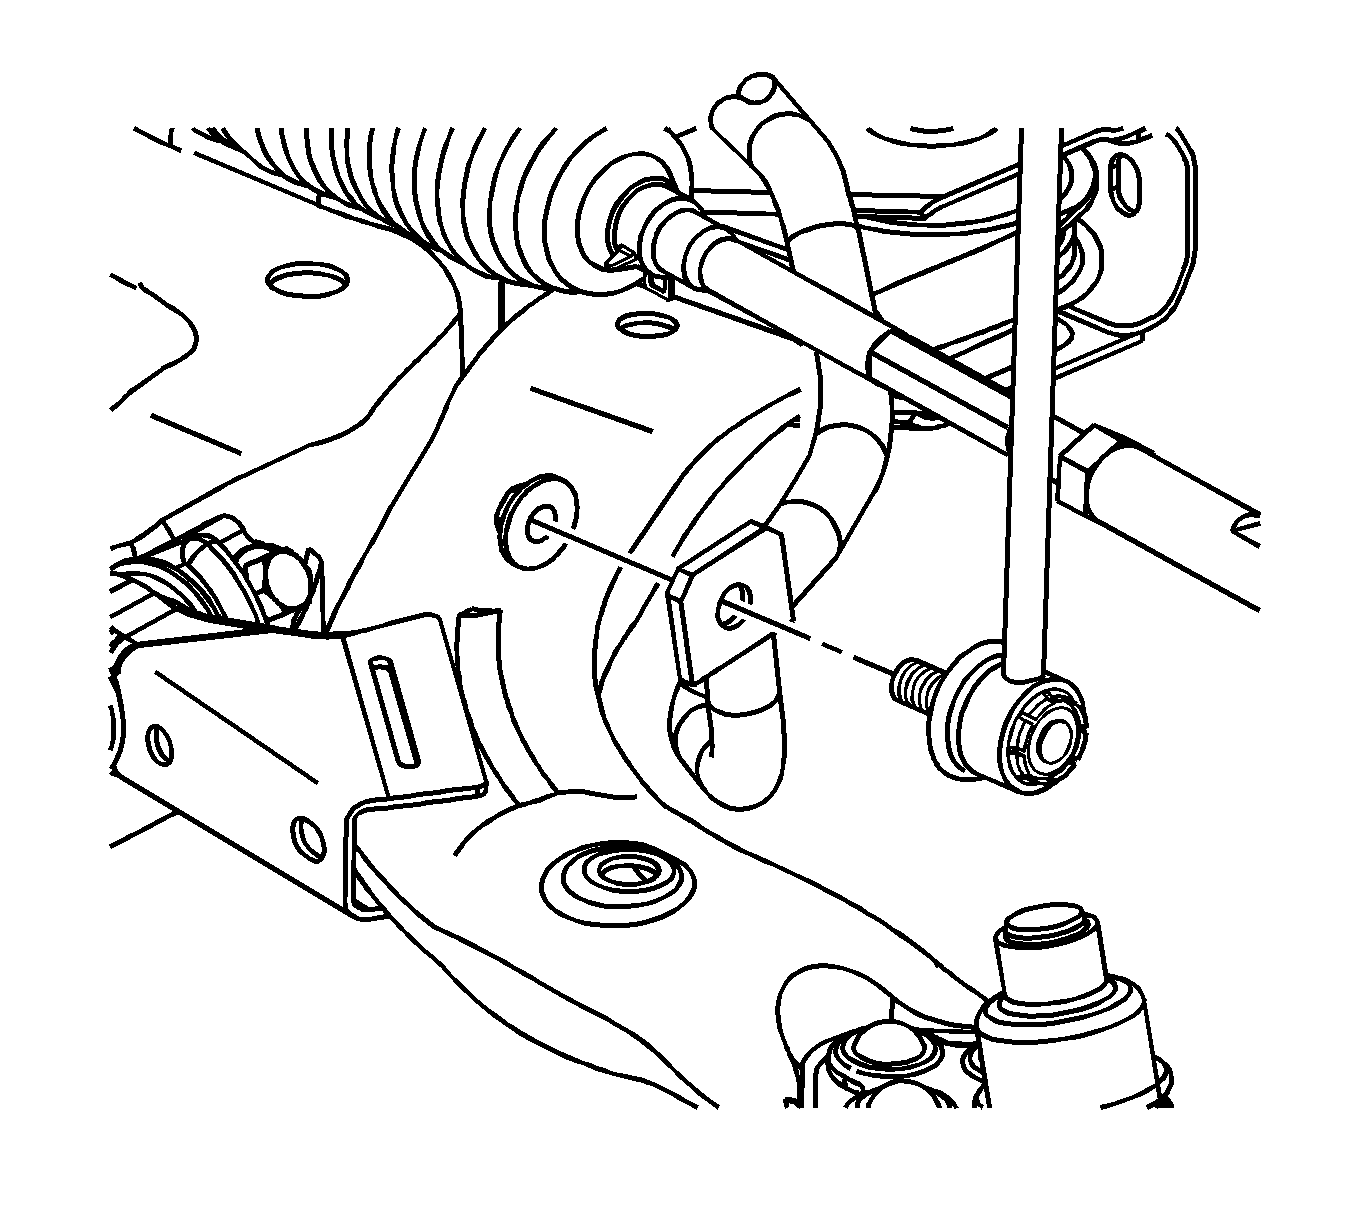
- Remove both stabilizer link to stabilizer shaft nuts. Refer to Stabilizer Shaft Link Replacement.
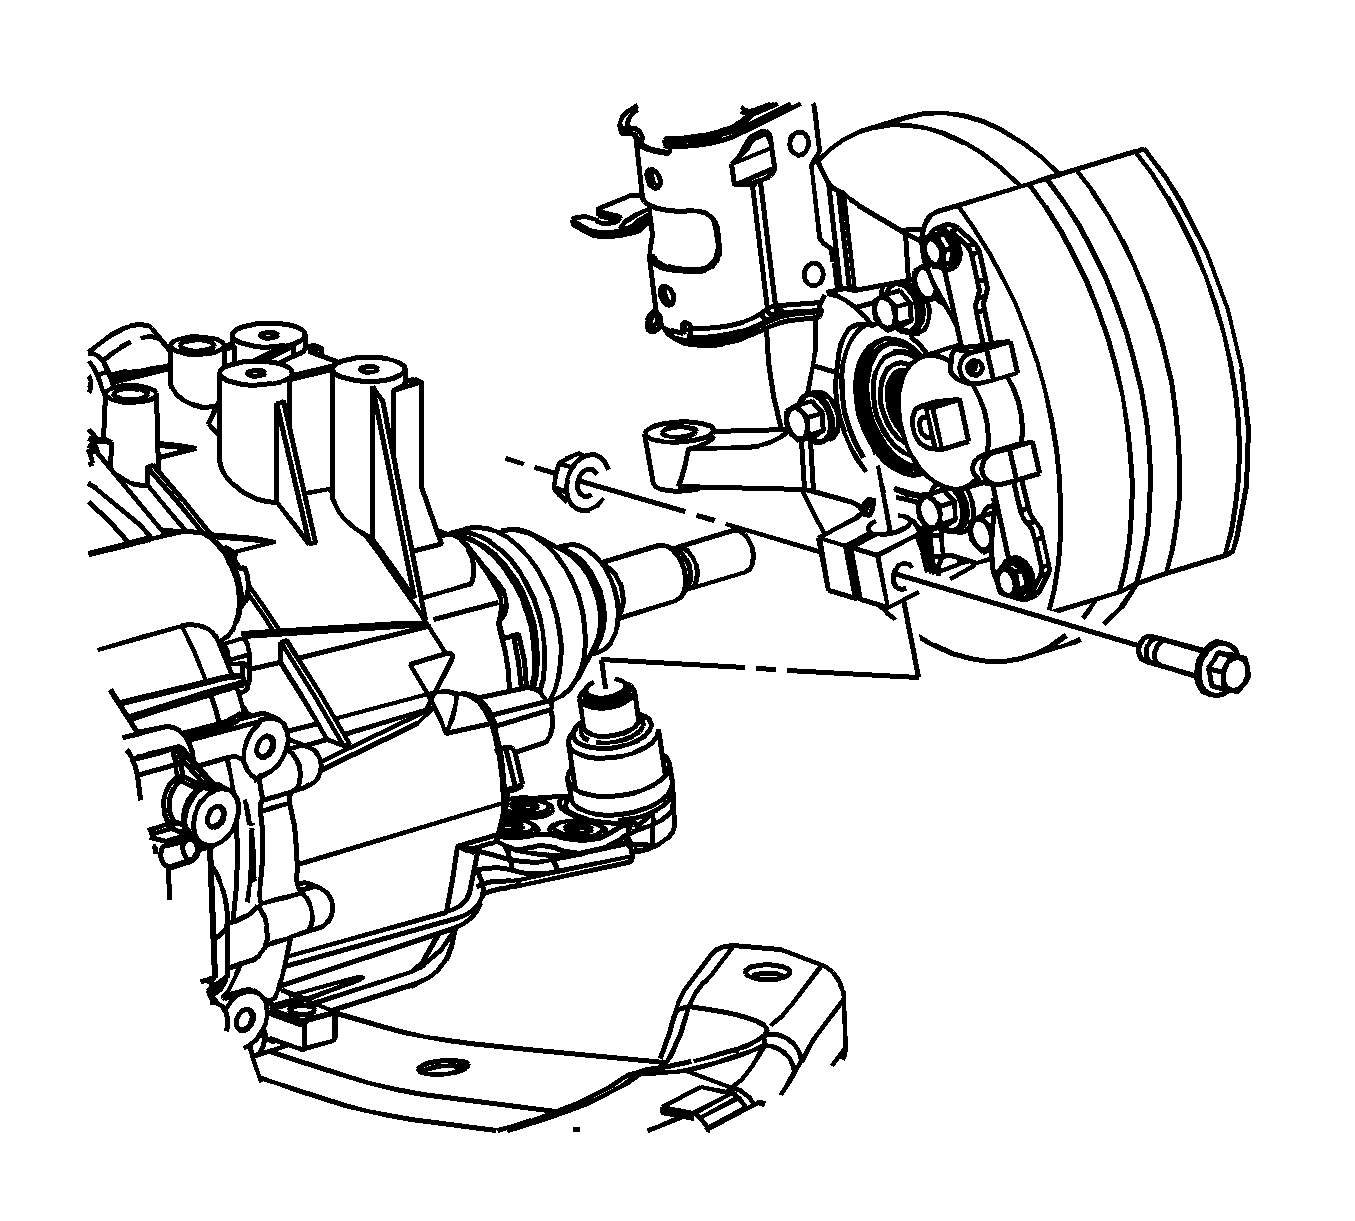
- Remove both tie rod to steering knuckle nuts.
- Use the J 24319-B to separate the outer tie rods from the steering knuckles.
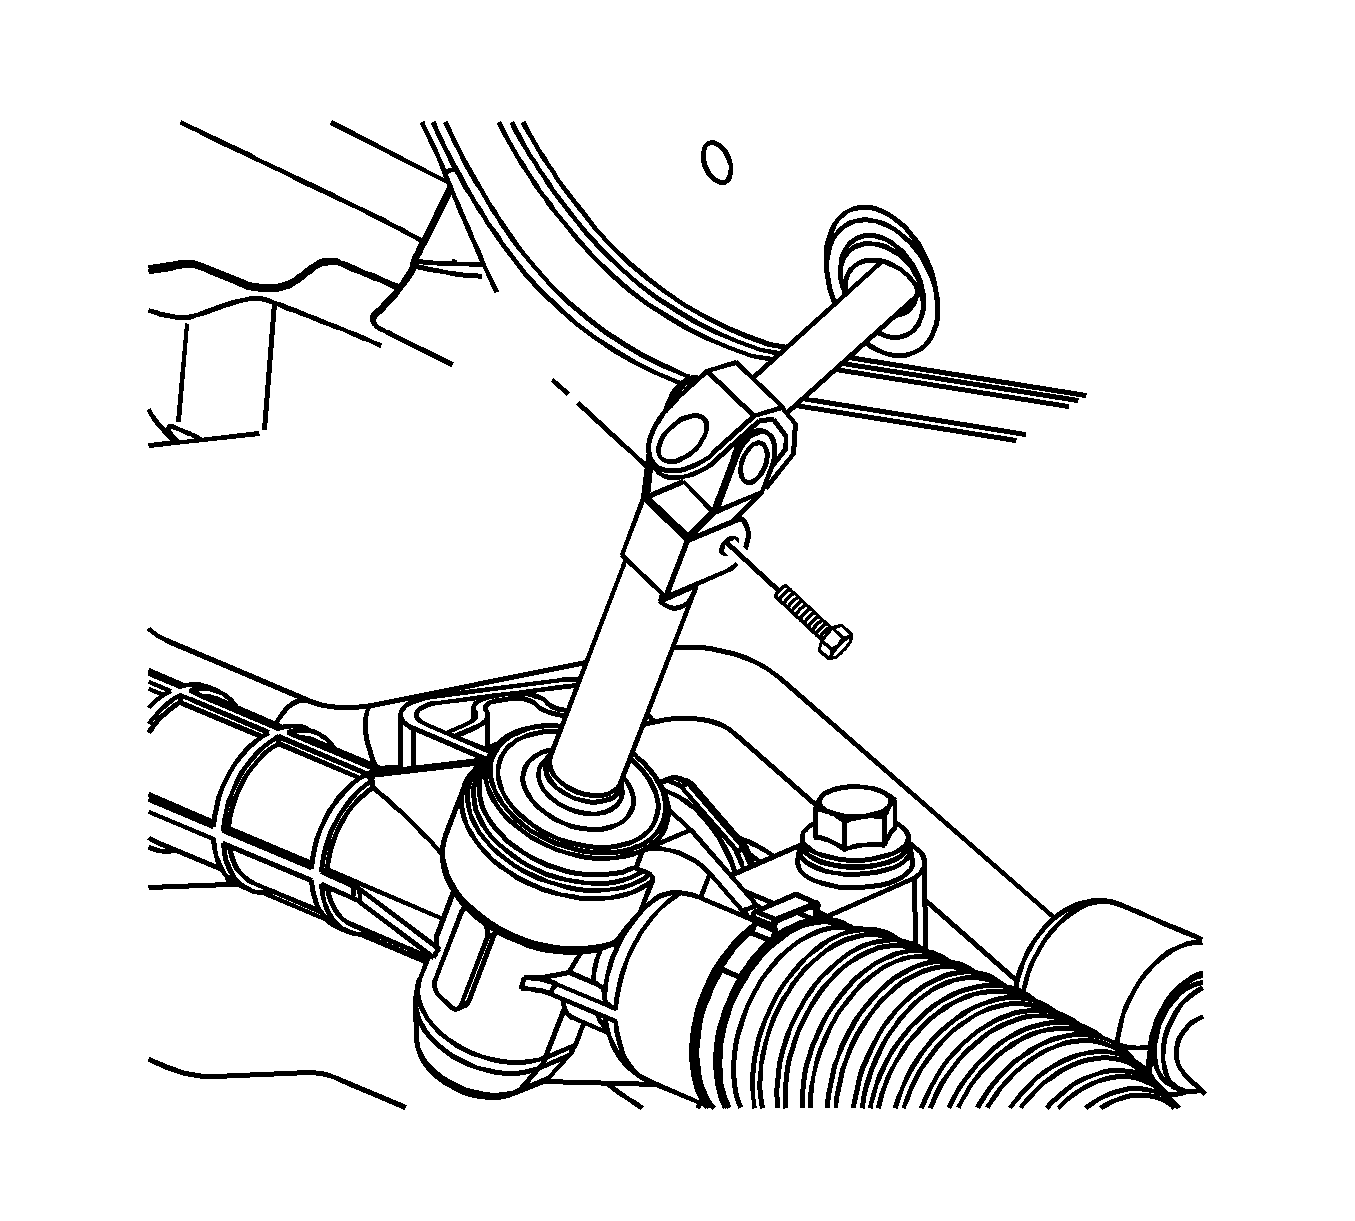
- Remove the intermediate steering shaft to steering gear pinch bolt and discard.
- Disconnect the intermediate steering shaft from the steering gear.
- Remove both lower control arm ball stud to steering knuckle pinch bolts.
- Lower the lower control arms in order to disengage the steering knuckle. If necessary, use the J 43631 .
- Mark the frame to body position with a paint pen or permanent marker.
- Lower the vehicle to approximately 1 meter (3 feet) off the ground in order to place a hydraulic lift table under the frame.
- Use two 2 x 4s between the lift table and the frame and lift the table to the frame.
- Slowly remove the frame bolts using the following sequence:
- Slowly lower the lift table and frame to the floor.
- Continue with the following steps when replacing the frame:
Note: DO NOT rotate the intermediate shaft once separated from the gear. Possible damage or a malfunction could occur.
Caution: Do not free the ball stud by using a pickle fork or a wedge-type tool. Damage to the seal or bushing may result.
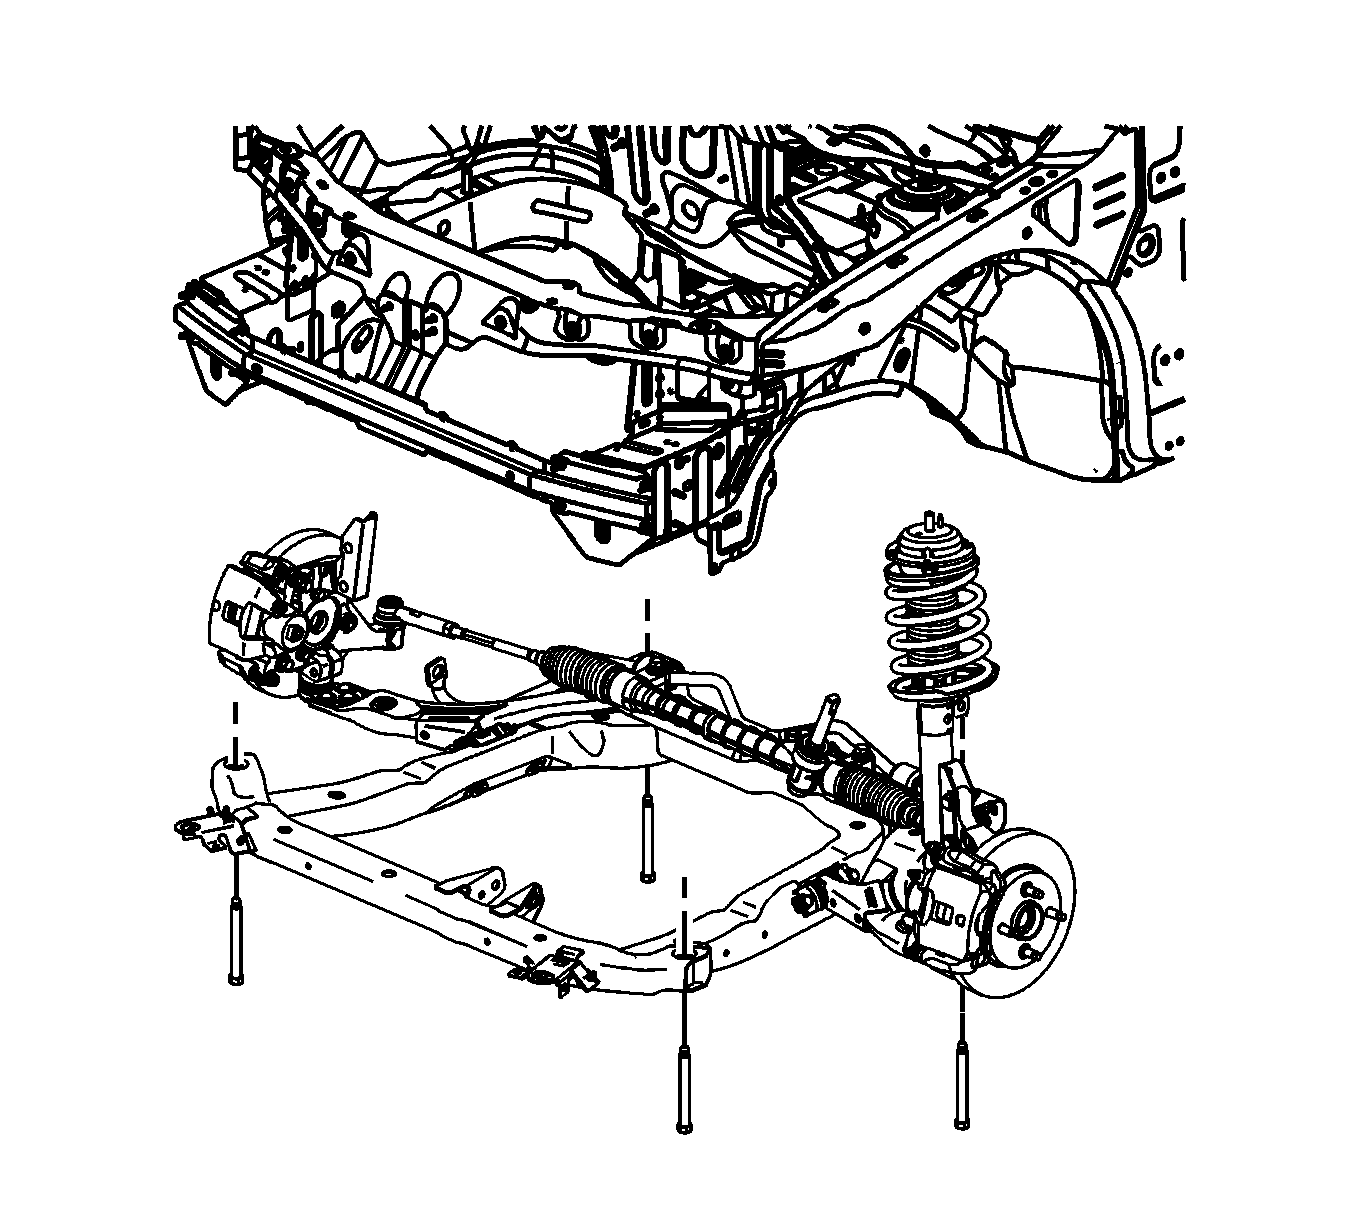
| 19.1. | Remove the front frame bolts. |
| 19.2. | Remove the rear frame bolts. |
| 21.1. | Remove the steering gear from the frame. Refer to Steering Gear Replacement. |
| 21.2. | Remove the stabilizer bar from the frame. Refer to Stabilizer Shaft Replacement. |
| 21.3. | Remove the lower control arms from the frame. Refer to Lower Control Arm Replacement. |
| 21.4. | Remove the radiator brackets from the frame. |
Installation Procedure
- If replacing the frame, perform the following steps:
- With the frame on the lift table, raise the frame to the vehicle.
- Hand start all the frame bolts while aligning the frame to the paint marks.
- Tighten the frame bolts to 100 N·m (74 lb ft) plus 180 degrees.
- Lower and remove the hydraulic table.
- Connect the lower control arm to the steering knuckle.
- Install the ball joint pinch bolt and nut.
- Hand start the front transaxle mount through bolt.
- Loosen the rear transmission mount through bolt.
- Tighten the rear transaxle mount to frame bolts to 50 N·m (37 lb ft).
- Tighten the front and rear transaxle mount through bolts in the following order.
- Install the outer tie rods to the steering knuckles.
- Install the new outer tie rod to the knuckle nuts and tighten to 25 N·m (18 lb ft) plus 90 degrees.
- Connect the stabilizer links to the stabilizer shaft. Refer to Stabilizer Shaft Link Replacement.
- Connect the intermediate shaft to the steering gear.
- Install a new intermediate shaft pinch bolt and tighten to 34 N·m (25 lb ft).
- Install the left and right splash shields and the 3 inner fender screws. Refer to Engine Splash Shield Replacement - Left Side or Engine Splash Shield Replacement - Right Side.
- Install the lower radiator air deflector to the frame.
- Install the front wheels. Refer to Tire and Wheel Removal and Installation.
- Lower the vehicle.
- Road test the vehicle in order to test for the following conditions:
| 1.1. | Install the radiator brackets to the frame. |
| 1.2. | Install the lower control arms to the frame. Refer to Lower Control Arm Replacement. |
| 1.3. | Install the stabilizer bar to the frame. Refer to Stabilizer Shaft Replacement. |
| 1.4. | Install the steering gear to the frame. Refer to Steering Gear Replacement. |
Caution: Refer to Fastener Caution in the Preface section.
Note: The torque sequence must be followed in the order that is listed.
| • | First Pass--Tighten the nut to 50 N·m (37 lb ft). |
| • | Reverse the nut 3/4 turn. |
| • | Second Pass--Tighten the nut to 50 N·m (37 lb ft) plus 30 degrees. |
Note: The front and rear transmission mounts must be allowed to settle with the through bolts loosened.
| • | Tighten the rear bolt to 100 N·m (74 lb ft). |
| • | Tighten the front bolt to 100 N·m (74 lb ft). |
| • | Steering leads or pulls--Refer to Wheel Alignment Measurement. |
| • | Abnormal powertrain noise or vibration at idle--Inspect the engine and transmission mounts for proper alignment and torque. |
