For 1990-2009 cars only
SMU - Revised Power Steering Gear Replacement

| Subject: | Revised Power Steering Gear Replacement |
| Models: | 2004-2006 Chevrolet Colorado |
| 2004-2006 GMC Canyon |
| 2006 HUMMER H3 |
This bulletin is being issued to revise the Power Steering Gear Replacement procedure in the Power Steering System sub-section of the Service Manual. Please replace the current information in the Service Manual with the following information.
The following information has been updated within SI. If you are using a paper version of this Service Manual, please make a reference to this bulletin on the affected page.
Power Steering Gear Replacement (Colorado/Canyon)
Removal Procedure
- Raise and support the vehicle. Refer to Lifting and Jacking the Vehicle in General Information.
- Remove both of the front tire and wheel assemblies. Refer to Tire and Wheel Removal and Installation in Tires and Wheels.
- Remove the engine protection shield if equipped. Refer to Engine Protection Shield Replacement in Frame and Underbody.
- Disconnect the outer tie rod end from the steering knuckle. Refer to Rack and Pinion Outer Tie Rod End Replacement.
- Place a drain pan to catch the fluid.
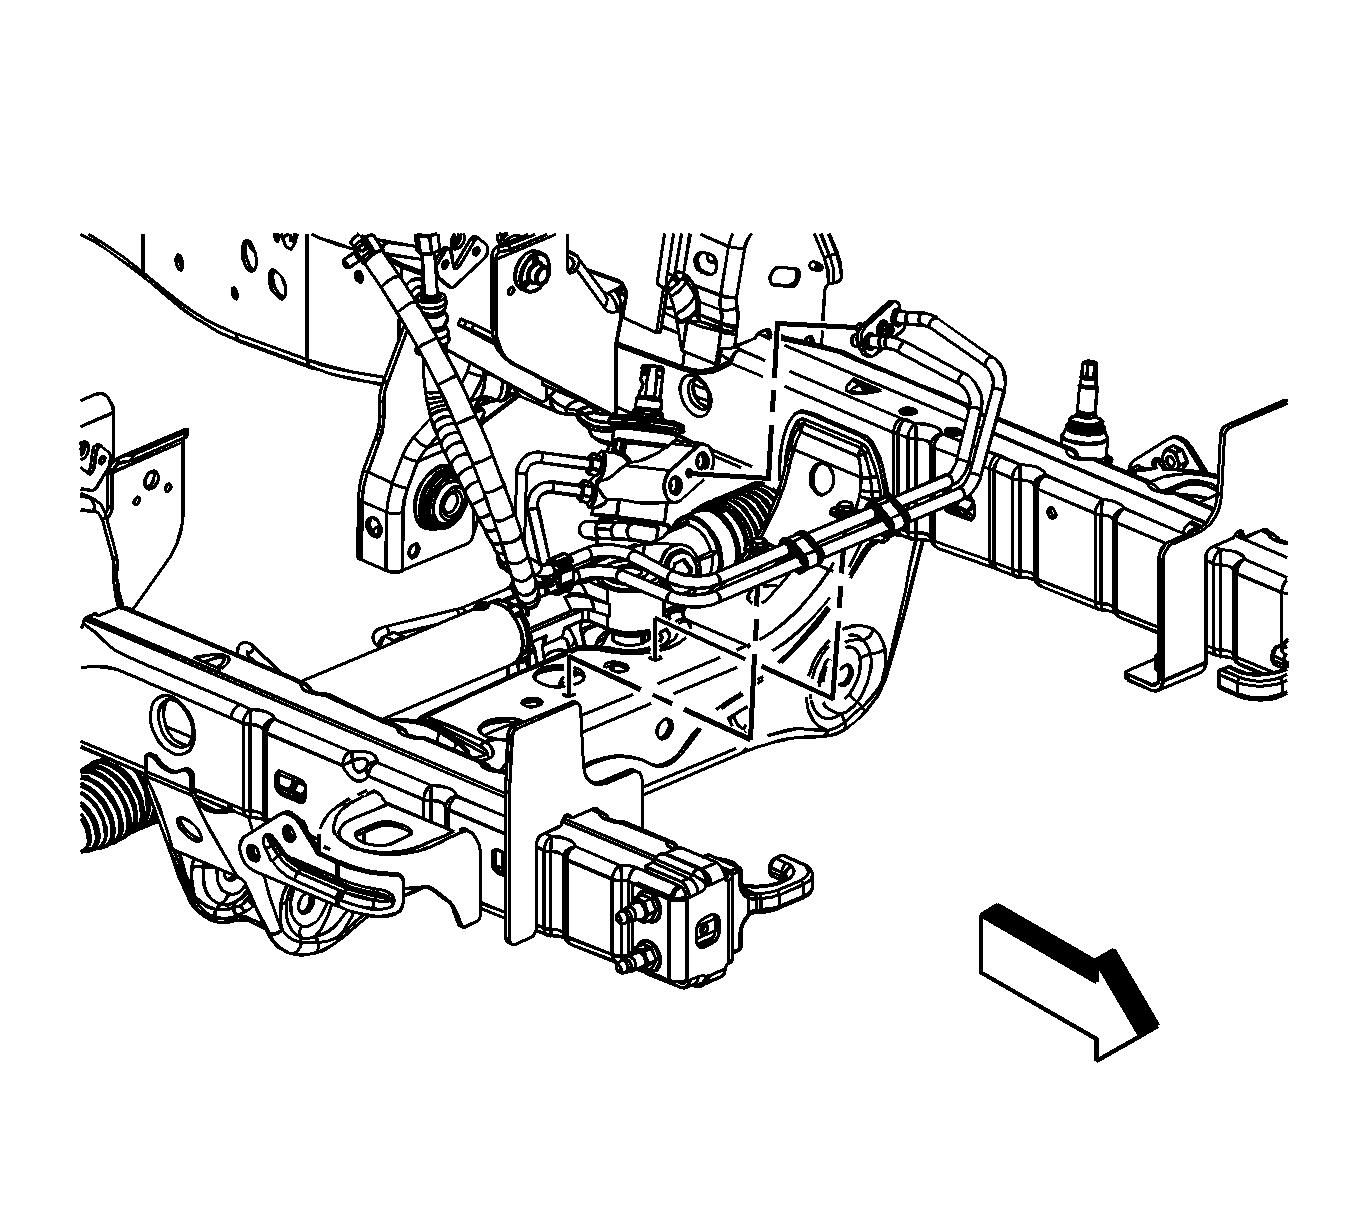
- Disconnect the power steering hose assembly from the steering gear. Refer to Power Steering Gear Inlet and Outlet Hose Replacement.
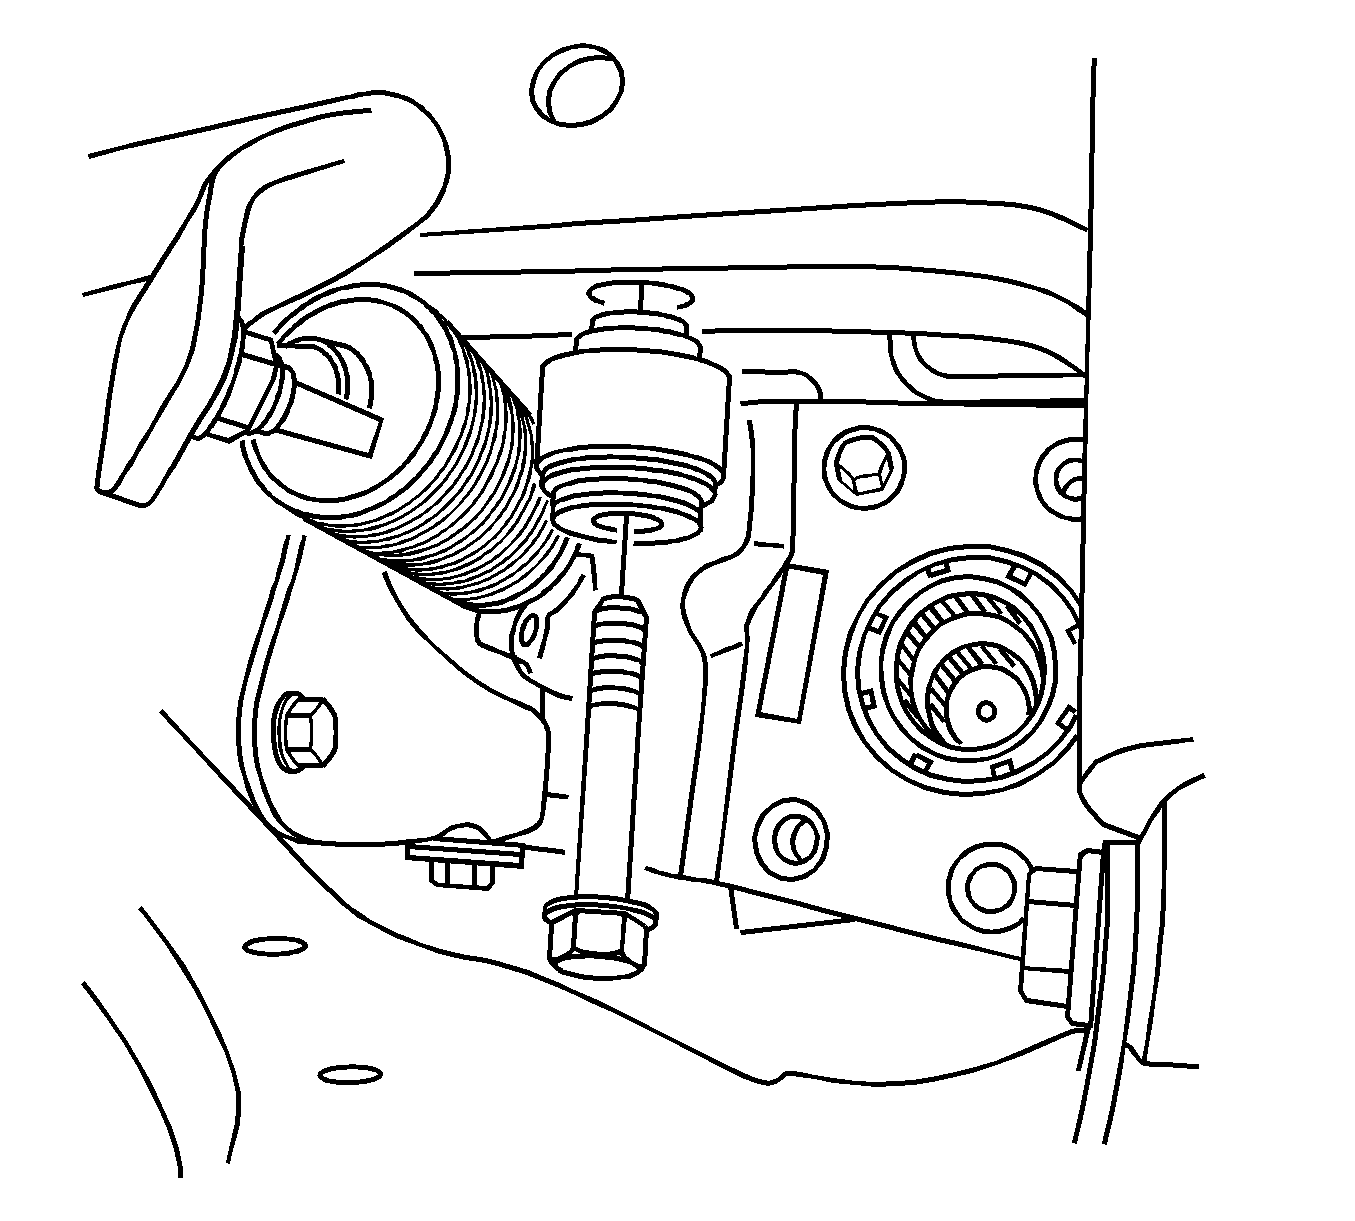
- Remove the coupler clamp bolt from the intermediate shaft. Refer to Intermediate Steering Shaft Replacement - Lower in Steering Wheel and Column.
- Separate the intermediate shaft from the steering gear.
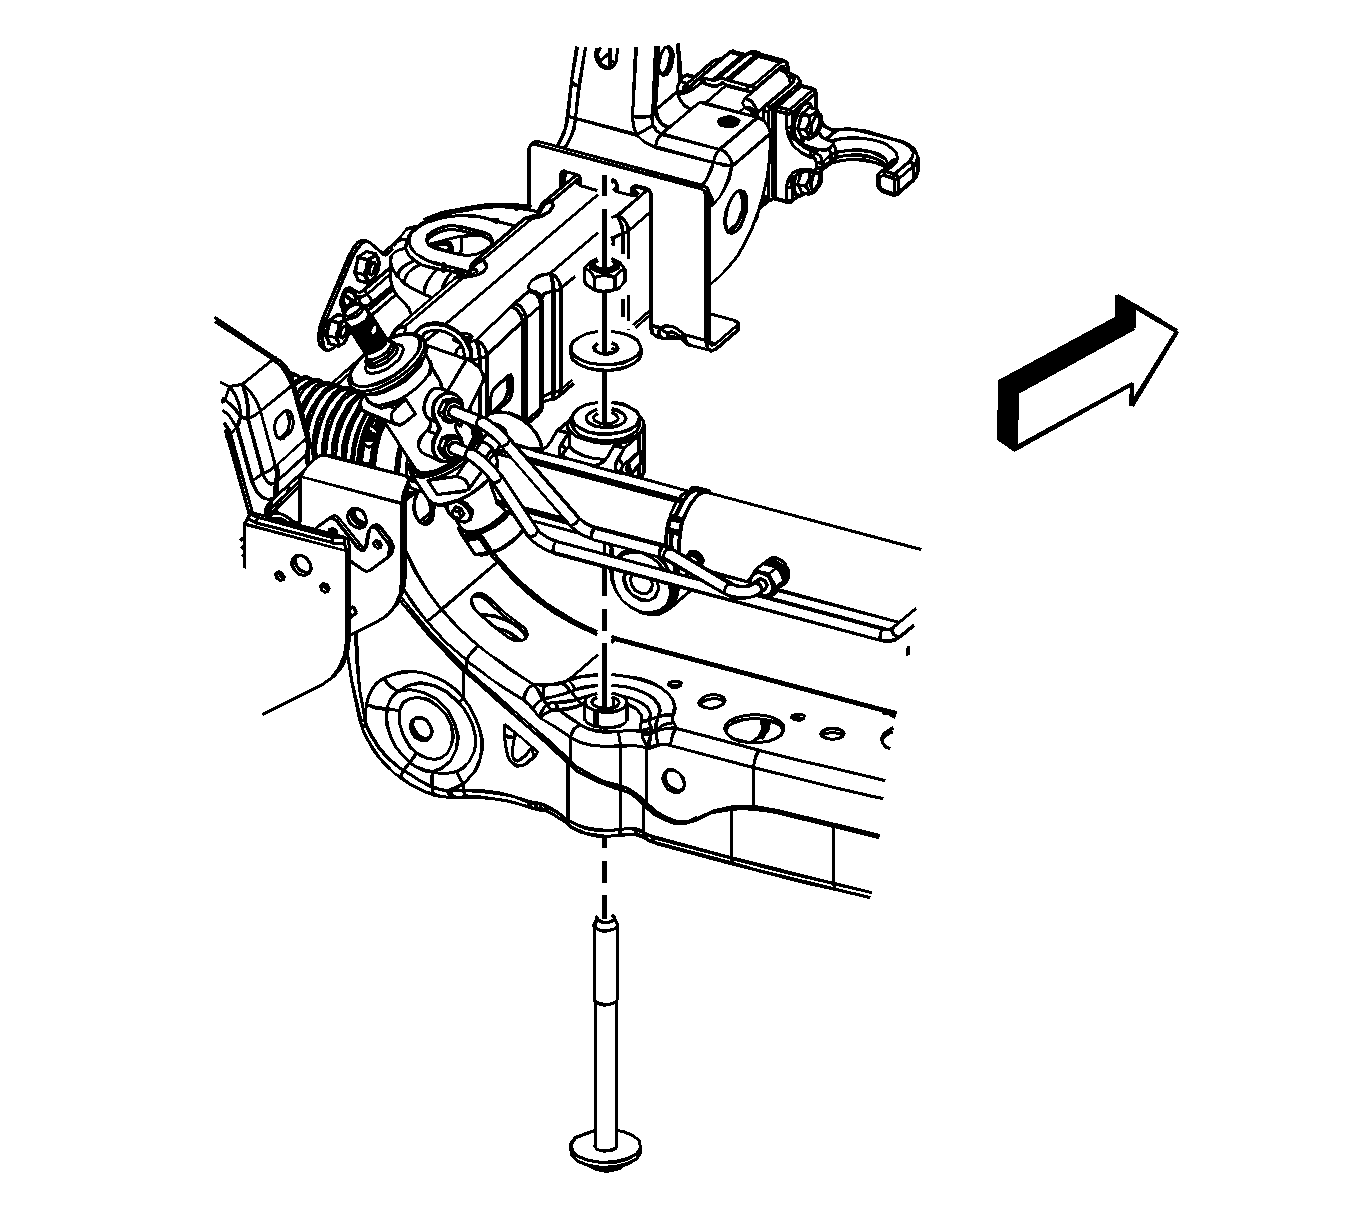
- Remove the steering gear vertical mounting nuts, the washers and the bolts.
- On 4WD vehicles, support the front carrier and remove the drivers side mounting bracket-to-frame bolts.
- Move LH side of the front carrier rearward enough to remove the gear.
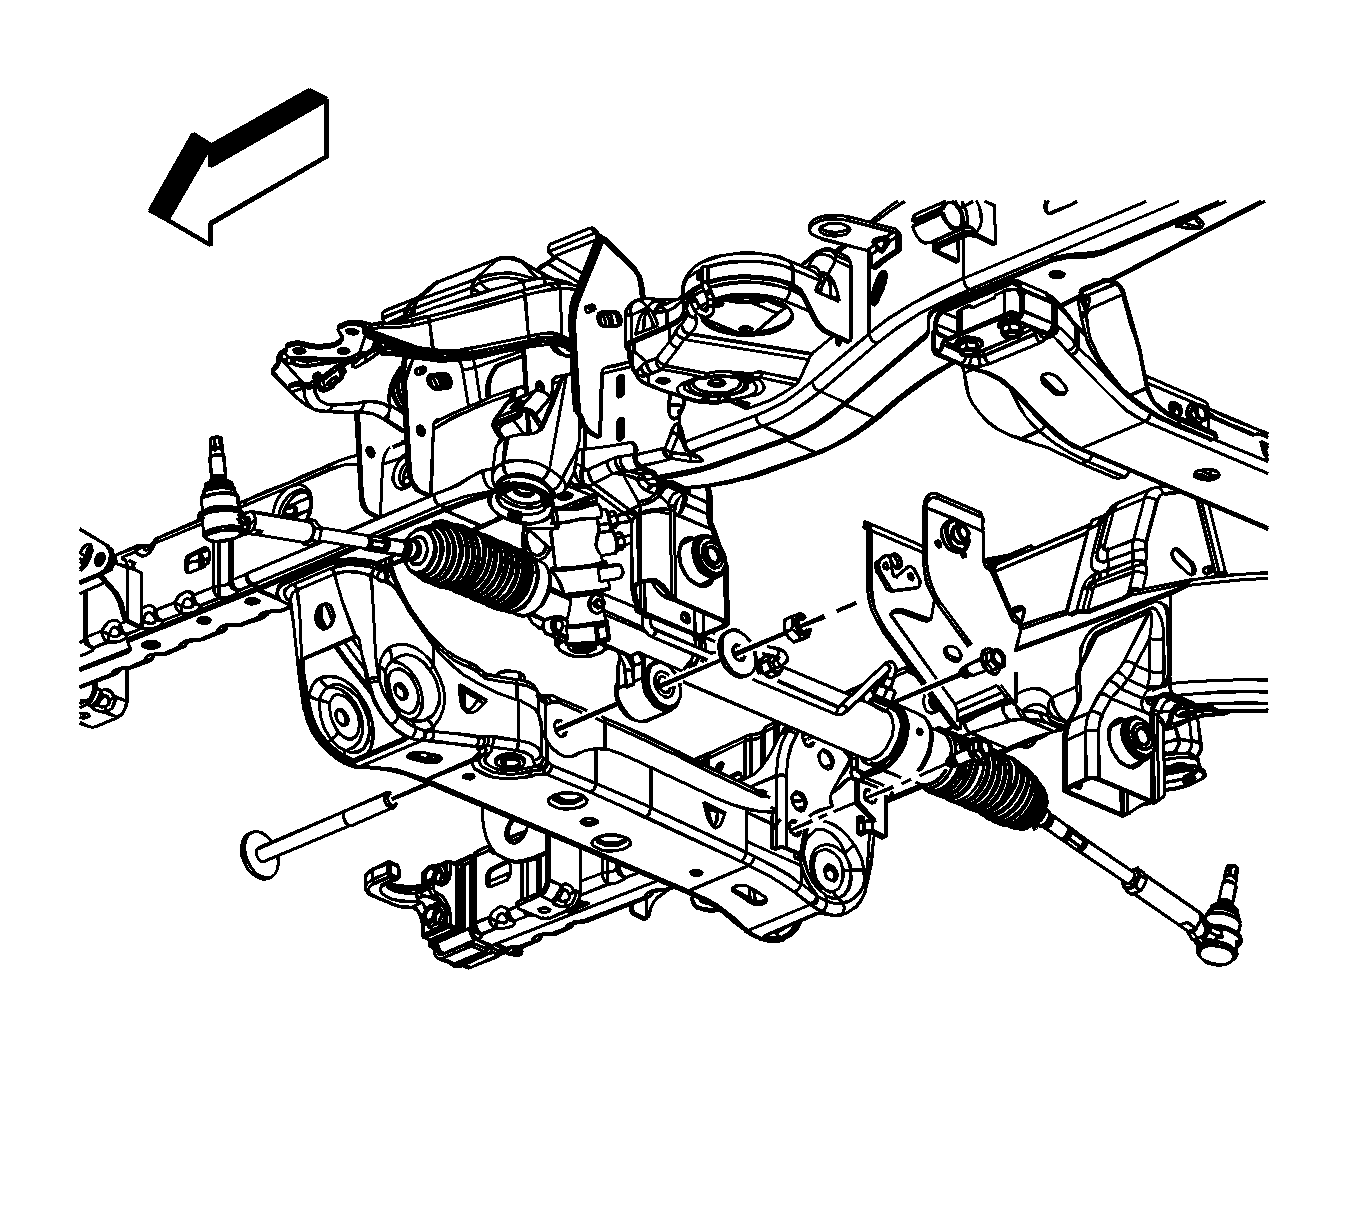
- Remove the steering gear horizontal mounting nuts, the washers and the bolts.
- Remove the steering gear RH isolator bracket.
- Remove the crossmember, 2WD ONLY. Refer to Crossmember Replacement in Frame and Underbody.
- Remove the steering gear from the vehicle.


Installation Procedure
- Install the steering gear into the vehicle.
- Install the steering gear RH isolator bracket.
- Loose install the steering gear horizontal mounting nuts, the washers and the bolts.
- On 4WD vehicles, install the drivers side carrier mounting bracket-to-frame bolts.
- Remove the front carrier support.
- Install the crossmember, 2WD ONLY. Refer to Crossmember Replacement in Frame and Underbody.
- Loose install the steering gear vertical mounting nuts, the washers and the bolts.
- Install the intermediate shaft to the steering gear.
- Install the coupler clamp bolt to the intermediate shaft. Refer to Intermediate Steering Shaft Replacement - Lower in Steering Wheel and Column.
- Connect the power steering hose assembly to the steering gear. Refer to Power Steering Gear Inlet and Outlet Hose Replacement.
- Install the engine protection shield, if equipped. Refer to Engine Protection Shield Replacement in Frame and Underbody.
- Install the outer tie rod end to the steering knuckle. Refer to Rack and Pinion Outer Tie Rod End Replacement.
- Install both of the front tire and wheel assemblies. Refer to Tire and Wheel Removal and Installation in Tires and Wheels.
- Lower the vehicle.
- Bleed the power steering system. Refer to Bleeding the Power Steering System.
- Check the wheel alignment. Refer to Measuring Wheel Alignment in Wheel Alignment.


Notice: Refer to Fastener Notice in Cautions and Notices.
Tighten
Tighten the bolts to 152 N·m (112 lb ft).

Tighten
| • | Tighten the long bolts to 130 N·m (96 lb ft). |
| • | Tighten the isolator clamp bolts to 100 N·m (74 lb ft). |

Power Steering Gear Replacement (H3)
Removal Procedure
- Raise and support the vehicle. Refer to Lifting and Jacking the Vehicle.
- Remove both of the front tire and wheel assemblies. Refer to Tire and Wheel Removal and Installation.
- Remove the engine shield. Refer to Engine Shield Replacement.
- Disconnect the outer tie rod end from the steering knuckle. Refer to Rack and Pinion Outer Tie Rod End Replacement.
- Place a drain pan to catch the fluid.
- Disconnect the power steering hose assembly from the steering gear. Refer to Power Steering Gear Inlet and Outlet Hose Replacement.
- Remove the coupler clamp bolt from the intermediate shaft. Refer to Intermediate Steering Shaft Replacement - Lower.
- Separate the intermediate shaft from the steering gear.
- Remove the steering gear vertical mounting nuts, the washers and the bolts.
- Remove the steering gear horizontal mounting nuts, the washers and the bolts.
- Remove the steering gear RH isolator bracket.
- Remove the steering gear from the vehicle.


Installation Procedure
- Install the steering gear into the vehicle.
- Install the steering gear RH isolator bracket.
- Loose install the steering gear horizontal mounting nuts, the washers and the bolts.
- Loose install the steering gear vertical mounting nuts, the washers and the bolts.
- Install the intermediate shaft to the steering gear.
- Install the coupler clamp bolt to the intermediate shaft. Refer to Intermediate Steering Shaft Replacement - Lower.
- Connect the power steering hose assembly to the steering gear. Refer to Power Steering Gear Inlet and Outlet Hose Replacement.
- Install the engine shield. Refer to Engine Shield Replacement.
- Install the outer tie rod end to the steering knuckle. Refer to Rack and Pinion Outer Tie Rod End Replacement.
- Install both of the front tire and wheel assemblies. Refer to Tire and Wheel Removal and Installation.
- Lower the vehicle.
- Bleed the power steering system. Refer to Bleeding the Power Steering System.
- Check the wheel alignment. Refer to Measuring Wheel Alignment.


Notice: Refer to Fastener Notice.
Tighten
| • | Tighten the long bolts to 130 N·m (96 lb ft). |
| • | Tighten the isolator clamp bolts to 100 N·m (74 lb ft). |

