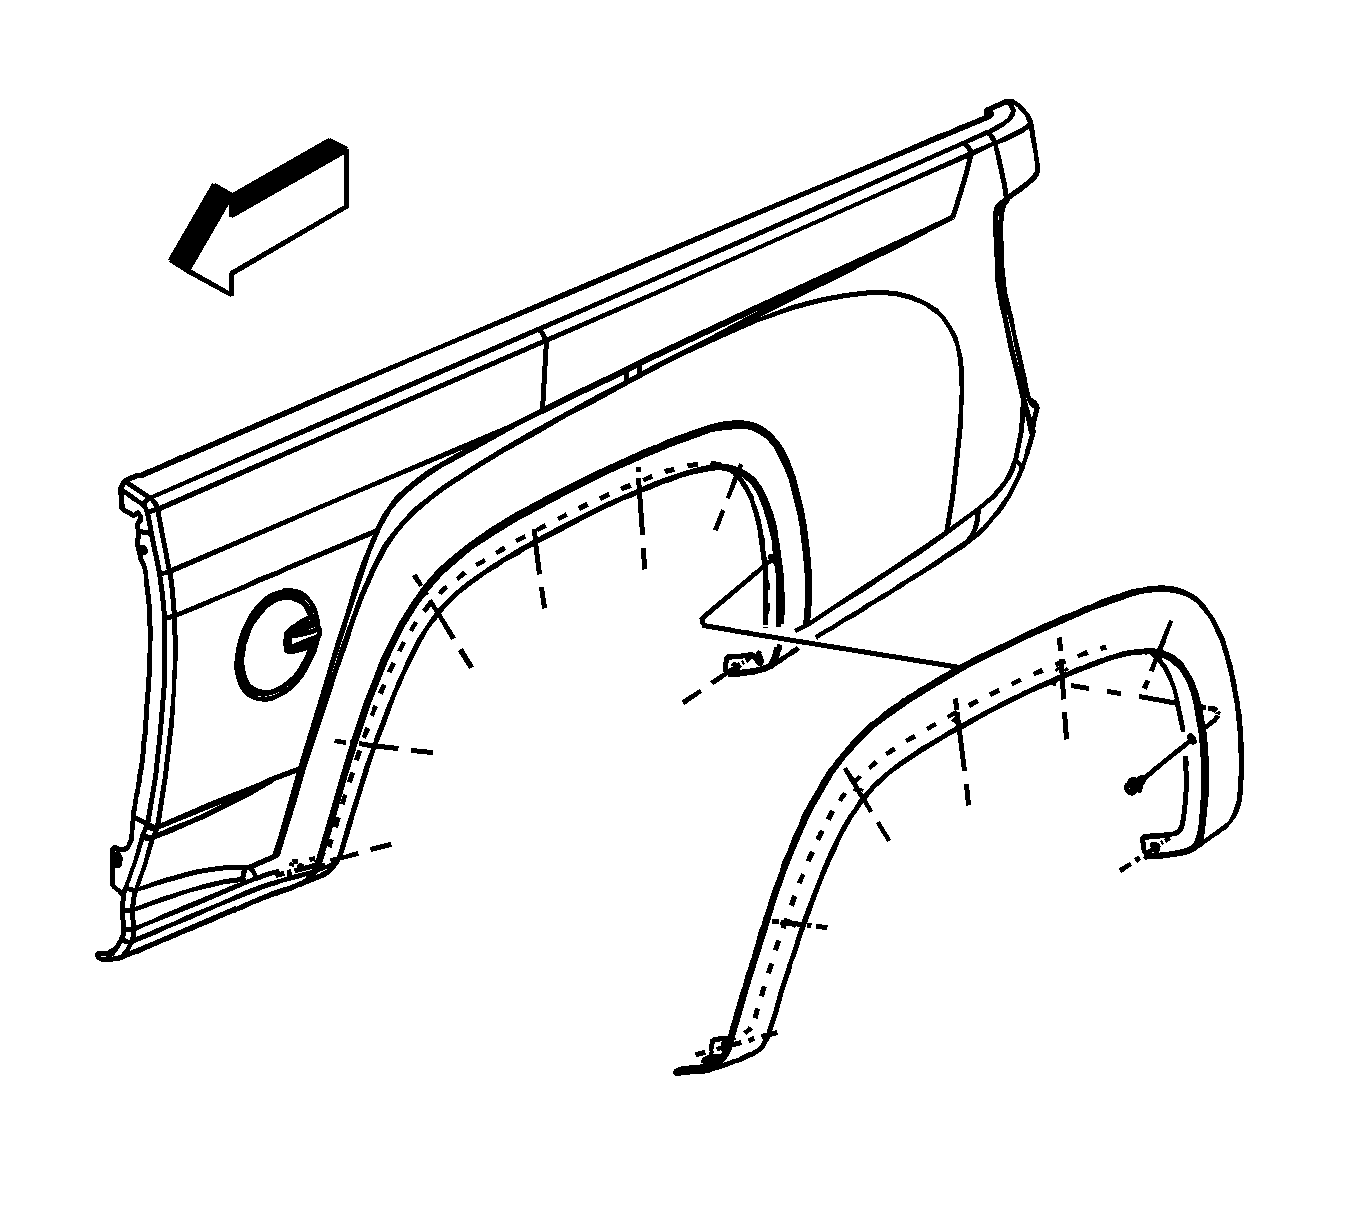
Rear Wheel Opening Flare Replacement Canyon
Tools Required
J 25070 Heat Gun
Removal Procedure
- Apply masking tape to protect the painted surfaces.
- Remove the 8 push-pins from the molding.
- Remove the molding from the vehicle using the following procedure:
- Remove all adhesive from the surface and the back of the molding using a 3M Scotch Brite molding adhesive remover disk, 3M P/N 07501 or equivalent.
- Clean the surface using varnish makers and painters (VMP) naphtha.
Notice: Use a plastic, flat-bladed tool to prevent paint damage when removing an emblem/name plate.
| 3.1. | Heat the wheel opening molding using a J 25070 . Hold the heat gun approximately 152 mm (6 in) from surface. |
Apply heat using a circular motion for about 30 seconds.
| Important: Be careful not to scratch or chip the paint. |
| 3.2. | Peel the wheel opening molding from the panel surface using a flat-bladed tool. |
| 3.3. | Clean the body panel using varnish makers and painters (VMP) naphtha. |

Installation Procedure
- Ensure the painted body surface in the tape contact area is clean and dry.
- Warm the body panel with a heat lamp or heat gun if necessary, to a temperature between 18.8-41.1°C (66-100°F).
- Install the molding to the wheel opening.
- Install the push-pins.
- Remove the tape liner from the adhesive tape.
- Ensure that the molding is aligned with the body panel. Press the wheel opening molding to the body panel.
- Remove the masking tape.
- Hand roll the wheel opening molding to the body in order to ensure proper adhesion.
Important: Do not touch the adhesive surface.
Rear Wheel Opening Flare Replacement XTREME
Tools Required
J 25070 Heat Gun
Removal Procedure
- Apply masking tape to protect the painted surfaces.
- Remove the screws (3) from the wheel opening molding to the panel.
- Remove the wheel opening molding.
- Remove all adhesive from the surface and the back of the molding using a 3M Scotch Brite molding adhesive remover disk, 3M P/N 07501 or equivalent.
- Clean the surface using varnish makers and painters (VMP) naphtha.
Notice: Use a plastic, flat-bladed tool to prevent paint damage when removing an emblem/name plate.
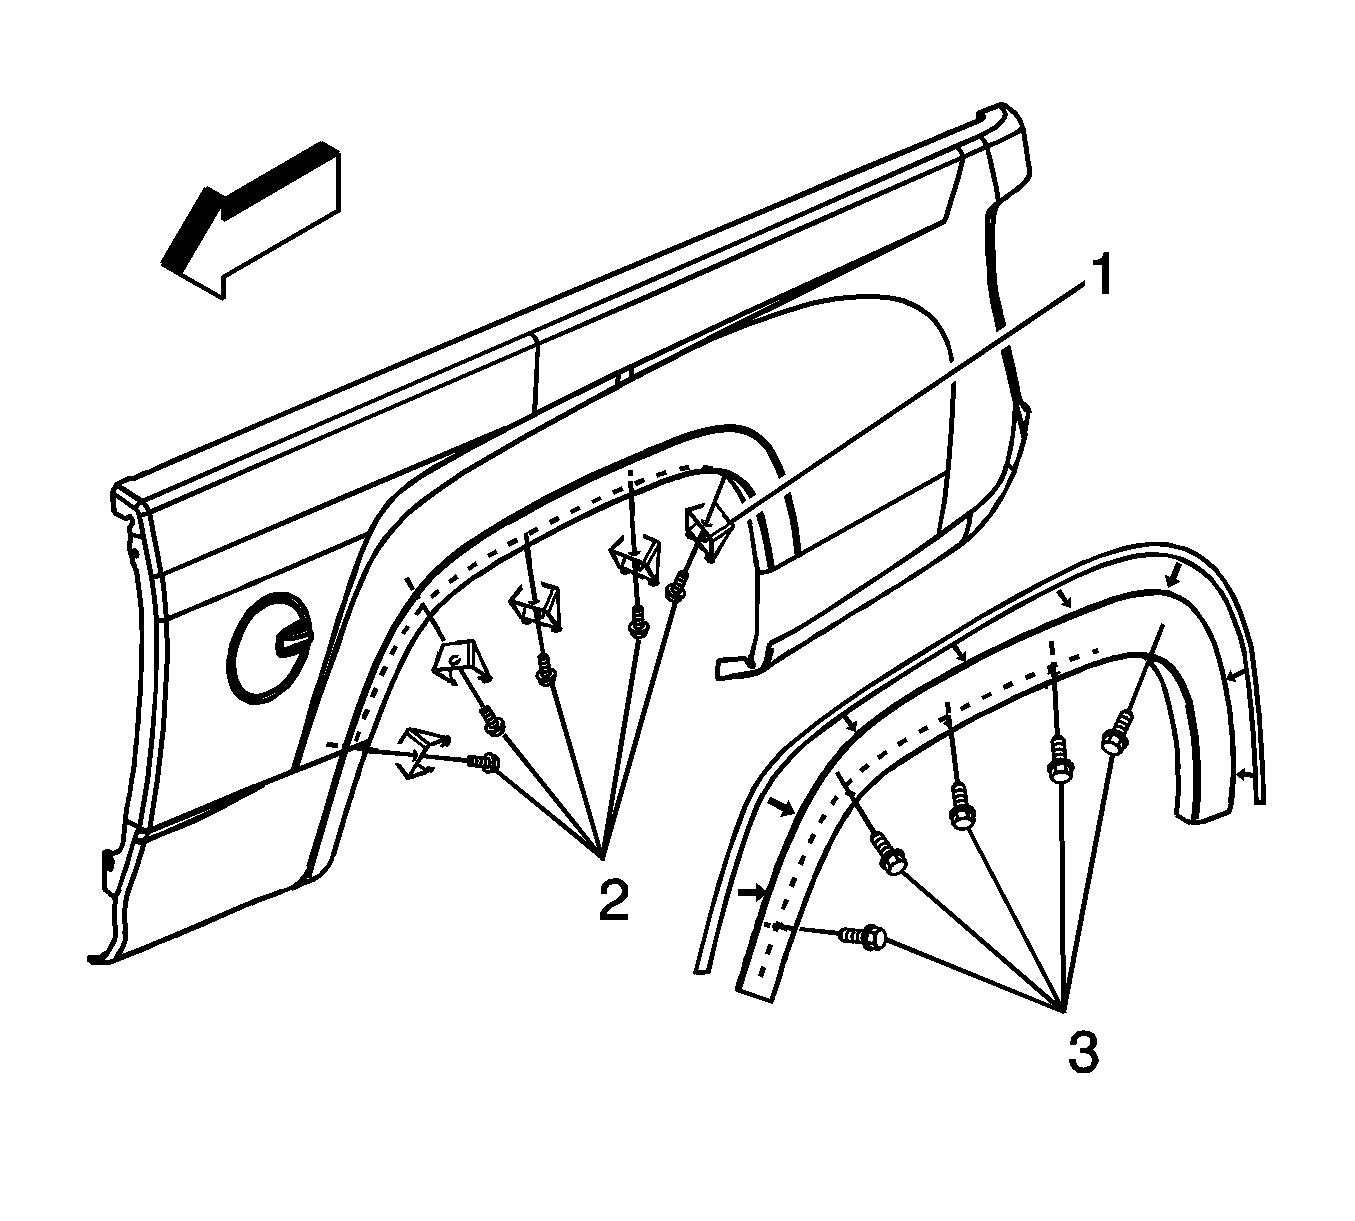
Important: If replacing the wheel opening molding, the spacer blocks (1) will have to be transferred to the new wheel opening molding.
Important: Be careful not to scratch or chip the paint.
| 3.1. | Heat the wheel opening molding using a J 25070 . Hold the heat gun approximately 152 mm (6 in) from surface. |
| 3.2. | Apply heat using a circular motion for about 30 seconds. |
| 3.3. | Use a flat-bladed tool to aid in the removal of the wheel opening molding from the panel. |
Work the tool around out edge of the molding until it fully releases from the panel.
| 3.4. | Release the tabs located at the lower corners of the rocker molding. |
Installation Procedure
- Warm the body panel and molding using a heat lamp or a heat gun, if necessary to a temperature between 18.8-43.3°C (66-100°F).
- Apply one side of the adhesive strip backing to the molding.
- Peel off the tape liner from the adhesive strip backing.
- Position the rear wheel opening molding to the rear panel.
- Install the screws (3) to the wheel opening molding.
- Install the screws retaining the wheel opening molding to the panel.
- Release the tabs located at the lower corners of the rocker molding.
- Press the molding to the panel.
- Remove the masking tape.
- Hand roll the molding to the panel in order to ensure proper adhesion.
Important: Do not touch the adhesive backing.
Important: If replacing the wheel opening molding, the spacer blocks (1) will have to be transferred to the new wheel opening molding.
Notice: Refer to Fastener Notice in the Preface section.
Tighten
Tighten the bolts to 2 N·m (18 lb in).
