For 1990-2009 cars only
Body Rear Trim Panel Replacement Regular Cab
Removal Procedure
- Remove the front seats. Refer to Front Seat Replacement - Bucket or Split Bench Seat Replacement .
- Remove the jack and tool storage bracket. Refer to Jack and Tool Stowage Container Bracket Replacement .
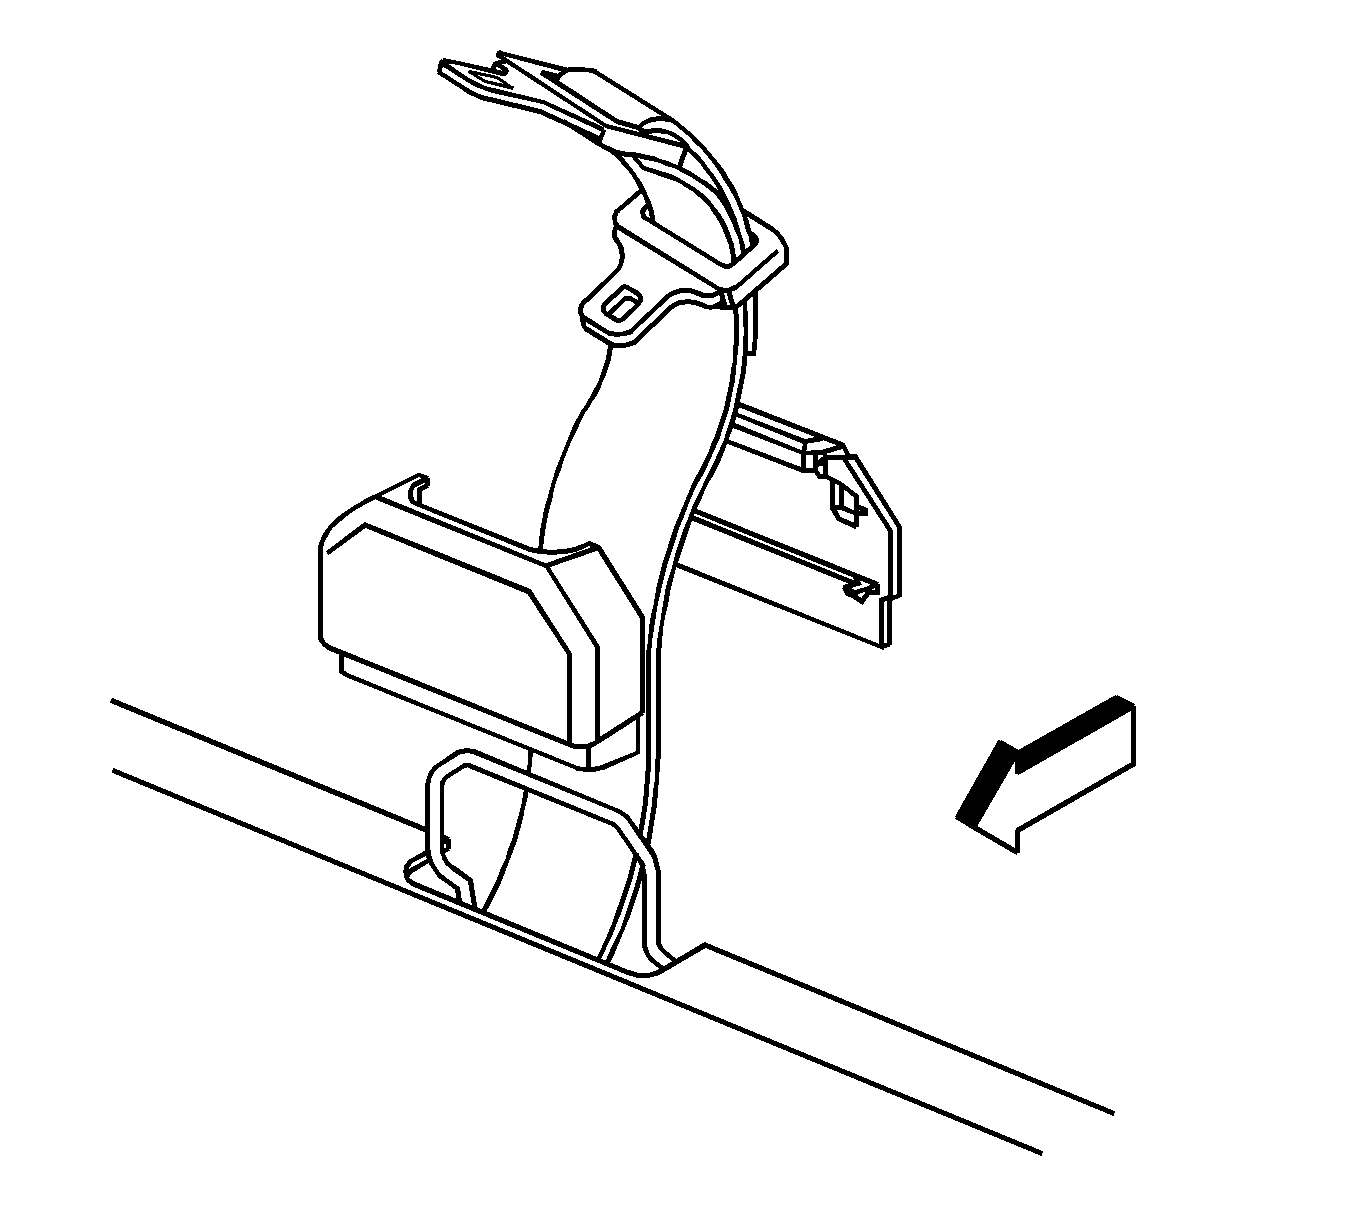
- Remove the rear shoulder belt guide.
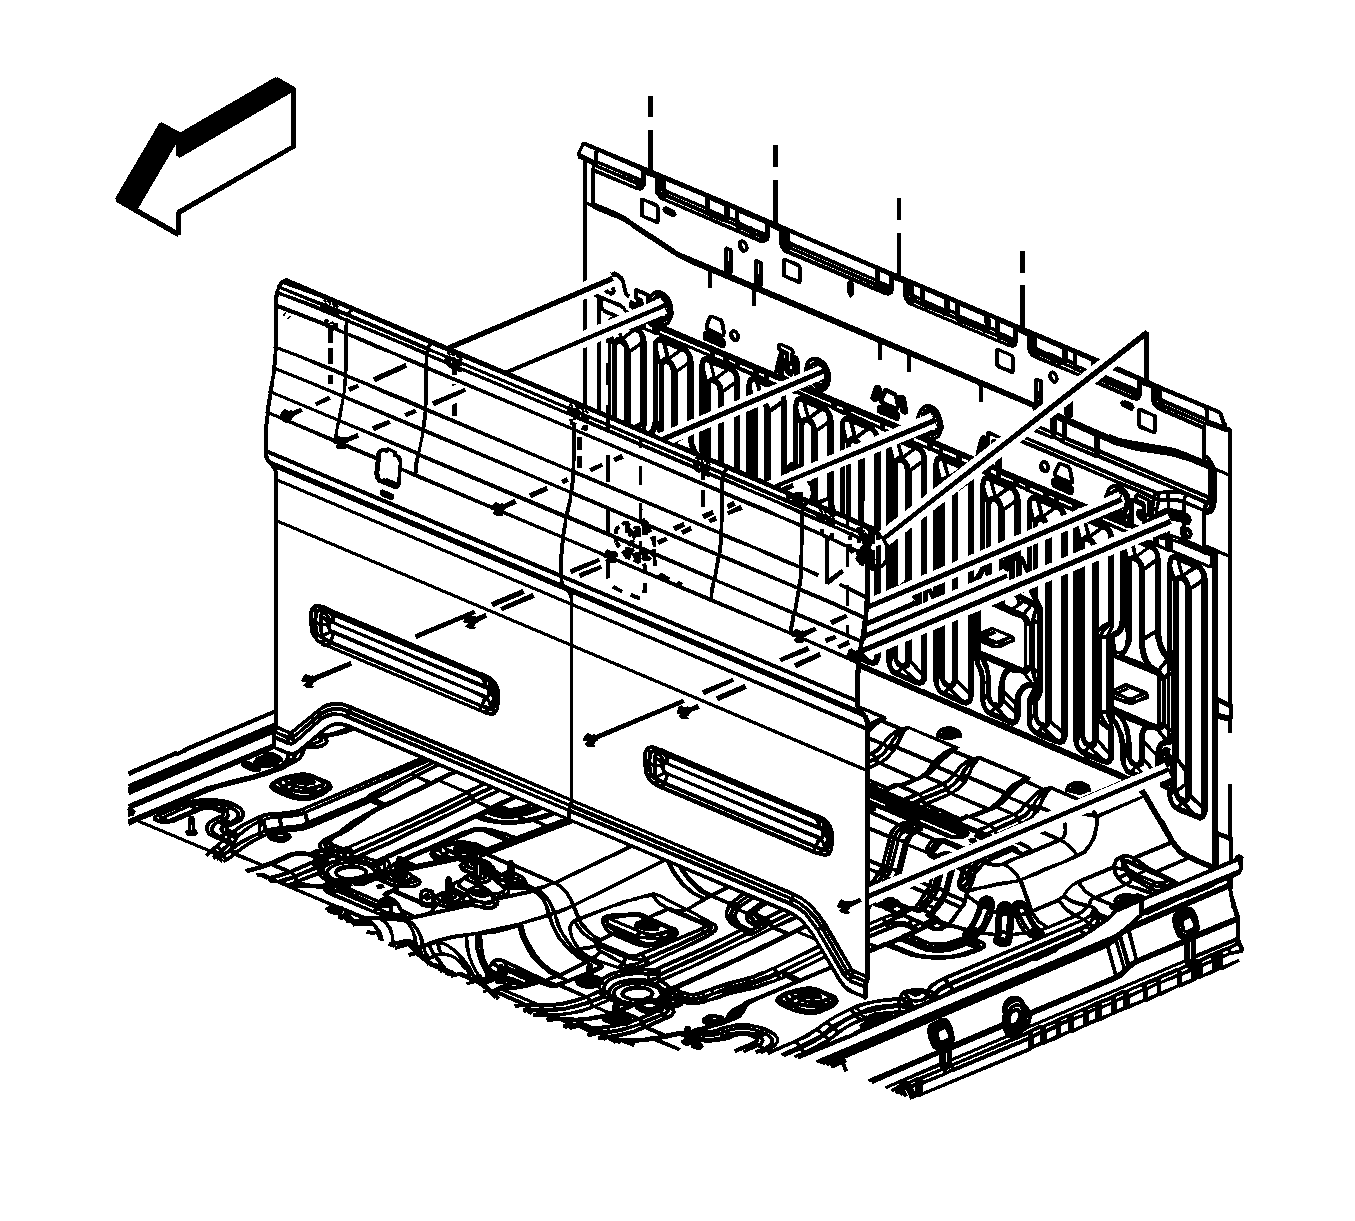
- Grasp the lower edge of the body rear trim panel and pull to release the fasteners from the sheet metal.
- Raise the panel to unhook it from the sheet metal along the lower edge of the rear window.
- Remove any fasteners that may have pulled away from the panel and reinstall them to the back of the panel.
- Remove the body rear trim panel from the vehicle.
Installation Procedure
- Hook the body rear trim panel in the sheet metal along the lower edge of the rear window.
- Install the panel by pushing firmly against the body to seat the panel fasteners.
- Install the rear shoulder belt guide.
- Install the jack and tool storage bracket. Refer to Jack and Tool Stowage Container Bracket Replacement .
- Remove the front seats. Refer to Front Seat Replacement - Bucket or Split Bench Seat Replacement .
Body Rear Trim Panel Replacement Extended Cab
Removal Procedure
- Remove the rear seat back. Refer to Rear Seat Back Replacement .
- Remove the folding seat. Refer to Folding Seat Replacement .
- Remove the jack and tool storage bracket. Refer to Jack and Tool Stowage Container Bracket Replacement .
- Remove the rear shoulder belt guide.
- Grasp the lower edge of the body rear trim panel and pull to release the fasteners from the sheet metal.
- Raise the panel to unhook it from the sheet metal along the lower edge of the rear window.
- Remove any fasteners that may have pulled away from the panel and reinstall them to the back of the panel.
- Remove the body rear trim panel from the vehicle.
Installation Procedure
- Hook the body rear trim panel in the sheet metal along the lower edge of the rear window.
- Install the panel by pushing firmly against the body to seat the panel fasteners.
- Install the rear shoulder belt guide.
- Install the jack and tool storage bracket. Refer to Jack and Tool Stowage Container Bracket Replacement .
- Install the folding seat. Refer to Folding Seat Replacement .
- Install the rear seat back. Refer to Rear Seat Back Replacement .
Body Rear Trim Panel Replacement Crew Cab
Removal Procedure
- Remove the rear seat. Refer to Rear Bench Seat Replacement .
- Remove the jack and tool storage bracket. Refer to Jack and Tool Stowage Container Bracket Replacement .
- Remove the rear shoulder belt guide.
- Grasp the lower edge of the body rear trim panel and pull to release the fasteners from the sheet metal.
- Raise the panel to unhook it from the sheet metal along the lower edge of the rear window.
- Remove any fasteners that may have pulled away from the panel and reinstall them to the back of the panel.
- Remove the body rear trim panel from the vehicle.
Installation Procedure
- Hook the body rear trim panel in the sheet metal along the lower edge of the rear window.
- Install the panel by pushing firmly against the body to seat the panel fasteners.
- Install the rear shoulder belt guide.
- Install the jack and tool storage bracket. Refer to Jack and Tool Stowage Container Bracket Replacement .
- Install the rear seat. Refer to Rear Bench Seat Replacement .
