For 1990-2009 cars only
Removal Procedure
- Remove the shift lever assembly. Refer to Shift Lever Assembly Replacement .
- Remove the console (w/o D06 only). Refer to Console Replacement in Instrument Panel, Gages, and Console.
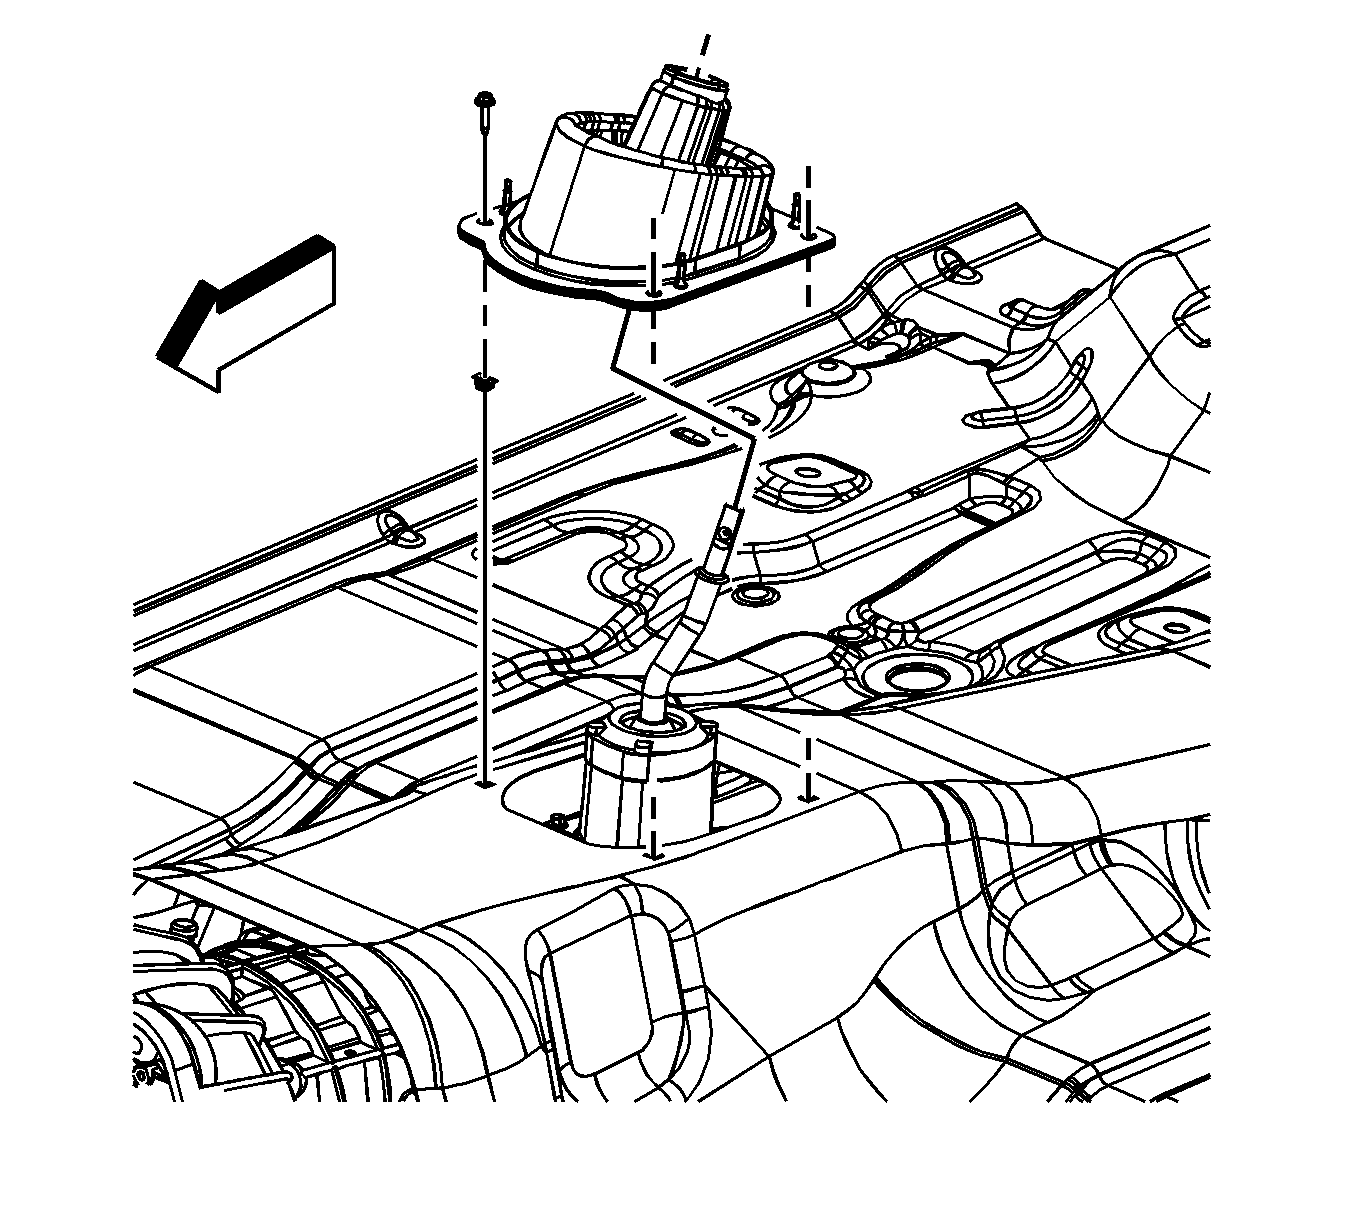
- Remove the control lever boot screws.
- Tilt and remove the control lever boot from the control lever.
- Shift the transmission into NEUTRAL.
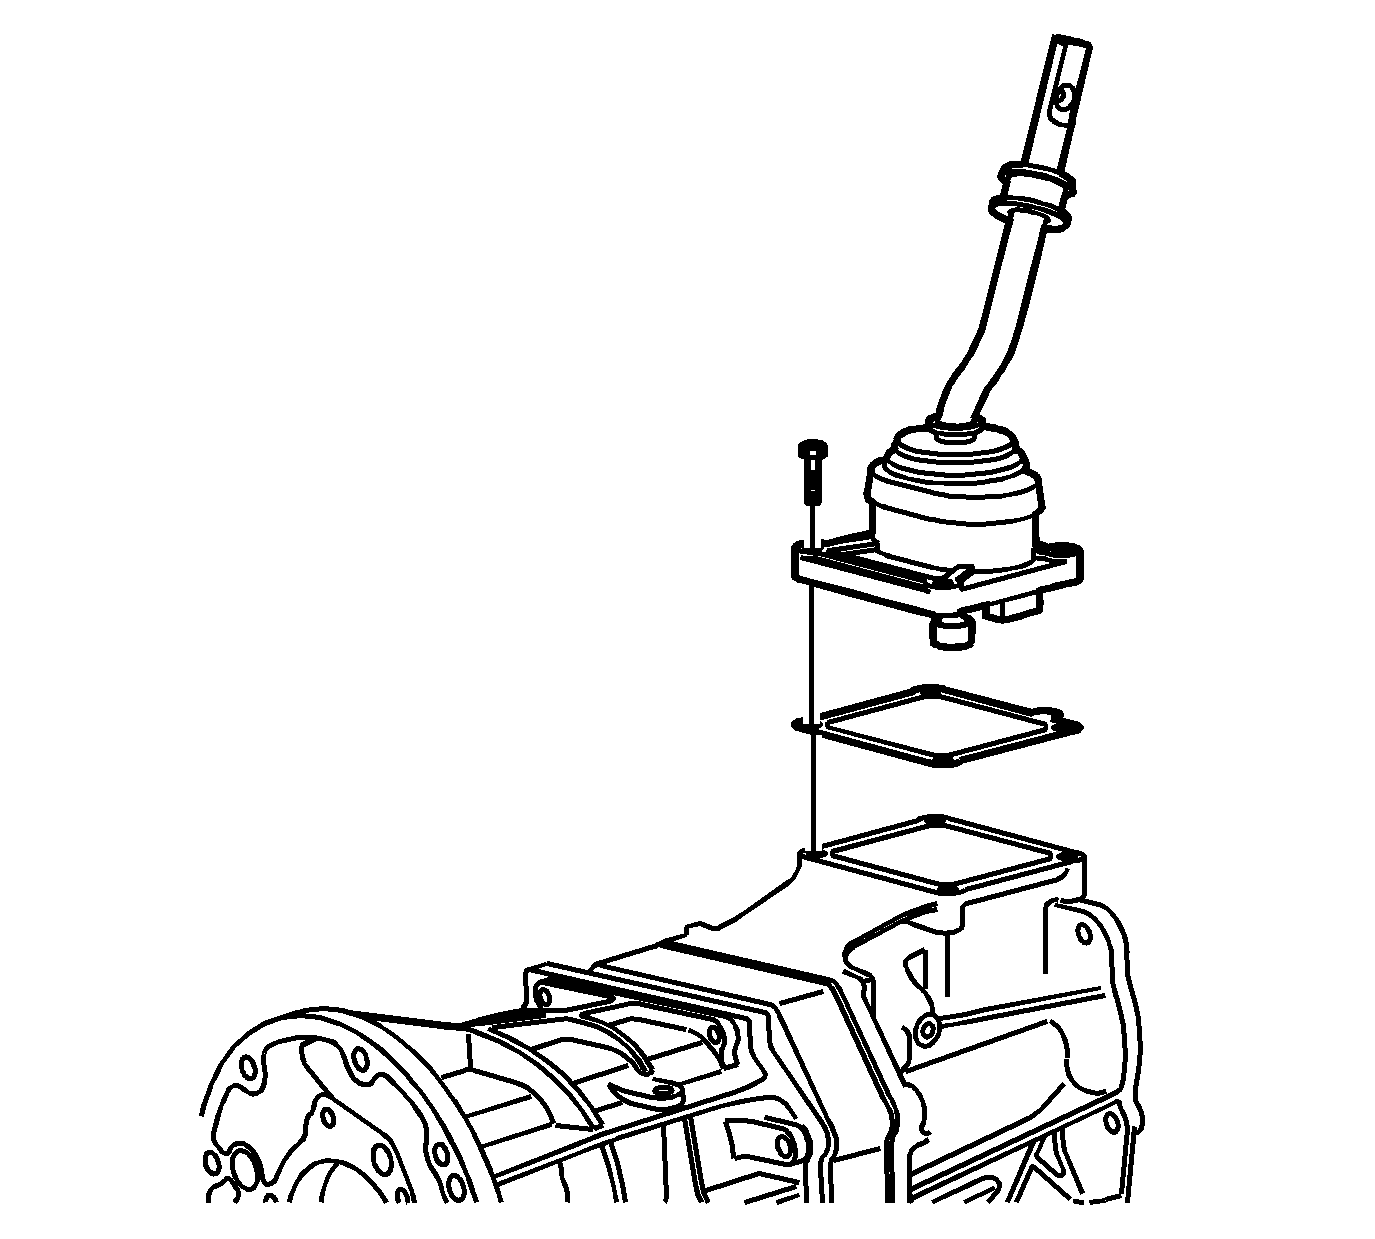
- Remove the control lever housing assembly bolts.
- Remove the control lever housing assembly and gasket.
- Mask off the control lever housing opening, in order to prevent foreign objects from entering the transmission.
- Disassemble the control lever housing if necessary. Refer to Shift Control Housing Disassemble in Manual Transmission-Asian AR5 Unit Repair.


Installation Procedure
- Assemble the control lever housing if previously disassembled. Refer to Shift Control Housing Assemble in Manual Transmission-Asian AR5 Unit Repair.
- Remove the masking from the control lever opening and ensure the sealing surface is clean and dry.
- Place the control lever gasket on to the transmission.
- Position the control lever housing assembly to the control lever assembly opening, aligning the bushing with the internal shift control lever.
- Install the control lever housing assembly bolts.
- Slide the boot into position over the control lever.
- Tilt the boot in order to seat to the floor.
- Install the control lever boot screws.
- Install the console (w/o D06 only). Refer to Console Replacement in Instrument Panel, Gages, and Console.
- Install the shift lever assembly. Refer to Shift Lever Assembly Replacement .

Notice: Refer to Fastener Notice in the Preface section.
Tighten
Tighten the control lever assembly bolts to 20 N·m
(15 lb ft).

Important: Ensure the carpet is not between the boot and the floor panel.
Tighten
Tighten the control lever boot screws to 2.5 N·m
(22 lb in).
