Rocker Panel Molding Replacement XTREME
Removal Procedure
- Open the front and rear doors.
- Raise the vehicle to gain access to the lower rocker molding retaining clips.
- Apply masking tape to protect the painted surfaces.
- Remove the front fender flare. Refer to Front Fender Flare Replacement .
- Remove the rear wheel opening flare. Refer to Rear Wheel Opening Flare Replacement .
- Remove the push-in pins from both corners of the rocker molding.
- Loosen the adhesive strip across the top edge of the rocker molding to the rocker panel.
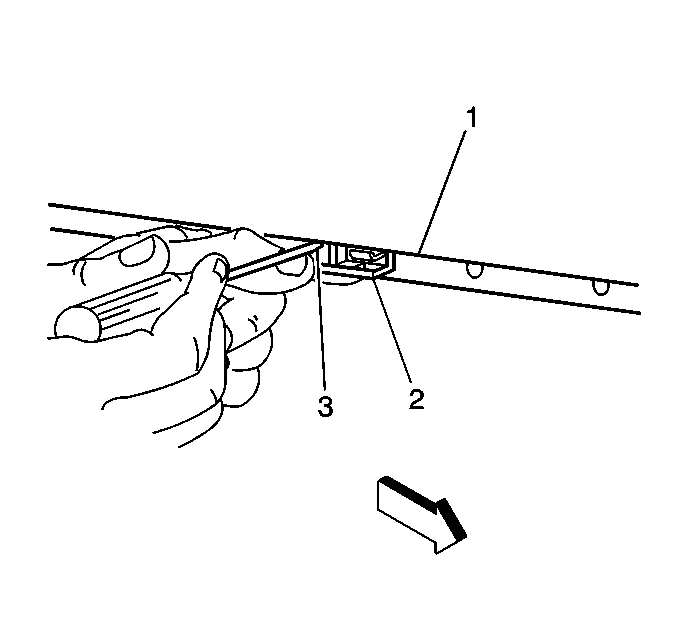
- Use a flat-bladed tool to aid in the removal of the rocker molding retaining clips (2) from the underside of the rocker molding.
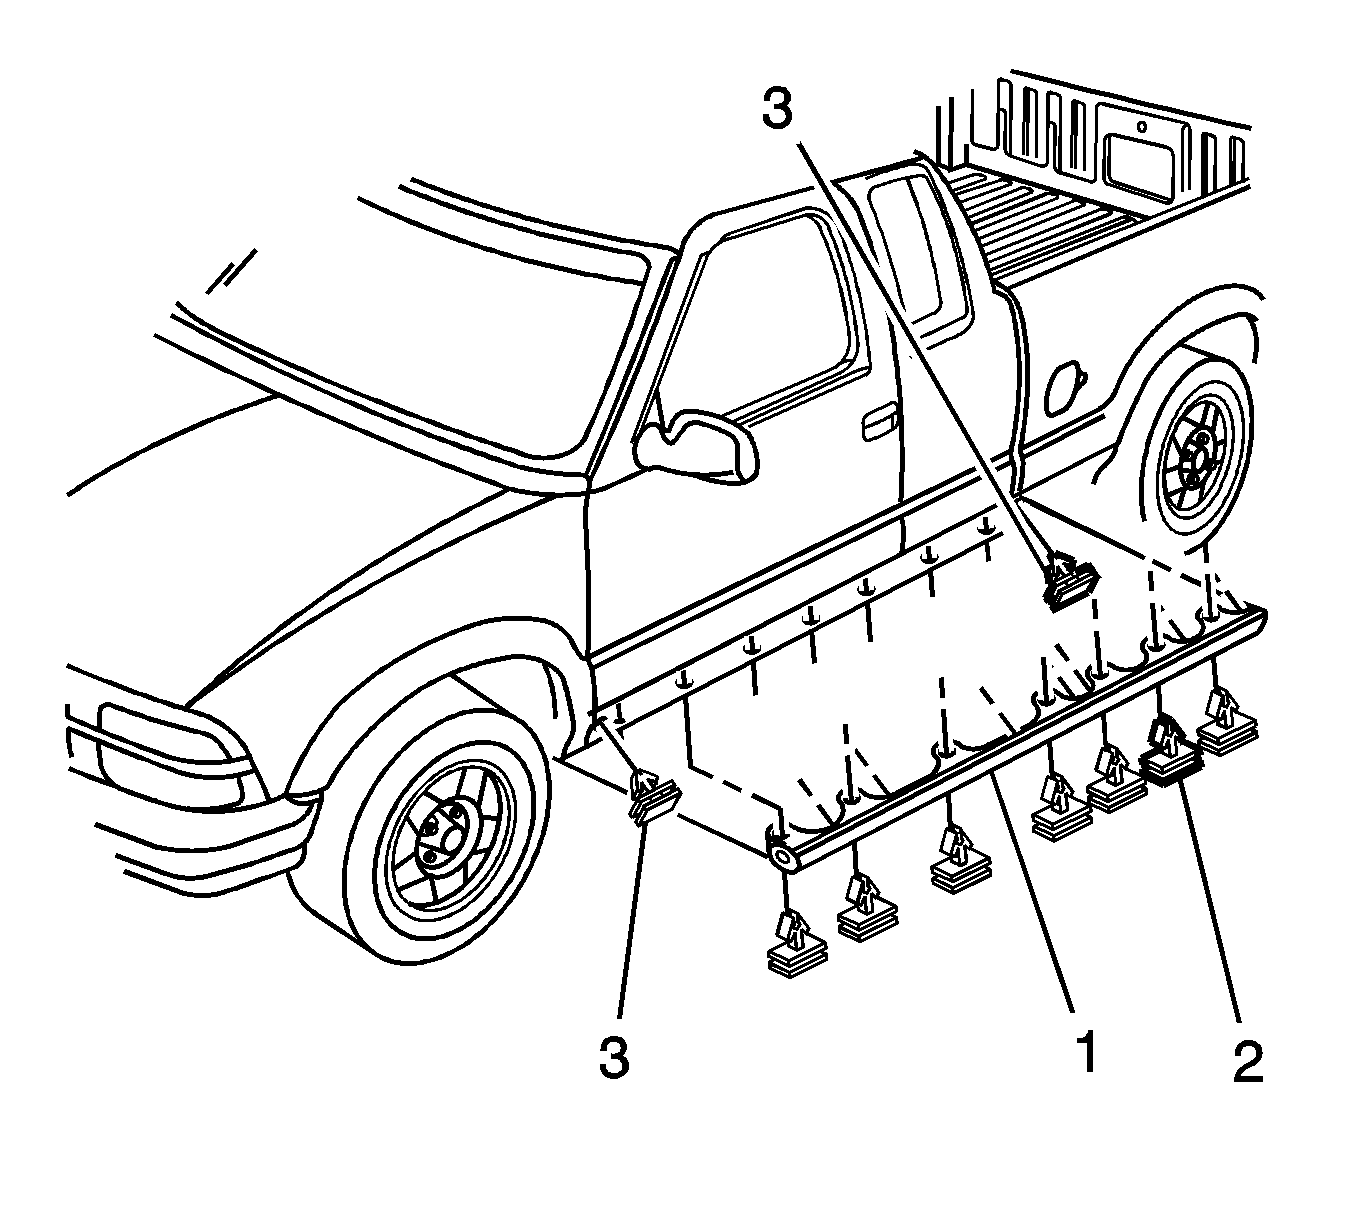
- Using a flat-bladed tool to aid in the removal of the rocker molding (1) and clips (3), work the tool by hand between the rocker panel and the rocker molding top edge until it releases.
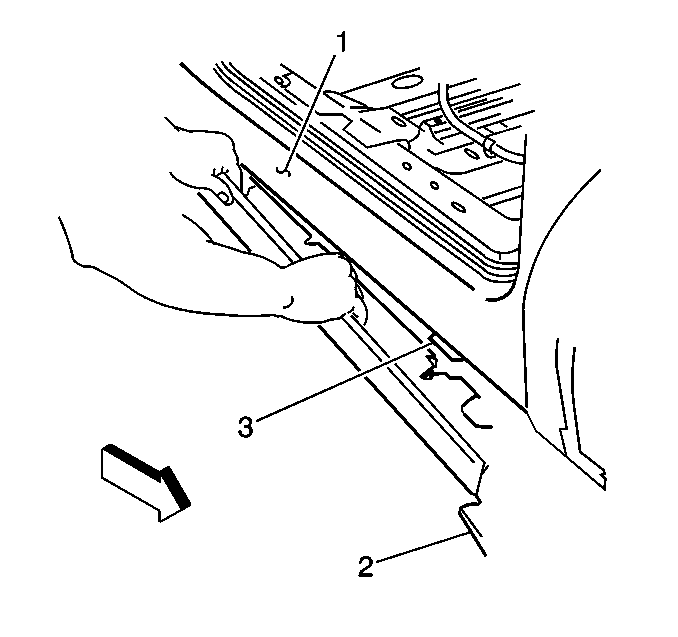
- Pull the top edge of the rocker molding (2) forward from the rocker panel (1) until the clips disengages from the rocker panel.
- Remove the rocker molding from the vehicle.
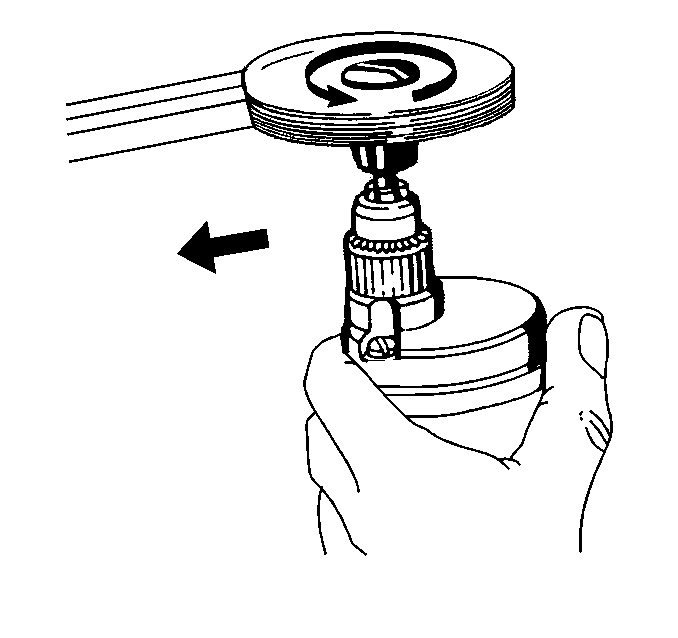
- Remove all adhesive from the surface and the back of the molding using a 3M Scotch Brite molding adhesive remover disk, 3M P/N 07501 or equivalent.
- Clean the surface using varnish makers and painters (VMP) naphtha.
Important: The rocker molding is retained by clips at each corner and across the underside. Both front and rear corners have push-in pins. The flares must be removed to remove the rocker molding.
Notice: Use a plastic, flat-bladed tool to prevent paint damage when removing an emblem/name plate.
| 7.1. | Apply heat to the top edge of the rocker molding, use a heat gun 152 mm (6 in) from the surface. Apply the heat using a circular motion up and down the molding for about 30 seconds. |
| 7.2. | Use a flat-bladed tool to aid in the removal of rocker molding from the rocker. |
Work the tool down the rocker molding going back and forth until it fully releases from the rocker.

Important: The rocker molding retaining clips (2) maybe damaged when removing the rocker molding and must be replaced.

Important: The rocker molding retaining clips (3) maybe damaged when removing the rocker molding and must be replaced.


Installation Procedure
- Replace all the damaged retaining clips (1, 2) before reinstall the rocker molding.
- Warm the rocker panel molding surface with a heat gun 152 mm (6 in) a minimum of 21°C (70°F).
- Apply the one side of the adhesive strip backing to the molding.
- Peel off the tape liner from the adhesive strip backing.
- Position the rocker molding retaining clips (3) to the locator holes in the rocker panel. Apply heavy hand pressure to secure the fasteners in the rocker panel.
- Install the underside retaining clips to the rocker panel.
- Install the push-in pins to both corners.
- Install the rear wheel opening flare. Refer to Rear Wheel Opening Flare Replacement .
- Install the front fender flare. Refer to Front Fender Flare Replacement .
- Remove the masking tape.
- Lower the vehicle.
- Inspect the doors to rocker molding for alignment.
- Close the front and rear doors.
Important: Do not touch the adhesive backing.

Important: The rocker molding clips are located in the middle and the underside. Both front and rear corners have push-in pins.
