Inflatable Restraint Seat Position Sensor Replacement Manual Seat
Removal Procedure
- Remove the seat from the vehicle. Refer to Front Seat Replacement - Bucket or Split Bench Seat Replacement .
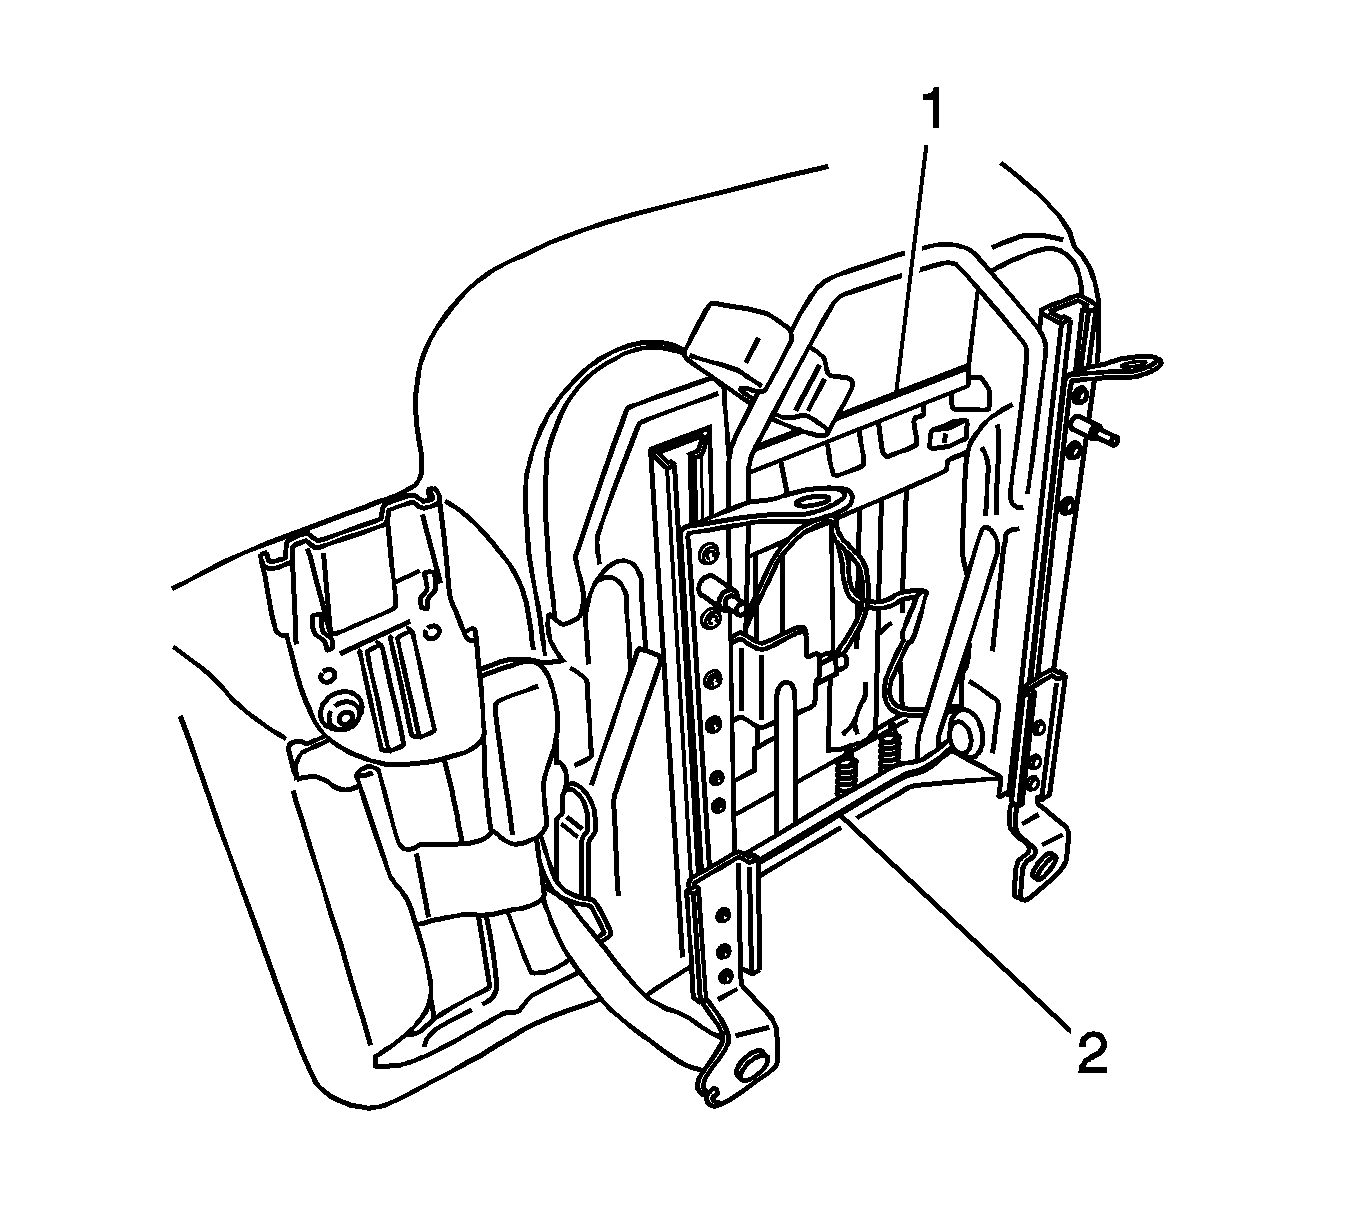
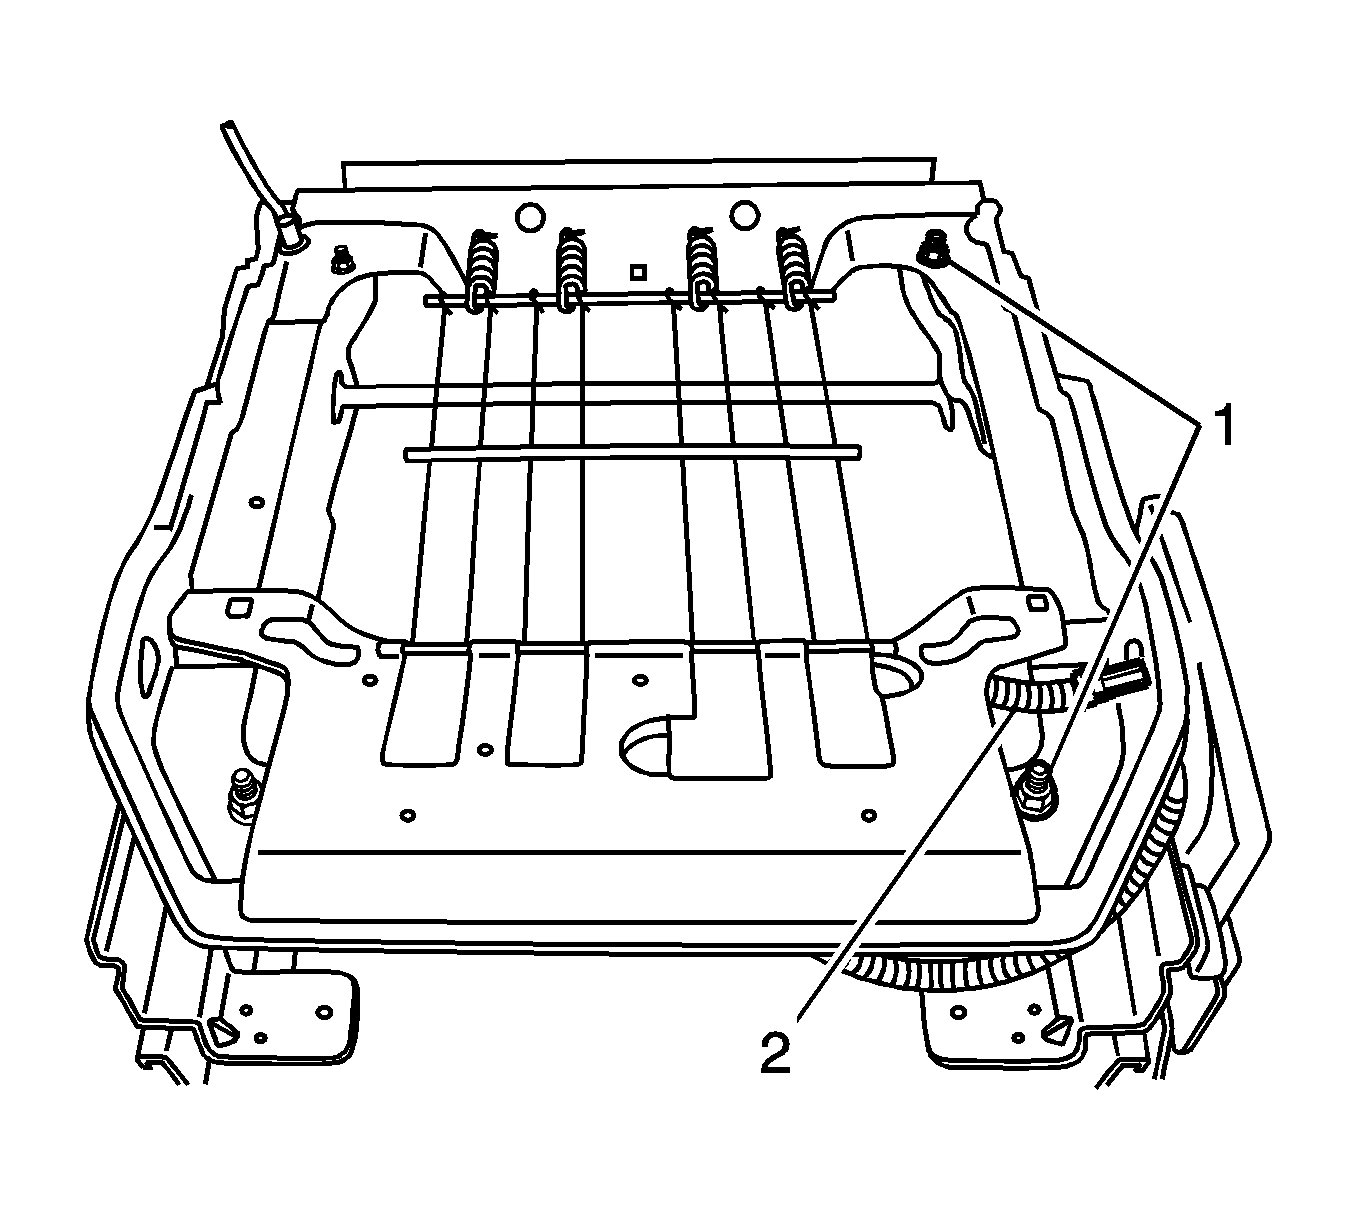
- Unclip the front, rear, and side J-strips (1, 2) on the underside of the seat.
- Remove the lumbar knob by pulling the knob straight away from the seat, if equipped.
- Remove the recliner handle. Refer to Driver Seat and Passenger Seat Recliner Handle Replacement .
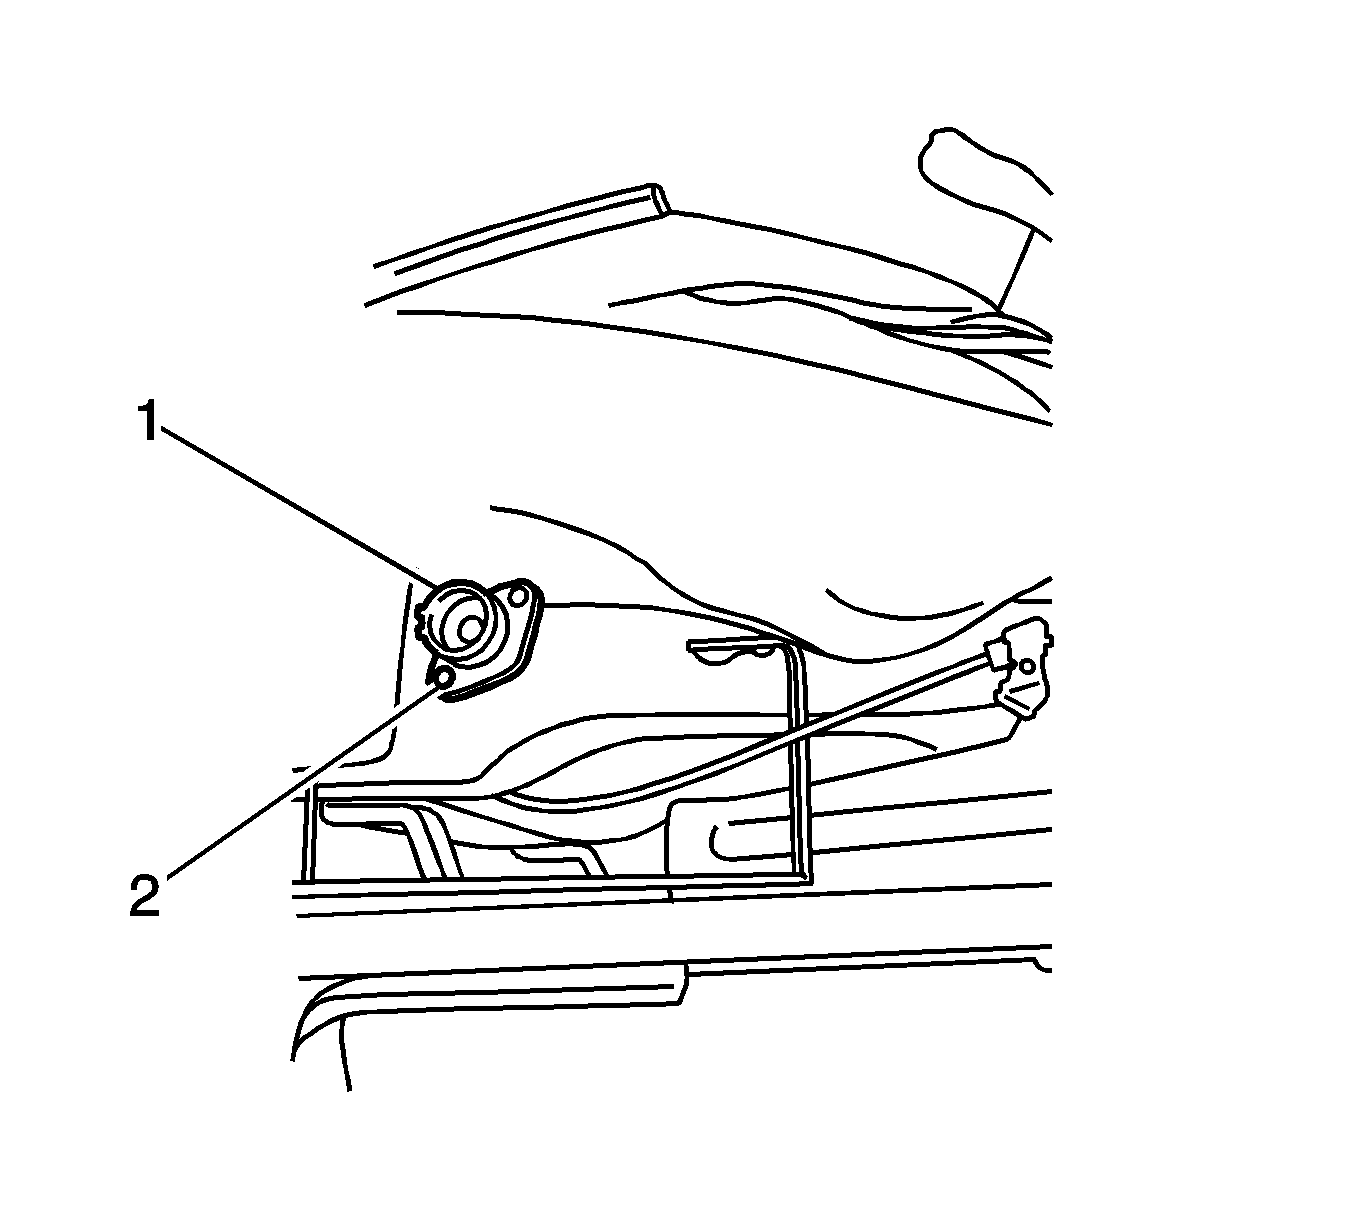
- Remove the screws (2) that retain the lumbar adjustment mechanism (1) to the seat adjuster.
- Remove the lumbar cable from the lumbar adjustment mechanism.
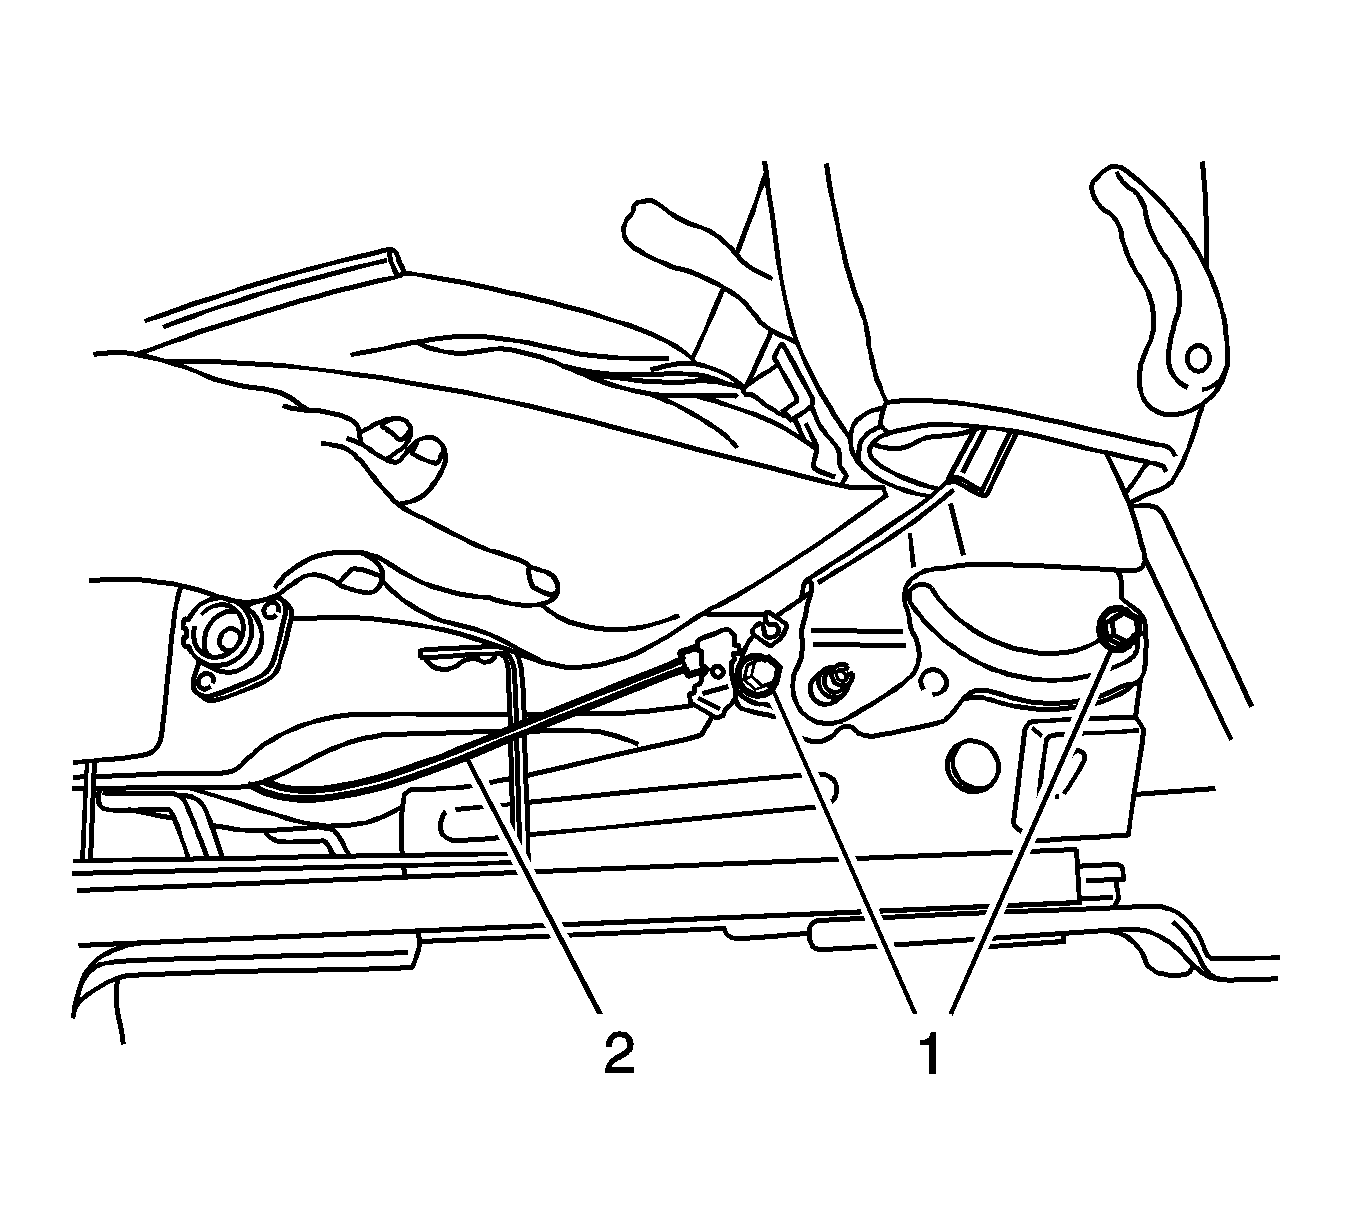
- Remove the 2 bolts (1) securing the seat recliner to the seat adjuster.
- Remove the seat back assembly from the seat cushion assembly.
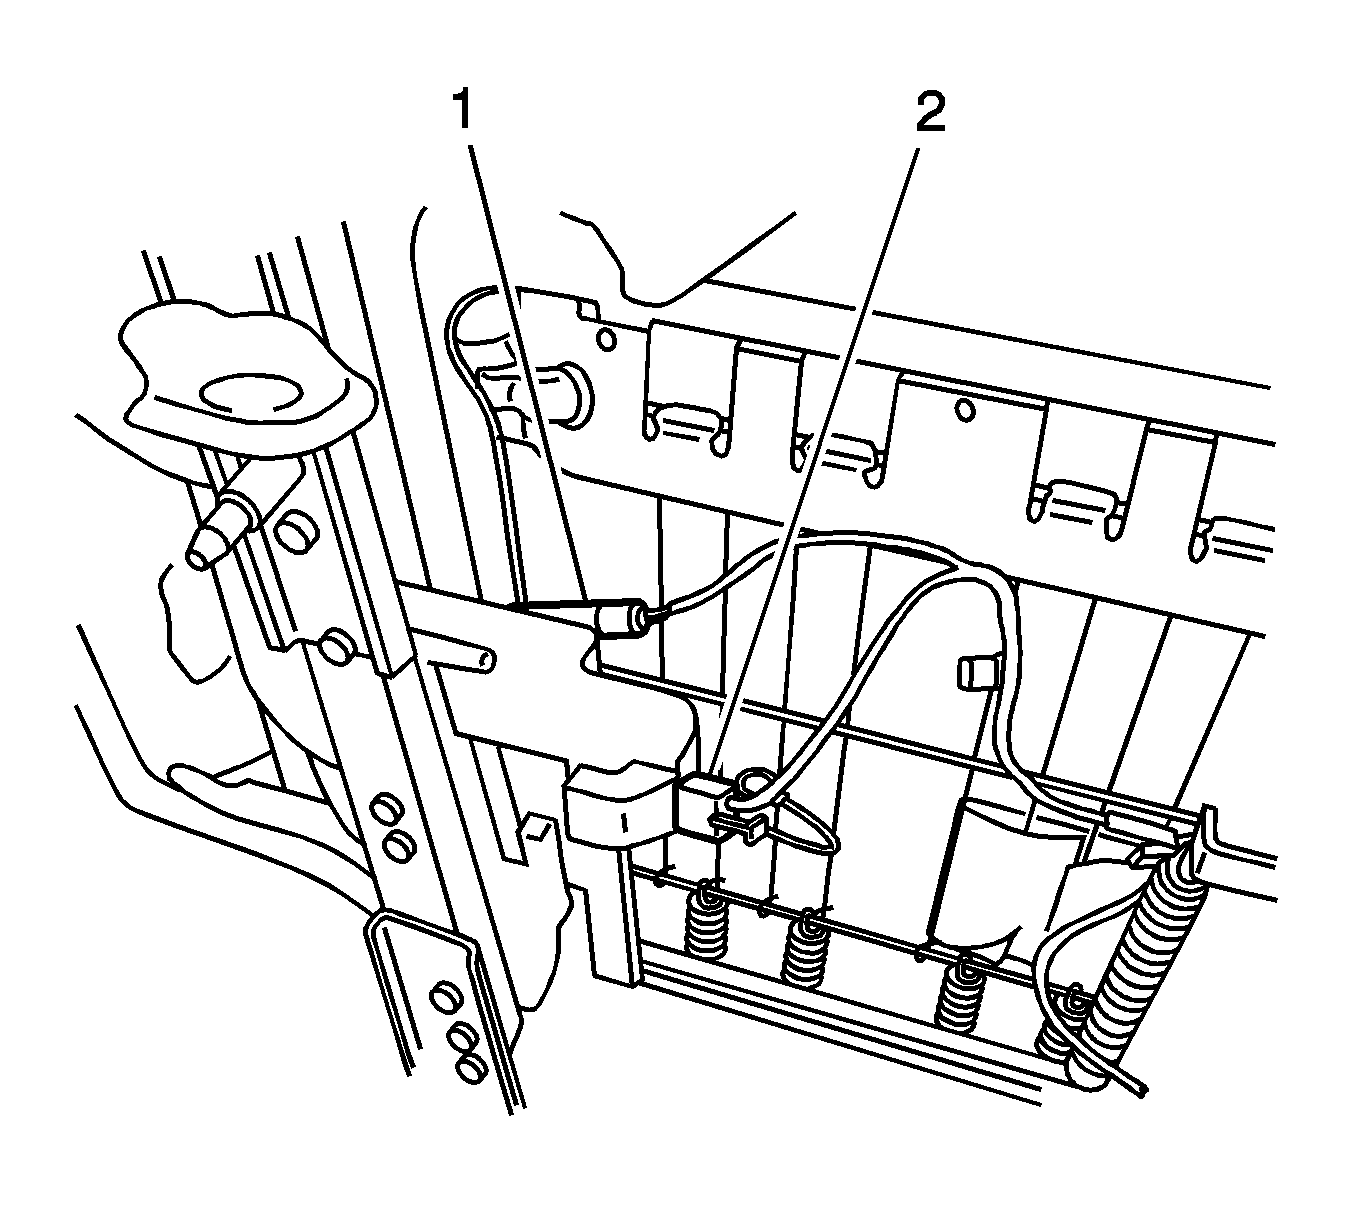
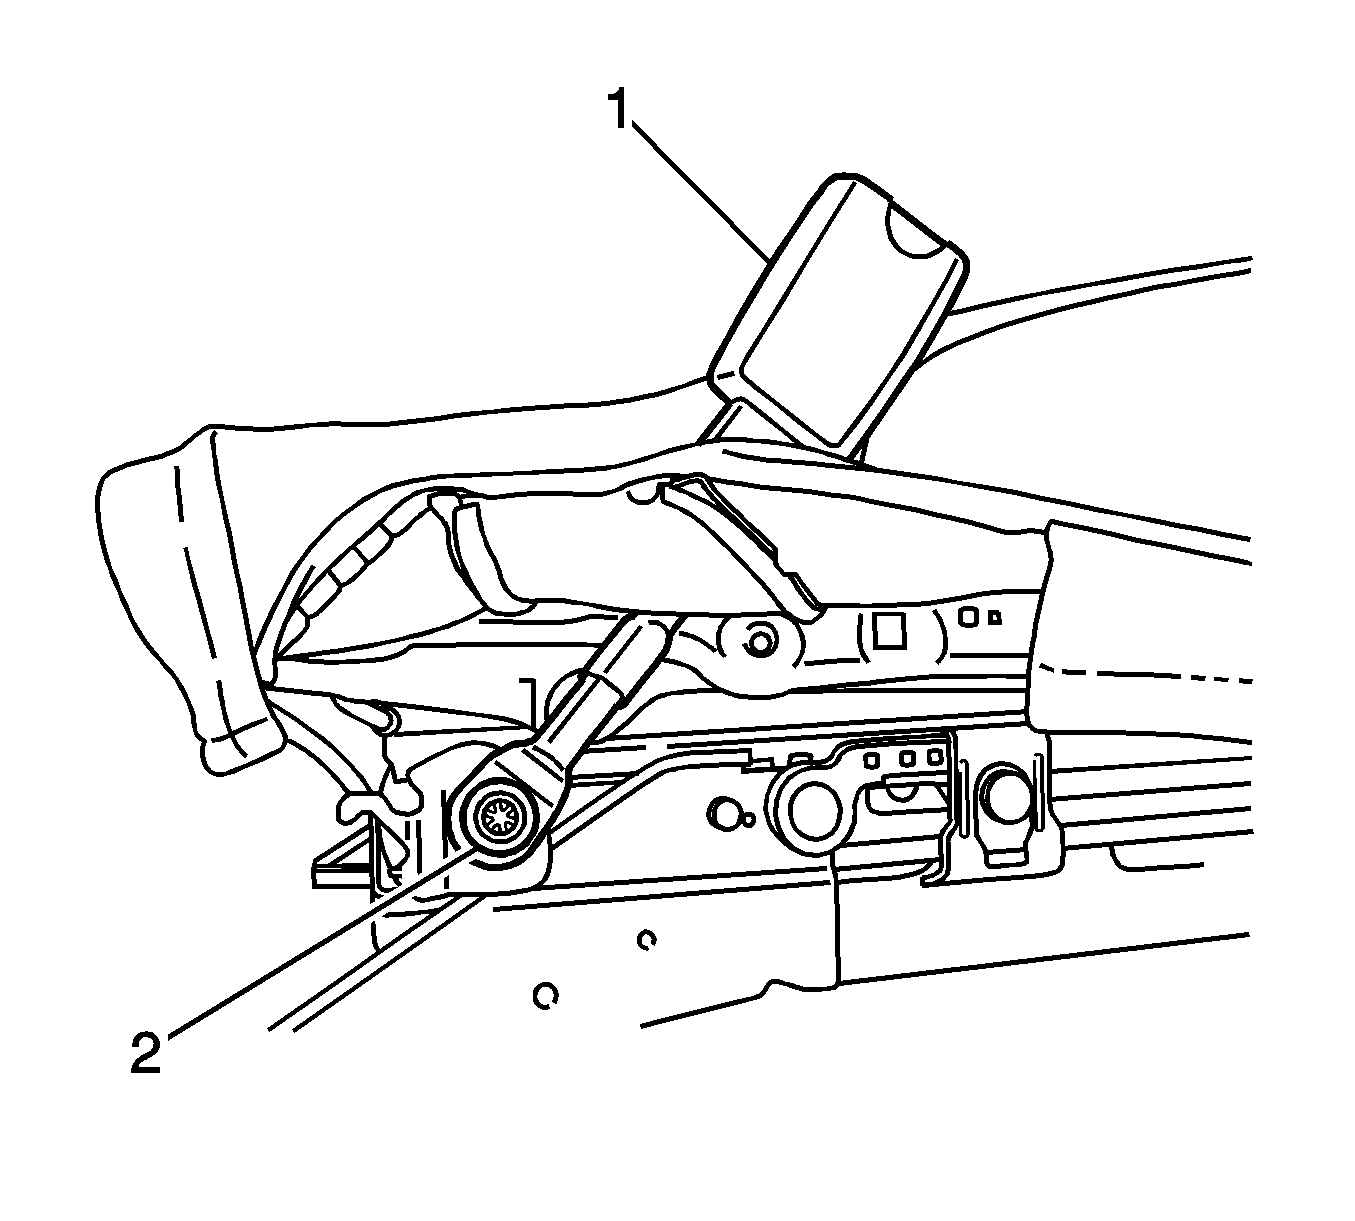
- Disconnect the seat belt buckle electrical connector (1).
- Disconnect the wiring harness (2) from the seat position switch.
- Remove the bolt (2) securing the seat belt buckle assembly (1) to the seat adjuster.
- Remove the seat cushion cover and foam.
- Remove the assist spring.
- Remove the 4 nuts (1) securing the seat cushion frame to the seat adjusters.
- Remove the seat adjusters.
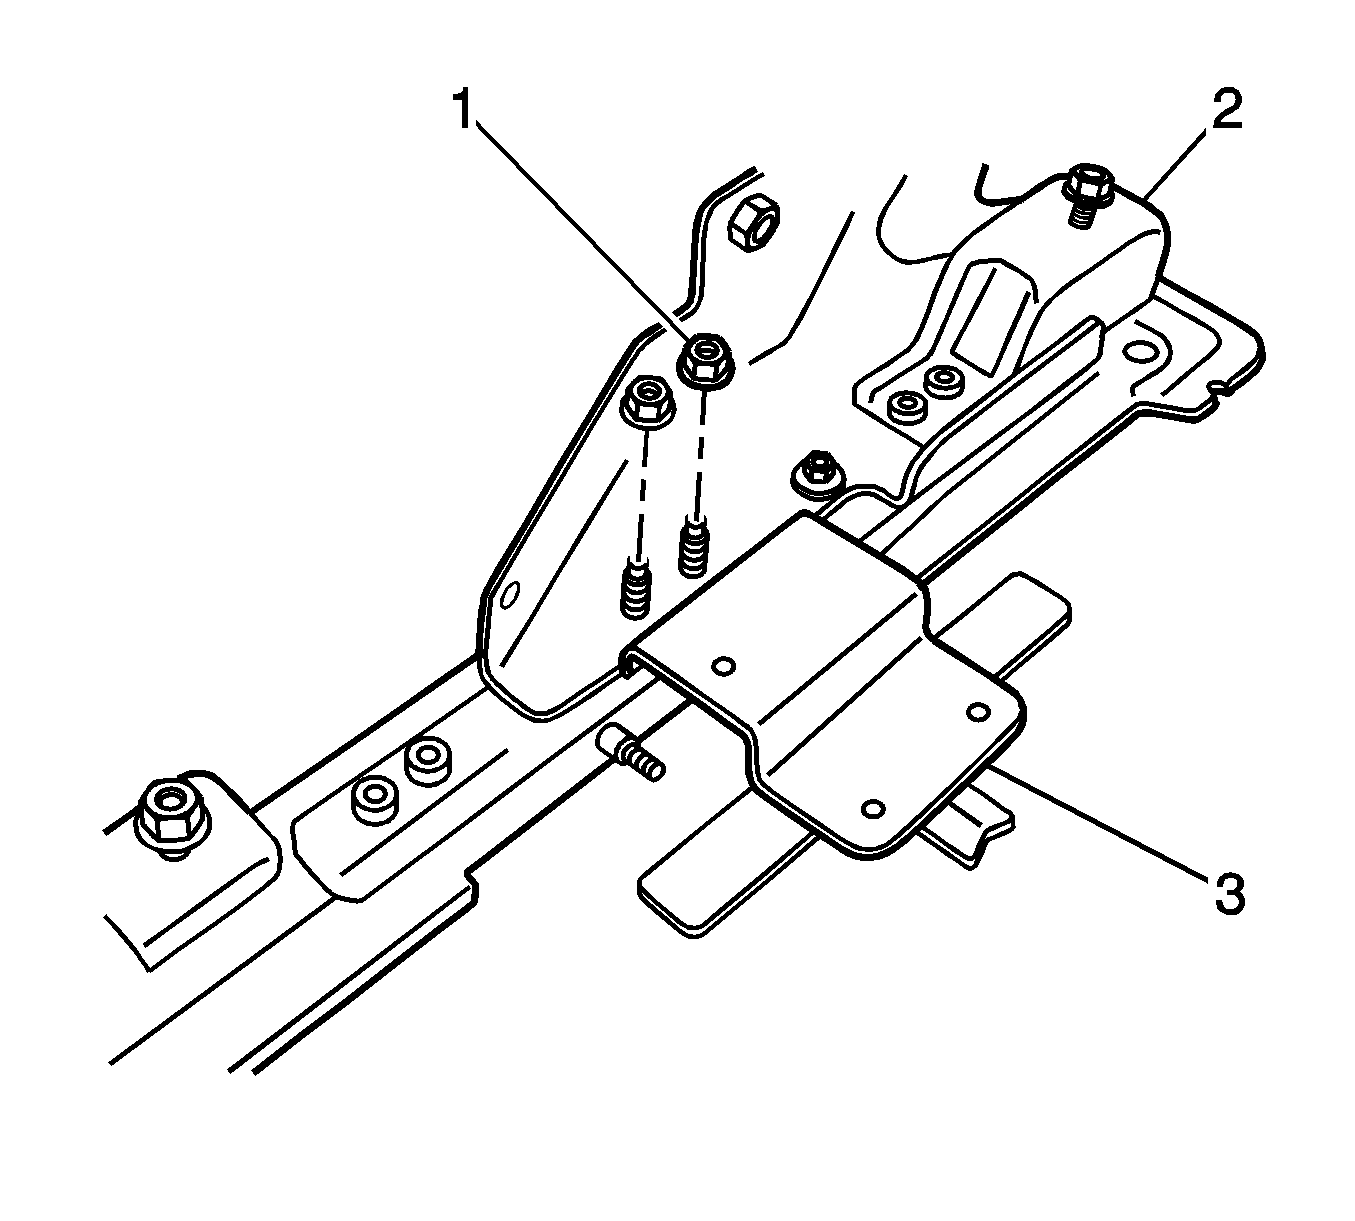
- Remove the 2 nuts (1) securing the seat position switch (3) to the seat adjuster (2).
Installation Procedure
- Install the seat position switch (3) to the seat adjuster (2) with 2 nuts (1).
- Install the seat adjusters to the seat cushion frame with 4 nuts (1).
- Install the assist spring.
- Install the seat cushion foam pad and cover to the frame.
- Install the seat belt buckle assembly (1) through the seat cushion pad.
- Install the seat belt buckle assembly (1) to the seat adjuster with the bolt (2).
- Connect the seat belt buckle electrical connector (1).
- Connect the wiring harness (2) to the seat position switch.
- Position the seat back assembly on the seat cushion assembly.
- Install the 2 bolts (1) securing the seat recliner to the seat adjuster.
- Install the lumbar adjustment mechanism (1) to the seat adjuster with the 2 screws (2).
- Install the lumbar cable to the lumbar adjustment mechanism.
- Install the lumbar knob by pushing the knob straight onto the shaft, if equipped.
- Install the recliner handle. Refer to Driver Seat and Passenger Seat Recliner Handle Replacement .
- Install the front, rear, and side J-strips (1, 2) to the underside of the seat.
- Install the seat in the vehicle. Refer to Front Seat Replacement - Bucket or Split Bench Seat Replacement .

Notice: Use the correct fastener in the correct location. Replacement fasteners must be the correct part number for that application. Fasteners requiring replacement or fasteners requiring the use of thread locking compound or sealant are identified in the service procedure. Do not use paints, lubricants, or corrosion inhibitors on fasteners or fastener joint surfaces unless specified. These coatings affect fastener torque and joint clamping force and may damage the fastener. Use the correct tightening sequence and specifications when installing fasteners in order to avoid damage to parts and systems.
Tighten
Tighten the seat position switch nuts to 24 N·m (18 lb ft).

Tighten
Tighten the seat cushion frame mounting nuts to 24 N·m (18 lb ft).

Tighten
Tighten the seat belt buckle bolt to 55 N·m (41 lb ft).


Inflatable Restraint Seat Position Sensor Replacement Power Seat
Removal Procedure
- Remove the seat from the vehicle. Refer to Front Seat Replacement - Bucket or Split Bench Seat Replacement .
- Ensure that the seat is in the full rear position.
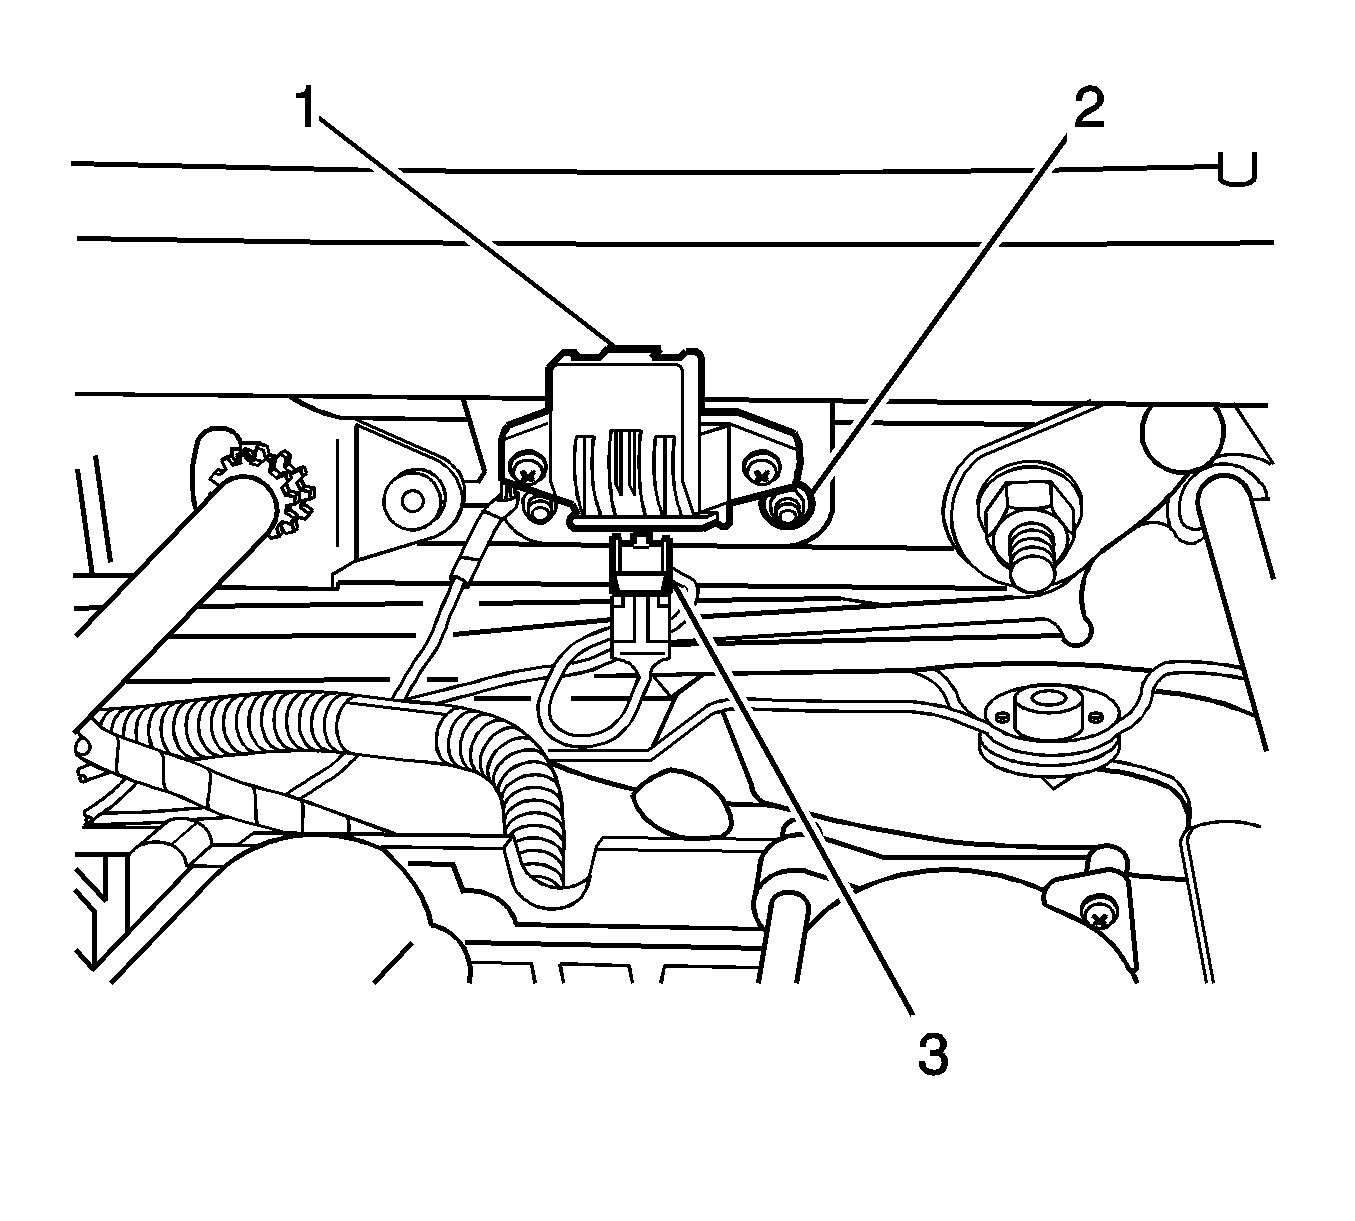
- Locate the seat position sensor (1) under the seat on the inside of the inner seat rail.
- Disconnect the electrical connector (3) from the seat position sensor (1).
- Remove the 2 nuts (2) that retain the seat position sensor to the seat rail.
- Remove the seat position sensor from the seat.
Installation Procedure
- Install the seat position sensor (1) to the seat rail with 2 nuts (2).
- Connect the electrical connector (13) to the seat position sensor (1).
- Install the seat in the vehicle. Refer to Front Seat Replacement - Bucket or Split Bench Seat Replacement .
Notice: Refer to Fastener Notice in the Preface section.

Tighten
Tighten the seat position sensor nuts to 9 N·m (79 lb in).
