Popping/Snapping Noise When Vehicle is Hot, at Idle or Immediately after Vehicle is Shut Off (Replace Muffler Heat Shield)

| Subject: | Popping/Snapping Noise When Vehicle is Hot, at Idle or Immediately After Vehicle is Shut Off (Replace Muffler Heat Shield) |
| Models: | 2004-2005 Chevrolet Colorado |
| 2004-2005 GMC Canyon |
This bulletin is being revised to include parts availability and repair instructions.
Please discard Advanced Service Information Bulletin Number 04-06-05-005 (Section 06 -- Engine/Propulsion System).
Condition
Some customers may comment on a popping/snapping noise from underneath the vehicle at idle or immediately after the vehicle is shut off.
The noise may be intermittent depending on the outside temperature and or temperature of the exhaust system at the time of testing. Some popping/snapping noise from the exhaust system during cool down is a normal condition.
Cause
As the exhaust system warms and cools, the muffler and the muffler heat shield expand and contract at different rates and may cause a popping and/or snapping noise.
Some popping/snapping noise from the exhaust system during cool down is a normal condition. The customer should be made aware that this service procedure is designed to reduce but not eliminate all exhaust system popping and snapping during cool down.
Correction
DO THIS | DON'T DO THIS |
|---|---|
Install a new heat shield and straps on the existing muffler. | DO NOT replace exhaust system components other than the muffler heat shield. |
Important: Some popping/snapping noise from the exhaust system during cool down is a normal condition. The customer should be made aware that this service procedure is designed to reduce but not eliminate all exhaust system popping and snapping during cool down.
Follow the service procedure below to correct this condition.
- Raise and support the vehicle. Refer to Lifting and Jacking the Vehicle in General Information SI Document ID #672691.
- Remove the nuts securing the muffler to the catalytic converter.
- Apply a soapy solution to the exhaust pipe hanger rods in order to ease the removal of the exhaust hangers.
- Pry the exhaust hangers free from the exhaust pipe hanger rods.
- Reposition the muffler to gain access to the muffler heat shield.
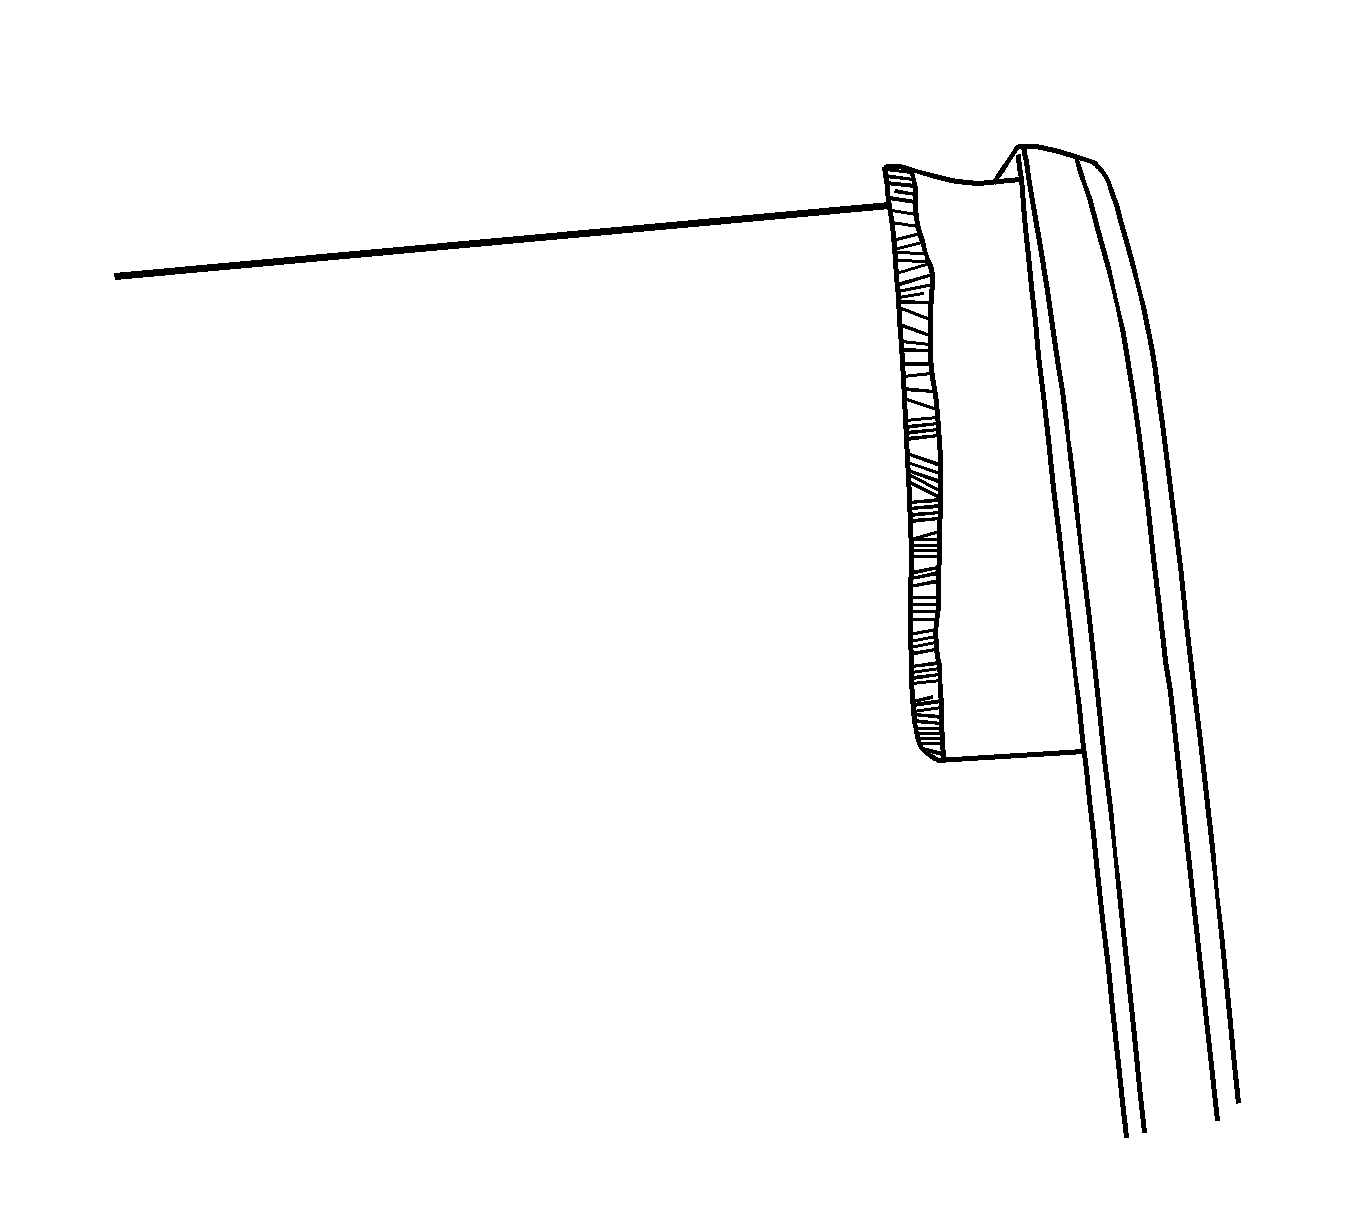
- Using an air-powered hack saw blade or equivalent, cut off the existing muffler heat shield just as the heat shield rises off of the muffler. See the illustration above.
- Remove the heat shield from the muffler.
- Hammer flush the remaining heat shield to the muffler.
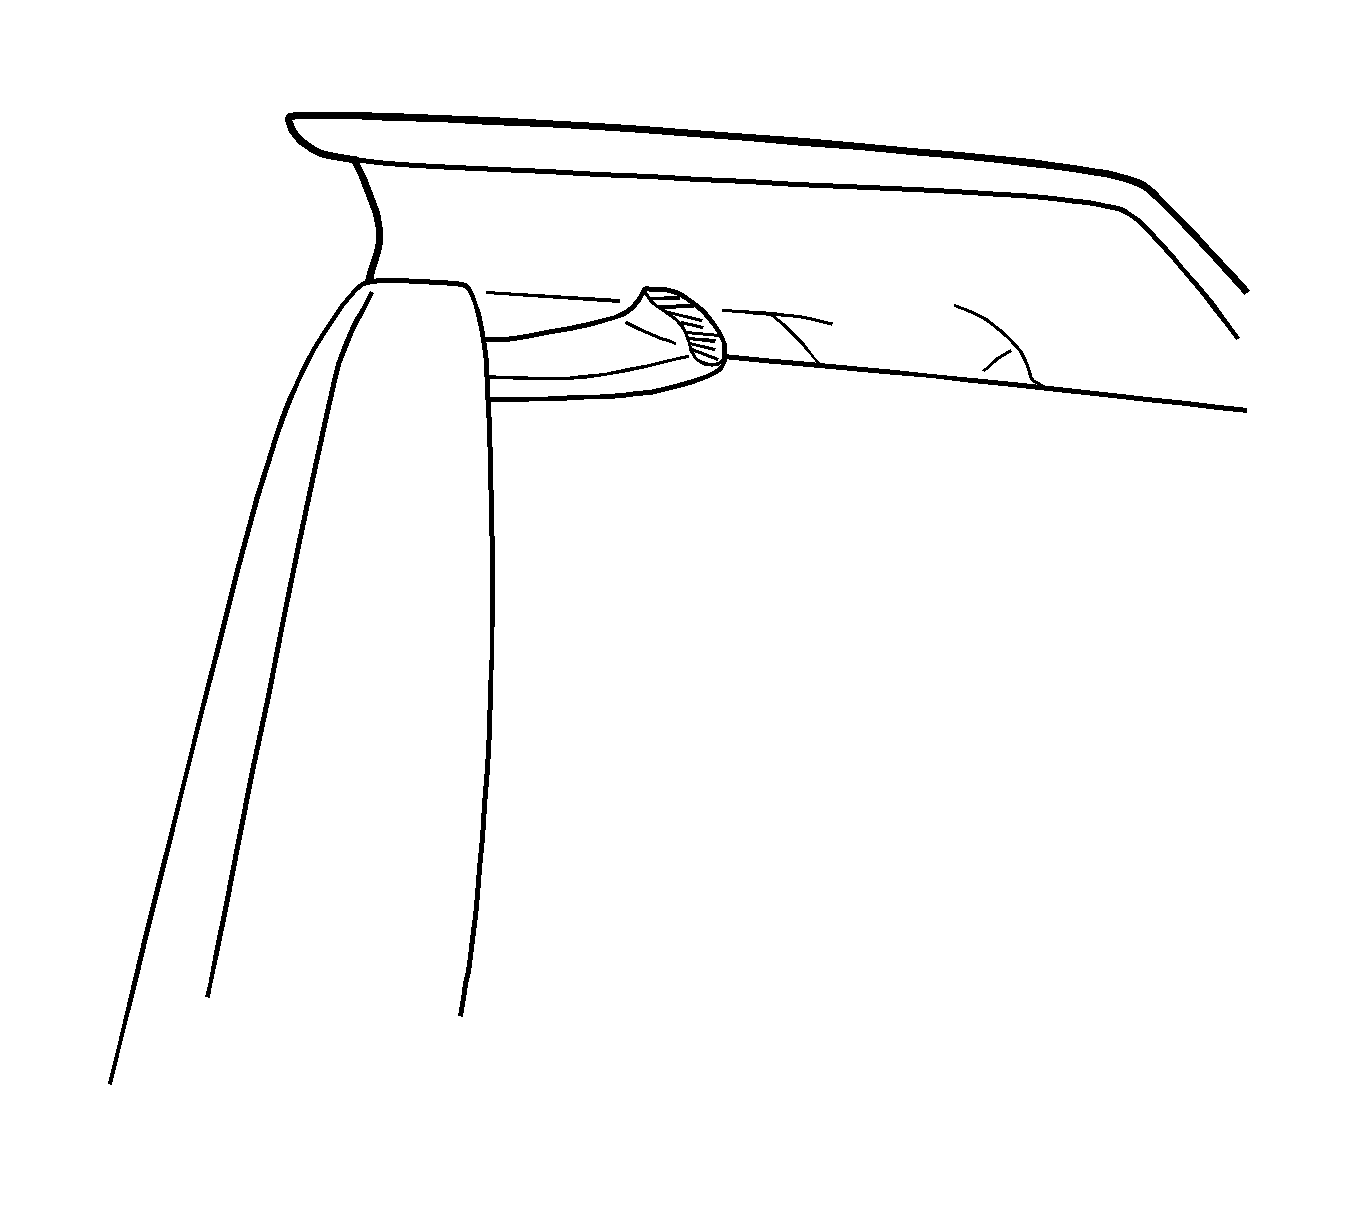
- Install the new heat shield, P/N 15213389, onto the muffler as shown above.
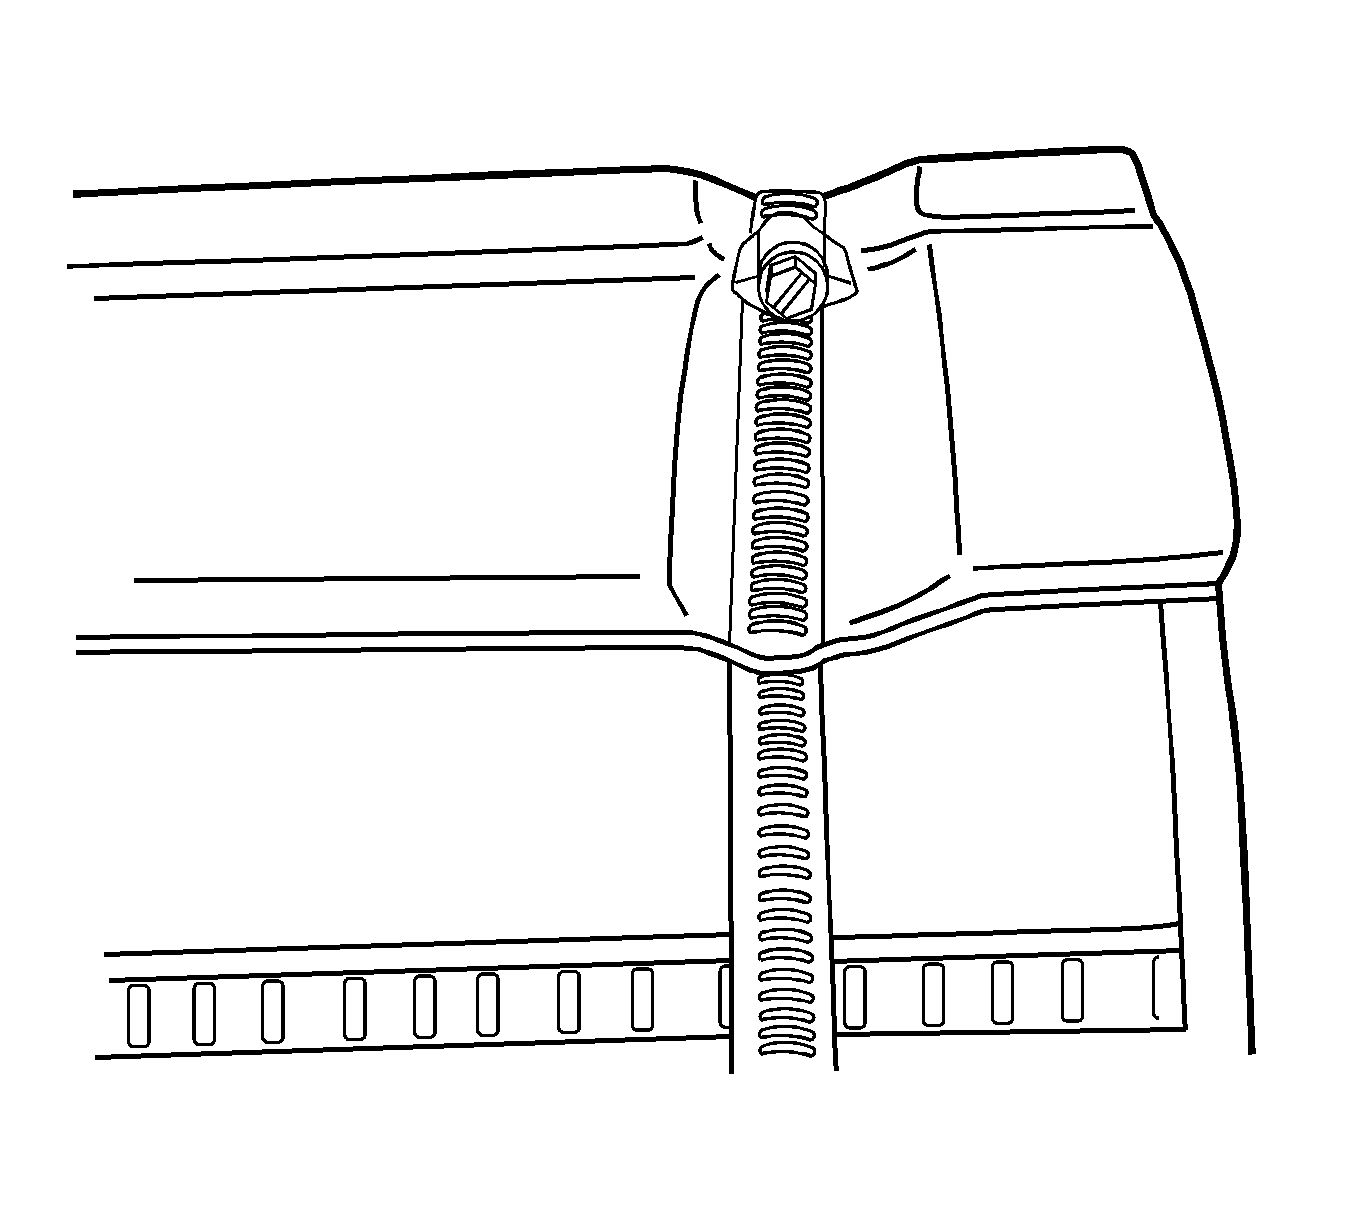
- Install two straps, P/N 10391259, so that the strap screw head will be located on top of the muffler.
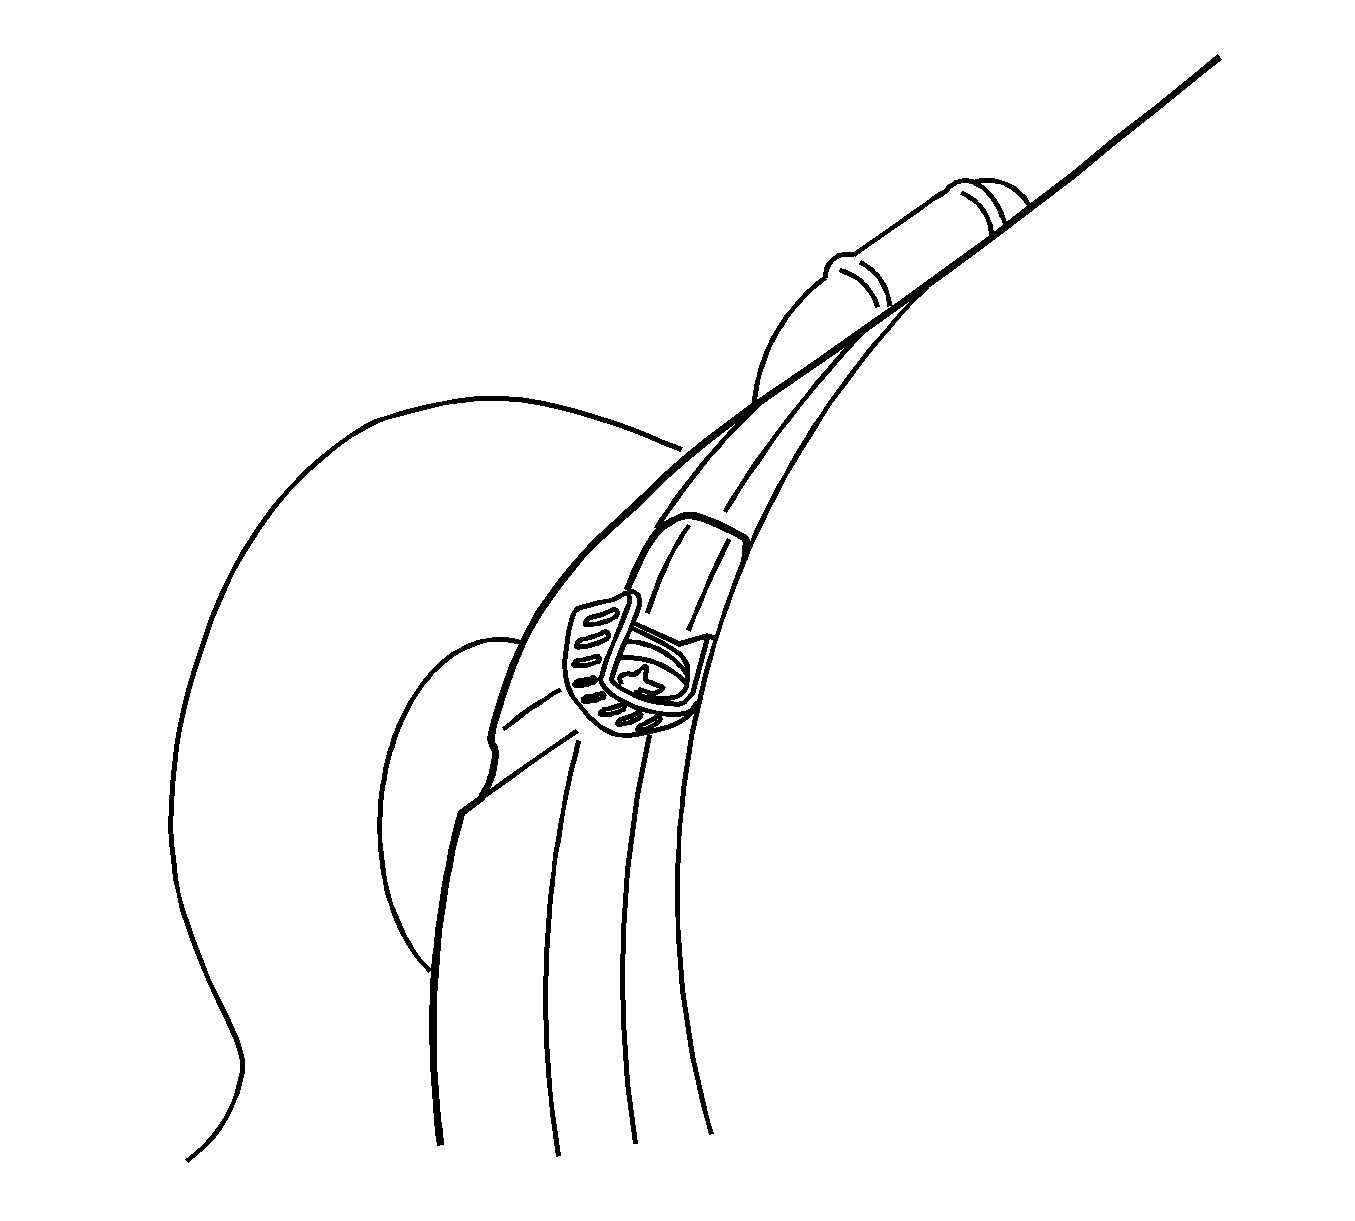
- Cut off the excess strap material and bend the strap over the strap screw head as indicated above.
- Reposition the muffler in the correct position.
- Slide the muffler forward into position, aligning the studs with the rear of the catalytic converter.
- Install the nuts securing the muffler to the catalytic converter, but DO NOT tighten at this time.
- Apply a soapy solution to the following areas in order to ease the installation of the hangers.
- Press the exhaust pipe hangers over the exhaust pipe hanger rods.
- Tighten the muffler nuts by hand until each contacts the metal flange.
- Tighten the muffler nuts to 45 N·m (33 lb ft).
- Lower the vehicle.
Caution:
• In order to avoid being burned, do not service the exhaust system while it is still hot. Service the system when it is cool. • Always wear protective goggles and gloves when removing exhaust parts as falling rust and sharp edges could result in serious personal injury.
Important: Do not use oil base lubricants on the rubber exhaust hangers.
Important: It is not necessary to remove the muffler from the vehicle to replace the muffler heat shield.

Notice: Use extreme caution not to damage the muffler when removing the heat shield from the muffler.

Important: The new heat shield should not come in contact with the remaining muffler heat shield.

Tighten
Tighten the strap screw to 4 N·m (35 lb in).

| • | The inner diameter of the exhaust pipe hanger. |
| • | The exhaust pipe hanger rod . |
Tighten
Dealer Action
Please contact all customers that were told they would be called when a repair became available.
Parts Information
Part Number | Description | Qty |
|---|---|---|
10391259 | Strap, Muffler Heat Shield Strap | 2 |
15213389 | Shield, Muffler Heat Shield | 1 |
Parts are expected to be available from GMSPO on December 23, 2004.
Warranty Information
For vehicles repaired under warranty, use:
Labor Operation | Description | Labor Time |
|---|---|---|
L9703* | Shield, Muffler Heat Shield - Replace | 0.5 hr |
*This labor operation number is for use only with this bulletin. This number will not be published in the Labor Time Guide.
