FRONT DOOR GLASS DISENGAGEMENT

Model and Year: 1988-89 CORSICA, BERETTA
Some 1988-89 Corsica/Beretta vehicles may exhibit front door glass disengagement. This condition may be due to the front glass guides coming out of the lower end of the front run channel retainers and/or the rear guide coming out of the rear run channel on Beretta styles only.
After removing door trim, inner belt seal strip and loosening water deflector:
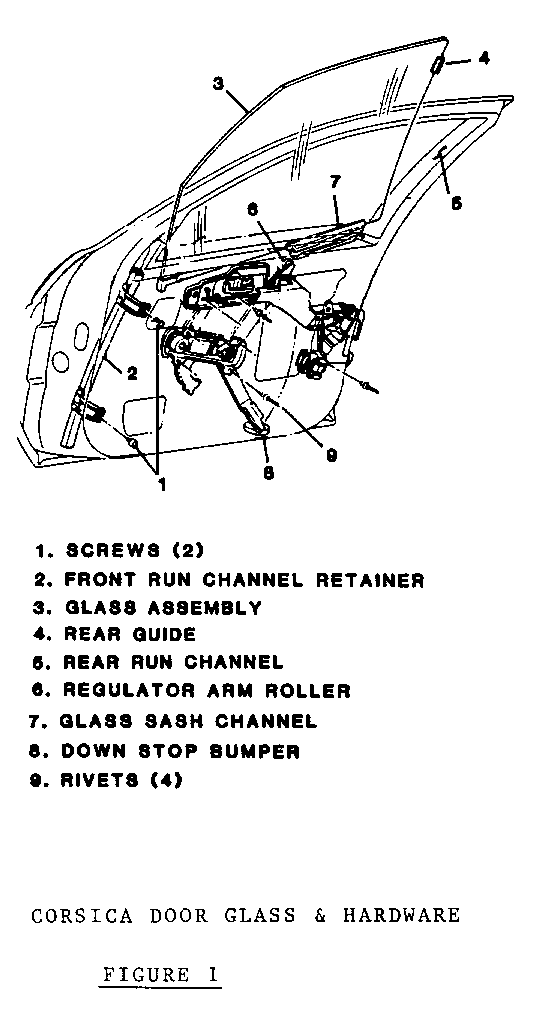
CORSICA (FIGURES 1-2-3)
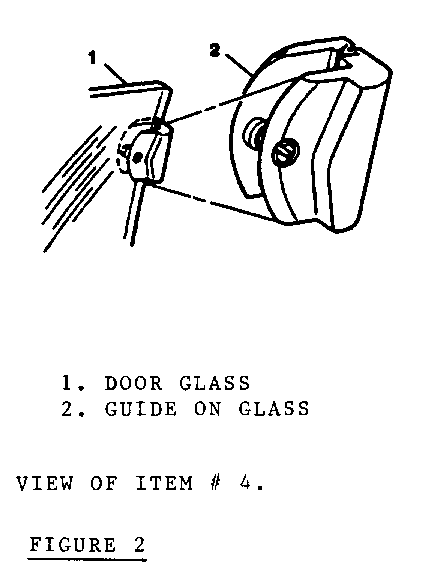
1. Remove door glass and inspect glass guides for damage or wear. Any damage or wear on front guide, replace the glass assembly. If any wear on rear guide, replace guide with P/N 10103130 (See Figure 2).
IMPORTANT: REMOVE GUIDE BY WRAPPING TAPE AROUND BLADE OF TOOL BT-7323A OR EQUIVALENT AND INSERTING TOOL BETWEEN GUIDE AND GLASS AT FASTENER AND CAREFULLY PRYING APART.
INSTALL OR CONNECT
1. HEAT GUIDE WITH HOT AIR GUN OR SOAK IN HOT WATER FOR ABOUT ONE MINUTE.
2. GUIDE TO GLASS BY ALIGNING TO HOLE IN GLASS AND PRESSING GUIDE TOGETHER AT FASTENER LOCATION.
2. Inspect front run channel retainer and the rear retainer inside the run channel assembly for any distortions, bends, etc. if damaged, the parts must be replaced.
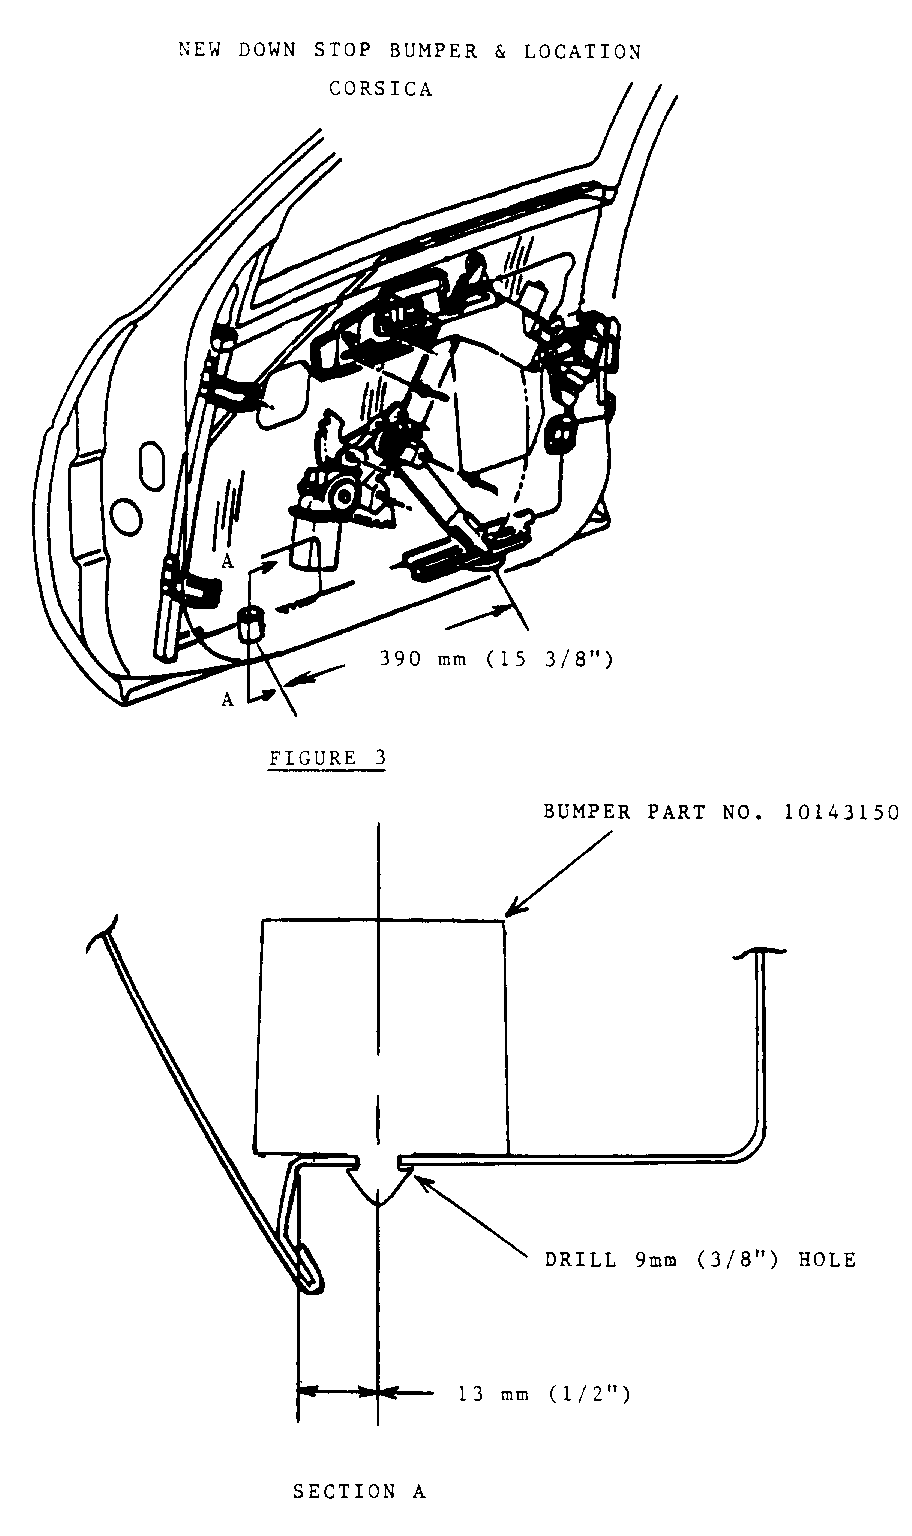
3. Install new (40mm) down stop bumper by locating and drilling 9mm hole in bottom of door as shown in Figure 3. Use GM P/N 10143150. After installation, apply a coating of GM# 1052349 Lubriplate, GM# 1052863 Silicone Grease or equivalent to the tops of both down stop bumpers.
IMPORTANT: AFTER DRILLING HOLE BUT PRIOR TO INSTALLING BUMPER, APPLY A COATING OF GM 1052856 OR EQUIVALENT AS A CORROSION PROTECTION IN THE AREA OF THE HOLE DRILLED IN BOTTOM OF DOOR. ALLOW 30 MINUTES OF DRYING TIME BEFORE INSTALLING BUMPER. EQUIVALENT AS A CORROSION PROTECTION IN THE AREA OF THE HOLE DRILLED IN BOTTOM OF DOOR. ALLOW 30 MINUTES OF DRYING TIME BEFORE INSTALLING BUMPER.
4. Install run channels, retainers and door glass. (loosely install front run channel retainer bolts).
5. Adjust front run channel retainer by raising glass to full up position, apply slight rearward pressure and slightly tighten the upper attaching bolt. Lower door glass to the full down position and while applying slight rearward pressure tighten both the lower and upper attaching bolts.
6. Cycle door glass to insure satisfactory operation prior to installing remaining hardware and trim parts.
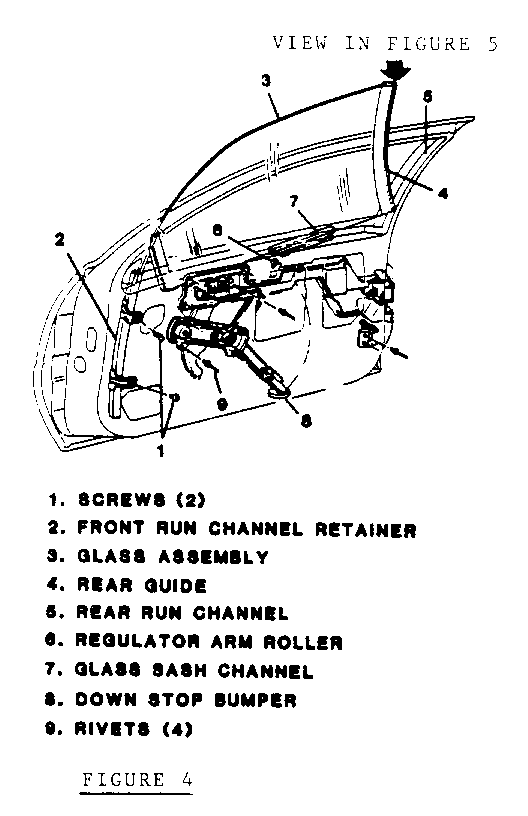
BERETTA (FIGURES 4-5-6-7)
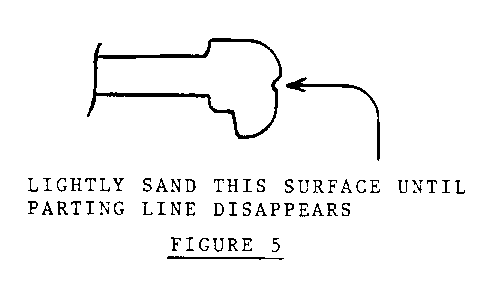
1. Remove door glass and inspect glass guides for damage or wear. If guides show no damage or wear and glass assembly can be reused, inspect rear edge of rear guide and lightly sand rear surface of guide using 400 grit paper until the mold parting line disappears (See Figure 5). If any damage to glass guides are present, replace glass assembly.
2. Inspect the front run channel retainer and rear retainer inside the run channel assembly. Any distortions, bends, etc. require that the parts be replaced.
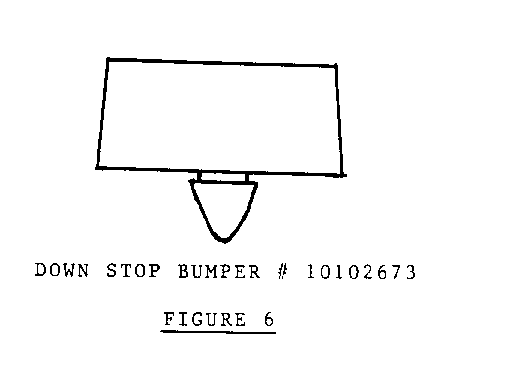
3. Install new downstop bumper (20mm high) GM PIN 10102673 at the front of the door in the existing hole in the bottom of the door (Figure 6). After installation, apply a coating of GM# 1052349 Lubriplate, GM# 1052863 Silicone Grease or equivalent to the tops of both down stop bumpers.
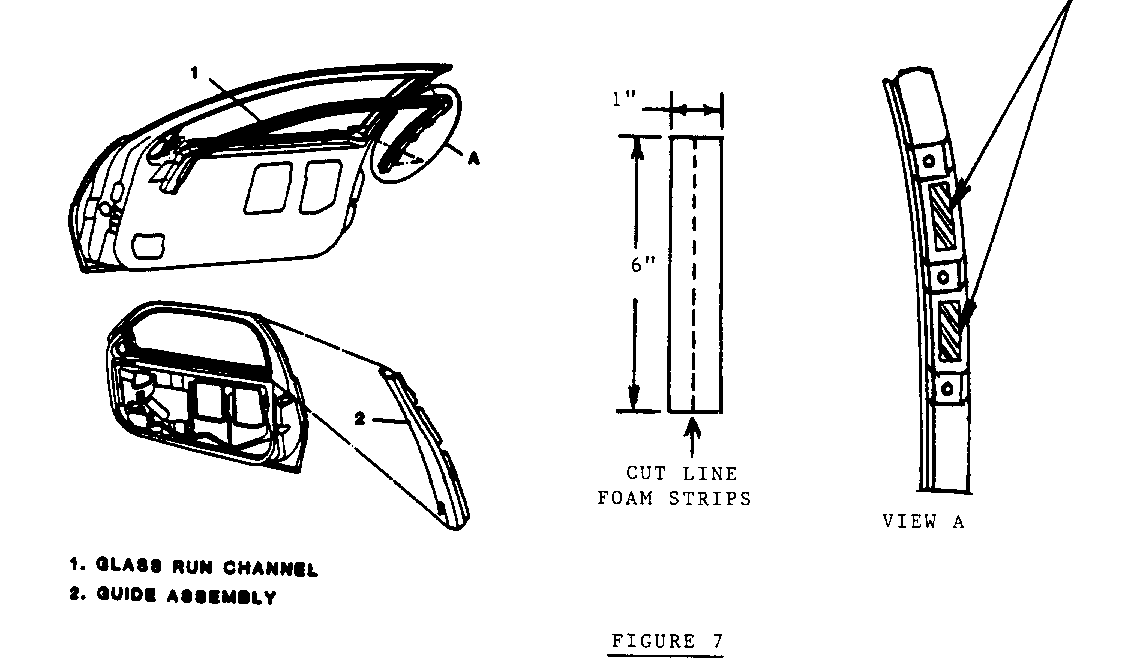
4. Grasp the rear portion of the run channel by hand and attempt to slide up and down to determine if the position is held securely (See Figure 7).
IMPORTANT: IF MOVEMENT IS NOTICED (OR IF RUN CHANNEL HAS TO BE REPLACED DUE TO BENDS OR DISTORTION), INSTALL TWO FOAM STRIPS ON BACK OF RUN CHANNEL AS SHOWN IN FIGURE 7, VIEW A. (MAKE FROM 6" X 1" STRIP OF 3M (R) #06375 (4508) FOAM TAPE, OR EQUIVALENT, CUT IN TWO PIECES LENGTHWISE). THIS MATERIAL SHOULD PROVIDE THE PROPER AMOUNT OF INTERFERENCE TO PREVENT RUN CHANNEL MOVEMENT. AFTER FOAM INSTALLATION, INSTALL RUN CHANNEL INTO FRAME.
5. Reinstall the door glass and front run channel retainer (loosely install the retainer bolts).
6. Adjust the front run channel retainer by raising the door glass to full up position, apply slight rearward pressure and slightly tighten the upper attaching bolt. Lower door glass to full down position and while applying slight rearward pressure, tighten both the lower and upper attaching bolts.
7. Cycle the door glass to insure satisfactory operation prior to installing the remaining hardware and trim parts.
LABOR OPERATION LABOR NUMBER TIME --------------- -----
CORSICA T1400 Right .7 Hours
T1401 Left .7 Hours
BERETTA T1402 Right .8 Hours
T1403 Left .8 Hours
General Motors bulletins are intended for use by professional technicians, not a "do-it-yourselfer". They are written to inform those technicians of conditions that may occur on some vehicles, or to provide information that could assist in the proper service of a vehicle. Properly trained technicians have the equipment, tools, safety instructions and know-how to do a job properly and safely. If a condition is described, do not assume that the bulletin applies to your vehicle, or that your vehicle will have that condition. See a General Motors dealer servicing your brand of General Motors vehicle for information on whether your vehicle may benefit from the information.
