ROOF PANEL ATTACHING POINT ADJUSTMENT PROCEDURE

VEHICLES AFFECTED: 1984 Corvette
The following adjustment procedure has been developed to ensure the proper fit and installation of replacement tops.
CORVETTE ROOF PANEL ATTACHING POINT ADJUSTMENT
1. Place the vehicle on a level surface and remove the existing roof panel.
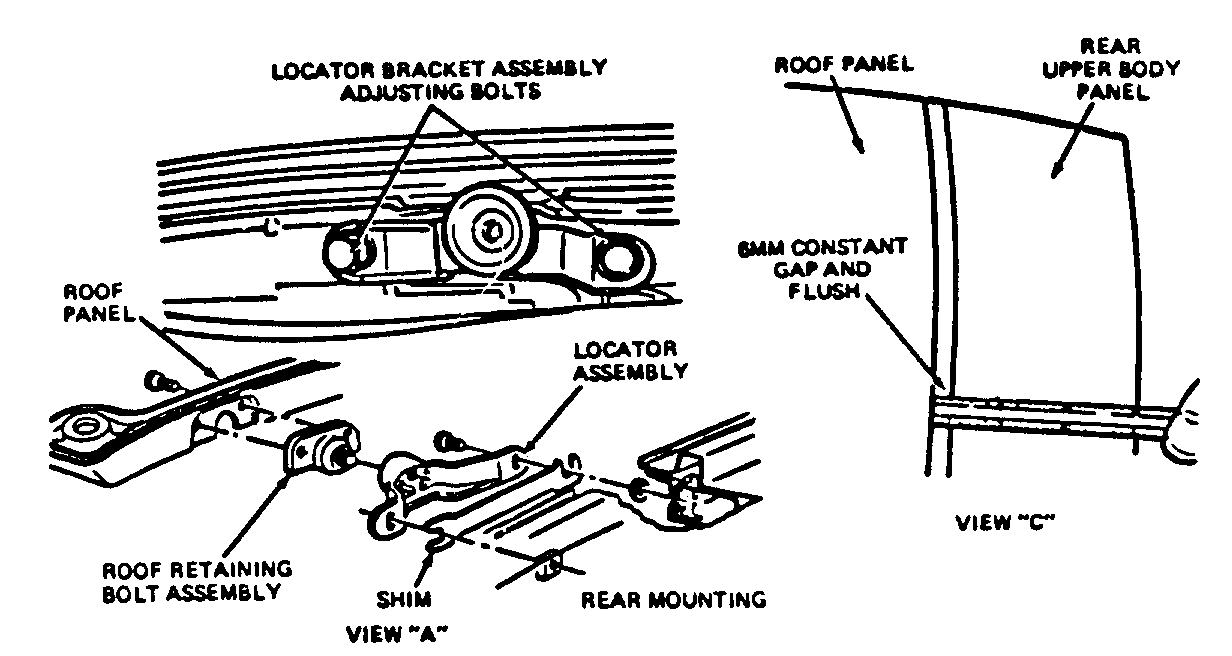
2. Transfer the rear roof panel retaining bolt assemblies and, if necessary, the roof panel mouldings to the replacement panel. Torque the attaching bolts to 25 N.m (18.5 ft. lbs.) (View A).
3. Remove the centre rear roof trim panel attaching screws to gain access to the locator bracket assemblies and loosen the adjusting bolts (view A).
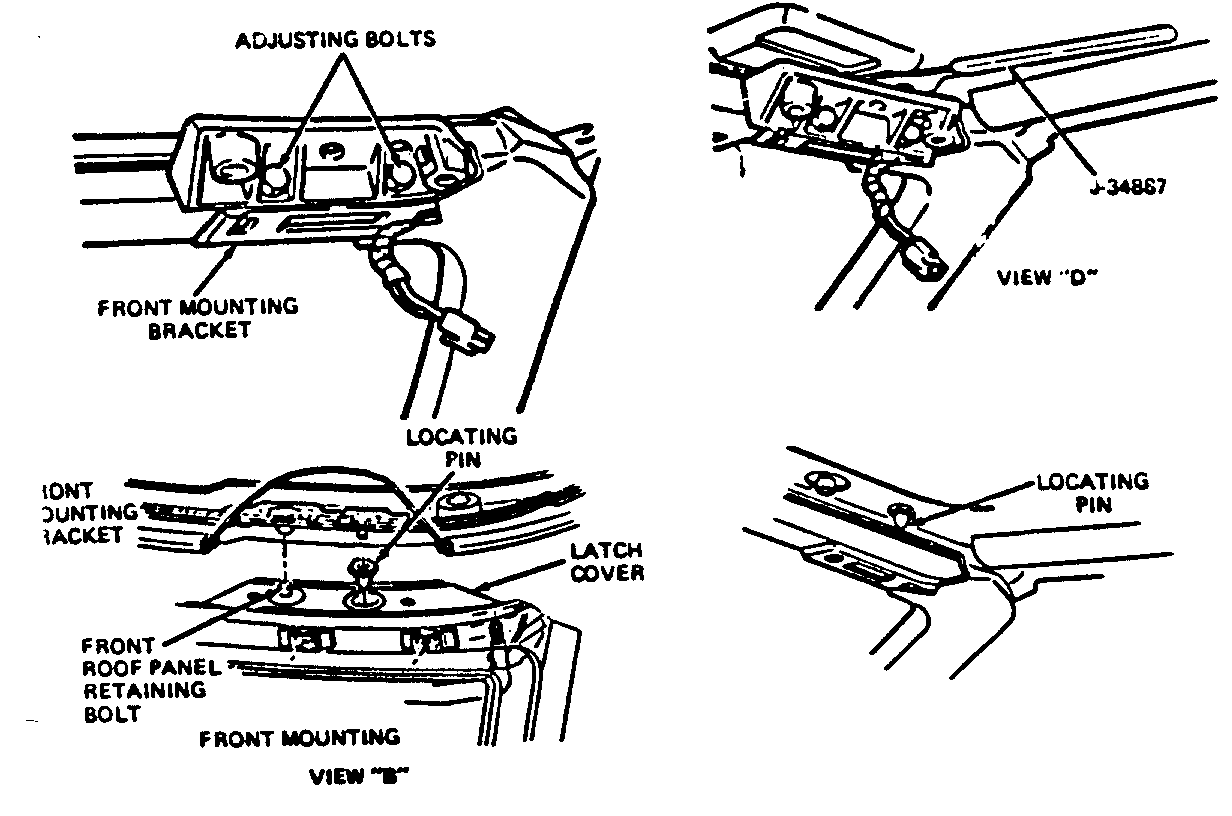
4. Remove the sunshade, the mounting covers and the windshield header garnish moulding to gain access to front mounting bracket assemblies.
5. Loosen the replacement roof panel locating pins (see View B).
6. Place the new roof panel on the vehicle and snug the rear roof panel retainirg bolts to 5 N.m (3-4 ft. lbs.). Check to see if an approximate 6mm space and flush condition exists between the roof panel and the upper body rear panel (see View C). Adjust the locator brackets as necessary to obtain this fit (see View A).
7. Carefully attach the front roof panel retaining bolt making sure the bolt threads align with the bracket in the roof panel.
8. Torque the rear roof panel retaining bolts to 20 N.m (15 ft. lbs.) (see View A).
9. Using a Kent-Moore Tool J-34887, snug up the roof panel locating pin (see View D).
10. Torque the front roof panel retaining bolts to 20 N.m (15 ft. lbs.) (see View B).
11. Check the fit of the roof panel to the windshield reveal moulding. The panel should be parallel and compress the weatherstrip evenly. Adjust the mounting bracket assemblies, if necessary, to obtain a proper fit (see View B).
12. Remove the roof panel from the vehicle and torque the locating pins to 15 N.m (10-12 ft. lbs.). Hold the 'T' nut to make sure it doesn't move when tightening the locator pins.
13. Reinstall all the trim items that had been removed to allow the necessary adjustments ensuring a proper fit of the roof panel.
14. Reinstall the roof panel. Loosely attach the rear bolts, then the front; torque the rear bolts, then the front to 20 N.m (15 ft. lbs.).
15. Water test the side door glass to roof panel weatherstrip fit. If leaks are evident, adjust the door glass.
Labour Operation Number: B2308
Labour Time : 1.0 hours
General Motors bulletins are intended for use by professional technicians, not a "do-it-yourselfer". They are written to inform those technicians of conditions that may occur on some vehicles, or to provide information that could assist in the proper service of a vehicle. Properly trained technicians have the equipment, tools, safety instructions and know-how to do a job properly and safely. If a condition is described, do not assume that the bulletin applies to your vehicle, or that your vehicle will have that condition. See a General Motors dealer servicing your brand of General Motors vehicle for information on whether your vehicle may benefit from the information.
