TRANSMISSION EXCHANGE PROGRAM (ZF 6 SPEED MANUAL)

TRANSMISSION APPLICATIONS: 7060
TRANSMISSION MODELS: ZF 6-SPEED MANUAL TRANS.
SUBJECT: TRANSMISSION EXCHANGE PROGRAM
VEHICLE APPLICATIONS: 91 CORVETTE
Bulletin Covers:
To continue to gain helpful product feedback on the ZF 6-speed manual transmission, the current exchange program in effect will continue until further notice.
The exchange program will be administered by the Technical Assistance Centre (T.A.C.).
The following explains all requirements regarding diagnosis, serviceable and non-serviceable items, (warranty claims processing procedures and shipping instructions).
In the event your Dealership receives a comment on a 1989-91 ZF 6-speed, follow the procedure listed below. Your cooperation in adhering to the following procedures will greatly improve the effectiveness of the program.
A. PRELIMINARY DIAGNOSTIC PROCEDURE ------------------------------------ Condition and Remedy -- external causes of condition
Condition Cause Remedy
Cannot shift a) Clutch does not Check clutch into gears disengage operation-repair as necessary per Service Manual Section 7C
b) Internal Cause Exchange Transmission
Noisy in all a) Oil fluid level Refill transmission gears, neutral, too low (Part oil according to forward and number 1052931 specification. reverse. Determine cause of low oil level; i.e. repair as necessary.
b) Transmission over Correct oil level -heats due to excessively low or high oil fluid level
c) Internal cause Exchange transmission
Transmission a) Low Speed parking Normal condition first gear growl lot maneuver
Noise on engine a) Dual mass flywheel Normal condition shut-down resonance
Noise in all a) Bell-housing Loosen bolts for gears (growl transmission transmission, bell or gear whine) misalignment housing and support beam. Retorque starting with bell housing and support beams to transmission Bolt torque sequence should be horizontal then vertical in increments of 5-10 ft.lbs. Refer to page 4A-5 for drive- line support alignment procedure in the 1990 or 1991 Corvette Service Man.
B. ON-VEHICLE SERVICE (without exchange) ------------------------------------------ Corrections to perform while transmission is installed in vehicle:
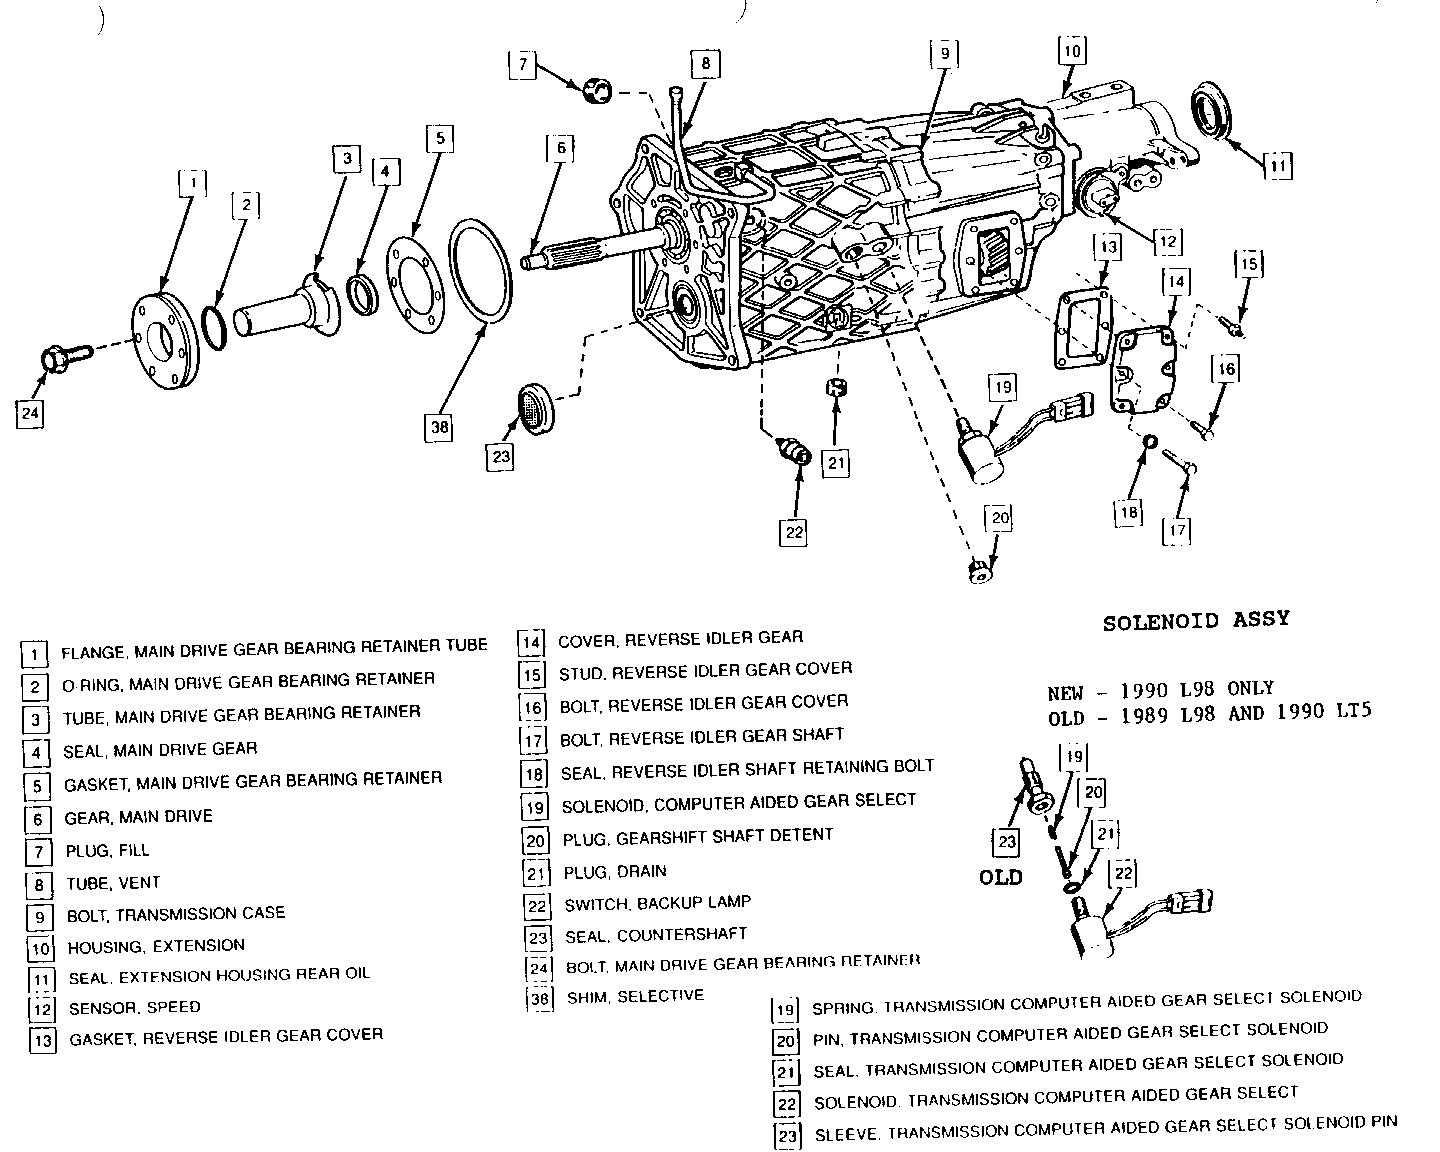
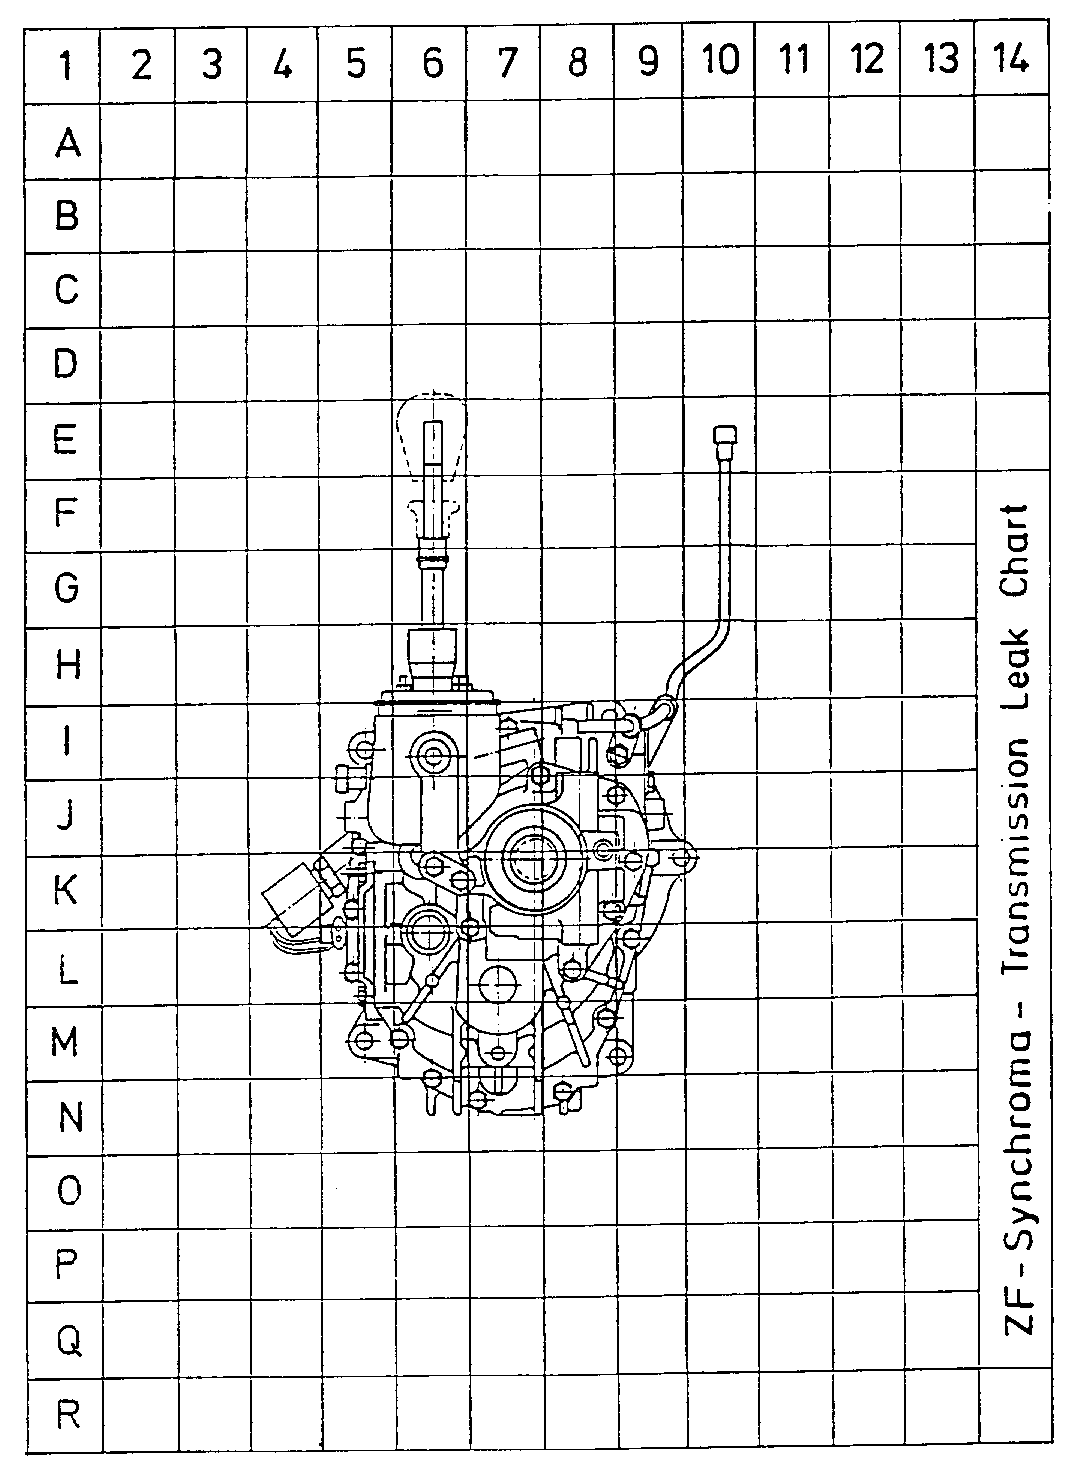
Condition Cause Remedy ------------ --------------------- ----------------- Transmission a) Extension Housing Replace extension leaks Rear Oil Fluid housing rear oil Seal Leaks (see seal. (Kent Moore illustration special tool Page 10) #J21359-A req.)
b) Reverse idler Replace gasket (See cover leaks. (See Illustration) NOTICE: Illustration Reverse Idler Shaft Page 10) can change its position.
After removing cover, screw in Reverse Idler Shaft bolt to hold shaft in position.
c) Oil drain plug Check for tight fit. leaks (See Ill.)
d) Backup lamp switch Check for tight fit; leaks (See illus replace as Page 10) necessary.
e) Breather tube leaks Check for tight fit; (See Illustration) replace as necessary.
f) Speed Sensor leaks Replace o-ring. Leakage and other a) Computer aided Gear Check for tight fit Select Solenoid (25 Nm or 18 ft.lbs.) (See Illustration Replace solenoid Page 10). assembly as necessary.
C. OUT-OF-VEHICLE REPAIR (without exchange) --------------------------------------------- Condition Cause Remedy ------------------- --------------- -------------------- Transmission leaks a) Input shaft Replace input shaft leaks bearing retainer assembly, o-ring and gasket. Front input bearing endplay should be checked and reshimmed if necessary per procedure in shop-manual. (See Illustration Page 10.) Kent Moore special tool J38126 needed for o-ring replacement. NOTICE: Bearing retainer for L98 and LT5 engine is not interchangeable.
b) Countershaft Replace countershaft seal leaks seal ( See Illus.). Kent Moore Special Tool #J29381 req.
D. LIST OF POSSIBLE COMMENTS - CAUSE AND REPAIR ----------------------------------------------- Below are some other possible transmission conditions which are not listed in A, B, or C.
Condition Cause Remedy ------------ ------------- ------------- Cannot shift a) Gearshift Exchange transmission into gear Linkage
b) C.A.G.S. solenoid Inspect solenoid sticks pin and sleeve
Transmission a) Transmission case Exchange transmission leaks leaks
Reverse bind or a) Reverse blockout Repair per T.A.C. blockout (cannot set screw loose instructions. get into gear)
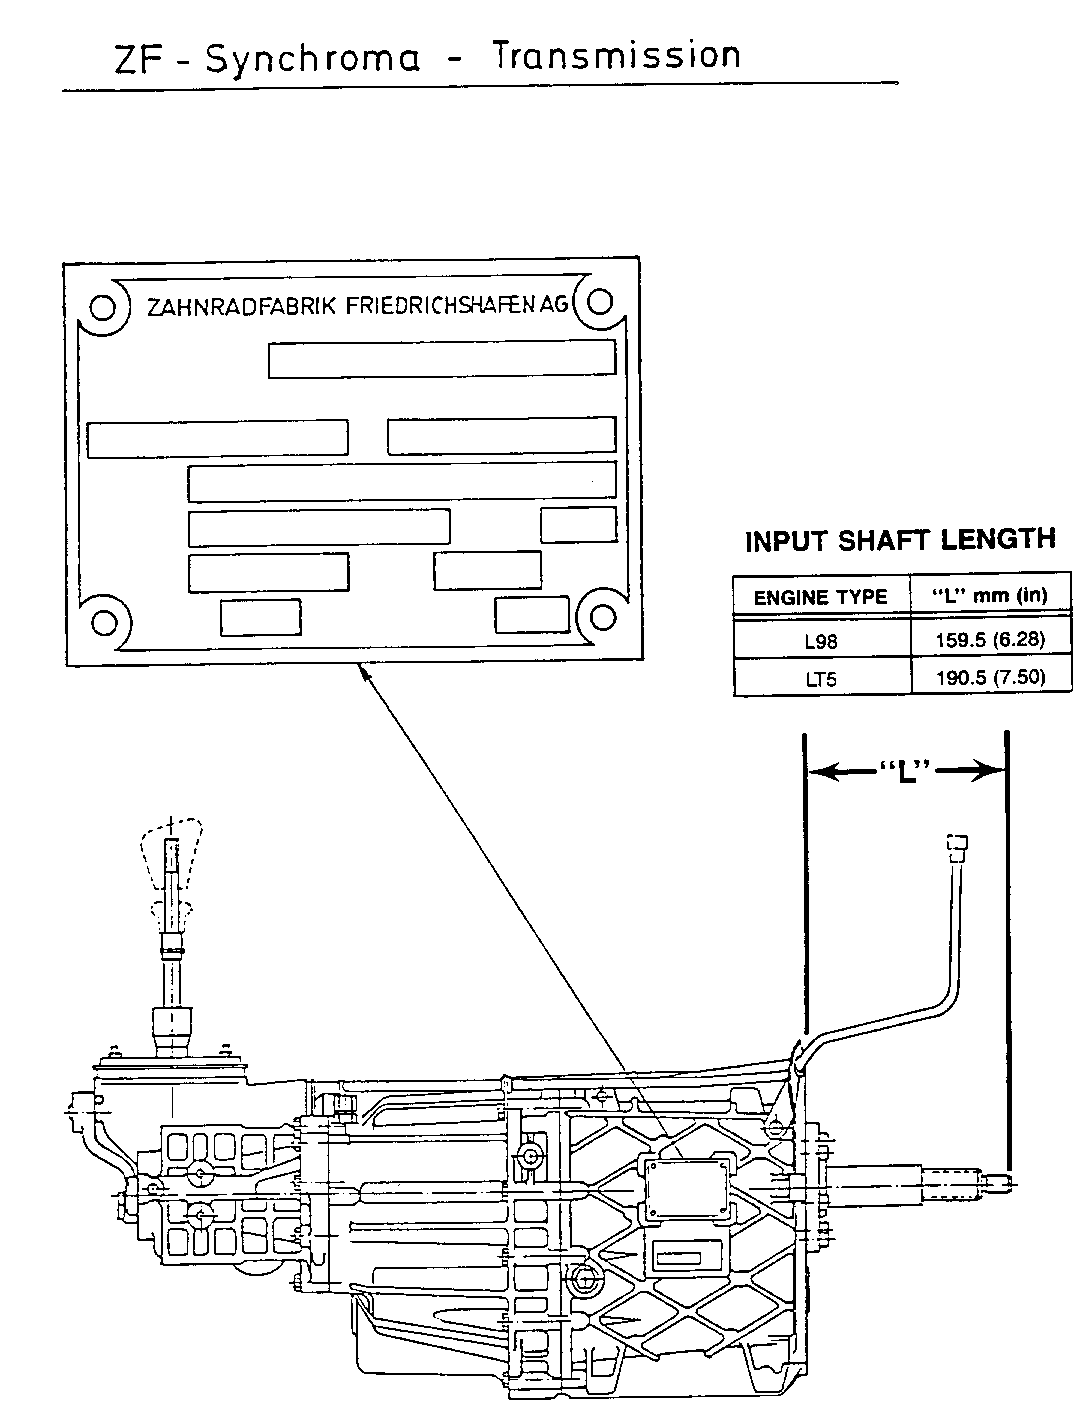
E. EXCHANGE PROCEDURE ---------------------- Once the above preliminary diagnosis and/or repairs are made and an exchange unit is still deemed necessary. Contact TAC. The ML9 is not available from CANSPO. Please be prepared to provide gearbox number from original transmission tag, vehicle delivery date and dealer shipping address.
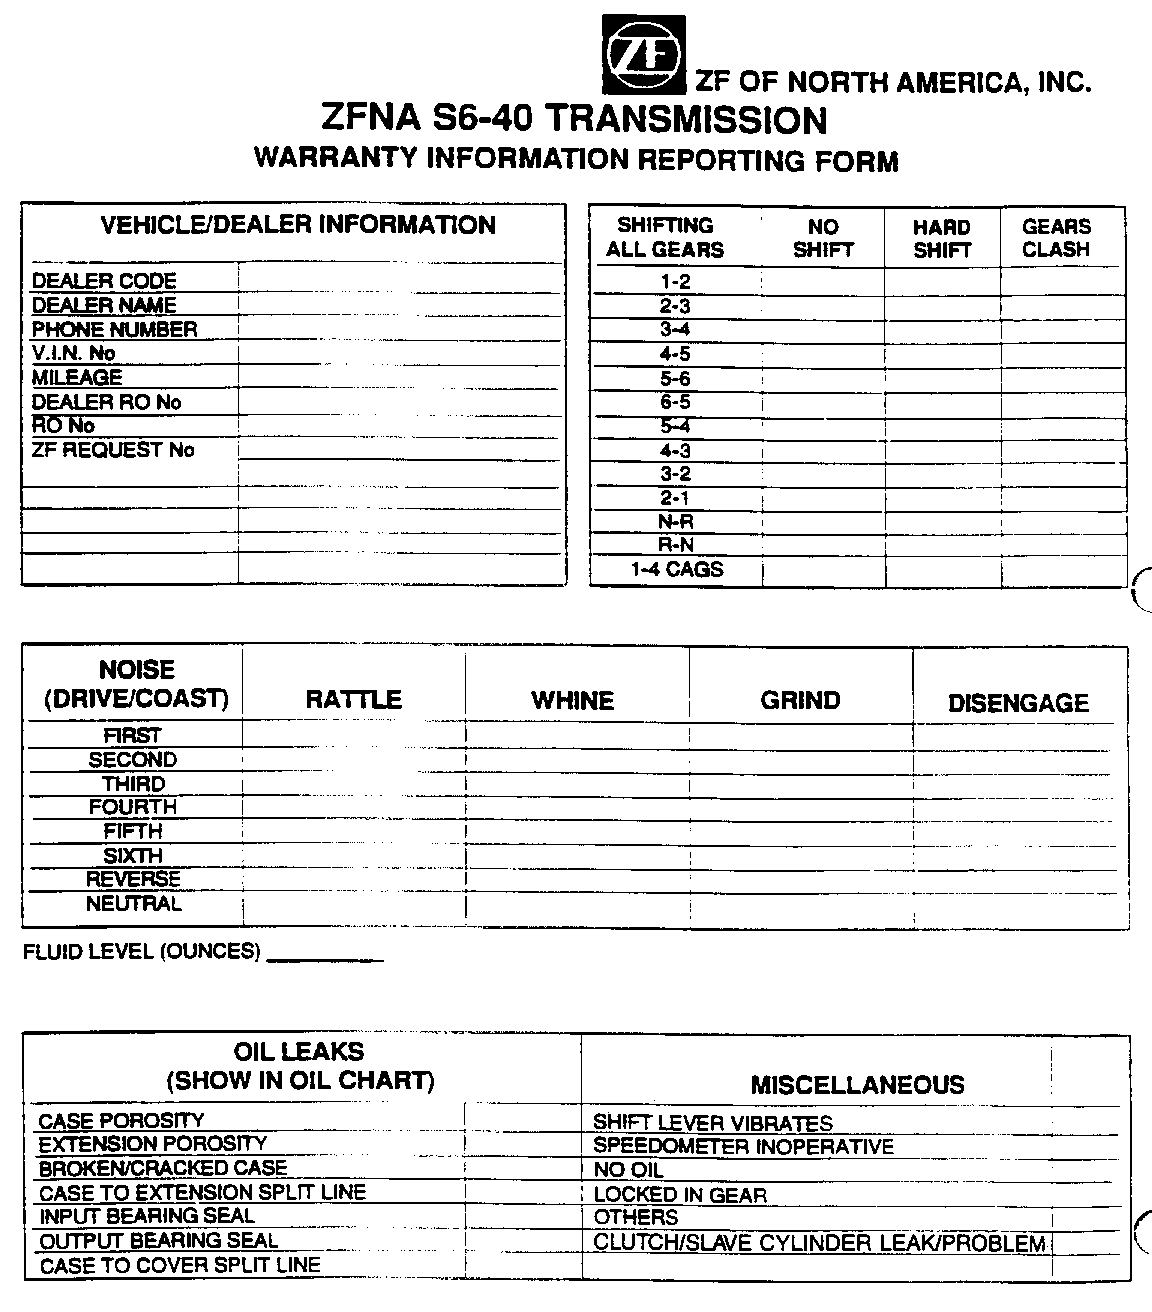
Also, be prepared to provide the necessary information by filling out the reporting form (example attached, reproduce locally) prior to calling.
The Technical Assistance Centre will arrange to ship an exchange unit to your dealership and provide your dealership with a TAC case number. This number must be written on the return transmission case cover before returning the unit.
To increase the effectiveness of the program, the removed transmission unit must be returned immediately (not later than 1 week after date of receipt of replacement unit). Under no circumstances a the removed transmission be retained or purchased by the dealer.
The removed transmission must be returned complete, including shifter assembly, as removed from the vehicle without examination of the unit other than as described in paragraphs A, B, C, or D above. Dealerships returning units that have been even partially disassembled may be subject to being billed for all materials furnished.
The exchange unit will have an envelope attached to it. This envelope will contain:
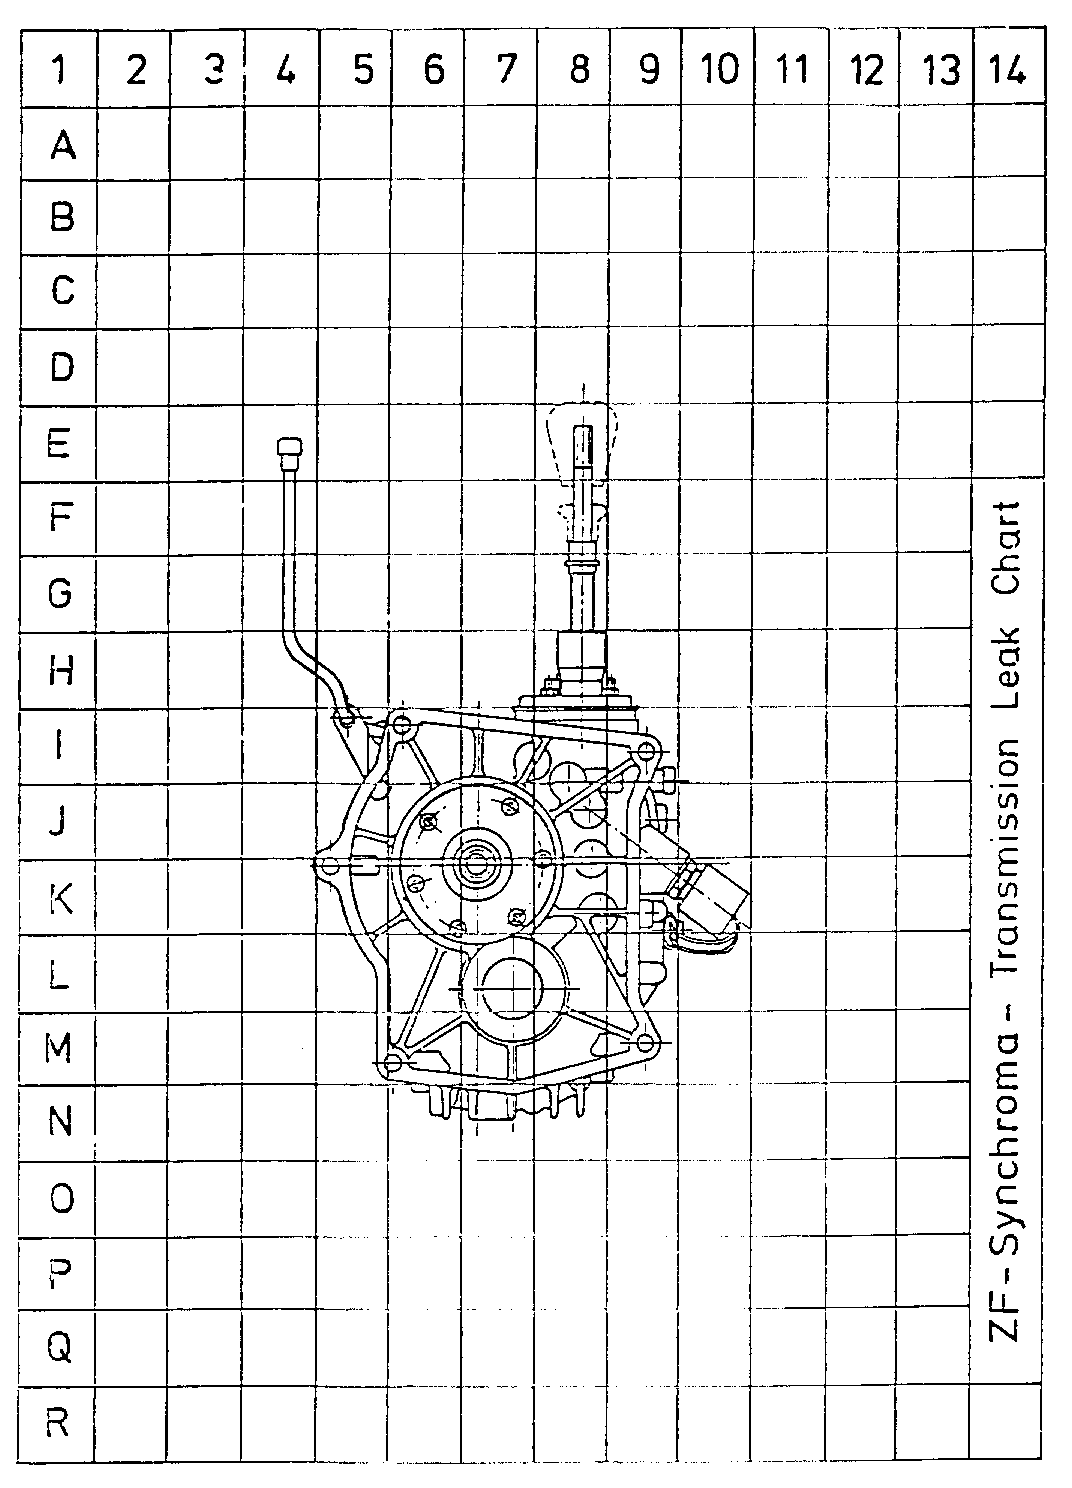
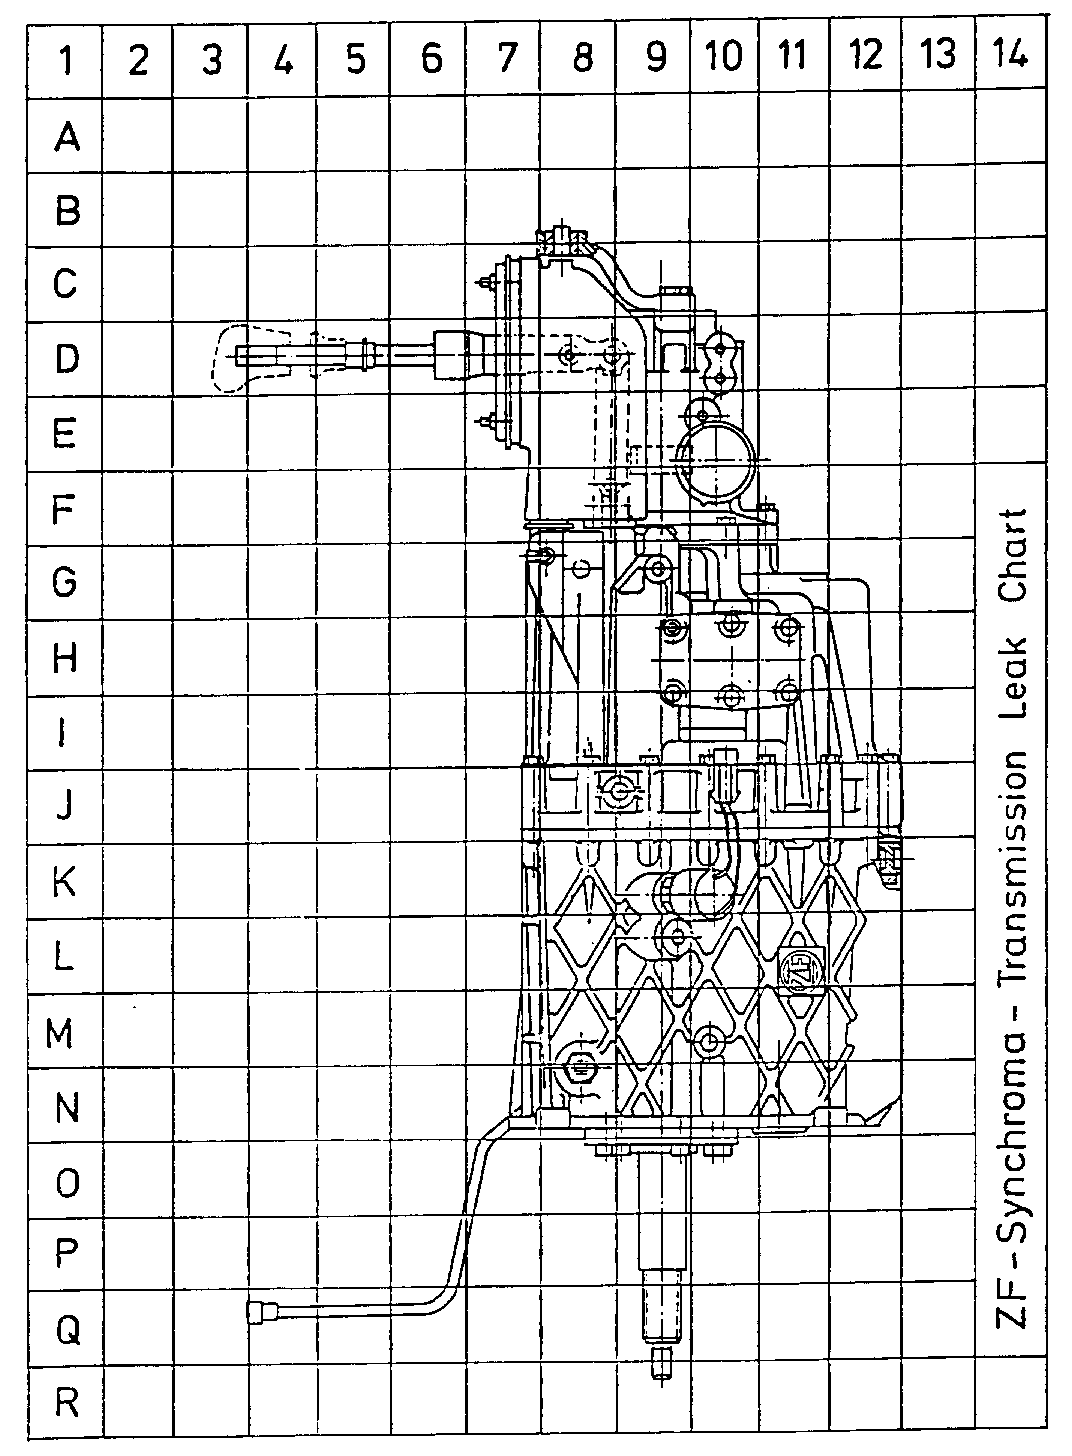
o Return shipping label o Reporting form o Leak identification charts o Identification tag explanation chart
NOTE: FOR CORVETTE OWNERS WHO WISH TO RETAIN ORIGINAL TRANSMISSION CASE IN VEHICLE, ZF OF NORTH AMERICA WILL REFURBISH THE ORIGINAL TRANSMISSION. If after inspection of the original transmission, it is determined to be non-repairable, the dealer will be notified through the Technical Assistance Centre (TAC) and a replacement transmission will be shipped from ZF, of North American.
F. PREPARATION FOR SHIPPING ---------------------------- Drain oil transmission fluid from the concerned unit. Replace the drain plug. Disconnect and retain speed sensor and remove transmission.
NOTE: Do not remove transmission shifter.
Remove all plastic shipping plugs and covers from the exchange unit and install them on the removed unit.
NOTE: Compare input shaft length to original or refer to chart on on Page 10.
Complete the information on the complaint tag. Refer to the identification tax explanation chart.
If transmission leaks (see illustrations attached), clean leak areas, powder, and mark leak area on transmission. Mark area of leakage on illustrations with red pen. Write the TAC reference number on the leak identification forms.
Fold the report form, staple it to the complaint tag and secure the tag to the clutch housing bolt hole of the removed unit. Fold and staple the leak identification forms to the same tag.
Write the TAC case number on the case cover of the removed transmission and on the Warranty information Reporting Form.
Repack the removed unit into the original shipping container.
Place leak identification charts, and copy of repair order in original envelope and attach to original transmission.
General Motors bulletins are intended for use by professional technicians, not a "do-it-yourselfer". They are written to inform those technicians of conditions that may occur on some vehicles, or to provide information that could assist in the proper service of a vehicle. Properly trained technicians have the equipment, tools, safety instructions and know-how to do a job properly and safely. If a condition is described, do not assume that the bulletin applies to your vehicle, or that your vehicle will have that condition. See a General Motors dealer servicing your brand of General Motors vehicle for information on whether your vehicle may benefit from the information.
