Removal Procedure
Notice: Do not reuse the fluid that has been bled from a system in order to
fill the clutch master cylinder reservoir for the following reasons:
- The fluid may be aerated
- The fluid may be contaminated
- The fluid may contain too much moisture
Important: Bleed the hydraulic system whenever any part of the system has been
disconnected, or the level of fluid in the reservoir is so low that air has
been drawn into the master cylinder.
- Remove the PCM from the mounting bracket in order to access the
clutch master cylinder for filling. Refer to
Powertrain Control Module Replacement/Programming
in Engine Controls.
- Fill the master cylinder reservoir with clutch hydraulic fluid
GM P/N 12345347, or equivalent.
- In order to remove much of the air from the system prior to bleeding
at the actuator, complete the following steps:
| 3.1. | Remove the clutch master cylinder cap and the moisture barrier. |
| 3.3. | Lightly stroke the clutch pedal in order to release air trapped
in the system through the master cylinder. |
| 3.4. | Remove the clutch master cylinder cap and reinstall the moisture
barrier. |
- Raise and support the vehicle. Refer to Section 0A.
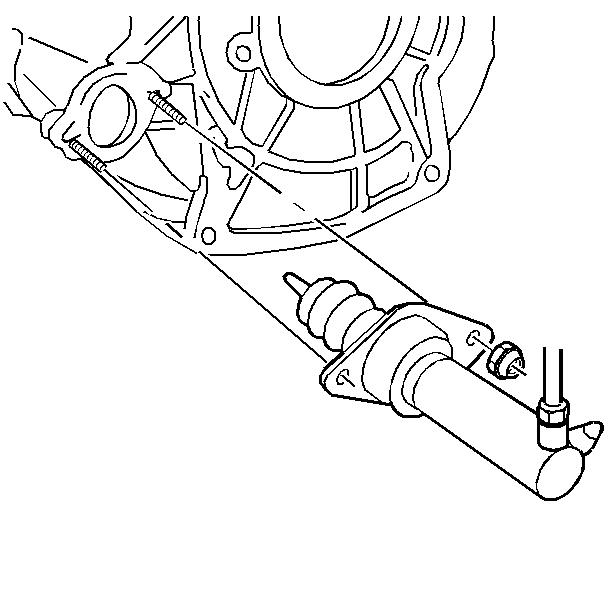
- Remove the actuator cylinder retaining nuts.
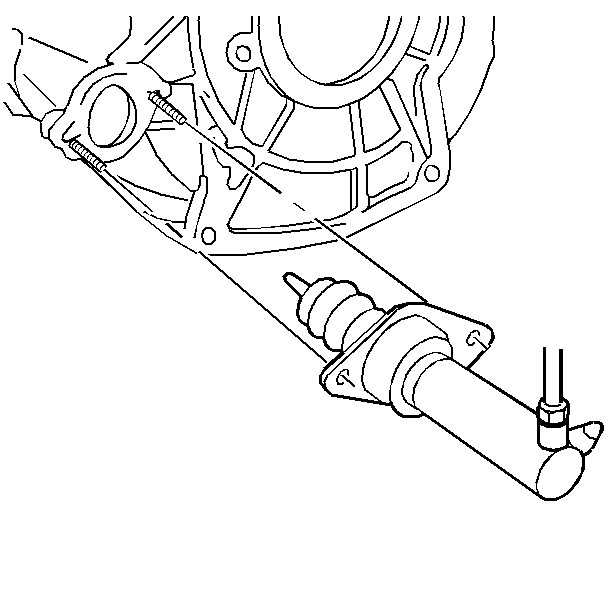
- Remove the pushrod and the actuator cylinder from the clutch housing.
- Remove the hydraulic line from the retaining clip.
- Remove the bleed screw dust cap.
- Hold the cylinder in a horizontal position with the bleeder screw
vertical.
- Fully depress the clutch pedal and open the bleed screw.
- Close the bleed screw and release the clutch pedal.
- Repeat steps 10 and 11 until all air is evacuated. Check and refill
the clutch master cylinder reservoir as required in order to prevent air from
being drawn through the clutch master cylinder.
Installation Procedure
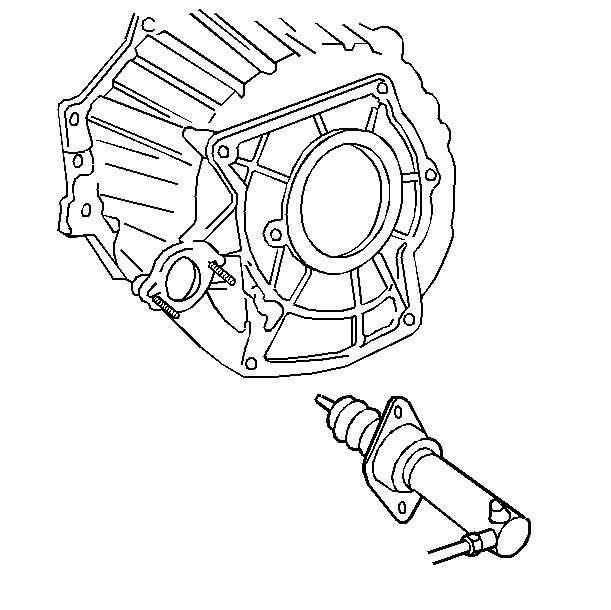
- Install the dust cap onto the bleed screw.
- Install the hydraulic hose into the retaining clip.
- Install the clutch actuator cylinder and the retaining nuts.
Tighten
Tighten the nuts to 25 N·m (18 lb ft).
Notice: Use the correct fastener in the correct location. Replacement fasteners
must be the correct part number for that application. Fasteners requiring
replacement or fasteners requiring the use of thread locking compound or sealant
are identified in the service procedure. Do not use paints, lubricants, or
corrosion inhibitors on fasteners or fastener joint surfaces unless specified.
These coatings affect fastener torque and joint clamping force and may damage
the fastener. Use the correct tightening sequence and specifications when
installing fasteners in order to avoid damage to parts and systems.
- Lower the vehicle.
- Install the PCM. Refer to
Powertrain Control Module Replacement/Programming
in Engine Controls.
