Installation Procedure
Important: After installing the driveline support, check the air intake duct to throttle body mating surface. If the air duct becomes dislodged from the throttle body a drivability problem may occur.
- Install the transmission into position and support with a suitable jack.
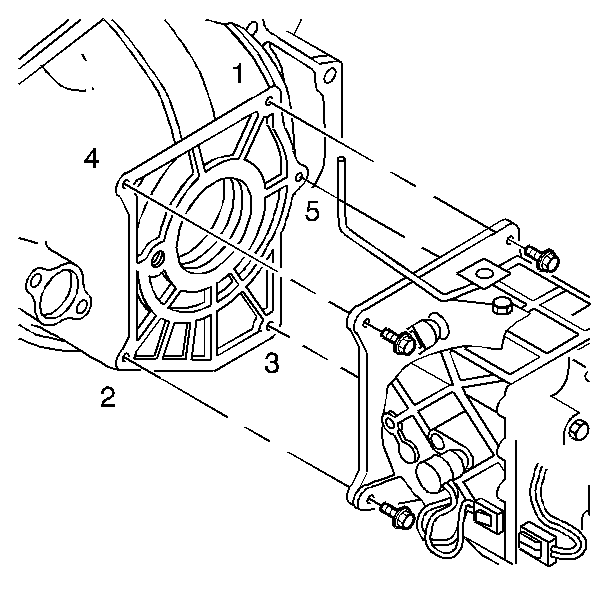
- Install the transmission to flywheel housing bolts.
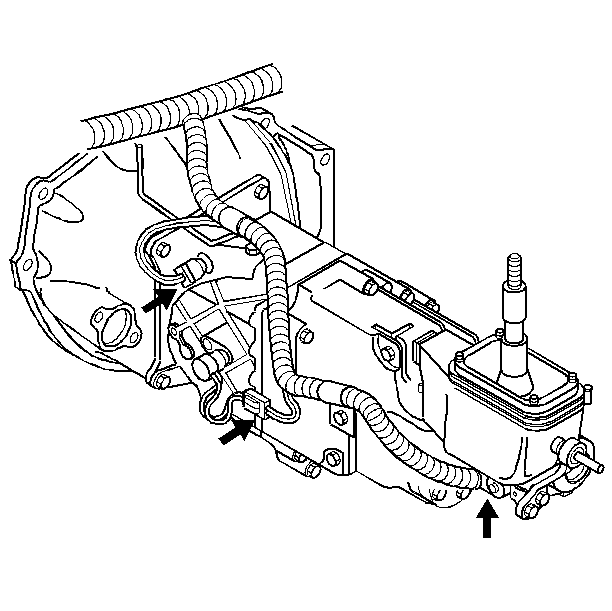
- Connect the following wire harness connectors:
- Slide the driveline torque beam forward onto the transmission extension housing.
- Install the propeller shaft and the retaining bolts. Install the propeller shaft onto the yoke in the same position as removed noting the marked areas.
- Install the bolts retaining the gearshift support bracket.
- Check the transmission fluid level. Refer to Transmission Fluid Inspection .
- Install the parking brake front cable guide to the driveline support.
- Align the driveline support and install the washers, bolts, and nuts.
- Tighten the driveline support to differential carrier retaining bolts to 80 N·m (59 lb ft).
- Tighten the driveline support to transmission retaining bolts to 50 N·m (37 lb ft).
- Remove the transmission support.
- Install the complete exhaust system. Refer to General Exhaust System Replacement in Engine Exhaust.
- Lower the vehicle.
- Install the front floor console trim plate assembly. Refer to SECTION 8C.
- Connect the negative battery cable.

Tighten
Tighten the bolts to 50 N·m (37 lb ft) in
the tightening sequence illustrated. Refer to
Notice: Use the correct fastener in the correct location. Replacement fasteners must be the correct part number for that application. Fasteners requiring replacement or fasteners requiring the use of thread locking compound or sealant are identified in the service procedure. Do not use paints, lubricants, or corrosion inhibitors on fasteners or fastener joint surfaces unless specified. These coatings affect fastener torque and joint clamping force and may damage the fastener. Use the correct tightening sequence and specifications when installing fasteners in order to avoid damage to parts and systems.
in General Information.
| • | The backup lamp switch |
| • | The vehicle speed sensor |
| • | The computer aided gear select solenoid |
Tighten
Tighten the propeller shaft to yoke retaining bolts to 25 N·m
(18 lb ft).
Tighten
The bolts to 25 N·m (18 Ib ft).
Tighten
Tighten
The terminal bolt to 15 N·m (11 lb ft).
