Notice: Use the correct fastener in the correct location. Replacement fasteners
must be the correct part number for that application. Fasteners requiring
replacement or fasteners requiring the use of thread locking compound or sealant
are identified in the service procedure. Do not use paints, lubricants, or
corrosion inhibitors on fasteners or fastener joint surfaces unless specified.
These coatings affect fastener torque and joint clamping force and may damage
the fastener. Use the correct tightening sequence and specifications when
installing fasteners in order to avoid damage to parts and systems.
Important:
| • | Note the position of the crankshaft balancer before removal. The balancer
does not use a key or keyway for positioning. Mark or scribe the end of the
crankshaft and the balancer before component removal. The crankshaft balancer
must be installed to the original position. If replacing the crankshaft balancer,
note the location of any existing balance weights, if applicable. Install
new balance weights into the new crankshaft balancer, if applicable. Crankshaft
balancer weights must be installed into the new balancer in the same location
as the old balancer. A properly installed balance weight will be either flush
or below flush with the face of the balancer. |
| • | Do not use the crankshaft balancer bolt again. Install a NEW crankshaft
balancer bolt during assembly. |
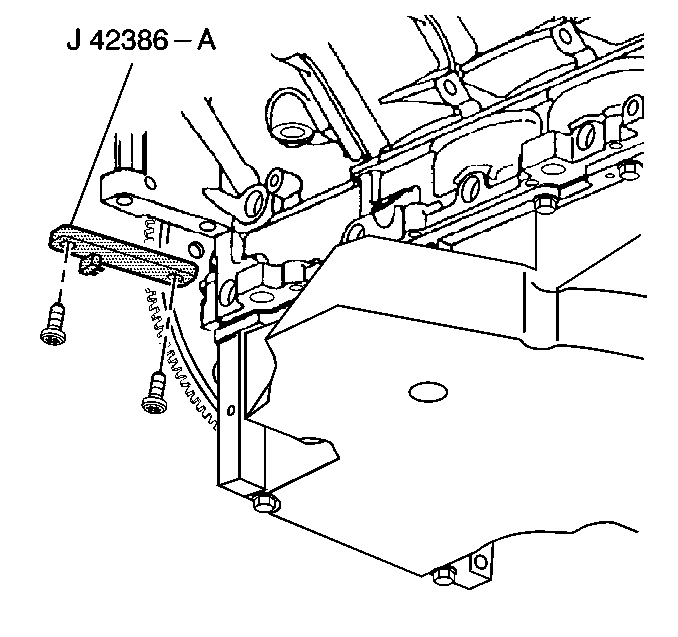
| • | Make sure that the teeth of the flywheel holding tool mesh with the
teeth of the engine flywheel. |
- Install the J 42386-A
and bolts.
Tighten
Tighten the J 42386 bolts to 50 N·m (37 lb ft).
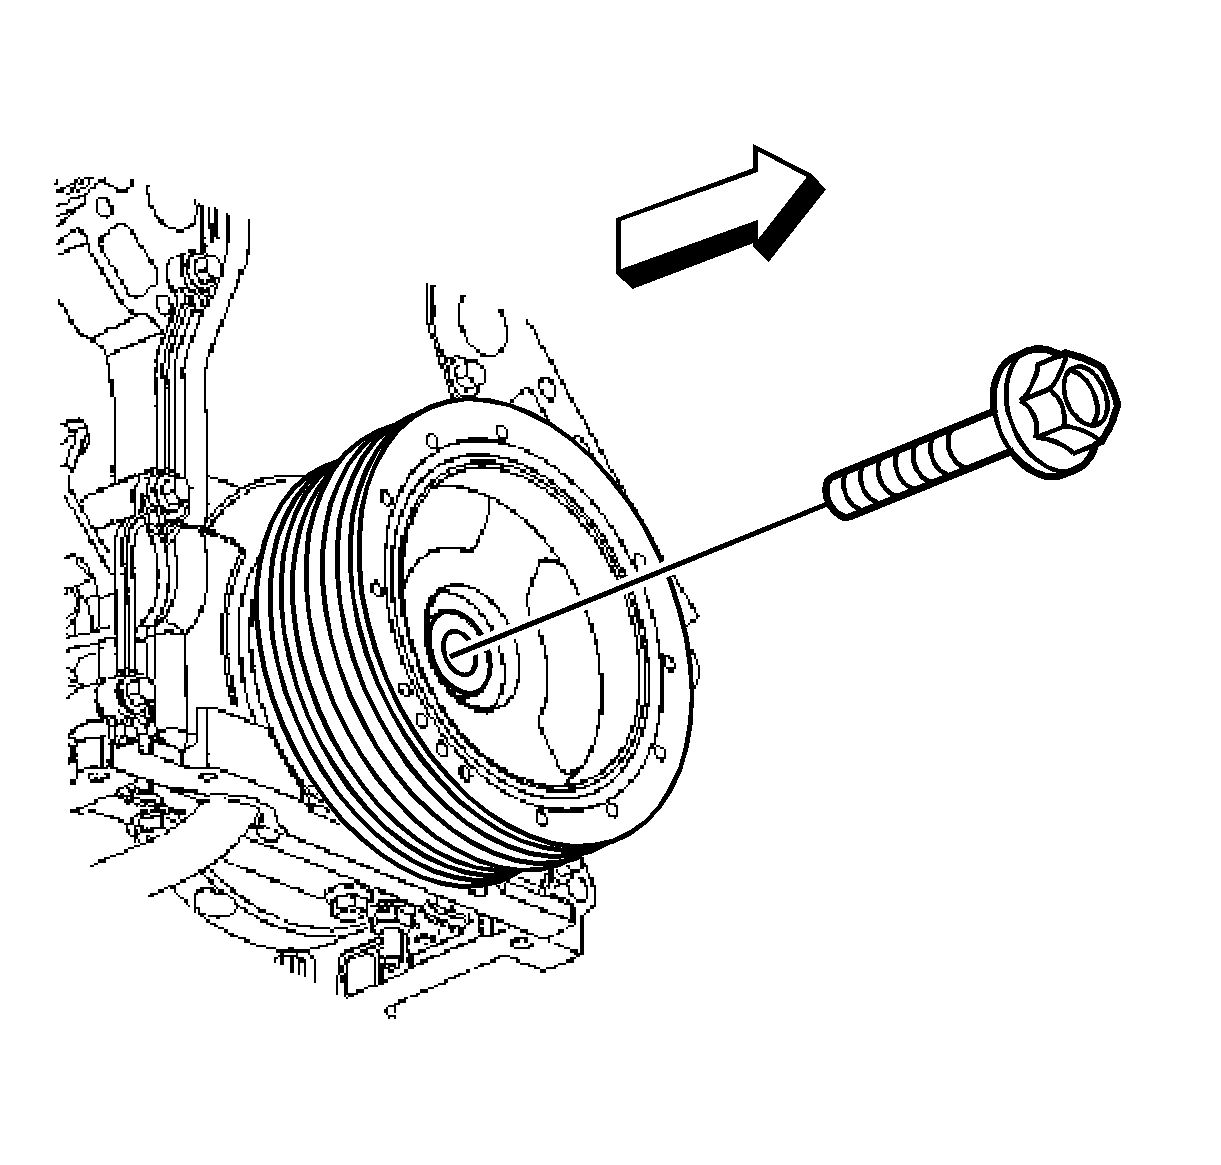
- Remove the crankshaft balancer bolt.
Do not discard the
crankshaft balancer bolt. The balancer bolt will be used during the balancer
installation procedure.
- Mark or scribe the crankshaft balancer and the end of the crankshaft.
Note the balancer installed position on the crankshaft for assembly.
Refer to
Engine Balancing
.
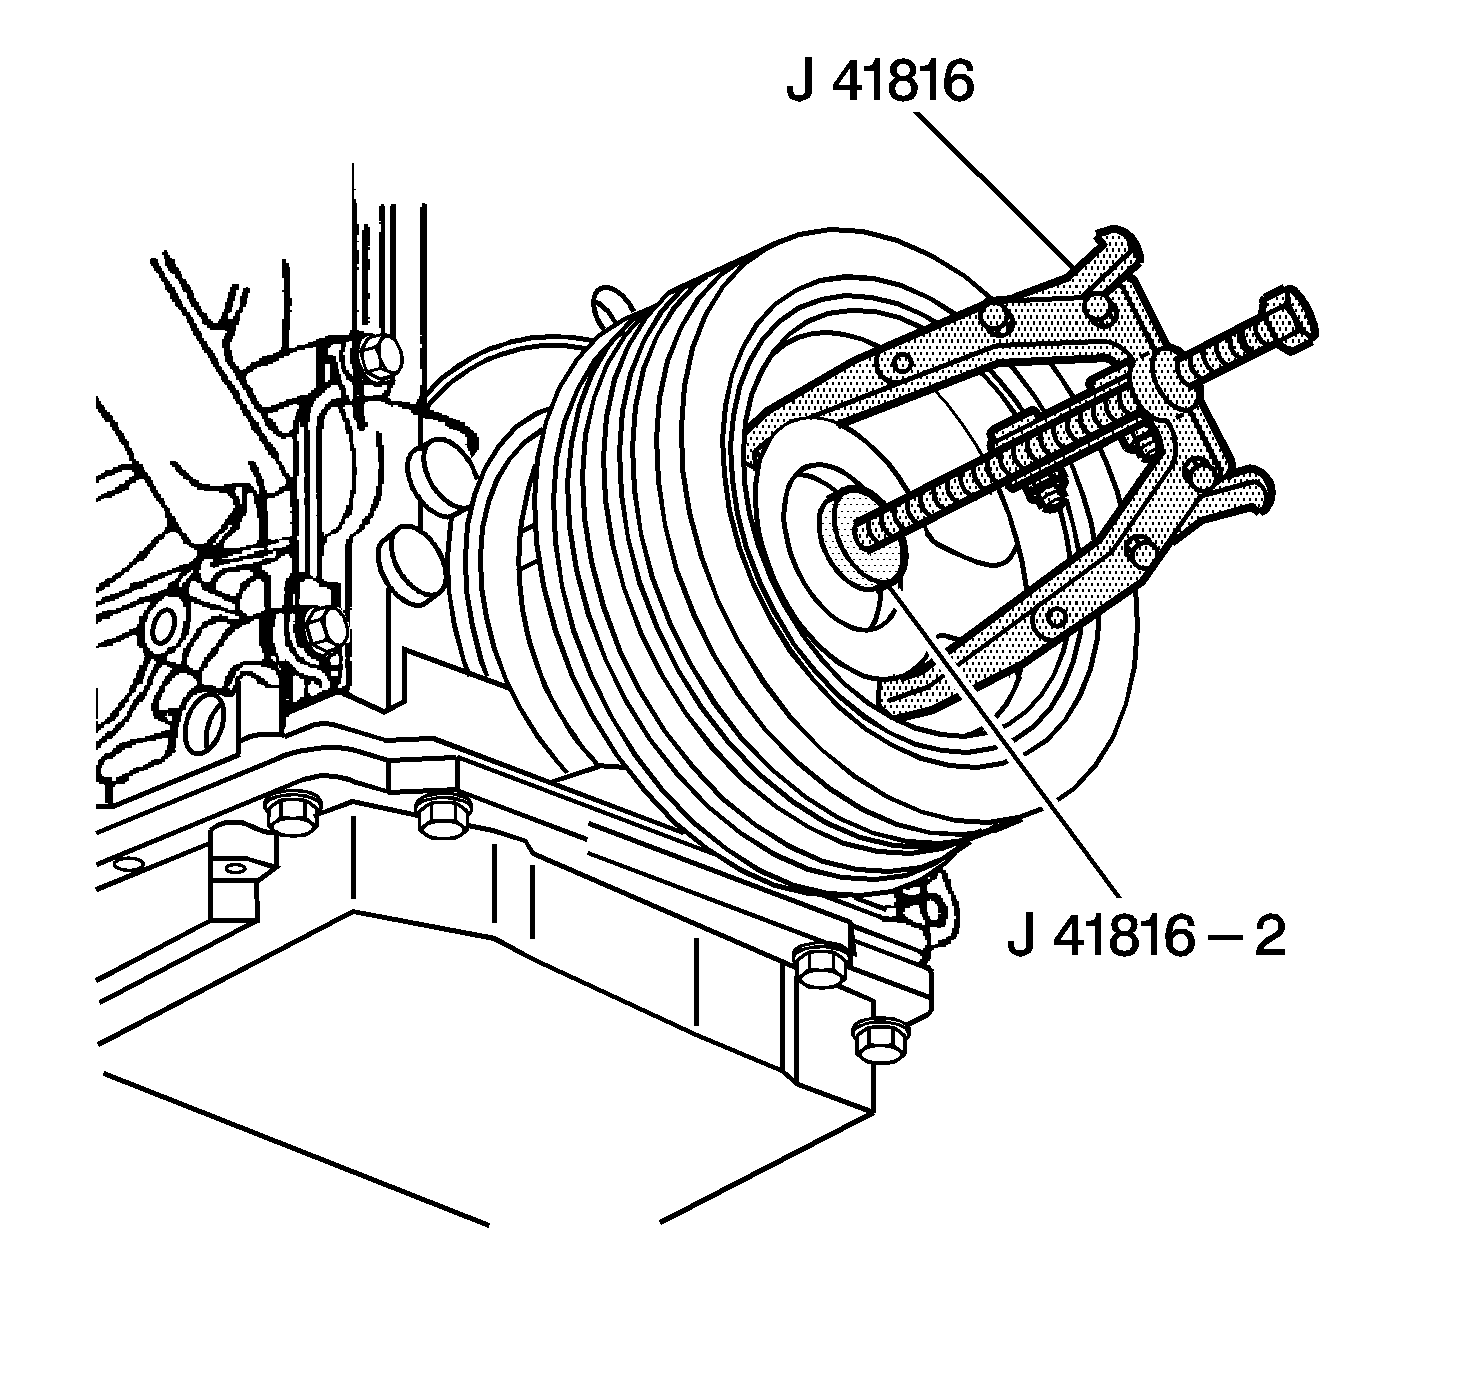
- Use the J 41816
and
the J 41816-2
in order
to remove the crankshaft balancer.
- Remove the J 42386-A
and bolts.
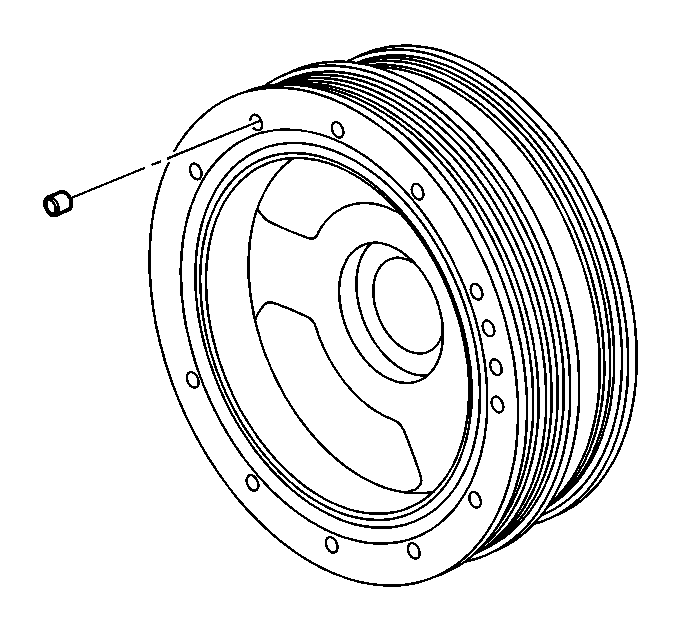
- Note the position of crankshaft
balancer weights, if applicable.
- Clean the balancer in solvent.
Caution: Wear safety glasses in order to avoid eye damage.
- Dry the component with compressed air.
- Inspect the crankshaft balancer for the following:
| • | Loose or improperly installed balance weights |
| • | A properly
installed balance weight should be installed until flush or below flush with
the face of the balancer. |
| • | Worn, grooved, or damaged hub seal surface |
| • | A crankshaft
balancer hub seal surface with excessive scoring, grooves, or other damage
must be replaced. |
| • | Minor imperfections on the hub seal surface
may be removed with polishing compound or a fine grade emery cloth. |
| | Important: In order of the belt to track properly, the belt grooves should be free
of all dirt or debris.
|
| • | Dirty or damaged belt grooves |
| • | The balancer belt grooves
should be free of any nick, gouges, or other damage that may not allow the
belt to track properly. |
| • | Minor imperfections may be removed with
a fine grade file. |
| • | Worn, chunking, or deteriorated rubber between the hub and pulley |
